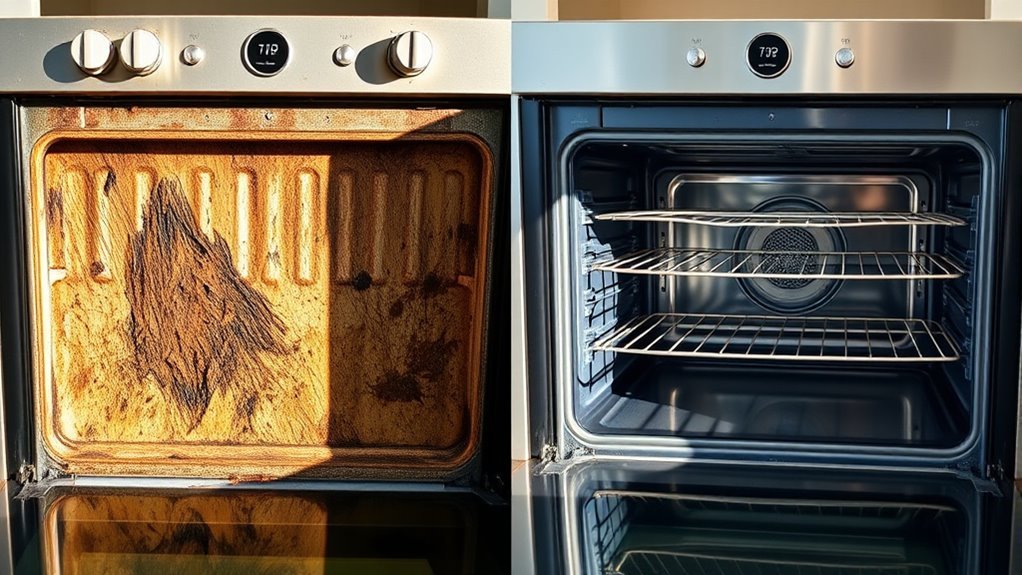
Cleaning Tips Before and After Oven
Before cleaning your oven, make sure it’s cool and unplugged, then remove racks and soak them in warm, soapy water. Use rubber gloves and a gentle cleaner or natural baking soda paste for the interior, avoiding harsh chemicals. Wipe down surfaces carefully, paying attention to the door and glass panel. After cooking, clean spills promptly and use liners to prevent buildup. Follow safety precautions to protect yourself and your oven. For more detailed upkeep tips, keep exploring these methods.
Preparing Your Oven for Cleaning
Before you begin cleaning your oven, make sure it’s completely cool to prevent burns and assure safety. Oven preparation starts with removing racks, trays, and any loose debris inside. This guarantees you can access all surfaces thoroughly. Next, check your oven’s manual for recommended cleaning frequency—most suggest a deep clean every three to six months, but spills should be addressed immediately. Consistent cleaning frequency prevents stubborn buildup, making your task easier. Avoid using harsh chemicals without ventilation, and verify the area is well-lit for spotting grime. Proper oven preparation not only protects you but also enhances cleaning efficiency, allowing you to maintain your oven’s performance and extend its lifespan. Taking these methodical steps grants you the freedom to enjoy a spotless, safer cooking environment.
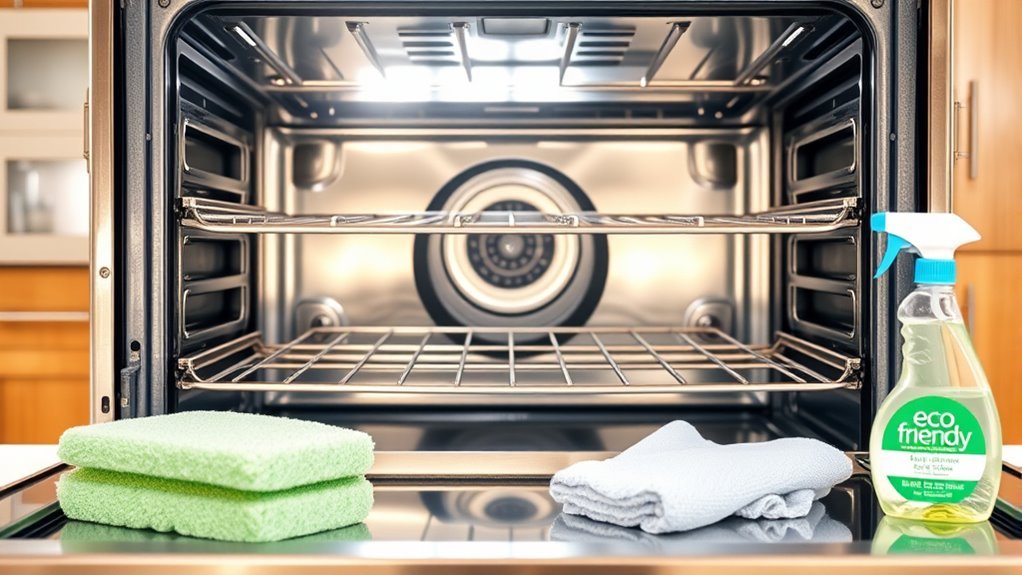
Essential Tools and Cleaning Supplies
To clean your oven effectively, you’ll need a specific set of tools and supplies tailored to tackle grease, grime, and burnt-on food. Having the right cleaning tools guarantees efficiency and prevents damage. Here’s a supply checklist you should prepare before starting:
Effective oven cleaning requires the right tools to tackle grease and grime while protecting your appliance.
- Heavy-duty rubber gloves for protection
- Non-abrasive scrubbing sponges or pads
- A stiff-bristled brush for stubborn spots
- Oven-safe cleaner or a baking soda and vinegar solution
- Microfiber cloths for wiping and polishing
This supply checklist covers essentials, allowing you to freely address different cleaning challenges. Using the proper cleaning tools not only saves time but also preserves your oven’s finish and functionality. Gather these supplies beforehand to maintain control and freedom throughout the cleaning process.
Removing Oven Racks and Accessories
Two key steps prepare your oven for deep cleaning: removing the racks and any accessories inside. Start with careful rack removal; gently pull each rack out, guaranteeing you don’t scratch the oven walls or bend the racks. Place them in a sink or basin filled with warm, soapy water to loosen grime. Next, focus on accessory cleaning—remove trays, broiler pans, or thermometers and soak them similarly. Allow these items to soak while you prepare the oven interior. This methodical approach prevents damage and guarantees thorough cleaning. By separating racks and accessories for dedicated cleaning, you free yourself from stubborn residue and simplify the overall process. Taking these steps gives you the freedom to tackle oven cleaning efficiently and effectively.
Cleaning the Oven Interior Before Use
Once you’ve removed the racks and accessories, you can focus on cleaning the oven interior itself. Prior to this, make certain you complete a thorough pre cleaning checklist to prioritize oven safety. This minimizes hazards and guarantees effective cleaning. Begin by wearing gloves and ventilating the area. Then:
Remove racks first, complete a safety checklist, wear gloves, and ventilate before cleaning your oven interior.
- Remove loose debris with a damp cloth
- Avoid harsh chemicals that can damage surfaces
- Use a soft brush for stubborn spots
- Wipe down the interior walls and floor carefully
- Inspect heating elements for residue without touching them
Using Natural Ingredients for Oven Cleaning
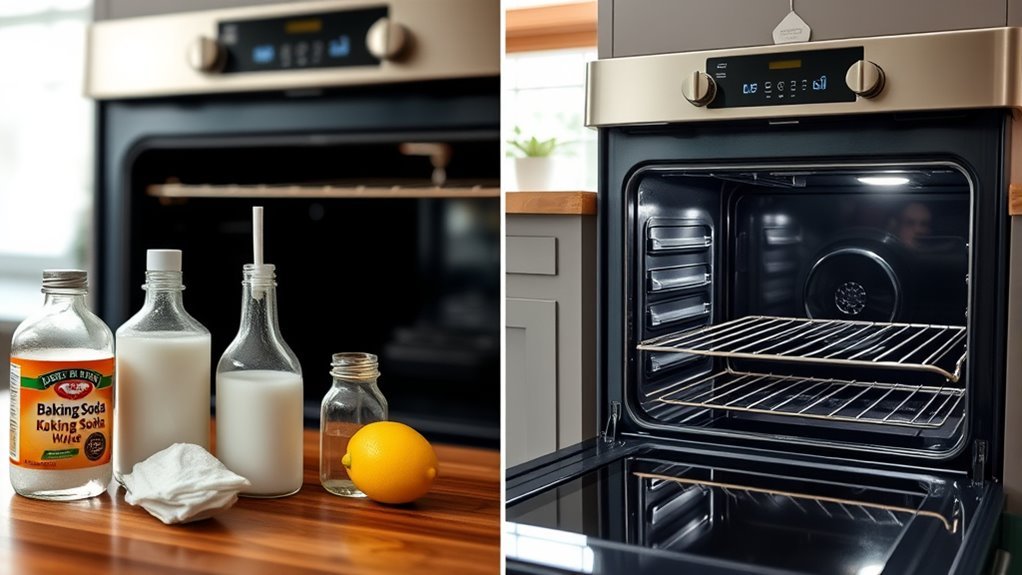
After thoroughly cleaning the oven interior, you might want to weigh options other than commercial cleaners that can be harsh or leave residues. Using natural ingredients like baking soda and a vinegar solution offers a safer, effective alternative. Start by sprinkling baking soda over the oven surfaces, then spray the vinegar solution to create a gentle fizzing reaction. This helps break down grime without toxic fumes. Let it sit for at least 15 minutes before wiping clean with a damp cloth. This method not only protects your health and the environment but also maintains your oven’s integrity. By choosing these natural ingredients, you gain control over what touches your cooking space, ensuring a clean oven without compromising your freedom or peace of mind.
How to Handle Tough Oven Stains and Grease
Tackle tough oven stains and grease by targeting them with specialized techniques that go beyond standard cleaning. For effective stain removal and grease cutting, you need methods that dissolve baked-on residues without harsh chemicals. Start by applying a paste of baking soda and water to stubborn spots, letting it sit for hours. Then use a plastic scraper to gently lift grime. For persistent grease, a vinegar spray breaks down oils efficiently. Remember to rinse thoroughly afterward.
Dissolve baked-on oven stains and grease with baking soda paste and vinegar spray for effortless cleaning.
- Use a baking soda paste for thick stains
- Apply vinegar for grease cutting
- Let cleaning agents sit to maximize effect
- Scrape gently with non-abrasive tools
- Rinse and wipe dry to prevent residue
Following these steps gives you freedom from scrubbing endlessly while restoring your oven’s cleanliness precisely.
Cleaning the Oven Door and Glass Panel
Cleaning the oven door and glass panel requires a careful approach to avoid scratches and streaks while removing grease and baked-on food. Start by wiping the oven door with a damp microfiber cloth to lift loose debris. Next, apply a gentle cleaner specifically designed for glass panels or a mixture of vinegar and water. Avoid abrasive pads; instead, use a soft sponge to scrub in circular motions. Pay close attention to corners where grime accumulates. After cleaning, rinse the glass panel with a clean damp cloth to remove residue. Finally, dry the oven door and glass panel thoroughly with a lint-free towel to prevent streaks. This method guarantees your oven door remains clear, functional, and visually appealing, giving you the freedom to enjoy a spotless kitchen without damage.
Maintaining Oven Cleanliness After Cooking
Though it’s tempting to wait until the oven cools completely, maintaining cleanliness right after cooking prevents buildup and makes your job easier. Incorporating oven maintenance into your routine cleaning guarantees grime doesn’t harden, saving you time and effort later.
After each use, quickly wipe down spills and crumbs with a damp cloth while the oven is still warm but safe to touch. This habit stops residue from turning into stubborn stains.
Key steps for effective post-cooking oven maintenance include:
- Removing racks to clean separately
- Wiping interior surfaces with mild detergent
- Using a soft brush for crevices
- Drying thoroughly to prevent rust
- Checking seals and door hinges for damage
This disciplined approach keeps your oven performing efficiently and extends its lifespan.
Tips for Preventing Future Oven Messes
Keeping your oven clean right after cooking sets the foundation for preventing stubborn messes, but reducing spills and splatters in the first place will save you even more time. To minimize future messes, use oven liners designed to catch drips and crumbs — they’re easy to remove and clean, ensuring effective spill containment. Position your trays and pans carefully, avoiding overcrowding to prevent overflow. Opt for deeper baking dishes when cooking saucy or greasy foods to reduce splatter. Regularly inspect seals and door gaskets to maintain proper heat distribution, which lessens uncontrolled spills. By integrating these practical steps, you’ll extend the intervals between deep cleans, giving you more freedom and less hassle while keeping your oven in ideal condition.
Safety Precautions When Cleaning Your Oven
Before you start scrubbing your oven, it’s important to take safety precautions to protect yourself and your appliance. Oven safety is critical to avoid cleaning hazards like chemical burns, respiratory irritation, or electrical issues. Use these guidelines to clean confidently:
Prioritize oven safety to prevent burns, irritation, and electrical hazards before you begin cleaning.
- Always unplug the oven or switch off the circuit breaker to prevent shocks.
- Ventilate the area well to reduce inhaling fumes from cleaners.
- Wear rubber gloves and eye protection to avoid skin or eye contact with harsh chemicals.
- Avoid mixing cleaning products, especially ammonia and bleach, which create toxic gases.
- Let the oven cool completely before cleaning to prevent burns.
Following these steps minimizes risks and guarantees your cleaning process is both safe and effective, giving you freedom to maintain your oven without worry.
Frequently Asked Questions
How Often Should I Schedule a Professional Oven Deep Cleaning?
You should schedule professional cleaning frequency based on your oven’s usage—typically every 6 to 12 months works well. Regular deep cleaning guarantees peak performance, reduces fire risks, and extends your oven’s lifespan. The benefits of deep cleaning go beyond appearance; it removes stubborn grease and carbon buildup that you might miss. This keeps your cooking environment safer and more efficient, giving you the freedom to enjoy your meals without worrying about maintenance.
Can Oven Cleaning Affect the Appliance’S Warranty?
You should always check your appliance’s warranty guidelines before cleaning, as improper cleaning methods can sometimes void the warranty. Using harsh chemicals or abrasive tools might damage internal components, affecting coverage. Sticking to manufacturer-recommended cleaning methods guarantees you maintain your freedom to clean without risking warranty claims. By following these guidelines precisely, you protect your investment and enjoy hassle-free appliance maintenance without losing warranty benefits.
What Are the Best Methods for Cleaning a Self-Cleaning Oven?
Ever wondered how to conquer oven grime with ease? When using the self-cleaning process, you’ll want to remove racks and wipe loose debris first. Activate the cycle, but remember safety precautions—ensure good ventilation and never open the door mid-cycle. Once finished, simply wipe the ash with a damp cloth. This method frees you from harsh chemicals while keeping your oven pristine, giving you both cleanliness and peace of mind.
How Do I Clean the Oven’S Heating Elements Safely?
To clean your oven’s heating elements safely, first unplug the oven or switch off its power to avoid shocks—safety precautions are key. Use gentle cleaning tools like a soft cloth or sponge; avoid abrasive scrubbing pads that can damage the elements. Lightly dampen the cloth with warm, soapy water and carefully wipe the elements, steering clear of soaking them. Once clean, dry thoroughly before restoring power, ensuring your freedom to cook without worry.
Are There Specific Cleaners Recommended for Gas vs. Electric Ovens?
Think of your oven as a well-tuned instrument needing the right oil. For gas ovens, choose oven cleaner types that avoid harsh chemicals to protect gas oven maintenance, like mild, non-abrasive sprays. Electric ovens can handle stronger, oven-specific cleaners designed to dissolve baked-on grime. Always check labels for compatibility to keep your appliance humming freely, ensuring you don’t trap yourself in a maze of damage or ineffective cleaning. Choose wisely.


