Mistakes to Avoid When Cleaning Your Windowsills
When cleaning your windowsills, avoid harsh chemicals that can damage paint or wood finishes. Don’t skip removing dust and debris first, as it prevents scratches. Use minimal water—too much causes wood swelling—and always dry the area thoroughly. Scrubbing too hard risks peeling paint, so opt for soft cloths and brushes made for your windowsill material. Protect surrounding areas to avoid damage. Skipping regular maintenance lets grime build up, making cleaning harder. Understanding these basics will help you preserve your windowsills effectively.
Using Harsh Chemicals That Damage Surfaces

While it might be tempting to reach for strong cleaners to get your windowsills spotless, using harsh chemicals can actually cause more harm than good. These substances can degrade paint, warp wood, or corrode metal, undermining the integrity of your windowsills over time. Instead, opt for chemical alternatives that prioritize surface compatibility, such as mild detergents or natural solutions like vinegar and baking soda. These options clean effectively without the risk of damage, letting you maintain your windowsills’ appearance and durability. Being mindful about what you apply not only protects your surfaces but also grants you the freedom to clean confidently, knowing you’re preserving your home’s character. Always test cleaning products on a small area first to verify they’re safe for your specific windowsill material. Additionally, choosing products with fewer toxic ingredients helps reduce chemical runoff that can harm nearby ecosystems.
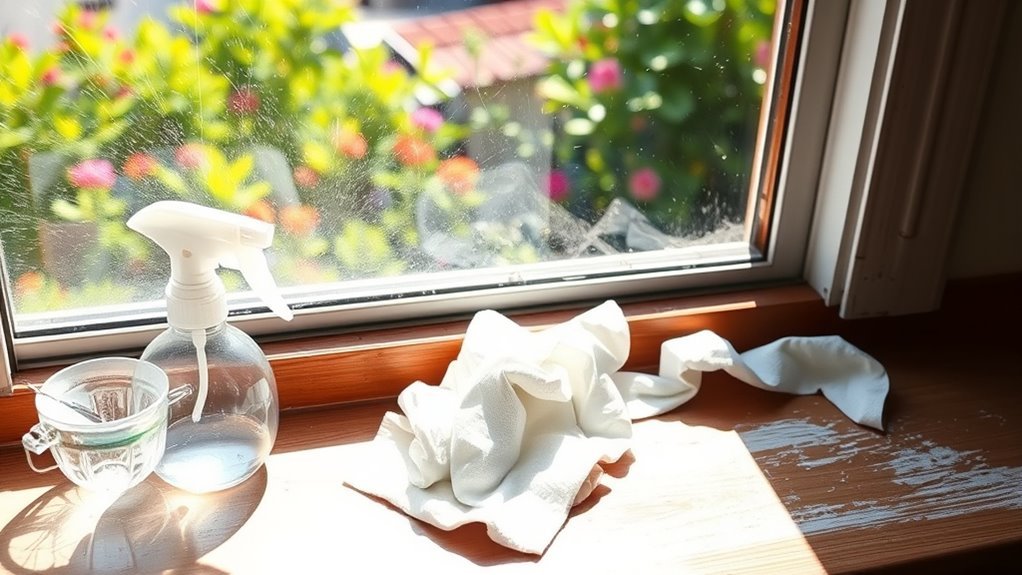
Ignoring Dust and Loose Debris Before Cleaning
Two key steps you should never skip before cleaning your windowsills are removing dust and loose debris. Neglecting this can lead to scratching surfaces or spreading dirt further during cleaning. Dust accumulation not only dulls the finish but can also harbor allergens, reducing your indoor air quality.
To prepare effectively, follow these three essential steps:
- Use a soft brush or handheld vacuum to gently remove loose dust and debris.
- Wipe down with a dry microfiber cloth to catch finer particles.
- Assess the cleaning frequency—windowsills near busy roads or open windows need more regular attention to prevent buildup.
Incorporating microfiber cloths in your cleaning routine ensures effective dust trapping and prevents dust from being scattered back into the air.
Overusing Water and Causing Wood Swelling

After you’ve thoroughly removed dust and debris, it’s important to be cautious with how much water you use when cleaning wooden windowsills. Overusing water can lead to wood swelling, warping, and even structural damage over time. To maintain effective moisture control, use a damp—not soaked—cloth or sponge to gently wipe the surface. Excess water seeps into the wood fibers, compromising wood protection and making your windowsills vulnerable to mold and rot. Always dry the area immediately with a clean, dry cloth after cleaning to prevent lingering moisture. By controlling water use, you preserve the integrity and appearance of your wooden windowsills, ensuring they remain durable and beautiful. Remember, less water means greater wood protection and freedom from costly repairs. Additionally, using natural disinfectants like diluted vinegar or mild soap solutions can help sanitize without adding excess moisture.
Scrubbing Too Aggressively and Peeling Paint
If you scrub your windowsills too hard, you risk damaging the paint finish, which can lead to peeling and flaking over time. To maintain paint preservation, it’s vital to adopt gentle scrubbing techniques that clean without compromising the surface. Here’s how you can protect your windowsills:
- Use soft-bristle brushes or non-abrasive sponges to avoid scratching the paint.
- Apply mild cleaning solutions instead of harsh chemicals that weaken paint adhesion.
- Test scrubbing pressure on a small area before proceeding to guarantee the paint remains intact.
Additionally, avoid using harsh chemicals like ammonia-based cleaners, as they can not only damage paint but also leave residues that attract more dirt.
Neglecting to Protect Surrounding Areas

Before you start cleaning, make sure to cover nearby furniture with protective materials to prevent damage. Using drop cloths beneath the windowsill can catch drips and debris effectively. Taking these steps saves you time and effort during cleanup.
Cover Furniture Properly
While cleaning windowsills, you might focus so much on the task that you forget to shield the nearby furniture and flooring from drips and debris. Properly covering furniture is essential to protect your space and maintain freedom from extra cleaning. Here’s how to do it right:
- Assess furniture placement around the windowsill to identify what needs protection.
- Use appropriate protective coverings like plastic sheets or waterproof fabric to catch any liquid or dust.
- Secure coverings with tape or weights to prevent shifting during cleaning.
Use Drop Cloths
When you clean windowsills, it’s easy to overlook protecting the surrounding floor and walls, which can lead to stains or damage. Using drop cloths is crucial to prevent spills and debris from ruining your space. The drop cloths benefits include easy cleanup and safeguarding surfaces from harsh cleaning agents. Proper installation means spreading the cloth firmly, covering all nearby areas, and securing edges to avoid slipping.
| Drop Cloths Benefits | Proper Installation Tips |
|---|---|
| Protects floors and walls | Cover entire cleaning area |
| Catches debris and spills | Secure edges with tape or weights |
| Easy to remove and clean | Guarantee no gaps or folds |
| Reusable and durable | Position before starting work |
Forgetting to Dry the Windowsills Thoroughly
Although it might seem like a minor step, forgetting to dry your windowsills thoroughly can lead to moisture buildup that fosters mold, mildew, and wood damage. Proper moisture control is essential to preserving your windowsills’ integrity and appearance. To guarantee effective drying, consider these drying techniques:
Thoroughly drying windowsills prevents moisture buildup that causes mold, mildew, and wood damage.
- Use a microfiber cloth to absorb remaining moisture immediately after cleaning.
- Open windows or use a fan to increase air circulation and speed up the drying process.
- Avoid leaving damp cleaning tools on the sill, as they can trap moisture.
Maintaining proper ventilation helps reduce moisture accumulation and prevents future staining issues.
Using the Wrong Cleaning Tools for the Material
You’ll want to select cleaning tools that suit your windowsill’s material to avoid damage. Abrasive brushes can scratch surfaces, so stick with soft cloths for gentle yet effective cleaning. Matching your tools properly guarantees a thorough clean without compromising the finish. Using a soft, dry cloth helps clear loose particles without causing scratches.
Match Tools to Material
One essential step in cleaning windowsills effectively is choosing the right tools for the material you’re working with. Mismatched tools can damage surfaces, wasting your effort and limiting your freedom to maintain your space. Consider these points for proper tool compatibility with various window materials:
- Wooden windowsills: Use soft cloths and gentle cleaners to avoid scratches and water damage.
- Vinyl or plastic windowsills: Non-abrasive sponges and mild detergents work best to prevent discoloration or warping.
- Metal windowsills: Opt for microfiber cloths and avoid harsh chemicals that can corrode finishes.
Matching tools to the window materials guarantees efficient cleaning without harm, freeing you from costly repairs and preserving your windowsills’ appearance. Always check tool compatibility before you start cleaning.
Avoid Abrasive Brushes
Choosing the right tools for your windowsill material is only part of the equation; selecting brushes that won’t damage the surface is just as important. Abrasive brushes might seem effective at first, but they can scratch or wear down delicate finishes, undermining your sills maintenance tips. Instead, opt for soft-bristled brushes designed to gently lift dirt without harming the surface. This approach aligns with proven window cleaning techniques that balance thoroughness with care. Remember, using the wrong tool may cause long-term damage, restricting your freedom to enjoy clean, intact windowsills. By avoiding abrasive brushes, you protect your investment and simplify future cleaning. Stick to brushes that respect your windowsill’s material, ensuring both cleanliness and durability every time you tackle sills maintenance.
Choose Soft Cloths
A soft cloth is essential for cleaning windowsills without causing damage. Choosing the right cleaning cloth types can save you time and protect your surfaces. Here are the key soft cloths benefits to evaluate:
- Microfiber cloths gently lift dust and dirt without scratching, perfect for delicate finishes.
- Cotton cloths absorb moisture effectively, helping you clean spills quickly without leaving streaks.
- Lint-free cloths prevent fibers from sticking to your windowsills, ensuring a spotless, polished look.
Using rough or abrasive materials can lead to scratches or dullness, restricting your freedom to keep your space pristine. Stick to soft cloths to maintain control over your cleaning routine and enjoy lasting results that respect your windowsills’ material.
Skipping Regular Maintenance and Deep Cleaning
Although it might seem convenient to skip regular maintenance and deep cleaning of your windowsills, neglecting these tasks can lead to buildup that’s harder to remove later. Consistent window care and routine upkeep prevent dirt, mold, and damage, keeping your windowsills looking fresh and functional. Here’s a quick guide to help you maintain them effectively:
| Task | Frequency | Benefits |
|---|---|---|
| Dust removal | Weekly | Prevents dirt accumulation |
| Wiping with damp cloth | Bi-weekly | Removes surface grime |
| Deep cleaning | Monthly | Eliminates stubborn buildup |
| Inspecting for damage | Monthly | Early problem detection |
| Applying protective treatment | Quarterly | Extends windowsill lifespan |
Remember that using eco-friendly cleaners helps protect your windowsill materials and the environment during your cleaning routine.
Applying Sealants or Paint on Dirty or Wet Surfaces
If you apply sealants or paint on dirty or wet surfaces, the finish won’t adhere properly and will likely peel or bubble over time. Proper surface preparation techniques are essential for a durable result. Before you start, make certain to:
Applying sealants or paint on dirty, wet surfaces causes peeling and bubbling—proper preparation ensures lasting results.
- Thoroughly clean the windowsill, removing dust, dirt, and old paint to guarantee a smooth base.
- Allow the surface to dry completely; moisture traps under sealants cause adhesion failure.
- Follow sealant application tips, like applying in thin, even layers and avoiding over-application.
Taking these steps guarantees a professional finish that lasts, giving you the freedom to enjoy your refreshed windowsills without constant touch-ups. Remember, patience in preparation saves you time and effort in the long run. Additionally, using gentle cleaning solution and ensuring the area is well-ventilated can enhance the effectiveness of your surface preparation.
Frequently Asked Questions
How Often Should Windowsills Be Cleaned for Optimal Maintenance?
Imagine Sarah, who sticks to a seasonal cleaning routine, tackling her windowsills every spring and fall. You should aim for the same, aligning your windowsill care with your maintenance schedule. Cleaning them twice a year helps prevent dirt buildup and keeps your home fresh. If you live in a dusty or rainy area, consider adding a quick monthly wipe-down. This way, you maintain freedom from grime without overdoing it.
Can Sunlight Affect the Lifespan of Painted Windowsills?
Yes, sun exposure can definitely affect the lifespan of painted windowsills. When your windowsills are constantly exposed to sunlight, the UV rays can cause paint deterioration, leading to fading, cracking, or peeling over time. To protect your paint job and extend its life, consider using UV-resistant paint or adding shades or curtains to reduce direct sun exposure. Regular maintenance will keep your windowsills looking fresh and durable longer.
What Are Eco-Friendly Alternatives for Cleaning Windowsills?
Did you know over 90% of household cleaning products contain harmful chemicals? To keep your windowsills spotless and safe, try natural cleaners like a vinegar solution—mix equal parts vinegar and water for an effective, eco-friendly cleaner. This combo cuts through dirt without harsh fumes, giving you freedom from toxins. Plus, it’s budget-friendly and easy to make at home, letting you clean confidently while caring for your space and the planet.
How to Repair Minor Cracks in Windowsills Before Cleaning?
To tackle minor cracks, start with crack repair by cleaning the area thoroughly and removing loose debris. Then, use a suitable filler or wood putty to fill the crack, smoothing it out with a putty knife. After it dries, sand the surface for an even finish. This simple windowsill maintenance not only improves appearance but also prevents further damage, giving you freedom to clean without worrying about worsening the cracks.
Is It Necessary to Remove Window Screens Before Cleaning Sills?
You might find yourself wiping the sill just as a breeze shifts the window screen, nudging dirt into corners. Removing the window screen before cleaning sills isn’t always necessary but often helps you reach every nook. Window screen removal lets you use precise cleaning techniques, like small brushes or cloths, without obstruction. If freedom to clean thoroughly matters to you, taking that extra step guarantees a spotless finish and extends the sill’s life.


