
How to Remove Permanent Marker From Hard Surfaces
To remove permanent marker from hard surfaces, first identify the material—glass, metal, or wood—since each needs specific care. Wear gloves and guarantee good ventilation before cleaning. You can try rubbing alcohol, nail polish remover, or a baking soda paste by gently applying and wiping the stain. For delicate surfaces, use milder solutions like vinegar with dish soap. Acting quickly helps, and knowing these methods will make your cleaning more effective and safe. If you want to tackle tougher stains or protect your surfaces better, more tips await.
Identifying Different Types of Hard Surfaces

When you’re dealing with permanent marker stains, knowing the type of hard surface you’re working on is essential. Different types of surfaces—like glass, metal, plastic, and wood—each call for specific cleaning techniques. For example, glass can often handle stronger solvents, while wood might need gentler approaches to avoid damage. Identifying your surface type lets you choose the right method, preventing unnecessary wear or discoloration. You want to preserve your space’s integrity while reclaiming your freedom from stubborn marks. So, take a moment to assess whether your surface is porous or non-porous, smooth or textured. This awareness empowers you to tackle stains effectively, using techniques tailored to your surface, ensuring a clean finish without compromising the material’s quality.
Safety Precautions Before Starting the Cleaning Process
Before you start cleaning, make sure the area is well-ventilated and wear protective gloves to keep your skin safe. Always test any cleaning product on a small, hidden spot first to avoid damaging the surface. Taking these precautions will help you clean effectively without any unwanted surprises.
Ventilation and Protective Gear
Although removing permanent marker might seem straightforward, it’s important to prioritize ventilation and protective gear to keep yourself safe. You’ll want to open windows or use fans as effective ventilation methods to guarantee fresh air circulates, reducing the buildup of fumes from cleaning products. Don’t skip protective equipment like gloves and masks—they shield your skin and respiratory system from harsh chemicals. Wearing gloves gives you the freedom to work confidently without worrying about irritation, while a mask helps you breathe easy, especially in less ventilated spaces. Taking these simple steps means you can tackle the task with peace of mind, keeping your environment safe and your body protected. Safety doesn’t restrict your freedom; it supports it.
Test Cleaning Products First
How can you be confident a cleaning product won’t damage the surface you’re treating? Testing products on a small, hidden spot first is key. This step guarantees you avoid unwanted discoloration or damage while checking product effectiveness. Try different testing methods to find what works best without risking the entire surface.
Here’s how to test safely:
- Choose an inconspicuous area to apply the product
- Use a cotton swab or soft cloth for controlled application
- Wait a few minutes to observe any adverse reactions
- Wipe away residue gently to assess surface impact
- Compare results to see which product removes marker effectively without harm
Using Rubbing Alcohol to Erase Marker Stains

When you need to remove permanent marker stains, rubbing alcohol can be one of your most effective tools. Its rubbing alcohol effectiveness lies in breaking down the ink’s chemical bonds, making it easier to wipe away. To use it, dampen a clean cloth or cotton ball with rubbing alcohol and gently rub the stained area. Always test a small spot first to avoid damage. If rubbing alcohol isn’t available, alternative alcohol solutions like hand sanitizer or vodka can work similarly due to their alcohol content. Just apply them the same way, and you’ll often see the marker start to fade. This method gives you the freedom to tackle stubborn stains quickly without harsh scrubbing or complicated products.
Removing Permanent Marker With Baking Soda Paste
If you don’t have rubbing alcohol on hand, you can try a baking soda paste to lift permanent marker stains. This method is simple, affordable, and lets you take control of the cleanup without harsh chemicals. Here’s how to get started:
- Mix baking soda with a small amount of water to form a thick paste.
- Apply the paste directly onto the permanent marker stain using a cloth or your fingers.
- Gently rub the paste in circular motions, breaking down the marker’s hold.
- Let it sit for a few minutes to work its magic.
- Wipe the area clean with a damp cloth and repeat if necessary.
With this baking soda paste application, you’re free to tackle stubborn marks using everyday ingredients in your home.
How to Use Nail Polish Remover for Stain Removal
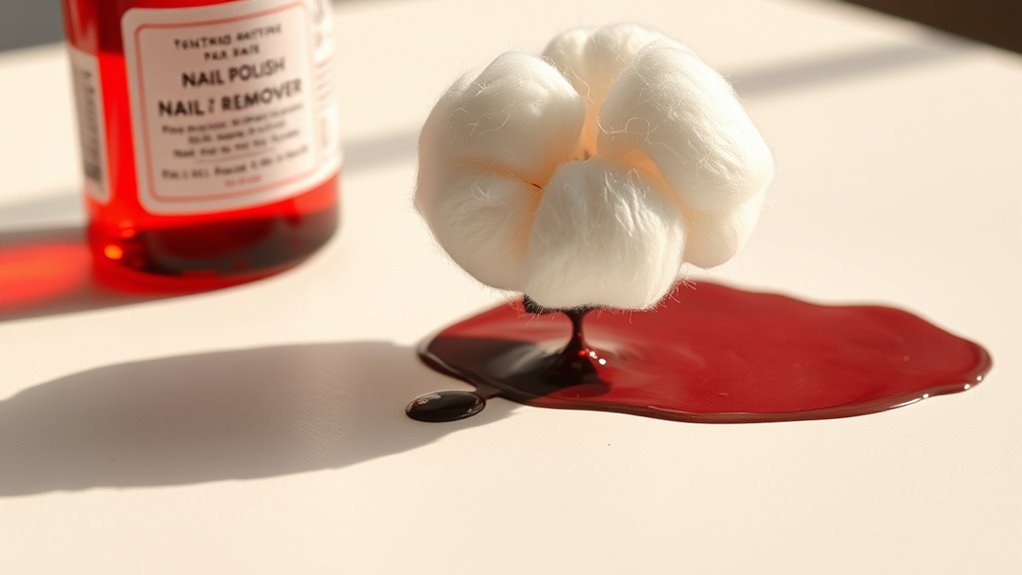
When using nail polish remover to tackle permanent marker stains, it’s important to pick one that contains acetone for best results. You’ll want to apply it carefully with a cotton ball or swab, testing a small area first to avoid damage. Always work in a well-ventilated space and keep the remover away from open flames for safety.
Choosing the Right Remover
Although nail polish remover isn’t designed specifically for permanent marker stains, it can be an effective solution if you choose the right type. When selecting a remover, consider the product effectiveness and the remover types available. Your goal is to find one that breaks down the ink without damaging the surface.
Here’s what to keep in mind:
- Opt for acetone-based removers for tougher stains.
- Non-acetone removers work better on delicate surfaces.
- Check for added moisturizers to prevent surface drying.
- Avoid removers with dyes or fragrances that might leave residue.
- Test a small area first to verify compatibility.
Application Tips and Safety
Choosing the right nail polish remover is just the first step; using it correctly guarantees the best results without harm. When tackling permanent marker stains, apply the remover sparingly with a cotton ball or soft cloth. Dab gently instead of rubbing aggressively to avoid damaging surfaces. Make sure you’re in a well-ventilated area, as the fumes from these cleaning solutions can be strong. Always test a small, hidden spot first to check for adverse reactions. Wearing gloves protects your skin and keeps you free to handle other tasks confidently. After application, wipe the area with a damp cloth to remove any residue. By following these application techniques and safety tips, you maintain control and freedom, ensuring your surfaces are clean without compromising your health or space.
Utilizing Whiteboard Markers to Lift Permanent Ink
If you’ve ever struggled to erase permanent marker, you’ll be glad to know that whiteboard markers can actually help lift the stubborn ink. This method works because the solvent in whiteboard markers reactivates the permanent ink, making it easier to wipe away. Here’s how you can use whiteboard markers for effective ink lifting:
- Scribble over the permanent marker with a whiteboard marker.
- Let the ink sit for a few seconds to dissolve the permanent pigment.
- Use a dry cloth or whiteboard eraser to wipe the area clean.
- Repeat if necessary for complete removal.
- Finish by cleaning the surface with a mild detergent to remove residue.
This technique offers a simple, freedom-friendly way to reclaim your surfaces without harsh chemicals.
Techniques With Magic Erasers for Tough Marks
Tackle stubborn permanent marker stains with a Magic Eraser, a versatile tool that can make quick work of tough marks. When using Magic eraser techniques, dampen the sponge slightly and gently rub the stained area in a circular motion. You don’t need heavy pressure; let the eraser’s micro-scrubbers do the job. For tougher marks removal, repeat the process, but avoid over-saturating the surface to prevent damage. Remember, Magic Erasers are best suited for hard, non-porous surfaces like countertops, tiles, or plastic. Always test a small hidden spot first to verify it won’t dull or scratch the finish. With this approach, you can confidently erase unwanted permanent marker stains and enjoy the freedom of a clean, refreshed surface.
Applying Vinegar and Dish Soap Solution
When you want a gentle yet effective method for removing permanent marker, a solution of vinegar and dish soap can be just what you need. This vinegar mixture breaks down ink without harsh chemicals, giving you freedom to clean safely. Here’s how to apply it:
- Mix equal parts white vinegar and water with a few drops of dish soap.
- Dip a soft cloth or sponge into the vinegar mixture.
- Gently rub the stained area in circular motions.
- Let it sit for a few minutes to loosen the marker.
- Wipe clean with a damp cloth, repeating if needed.
This method works great on most hard surfaces and keeps your space toxin-free while restoring its original look.
Preventing Damage While Cleaning Delicate Surfaces
When cleaning permanent marker off delicate surfaces, you’ll want to pick gentle cleaning agents to avoid damage. Always test your chosen solution on a hidden spot first to make sure it won’t cause discoloration or harm. Using soft tools like microfiber cloths can help you remove the stain without scratching or wearing down the surface.
Choose Gentle Cleaning Agents
Although permanent marker stains can be stubborn, you’ll want to choose gentle cleaning agents to protect delicate surfaces from damage. Harsh chemicals might remove the stain but could leave your surface scratched or discolored. Instead, focus on options that respect both your belongings and the environment. Here’s what you can use with confidence:
- Gentle detergents diluted in water
- Eco friendly solutions like vinegar and baking soda
- Mild soap combined with warm water
- Rubbing alcohol applied sparingly
- Coconut oil for natural stain lifting
These choices give you the freedom to clean effectively without sacrificing the integrity of your surfaces. Remember, being gentle doesn’t mean less effective; it means smarter care. Choose wisely and keep your space looking fresh and unscathed.
Test on Hidden Areas
Why risk damage to a visible area when you can test cleaning agents on a hidden spot first? Before diving into removing permanent marker, find discreet hidden spots on your surface to apply your chosen cleaner. These test areas let you gauge how the material reacts without jeopardizing the overall look. By trying out your method in these less obvious places, you protect your freedom to clean confidently, avoiding surprises like discoloration or surface damage. Always wait a few minutes after application to observe any adverse effects. If the hidden spot holds up, you’re clear to proceed on the main visible areas. This simple step guarantees your cleaning process respects the integrity of your surfaces while giving you control and peace of mind.
Use Soft Application Tools
After you’ve confirmed your cleaning agent won’t harm the surface, choosing the right tools is your next step. Using soft application tools helps protect delicate surfaces from scratches and damage while effectively lifting permanent marker stains. Stick to items that won’t interfere with the surface finish or texture.
Consider these options to keep your cleaning gentle yet effective:
- Soft cloths, like microfiber or cotton, for light wiping
- Gentle sponges that won’t abrade the surface
- Cotton swabs for precise application in tight spots
- Soft-bristled brushes for textured areas
- Non-abrasive pads designed for delicate materials
Tips for Maintaining Marker-Free Hard Surfaces
To keep your hard surfaces free from permanent marker stains, you’ll want to act quickly and regularly clean the area. Employing marker free strategies like using protective coatings or clear films can prevent stains and offer surface protection. Also, avoid leaving markers unattended near your surfaces. Consistent cleaning with mild solutions keeps surfaces fresh and stain-free.
| Marker Free Strategies | Surface Protection Tips |
|---|---|
| Apply clear protective film | Use washable markers instead |
| Clean spills immediately | Keep markers capped tightly |
| Use surface-safe cleaners | Store markers away from reach |
| Educate household members | Test cleaning agents first |
| Schedule regular wipe-downs | Avoid harsh abrasives |
Frequently Asked Questions
Can Permanent Marker Stains Be Removed From Fabric or Clothing?
Yes, you can often remove permanent marker stains from fabric or clothing, but it takes quick action and careful fabric care. To boost your chances, dab the stain gently with rubbing alcohol or a stain remover designed for tough spots. Remember, marker stain prevention is key—try to keep markers away from your clothes to avoid hassle. With the right approach, you’ll enjoy more freedom without worrying about those pesky stains ruining your style.
How Long Should I Let Cleaning Solutions Sit on the Stain?
Think of the stain as a stubborn lock, and your cleaning solutions as the key that needs time to work. You’ll usually want to let the solution sit for about 5 to 10 minutes, giving it freedom to break down the stain without damaging the surface. This balance is essential—too little time, and the stain remains; too long, and you risk harm. Patience here is your ally in reclaiming a clean, open space.
Are There Eco-Friendly Alternatives to Chemical Cleaners for Marker Removal?
You’ll be glad to know there are plenty of natural cleaning options that won’t tie you down with harsh chemicals. Non-toxic solutions like baking soda mixed with water, white vinegar, or lemon juice can effectively tackle marker stains while keeping your space safe and eco-friendly. These natural cleaners give you the freedom to refresh your surfaces without worrying about harmful residues or environmental impact. Give them a try and enjoy a cleaner, greener home.
Can Heat Help in Removing Permanent Marker Stains?
You might think heat application could melt away permanent marker stains like magic, but it’s not quite that simple. Using heat can sometimes soften the ink, making it easier to lift with a cloth or cleaner. Just be careful—not all surfaces handle heat well, and too much can cause damage. So, if you want freedom from stubborn stains, try gentle warming first, but always test a small spot before going all in.
What Should I Do if the Marker Stain Is Old and Set In?
If you’re dealing with old stains that won’t budge, don’t give up just yet. You’ll want to try stronger cleaning methods like rubbing alcohol, nail polish remover, or a baking soda paste. Apply them gently and let them sit for a few minutes to break down the stubborn ink. Remember, patience is key—you’ve got the freedom to experiment until that old mark fades away. Just be sure to test a small spot first!


