DIY Cleaner for Dryer Surfaces
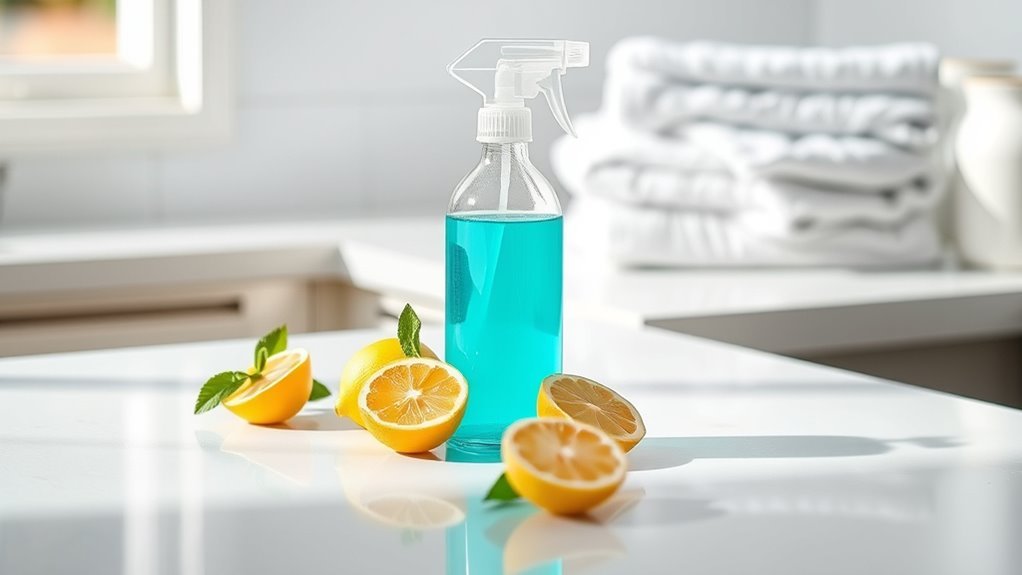
For cleaning your dryer’s surfaces, mix equal parts of white vinegar and water in a spray bottle for a natural, effective cleaner. Start by unplugging your dryer and emptying the lint trap. Spray the solution onto a microfiber cloth and wipe down the exterior and interior drum. Don’t forget to clean around the venting system too. Regular cleaning helps maintain efficiency. Stick around to discover more tips for keeping your dryer in top shape!

In this article, we will explore effective and eco-friendly methods for maintaining the cleanliness of your dryer surfaces. You’ll discover how simple DIY solutions can replace harsh chemical cleaners, providing a safer environment for your home. By incorporating regular cleaning practices, including easy monthly wipe-downs and deeper scrubs every few months, you can prevent lint and dust buildup. We’ll also share a powerful combination of vinegar and baking soda that can tackle grime effectively, ensuring your appliance remains in top condition. By the end of this article, you will have the knowledge and tools to enhance your dryer maintenance routine, promoting a healthier, chemical-free lifestyle. Regular maintenance and cleaning schedules are key to preventing buildup and ensuring the longevity of your appliance’s surfaces and seals.
Preparation For Cleaning
Before diving into the cleaning process, it’s essential to gather everything you’ll need. A well-prepared cleaning schedule can make all the difference, especially when dealing with various surface types. Here’s what you should collect:
Gathering your cleaning supplies ahead of time ensures an efficient and effective cleaning session for your space.
- Microfiber cloths – Ideal for trapping dust and grime without scratching surfaces.
- Baking soda – A natural abrasive that’s great for tough stains.
- White vinegar – Effective for cutting through grease and deodorizing.
- Spray bottle – Perfect for mixing and applying your DIY cleaner.
Having these items ready will guarantee you’re set for a thorough cleaning session. Remember, dedicating a little time now will lead to a cleaner, fresher dryer in the long run, giving you the freedom to enjoy your space! To ensure safety and efficiency, always unplug the dryer before beginning any cleaning tasks.
Tools and Chemical Required

With your cleaning supplies in hand, it’s time to focus on the tools and chemicals that will enhance your cleaning efficiency. For a successful DIY cleaner, you’ll need a few essentials. Here’s a handy table to guide you:
| Tools | Eco-Friendly Ingredients | Usage |
|---|---|---|
| Microfiber cloths | White vinegar | Wipe surfaces |
| Spray bottles | Baking soda | Scrub tough spots |
| Soft-bristle brush | Essential oils | Freshen the air |
| Bucket | Castile soap | Mix cleaner |
Using these eco-friendly ingredients not only keeps your dryer surfaces clean but also guarantees you’re minimizing your environmental impact. Remember to store your homemade solutions in airtight containers to maintain their freshness and effectiveness. So gather your supplies and get ready to make your dryer sparkle!
How to Clean:

Step-by-Step Guide to Clean Your Dryer
To ensure your dryer operates efficiently and safely, it’s essential to clean it regularly. Follow these detailed steps for a thorough cleaning process:
Step 1: Unplug the Dryer
- For safety, always unplug the dryer from the electrical outlet before beginning any cleaning process. This prevents any accidental starts or electrical hazards.
Step 2: Remove Lint from the Lint Trap
- Pull out the lint trap located just inside the door of your dryer.
- Use your fingers or a soft brush to remove any lint buildup from the trap.
- After removing the lint, vacuum the area around the lint trap to get rid of any stray lint that may have escaped.
Step 3: Clean the Exterior of the Dryer
- Take a damp cloth and dip it into a DIY cleaner solution (a mix of equal parts vinegar and water works well).
- Wipe down the entire exterior surface of the dryer, paying special attention to the handles and buttons, where dirt and grime tend to accumulate.
- For stubborn spots, you may need to use a soft sponge or cloth to scrub gently.
Step 4: Clean the Interior Drum
- Prepare a cleaning solution by mixing equal parts of vinegar and water in a spray bottle.
- Open the dryer door and spray the interior drum lightly with the mixture.
- Use a clean cloth to wipe down the drum, making sure to reach all corners and crevices to remove any residue or stains.
- After cleaning, leave the door open for a while to allow the drum to air dry completely.
Step 5: Check and Clean the Venting System
- If accessible, check the venting system connected to the dryer. This may involve disconnecting the vent from the back of the dryer.
- Use a vacuum with a hose attachment to clean out any lint buildup in the venting system, which can prevent proper airflow and pose a fire hazard.
- Reattach the vent securely after cleaning.
Step 6: Plug the Dryer Back In
- Once all cleaning is completed and everything is dry, plug the dryer back into the electrical outlet.
Step 7: Regular Maintenance
- Schedule to clean your dryer every few months to maintain performance and safety. Regular maintenance can prevent lint buildup and improve efficiency.
Additionally, don’t forget to clean the moisture sensor inside the dryer drum regularly to ensure accurate drying cycles and prevent longer drying times.
Safety Consideration
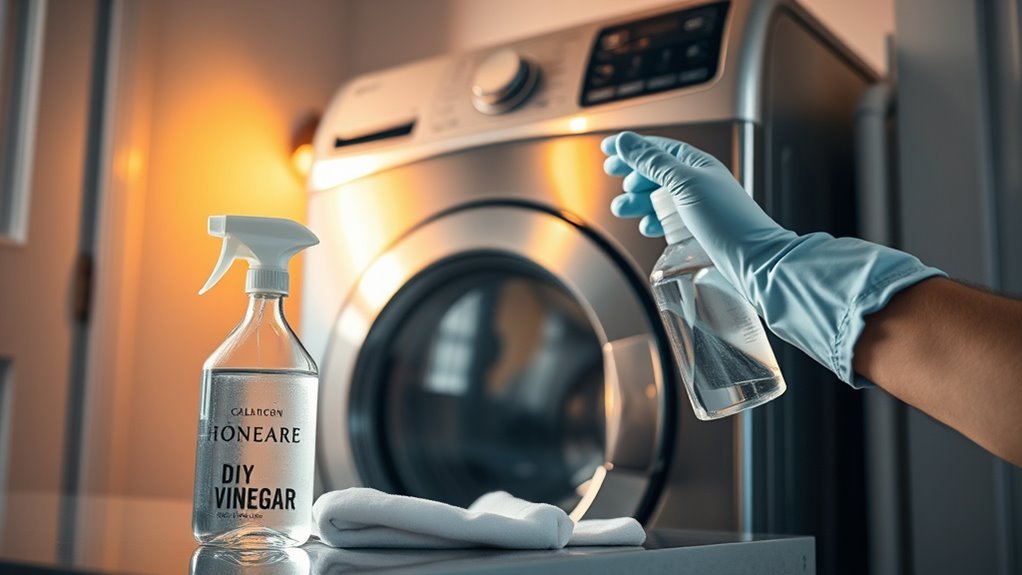
While cleaning your dryer is essential for its performance, it’s equally important to keep safety in mind throughout the process. Always prioritize chemical safety by reading labels on any cleaning products you use. Some ingredients can be hazardous if inhaled or come into contact with your skin. To protect yourself, make sure to wear personal protective equipment like gloves and a mask, especially if you’re sensitive to strong scents or chemicals. Confirm your workspace is well-ventilated to minimize exposure to any fumes. Remember, taking these precautions not only protects you but also enhances your cleaning experience. By being aware and prepared, you can enjoy a clean dryer without compromising your health. Safety first, always! Additionally, unplugging the dryer before starting any cleaning is a crucial safety precaution to prevent electrical hazards.
Tips to keep clean for long time
Although it might seem challenging to keep your dryer clean over time, there are simple habits you can adopt to maintain its cleanliness and efficiency. Implementing a regular cleaning schedule is key, along with some preventive maintenance tips. Here’s how you can do it:
- Empty the lint trap after every use to prevent buildup.
- Wipe surfaces with your DIY cleaner weekly to avoid grime accumulation.
- Inspect and clean the venting system every few months to guarantee peak airflow.
- Schedule deep cleans every six months, focusing on the drum and exterior.
- Additionally, using natural detergents when washing your laundry helps reduce residue buildup inside the dryer, keeping it cleaner for longer.
Frequently Asked Questions
Can I Use This Cleaner on Other Appliances?
Yes, you can definitely use this cleaner on other appliances! It’s versatile and can be effective for surfaces like refrigerators and microwaves. Just remember to test it on a small area first to guarantee it won’t damage the finish. For some extra cleaning tips, consider using a microfiber cloth for better results. Embracing alternative uses for your cleaner gives you more freedom to maintain a sparkling home with less hassle!
How Often Should I Clean My Dryer Surfaces?
You should clean your dryer surfaces at least once a month for ideal dryer maintenance. Think of it like polishing your vintage car; regular upkeep keeps things running smoothly. Cleaning frequency isn’t just about appearances; it helps prevent lint buildup, reducing fire hazards and improving efficiency. So, make it a monthly ritual. You’ll not only guarantee safety but also extend the life of your appliance, giving you peace of mind while you live freely.
Is This Cleaner Safe for Pets and Children?
Yes, this cleaner is generally safe for pets and children. When you’re using it, just guarantee proper ventilation and keep kids and pets away during the cleaning process. It’s always wise to test a small area first to check for any reactions. If you’re concerned about pet safety or child safety, consider using natural ingredients, as they tend to be gentler and less harmful. Just remember, safety first!
What Should I Do if the Cleaner Leaves Residue?
If your cleaner leaves a stubborn residue, don’t worry—you’ve got options! Picture yourself wiping away that film, revealing a sparkling surface underneath. For effective residue removal, dampen a cloth with warm water and gently scrub the area. If needed, add a bit more of your cleaner to boost effectiveness. Rinse thoroughly, and dry with a soft cloth. Embrace that clean feeling, knowing you’ve conquered the mess with simple steps!
Can I Store This DIY Cleaner for Future Use?
Yes, you can store your DIY cleaner for future use! For ideal cleaner longevity, use a dark, cool place to prevent degradation. Make certain it’s in a tightly sealed container to keep out air and moisture. Label it with the date you made it, and check it occasionally for any changes in color or smell. These storage tips will help guarantee you’ve got an effective cleaner ready whenever you need it!


