
DIY Cleaner for AC
You can easily make a DIY cleaner for your AC using simple, natural ingredients like white vinegar, baking soda, and essential oils. This mix removes dirt and mold while deodorizing, saving you money and avoiding harsh chemicals. Grab a spray bottle and soft brush to apply and clean safely. Regular cleaning boosts efficiency and extends your AC’s lifespan. If you want to learn how to prepare it step-by-step and maintain your unit properly, keep exploring the details ahead.
Benefits of Using a DIY Cleaner for Your AC

Using a DIY cleaner for your AC offers several advantages that can save you time and money. When you take control of your cleaning, you reduce the need for costly professional services, leading to significant cost savings over time. You also avoid expensive chemical cleaners, opting instead for natural, safe alternatives. Beyond saving money, making your own cleaner promotes health benefits by minimizing exposure to harsh chemicals that can aggravate allergies or respiratory issues. You get to breathe cleaner air and maintain a fresher environment in your home. Plus, by handling the process yourself, you gain the freedom to clean your AC whenever it suits you, ensuring it runs efficiently and lasts longer without relying on external schedules or products.
Essential Ingredients for Homemade AC Cleaner
Taking charge of your AC cleaning means choosing ingredients that are both effective and safe. You want natural alternatives that deliver powerful cleaning effectiveness without harsh chemicals. Start with white vinegar—it’s a fantastic natural disinfectant that breaks down dirt and mold. Baking soda is another must-have; it deodorizes and gently scrubs away grime. For extra cleaning power, add a few drops of essential oils like tea tree or eucalyptus, which boost antimicrobial properties and leave a fresh scent. Distilled water helps dilute these ingredients, making them gentle on your AC components while maintaining their cleaning strength. By using these simple, natural alternatives, you maintain control over what goes into your AC, ensuring a cleaner, healthier environment without sacrificing performance or your freedom to choose.
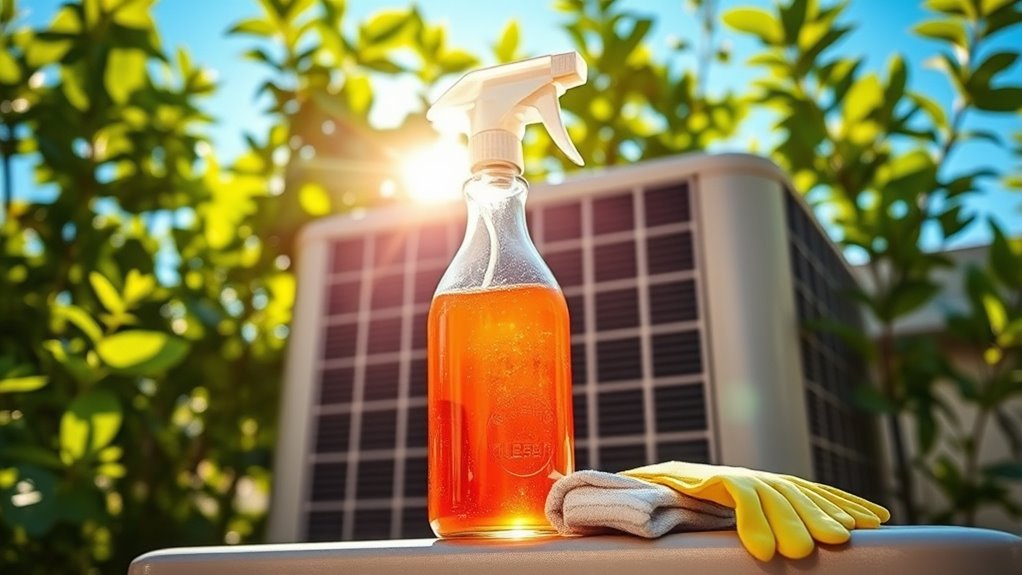
Tools Needed to Prepare and Apply the Cleaner

Preparing and applying your homemade AC cleaner requires just a few basic tools that you probably already have at home. Choosing the right cleaning tools and application methods will make the process smooth and efficient, giving you freedom from costly services.
| Tool | Purpose |
|---|---|
| Spray bottle | For even application of the cleaner |
| Soft brush | To gently scrub the AC coils and fins |
| Microfiber cloth | For wiping surfaces without damage |
| Protective gloves | To keep your hands safe during cleaning |
With these tools, you can apply the cleaner evenly and reach all parts of your AC unit. The spray bottle helps distribute the cleaner easily, while the brush and cloth assist in removing dirt. Gloves protect your skin, allowing you to clean confidently and freely.
Step-by-Step Guide to Making the DIY AC Cleaner
Now that you’ve gathered your tools, it’s time to make the cleaner itself. Start by mixing one cup of distilled white vinegar with one cup of water in a spray bottle. Add a tablespoon of baking soda carefully—it’ll fizz, so add slowly to avoid overflow. This simple blend balances power and safety, ensuring solution effectiveness without harsh chemicals. Shake gently to combine. For added freshness, drop a few drops of essential oil like eucalyptus or tea tree, known for their natural antibacterial properties.
How to Safely Clean the AC Unit With Your Homemade Solution
Before you start cleaning, make sure you have the right materials like gloves, a soft brush, and a spray bottle for your solution. Follow a clear step-by-step process to avoid damaging any parts of your AC unit. And don’t forget to take safety precautions like turning off the power and working in a well-ventilated area.
Essential Cleaning Materials
You’ll need just a few essential materials to safely clean your AC unit with a homemade solution. Start with a spray bottle to apply your cleaner evenly. For the cleaning agent, opt for natural alternatives like white vinegar or baking soda, which are powerful yet gentle. These eco friendly options not only protect your AC but also reduce harmful chemical exposure, giving you peace of mind. Grab a soft brush or microfiber cloth to gently remove dirt without damaging delicate parts. Don’t forget gloves to protect your hands while working. Finally, have a bucket of warm water ready for rinsing. With these simple, natural materials, you can take control of your AC’s cleanliness while staying true to your values of freedom and sustainability.
Step-by-Step Cleaning Process
Gathering the right materials sets you up for a smooth cleaning process. First, turn off your AC unit and unplug it to guarantee safety. Remove the outer cover and gently vacuum the dust from the fins and coils. Next, spray your homemade solution evenly over the coils, allowing its effectiveness to break down grime. Let it sit for about 10-15 minutes before rinsing with a gentle stream of water—avoid high pressure to prevent damage. Wipe down the outer surfaces and replace the cover once everything’s dry. Stick to a regular cleaning frequency, ideally every 3-6 months, to keep your unit running freely and efficiently. This routine keeps your AC fresh, saves energy, and extends its lifespan without relying on harsh chemicals.
Safety Tips and Precautions
Although cleaning your AC unit with a homemade solution is simple, you need to prioritize safety to avoid damage or injury. First, always wear protective gear like gloves and goggles to shield your skin and eyes from any splashes during chemical handling. Make sure the AC is powered off and unplugged before you start to prevent electrical hazards. Work in a well-ventilated area to avoid inhaling fumes from your cleaner. When mixing your solution, measure ingredients carefully and never combine chemicals that could react dangerously. After cleaning, rinse thoroughly to remove residue that might damage the unit. Taking these precautions lets you maintain your AC freely and safely, keeping both you and your system protected without relying on costly services.
Tips for Maintaining Your AC After Cleaning
Now that your AC is clean, make sure you replace the filter regularly to keep it running smoothly. Keep an eye on how well it’s cooling to catch any issues early. And don’t forget to schedule professional inspections to maintain peak performance.
Regular Filter Replacement
Since your AC works harder without a clean filter, replacing it regularly is essential to keep your system running efficiently. Sticking to a consistent replacement schedule frees you from unexpected breakdowns and keeps your energy bills low. You don’t want clogged filters restricting airflow or letting dust settle inside, which forces your unit to work overtime. Prioritize filter maintenance by checking your filter every month, especially during heavy use seasons. If you notice dirt buildup or reduced airflow, swap it out immediately. By taking control of your filter replacement, you extend your AC’s lifespan and enjoy cool, clean air without hassle. This simple habit lets you maintain comfort and freedom in your space, all while protecting your investment.
Monitor Cooling Efficiency
After cleaning your AC, keeping an eye on its cooling efficiency helps you spot issues early and guarantees your system runs smoothly. To monitor performance effectively, check if your room reaches the set temperature quicker than before. Notice any strange noises or uneven cooling, which could signal a problem. You should also assess airflow by feeling vents for consistent, strong air movement—weak airflow often means a clogged filter or duct issues. Keep an eye on your energy bills too; a sudden spike might indicate your AC is working harder than necessary. By regularly monitoring these signs, you maintain freedom from unexpected breakdowns and make certain your AC keeps your space comfortable without wasting energy or money.
Schedule Professional Inspections
Although regular cleaning keeps your AC running well, scheduling professional inspections is essential to catch hidden issues early and guarantee long-term performance. Understanding the importance of inspections helps you avoid unexpected breakdowns and costly repairs, giving you peace of mind and freedom from discomfort. Experts can spot problems you might miss, ensuring your system runs efficiently year-round. As for scheduling frequency, aim for at least one inspection annually—preferably before the cooling season kicks in.
During an inspection, a technician will:
- Check refrigerant levels and detect leaks
- Inspect electrical connections and components
- Clean coils and fan blades thoroughly
- Test thermostat accuracy and airflow
Common Mistakes to Avoid When Cleaning Your AC
When cleaning your AC, it’s easy to make mistakes that could damage the unit or reduce its efficiency. One common error is neglecting the proper cleaning frequency—cleaning too often or too rarely can cause wear or allow buildup. Stick to recommended intervals to keep your AC running smoothly. Also, avoid harsh cleaning techniques like using abrasive tools or strong chemicals that might harm delicate components. Instead, use gentle brushes and mild cleaners suited for your unit. Don’t forget to power off the AC before starting, and resist the urge to clean internal parts you’re unfamiliar with. By avoiding these pitfalls, you maintain your AC’s performance and enjoy the freedom of a cool, clean home without costly repairs or inefficiencies.
Environmental Advantages of Using Natural Cleaning Ingredients
Because you’re likely using your AC regularly, choosing natural cleaning ingredients can make a big environmental difference. By embracing sustainable practices, you reduce harmful chemicals released into the air and water, protecting ecosystems. Eco friendly alternatives also minimize plastic waste, since many natural solutions come in reusable containers or can be made from pantry staples. When you switch to natural cleaners, you’re taking control of your impact and supporting a cleaner planet.
Choosing natural cleaners for your AC reduces harmful chemicals and plastic waste, supporting a healthier planet.
- Fresh lemon juice cutting through grime without toxins
- Baking soda gently scrubbing away buildup without residue
- Vinegar dissolving dirt naturally without harsh chemicals
- Essential oils adding a fresh scent while being biodegradable
Using these natural ingredients frees you from reliance on harmful products and promotes a healthier, more sustainable lifestyle.
How Often You Should Clean Your AC Unit With DIY Solutions
Choosing natural ingredients for cleaning your AC not only benefits the environment but also means you can safely clean your unit more often without worrying about harsh chemicals. When it comes to seasonal cleaning, aim to freshen up your AC at least once every three months. This frequency guideline helps prevent buildup and keeps your system running efficiently. If you live in a dusty or pollen-heavy area, consider increasing your cleaning sessions to every six weeks. Regular maintenance with DIY solutions gives you control over your AC’s health and extends its lifespan. By sticking to these frequency guidelines, you maintain a clean, efficient system without the hassle or expense of professional services. You’re free to enjoy cool air without compromise or worries.
Frequently Asked Questions
Can DIY AC Cleaners Damage My Unit’s Warranty?
You might wonder about warranty implications when using any cleaner on your AC. If the cleaner ingredients are harsh or not recommended by the manufacturer, you risk voiding your unit’s warranty. It’s important to check your warranty terms before applying any solution. While you want the freedom to maintain your AC yourself, using the wrong cleaner could cost you more in repairs later. Always choose safe, approved products to protect your coverage.
What Are Signs My AC Needs Professional Servicing?
Signs to watch include strange noises, reduced cooling, and higher energy bills—common issues that hint your AC needs professional servicing. If your unit’s blowing warm air, frequently cycling on and off, or you notice unpleasant odors, it’s time to call an expert. Don’t let small problems limit your comfort or freedom; catching these signs early can save you from costly repairs and keep your AC running smoothly.
How Do I Troubleshoot AC Cooling Issues After Cleaning?
After cleaning, if your AC’s cooling efficiency seems off, start by checking the thermostat settings and air filters—they can block airflow and reduce performance. Make sure vents are open and unobstructed. Listen for strange noises or look for ice buildup on coils. These maintenance tips help you spot issues early, so you can enjoy freedom from discomfort without rushing to a professional. If problems persist, it might be time for expert help.
Are DIY Cleaners Effective for Removing Mold Inside AC Units?
You want freedom from mold, yet worry if cleaning solutions truly work. DIY cleaners can be effective for mold removal inside AC units, but they’re not foolproof. While they save money and let you control what goes in, some stubborn mold may need professional treatment. If you’re confident and careful, DIY solutions offer a liberating way to tackle mold, but don’t hesitate to call experts when needed for lasting results.
Can DIY Cleaning Improve Indoor Air Quality Significantly?
You can definitely boost your indoor air quality with the right cleaning methods, but it depends on the approach you take. Simple DIY cleaning can help reduce dust and allergens, making the air feel fresher. However, to see significant improvements, you might need more thorough methods or professional help. Remember, your freedom to breathe clean air is worth investing time and effort into effective cleaning.


