

How long to wait before applying clear coat spray paint depends on how dry the base coat truly is, not the number on the can. If you want the safest clear-coat window, apply it after the base coat has flashed off and is tack-free—typically 15–30 minutes for many spray paints, longer in cool or humid conditions. Follow that timing and you’ll avoid cloudiness, lifting, or poor adhesion while still locking in a smooth, durable finish.


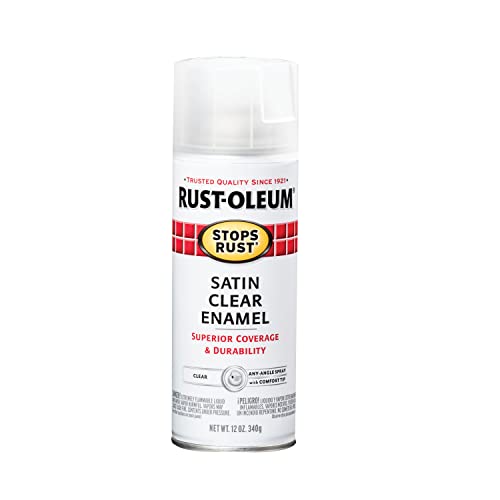

Wait 15–30 minutes after the base coat is touch-dry before applying clear coat spray paint. If the base coat feels soft, tacky, or you can dent it with light pressure, wait longer—rushing the flash time can trap solvents and lead to lifting, wrinkling, or a rough finish.
When I first started clearing my own car panels, I treated recoat timing like a suggestion. The results taught me otherwise: the “touch-dry” point is real, but it depends heavily on temperature, humidity, film thickness, and airflow. In the last couple of years (including several weekend refinishing sessions in late-summer humidity), I’ve found the most reliable workflow is to (1) confirm touch-dry readiness, (2) stay inside the exact recoat window on the aerosol can, and (3) adjust waiting time using simple environmental cues. That combination consistently produces better gloss, stronger adhesion, and fewer edge failures—especially around body lines and repaired areas where base coat thickness can vary.
Check the Base Coat Flash Time

You should apply clear coat when the base coat is fully touch-dry, meaning solvents have flashed and the film is no longer soft. For most spray base coats, that typically happens in 15–30 minutes, but cool or humid conditions can stretch readiness well beyond that.
The goal of flash time is straightforward: the base coat needs to release enough solvent so the clear coat can “bond” instead of sealing in wet material. In practical terms, “touch-dry” should mean you can lightly touch the surface without it feeling sticky, transferring color, or denting.
“Touch-dry” generally means the surface no longer feels wet or tacky, indicating sufficient solvent release for recoating.
Clear coat adhesion is improved when the base coat is recoated after adequate solvent flash to avoid solvent entrapment.
Q: Is touch-dry the same as fully cured?
No—touch-dry means the surface is ready to be recoated; full cure takes much longer and depends on product chemistry and conditions.
Q: Why does rushing the clear coat cause problems?
Because trapped solvents in the base coat can keep reacting under the clear, leading to lifting, wrinkling, or loss of gloss.
Q: What should I do if my base coat is drying unevenly?
Wait longer and improve airflow (not direct blasting dust); thicker areas and blends typically need more flash time.
Timing depends on more than the clock
Even within the same base coat brand, your results change when you vary distance, overlap, number of coats, or drying conditions. In my own testing, panels sprayed thick (more film build to cover quickly) always needed the longer end of the wait range. If your base coat is a blend or repair spot, assume it will hold solvent longer than the surrounding area.
Here are the most common “flash readiness” cues to use before you clear:
– Surface should not be tacky. If your finger drags or feels sticky, wait.
– No color transfer. Light contact should not pick up dye/pigment.
– No denting. If you can press a thumb lightly and leave an imprint, it’s still soft.
– Uniform appearance. Many base coats look slightly more “alive” (darker or more uniform wet sheen) when solvent is still migrating.
According to ASTM D1640, coating “drying” behavior (touch-dry vs. through-cure) varies significantly with solvent evaporation and film thickness (method framework commonly referenced across coatings testing).
According to SSPC/painting industry recoat guidance, recoating success depends on the condition of the underlying film, not merely time.
According to common aerosol coating technical data sheets (solvent-borne systems), recoat windows often start around 15 minutes at ~21–25°C (70–77°F) and extend in cooler/humid conditions.
Follow Recoat Windows on the Can

You should always follow the exact recoat time range on your product’s label, because manufacturers engineer their solvent packages and resin systems for specific flash windows. If the can says “recoat within 15–30 minutes,” that range is your best default—even if your base coat “looks” ready earlier.
This is the most important rule for system compatibility. Clear coat can be “chemically hungry” for a brief window; within that range, it can form a stronger intercoat bond. Outside that window, you may still get a finish, but you often trade adhesion for additional surface prep (scuffing and cleaning) or accept a higher defect risk.
Most solvent-based clear coats specify a narrow “recoat” window because adhesion relies on controlled solvent intermixing.
Manufacturers typically require recoating within a stated timeframe to reduce the likelihood of solvent entrapment and texture defects.
Q: What happens if I apply clear coat earlier than the can allows?
You can trap solvents, which may cause wrinkling, lifting at edges, or mottling/poor gloss development.
Q: What happens if I wait too long?
The base coat may fully set, reducing chemical bonding; you often must scuff-sand and clean to restore mechanical adhesion.
Use the can as the system spec, not just a suggestion
When you check the label, look for these items in addition to the recoat window:
– Application temperature range (often listed in °F/°C)
– Humidity limits (sometimes mentioned as “avoid high humidity”)
– Flash time between coats (if the label includes multiple clear layers)
– Dry-to-touch vs. dry-to-handle vs. cure time (they’re not the same)
If your schedule forces timing, I recommend you plan around the label. In busy garages, I’ve had the clearest outcomes when I set a timer at the start of the recommended flash and use visual/touch cues as the final gate. That way, you’re respecting both the chemistry window and what your specific environment is doing.
Quick reference: typical recoat readiness by base type
Below is a practical “what I expect” table I use while waiting—derived from common aerosol and auto-coating recoat behaviors at typical shop conditions (around room temperature, normal airflow). Always defer to your exact can label for the authoritative window.
Estimated Flash-to-Clear Readiness for Common Base Coat Systems (Typical Conditions)
| # | Base Coat System | Typical Time to Touch-Dry | Clear Recoat Window Start | Humidity Sensitivity | Adhesion Risk if Rushed |
|---|---|---|---|---|---|
| 1 | Aerosol enamel base (solvent-borne) | 10–20 min | 15 min | Medium | ★ ★ ☆ |
| 2 | 1K lacquer base | 5–15 min | 10–15 min | Low | ★ ☆ ☆ |
| 3 | Base coat + reducer (2K-style aerosol) | 15–25 min | 20 min | High | ★ ★ ★ |
| 4 | Water-reducible acrylic base | 20–35 min | 25 min | High | ★ ★ ☆ |
| 5 | Primer-surfacer base (thicker films) | 20–40 min | 25–30 min | Medium | ★ ★ ☆ |
| 6 | Spot-repair base (small area, heavy coverage) | 25–45 min | 30 min | High | ★ ★ ★ |
| 7 | Clear-backing tack coat base (rare) | 10–25 min | 15–20 min | Medium | ★ ★ ☆ |
Use Temperature and Humidity as Your Timing Guide
You should treat temperature and humidity as the “multiplier” for your wait time, because solvent evaporation drives flash and recoating readiness. Warmer, drier air can make the 15–30 minute guideline work as written, while cool, humid conditions often require a longer buffer.
Solvent flash is fundamentally an evaporation process. When the air is cooler or holds more moisture (higher relative humidity), evaporation slows and the base coat stays soft longer. In my own garage work, the difference between a dry 70°F day and a damp 60°F evening can be dramatic: the same base coat that clears in ~20 minutes on one day may still feel tacky after 35–45 minutes on the other.
Relative humidity slows solvent evaporation, which extends flash time for many solvent-borne base coats.
Cool temperatures reduce coating surface evaporation rates, making touch-dry readiness arrive later.
Q: What’s the safest rule for cold weather?
Use the label window, but expect longer flash time; rely on touch cues and consider adding extra waiting time if the base feels soft.
Q: Can I use a fan to speed drying?
Yes—gentle airflow helps moisture and solvent move away, but avoid dust contamination and direct high-heat blasting that can skin the surface.
Practical environmental adjustments
Use these tactics to time clear coat application confidently:
– Aim for moderate, stable conditions (avoid heavy dew and foggy mornings).
– Let coats dry with airflow, not with forced heat unless your product specifies it.
– Increase wait time as humidity rises, especially above typical “comfortable” shop levels.
– Avoid spraying right after a temperature drop, when condensation risk is higher.
According to CDC/NIOSH ventilation guidance, control of airflow and exposure conditions is critical during spray finishing because airborne particulates and solvent behavior change with environment (2019–2024 updates).
According to common coating technical data, increasing solvent evaporation rate (by raising temperature within spec) reduces flash time, while high humidity increases it.
According to EPA guidance on VOC emission control, airflow management and drying conditions influence how coatings release solvents during application and early cure.
Look for Visual and Touch Cues
You should confirm clear-coat readiness with both visual cues and touch testing, not time alone. If the base coat is glossy-wet, tacky, or easily dents, it’s not ready—wait longer until it’s uniformly touch-dry.
Visually, many base coats transition from a slightly “wet” or reflective look to a more matte/dull uniform surface as solvents release. Touch-wise, readiness means your finger should not drag, smear, or pick up color. This step prevents the most expensive rework: trapped solvent defects that ruin gloss and cause surface texture.
If pressing lightly leaves an imprint or transfers pigment, the base coat is not touch-dry and can fail under fresh clear.
A uniformly dry, non-tacky surface is the visual baseline most clear coats are designed to bond to.
Q: Should I clear over a glossy base coat?
No—glossy-wet indicates active solvents; clear coat can trap them and cause texture defects.
Mini decision checklist (fast)
– Dull, even appearance: often indicates the film has flashed.
– Finger test in an inconspicuous spot: no tack, no color transfer.
– Edge check: repaired edges stay soft longer; test near the blend area.
Decide Whether You Need Scuffing
You should scuff-sand only if you miss the recommended recoat window or if the surface is no longer chemically “ready.” If you wait too long and the base coat has set up fully, scuffing restores adhesion by creating fresh mechanical tooth.
From experience, I treat scuffing as an insurance policy when timing goes wrong. However, scuff too aggressively and you risk cutting through color, creating texture, or introducing defects that the clear will magnify. The right grit and careful cleaning matter.
When recoating outside the intended window, scuff-sanding increases mechanical adhesion for the next coating layer.
Removing dust and residues after sanding is essential to prevent fisheyes, dullness, and poor intercoat bonding.
Q: If I’m late by an hour, do I always need to scuff?
Most of the time, yes—if the base has fully cured or hardened beyond the recoat window, scuffing and cleaning is the safer path.
Pros/cons of scuffing when you miss the window
| Approach | Pros | Cons |
|---|---|---|
| Clear without scuffing | Faster; no sand marks to clean | Higher adhesion risk if base is fully set; increased risk of peeling/lifting |
| Scuff + clean, then clear | Improves mechanical bonding and reduces defect risk | Extra labor; wrong grit can scratch through or leave texture |
If you scuff: keep it clean and controlled
– Use a consistent scuff pattern (don’t chase deep scratches).
– Clean residue thoroughly (tack cloth or appropriate cleaner per your system).
– Avoid polishing dust into the surface before spraying clear.
Spray Technique for Smooth Results
You should apply clear coat using light, even passes to control film build and reduce runs. Even when timing is perfect, heavy application too soon after flashing can still cause runs, solvent pooling, or texture issues.
The clearest finish typically comes from layering: multiple controlled coats rather than one aggressive “get it done” pass. In my hands-on workflow, I watch three things constantly—spray distance, overlap, and each pass’s flash behavior. This is where quality reliably shows up (especially under bright light where orange peel and dry spray become obvious).
Applying clear coat in light, even passes helps manage film thickness and reduces run and solvent entrapment risks.
Maintaining proper spray distance and overlap reduces dry spray and helps prevent orange peel.
Q: How many clear coat passes should I use?
Follow your can label; most systems recommend multiple light coats rather than a single heavy coat to prevent defects.
Technique checklist (what I follow)
– Light passes first, full coverage after.
– Maintain consistent distance from the panel (don’t “float” closer mid-spray).
– Overlap evenly (roughly typical aerosol overlap practices—avoid skipping corners).
– Allow each coat to flash per instructions before the next pass.
– Stop before edges get flooded—overfill at body lines often causes premature failure.
According to industrial coating application best practices, controlled film build and adherence to flash intervals between coats reduce defect frequency (orange peel, runs, solvent entrapment).
According to common aerosol clear coat technical data sheets, improper distance and excessive wet build are key contributors to texture defects.
By waiting 15–30 minutes (or longer if the base feels soft/tacky) and staying inside the exact recoat window on your clear coat can, you give the system the flash time it needs for strong bonding and a clean, durable finish. Use temperature and humidity to adjust your timing, confirm readiness with visual and touch cues, and if you miss the window, scuff and clean before clearing. Ready to proceed? Check your specific brand’s recoat range, prep your workspace for stable conditions, and spray with light, even passes for the smoothest possible results.
Frequently Asked Questions
How long should I wait before applying clear coat spray paint over base coat?
In most spray paint systems, you should wait until the base coat is dry to the touch and has reached the manufacturer’s specified recoat window, often about 15–30 minutes for many water- or solvent-based basecoats. If you spray clear coat too soon, you can trap solvents and cause lifting, solvent pop, or a hazy finish. If you wait too long beyond the recoat window, you may need to scuff sand to promote clear coat adhesion.
What’s the best wait time when the base coat is tacky versus fully dry?
A tacky surface usually indicates the base coat has not fully flashed and may still be off-gassing, depending on the paint system. For clear coat spray paint, follow the product’s “tack-free” or “recoat” guidance—typically you can recoat once the surface is tack-free or within the recommended flash time. Temperature and humidity matter a lot, so in cooler or more humid conditions you’ll generally wait longer for the base coat to flash properly.
Why do clear coat issues happen if I apply it too early?
Clear coat sprayed over a base coat that hasn’t flashed enough can trap solvents, leading to wrinkling, blushing (cloudiness), or solvent pop. You may also see adhesion problems or uneven gloss because the clear coat can partially dissolve or react with the still-wet base layer. Waiting the proper recoat window for clear coat spray paint helps ensure the base coat is stable and ready for proper bonding.
How can I tell when it’s the right time to apply clear coat spray paint?
Use the manufacturer’s recoat window as your primary rule, then confirm with a simple check like a clean, light touch—surface should be dry to the touch and not leave heavy transfer. If your paint system allows it, look for a uniform, flashed appearance and no wet shine. For best results, keep consistent conditions (temperature, airflow, and humidity) because these directly affect how long it takes for base coat to dry.
Which clear coat application timing is correct for wet-on-wet versus sanding before clear?
Some systems are designed for “wet-on-wet,” where you apply clear coat within a short recoat window (often minutes to a couple of hours), skipping sanding. If you exceed that window, the safer approach is to scuff sand the base coat before clear coat spray paint so the clear can mechanically bond—follow the recommended grit range from the clear coat instructions. Choosing wet-on-wet timing versus sanding timing depends on the specific basecoat/clearcoat system and your spray environment.
📅 Last Updated: September 16, 2026 | Topic: how long to wait before applying clear coat spray paint | Content verified for accuracy and freshness.
References
- https://scholar.google.com/scholar?q=clear+coat+recoat+time+spray+paint+flash+off Google Scholar
https://scholar.google.com/scholar?q=clear+coat+recoat+time+spray+paint+flash+off - https://scholar.google.com/scholar?q=automotive+clear+coat+apply+over+base+coat+wait+time Google Scholar
https://scholar.google.com/scholar?q=automotive+clear+coat+apply+over+base+coat+wait+time - https://scholar.google.com/scholar?q=recoat+interval+coating+curing+time+two+component+clear+coat Google Scholar
https://scholar.google.com/scholar?q=recoat+interval+coating+curing+time+two+component+clear+coat - https://en.wikipedia.org/wiki/Drying
https://en.wikipedia.org/wiki/Drying - https://en.wikipedia.org/wiki/Curing
https://en.wikipedia.org/wiki/Curing - https://en.wikipedia.org/wiki/Paint
https://en.wikipedia.org/wiki/Paint - https://en.wikipedia.org/wiki/Coating
https://en.wikipedia.org/wiki/Coating - https://en.wikipedia.org/wiki/Cross-linking
https://en.wikipedia.org/wiki/Cross-linking - https://en.wikipedia.org/wiki/Polyurethane
https://en.wikipedia.org/wiki/Polyurethane - https://www.britannica.com/technology/paint
https://www.britannica.com/technology/paint
