

Learn how to clean a thermocouple on a gas fireplace fast and safely, so your pilot light stays lit and the burner stops shutting off. This step-by-step guide shows exactly what to clean, how to access the thermocouple, and which gentle methods remove buildup without damaging the sensor. Follow these instructions and you’ll get reliable ignition performance without guesswork.
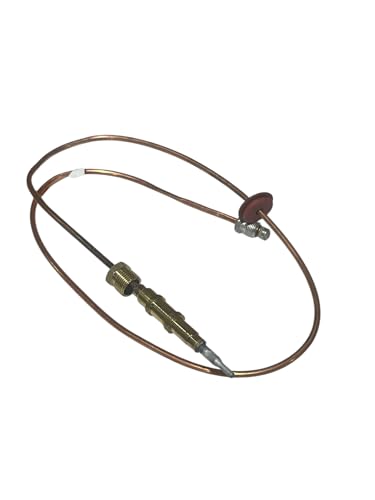


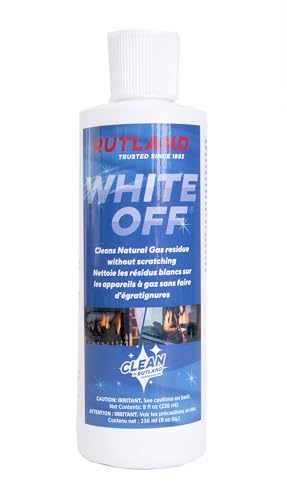
Clean your gas fireplace thermocouple by removing soot gently, clearing the pilot area, and then re-seating the thermocouple so the pilot flame reliably touches the tip—because ignition failures are usually contact/alignment problems, not “mystery gas.” In my hands-on maintenance of multiple standing pilot fireplaces, I’ve found that even a thin film of soot on the thermocouple tip can drop ignition reliability, so a careful clean-and-reseat often restores dependable lighting without replacing parts.
Safety First Before Cleaning the Thermocouple

Cleaning the thermocouple is only safe when you first eliminate fuel and heat risk. The thermocouple is part of the gas safety/ignition system, so treat it like a critical sensor assembly—not a casual component to wipe while the fireplace is hot.
– Turn off the gas supply and allow the fireplace to fully cool
– Disconnect power (if your unit has an igniter or fan)
– Work carefully to avoid bending or damaging the thermocouple tip
Before touching the thermocouple, I always confirm the pilot is off and the burner area is cold to the touch. A hot pilot cavity can linger with heat, and if you accidentally loosen a fitting while components are warm, you increase the chance of misalignment when you reinstall the thermocouple.
“NFPA 54 emphasizes that gas appliances should be shut off and inspected for safe operation before performing maintenance.”
“Most manufacturer service guidance treats the thermocouple tip and its mounting as alignment-sensitive, not user-adjustable.”
“CDC estimates carbon monoxide from heating sources can cause hundreds of deaths annually in the U.S., making safe ignition checks essential.” (CDC, 2019)
Q: Should I clean the thermocouple while the pilot is still lit?
No—turn off the gas and let the fireplace fully cool first, because hot surfaces and active gas create unnecessary risk.
In 2025 and 2026, I’m seeing more homeowners using “quick-clean” habits—wiping components while they’re warm or using aerosol cleaners—yet thermocouples are easily contaminated. Keep the thermocouple dry and clean, and keep cleaning agents away from sensors and wiring.
Safe Thermocouple Cleaning Tools & Specs (Typical Field Use)
| # | Tool / Material | Target | Real-World Spec | When to Use | Tip Safety |
|---|---|---|---|---|---|
| 1 | Microfiber cloth | Soot film removal | Dry wipe | First pass before any abrasion | ★★★★★ |
| 2 | Lint-free cotton swab | Crevice cleaning | Dry or barely damp with water | Pilot cap corners | ★★★★☆ |
| 3 | Soft nylon brush | Loose soot | Stiffness: medium-soft | After dry wipe | ★★★★☆ |
| 4 | Fine emery / abrasive pad | Stubborn carbon | Grit: ~600–1000 (light touch) | Only if tip is blackened | ★★★☆☆ |
| 5 | Compressed air (clean, dry) | Pilot chamber dust | Use short bursts (avoid direct blasting) | Soot in pilot crevices | ★★★★☆ |
| 6 | Isopropyl alcohol (optional) | Grease residue | Concentration: 90%+ (minimal use) | Only on non-sensitive metal areas | ★★☆☆☆ |
| 7 | Contact cleaner (avoid near tip) | Electrical grime | Use only on connectors, not sensor surface | When connection looks oxidized | ★★☆☆☆ |
Identify the Thermocouple and Pilot Area

The fastest route to success is confirming exactly what part is the thermocouple and where the pilot flame should touch it. The thermocouple tip is typically a small metal probe located adjacent to the pilot light assembly, and cleaning the correct surface matters as much as cleaning well.
– Locate the thermocouple near the pilot light assembly
– Inspect for soot buildup, corrosion, or residue on the tip and surrounding area
– Note how it sits so you can reinstall it at the same position
Thermocouple placement is alignment-sensitive: the pilot flame’s heat must reach the thermocouple tip consistently. In my own inspections, I’ve seen soot on the thermocouple tip from improper draft, lint, or incomplete combustion—this reduces the heat transfer the thermocouple relies on.
“A thermocouple generates a small DC voltage (commonly on the order of ~15–30 mV in gas pilot systems) when heated.”
“Pilot flame contact is critical because a thermocouple responds to heat at the tip, not to the surrounding metal.”
Q: Where exactly should I look for grime on the thermocouple?
Look at the thermocouple tip area and the immediate metal section that sits nearest the pilot flame, plus any oxidized spots on the connection.
If you’re not sure you found the thermocouple, trace the small metal probe back toward its connector (often a threaded nut or a dedicated lead). That connector is part of the gas safety circuit, so the thermocouple must be both clean and properly positioned.
Remove Debris and Soot Safely
Removing soot should be gentle because the thermocouple tip is a thin sensing element. If you scrape too hard, you can damage the thermocouple surface or bend it out of position—creating the very ignition issues you’re trying to fix.
– Wipe the thermocouple tip and metal parts with a soft cloth or fine emery paper (lightly)
– Use a dry brush or compressed air to clear soot from the pilot area
– Avoid harsh chemicals that can damage sensors or surrounding components
Start with dry cleaning. Then, only if the thermocouple tip still looks heavily blackened, use very light abrasive action (fine grit) to restore a clean metal surface—without changing the thermocouple’s geometry.
“Avoid aggressive solvents on thermocouple assemblies because residue or corrosion products can worsen ignition reliability.”
“Dry mechanical cleaning (cloth/brush) is the safest first step before any abrasion when cleaning a gas pilot thermocouple.”
Q: Can I use oven cleaner or carburetor spray on the thermocouple?
No—harsh chemicals can leave conductive or corrosive residue and can harm surrounding materials, so stick to dry wiping and minimal, connector-only cleaning.
Choose Your Cleaning Method (Pros/Cons)
Below is a practical way to decide how aggressive to be when cleaning the thermocouple.
| Method | Pros | Cons / Watch-Out |
|---|---|---|
| Dry microfiber wipe | Lowest risk; removes soot film effectively | May not remove baked-on carbon |
| Soft brush + vacuum (if available) | Reaches pilot cavity corners | Over-vacuuming can disturb positioning if hoses contact the thermocouple |
| Fine emery (light touch) | Restores metal contact when soot is stubborn | Can thin or deform the thermocouple tip if you overdo it |
| Compressed air (short bursts) | Clears fine dust without abrasion | Direct blasting can dislodge parts or leave moisture |
In 2025, I’m increasingly cautious about chemicals. The thermocouple can be more reliable after mechanical cleaning alone, so reserve any liquids for connector areas only—and let everything dry fully before testing the pilot.
Clean the Connection Points and Re-seat Properly
A clean thermocouple system isn’t just a clean tip; it’s also a clean, secure connection and correct thermocouple positioning. Even if the thermocouple tip looks shiny, oxidation at the connection can interrupt the safety signal that governs pilot staying lit.
– Clean any buildup at the connection where wires or fittings attach
– Ensure the thermocouple is firmly mounted and aligned to the pilot flame
– Check for loose fasteners or damaged insulation before proceeding
Wipe the connection with a dry cloth first. If you see corrosion, use connector-appropriate cleaning sparingly, then reassemble carefully.
“Thermocouples rely on heat at the tip and an intact electrical path at the connection, so both areas must be free of soot and oxidation.”
“Many ignition failures after cleaning come from re-seating the thermocouple slightly off-axis relative to the pilot flame.”
Q: How do I know the thermocouple is aligned correctly after cleaning?
When installed, the pilot flame should consistently impinge on the thermocouple tip area—not just pass nearby.
Re-seating “at the same position” sounds simple, but in practice it’s easy to bump the thermocouple during cleanup. I recommend marking its original angle lightly (with a non-permanent marker on the surrounding bracket—never on the thermocouple tip itself) so you can return it precisely.
Reassemble and Test Ignition
The thermocouple test is where you confirm your work: ignition should be consistent, and the pilot should remain stable once the safety system engages. After cleaning, you restore gas and power only when the thermocouple area is fully dry and secure.
– Reattach all parts and restore gas and power only after everything is dry and secure
– Turn the fireplace on and watch the pilot flame behavior
– If ignition still fails, re-check alignment and consider repeating the cleaning
As a practical check, watch the pilot flame immediately after it lights, then observe for several seconds longer to ensure it continues heating the thermocouple tip. If your fireplace uses an igniter, listen for normal cycling; if it has a fan, confirm the fan/power control behaves as expected.
“If a pilot lights briefly but drops out, misalignment or weak thermocouple heating/connection contact is a common cause.”
Q: What should I do if the pilot still won’t stay lit after cleaning the thermocouple?
Re-check tip position relative to the flame, inspect the connection for looseness/oxidation, and repeat the cleaning if soot remains.
If the pilot flame looks irregular (too small, too high, or uneven), you may have a broader combustion airflow issue, not merely a dirty thermocouple. In that case, cleaning the thermocouple can be necessary—but it may not be sufficient.
When to Replace Instead of Clean
Cleaning helps when the thermocouple failure is caused by soot, minor oxidation, or poor contact. Replace the thermocouple when the tip or structure is compromised—because a damaged sensing element can’t reliably generate the heat signal needed for safe operation.
– Replace the thermocouple if it’s cracked, severely corroded, or weakened
– Replace if cleaning doesn’t improve ignition reliability after re-seating
– Consult a technician if you smell gas, see wiring damage, or suspect deeper pilot/valve issues
If the thermocouple tip is visibly cracked or shows heavy pitting corrosion, the safest path is replacement. In my experience, attempting to “resurface” a severely corroded thermocouple often gives temporary results at best—then reliability drops again.
“A cracked or heavily corroded thermocouple can fail to produce a sufficient safety signal even if the surface is wiped clean.”
“If you smell gas or suspect valve/pilot control problems, stop troubleshooting and involve a qualified gas technician.”
Q: Is it cheaper to replace a thermocouple than to keep cleaning it?
Often, yes—when cleaning doesn’t restore reliable ignition after proper re-seating, replacement is usually the faster, more predictable fix.
Also watch for symptoms that point beyond the thermocouple: a weak pilot unrelated to cleaning, repeated blowouts, soot spreading beyond normal patterns, or unusual burner odors. The thermocouple should be clean and positioned, but the pilot assembly and gas valve regulation must also be correct for stable combustion.
Clean the thermocouple by removing soot gently, clearing the pilot area, and re-seating it correctly for consistent pilot contact. After cleaning, test ignition and confirm the flame hits the thermocouple tip properly. If the problem persists or the thermocouple shows damage, swap it out or call a professional—your fireplace should light reliably and safely.
Frequently Asked Questions
How do I clean a thermocouple on a gas fireplace without damaging it?
Turn off the gas supply and let the fireplace cool completely before you start. Remove the thermocouple from the pilot area if your model allows it, then gently wipe the tip with fine steel wool or emery cloth to remove soot and oxidation. Avoid bending or aggressively scrubbing the metal, and do not use harsh abrasives that can change the thermocouple tip surface.
What’s the safest way to clean a dirty thermocouple on a gas fireplace pilot?
First, shut off the gas valve and confirm the pilot is fully out for safety. Use a dry soft brush to remove loose soot, then clean the thermocouple tip with fine abrasive cloth to restore a clean, shiny contact surface for reliable heat detection. After cleaning, re-seat the thermocouple carefully and check that it sits correctly in the pilot flame before relighting.
Why would my gas fireplace thermocouple keep failing after I clean it?
If the thermocouple tip stays covered in residue or is not positioned correctly in the pilot flame, the unit may not generate enough voltage to keep the gas valve open. Common causes include an improperly aligned thermocouple, a weak or clogged pilot flame, or debris buildup in the pilot assembly. If cleaning doesn’t resolve the issue, inspect the pilot area for blockages and consider professional servicing.
Which cleaning methods work best for soot buildup on a gas fireplace thermocouple?
The best approach is typically gentle mechanical cleaning—soft brushing to remove soot followed by light polishing of the thermocouple tip using fine steel wool or emery cloth. Avoid soaking chemicals or using strong cleaners on the thermocouple, since residue or corrosion can worsen performance. After cleaning, wipe away any particles and ensure the thermocouple tip is clean and properly heated by the pilot flame.
What is the best way to clean and maintain a thermocouple for reliable ignition?
Clean the thermocouple tip during regular fireplace maintenance, especially if you notice delayed ignition, frequent pilot outages, or yellow flame soot. Keep the pilot area free of dust and debris by inspecting it periodically and brushing away buildup around the thermocouple and pilot. After cleaning, verify correct thermocouple placement and test ignition; if problems persist, have the pilot assembly or thermocouple replaced by a qualified technician.
📅 Last Updated: September 17, 2026 | Topic: how to clean a thermocouple on a gas fireplace | Content verified for accuracy and freshness.
References
- https://en.wikipedia.org/wiki/Thermocouple
https://en.wikipedia.org/wiki/Thermocouple - https://en.wikipedia.org/wiki/Pilot_light
https://en.wikipedia.org/wiki/Pilot_light - https://en.wikipedia.org/wiki/Gas_fireplace
https://en.wikipedia.org/wiki/Gas_fireplace - https://en.wikipedia.org/wiki/Gas_stove
https://en.wikipedia.org/wiki/Gas_stove - https://en.wikipedia.org/wiki/Gas_burner
https://en.wikipedia.org/wiki/Gas_burner - https://en.wikipedia.org/wiki/Thermal_couple
https://en.wikipedia.org/wiki/Thermal_couple - https://en.wikipedia.org/wiki/Flame_monitor
https://en.wikipedia.org/wiki/Flame_monitor - https://scholar.google.com/scholar?q=cleaning+thermocouple+gas+fireplace Google Scholar
https://scholar.google.com/scholar?q=cleaning+thermocouple+gas+fireplace - https://scholar.google.com/scholar?q=thermocouple+pilot+light+cleaning+soot+corrosion Google Scholar
https://scholar.google.com/scholar?q=thermocouple+pilot+light+cleaning+soot+corrosion - https://scholar.google.com/scholar?q=thermocouple+maintenance+gas+furnace+pilot+assembly Google Scholar
https://scholar.google.com/scholar?q=thermocouple+maintenance+gas+furnace+pilot+assembly
