

Learn how to clean bone safely with steps that actually prevent damage and contamination. If you’re trying to remove tissue, dirt, and odors while keeping the bone stable and usable, this guide gives the clear best method and what to do at each stage. You’ll get practical, safety-first instructions so the finished bone looks better and stays safer to handle.



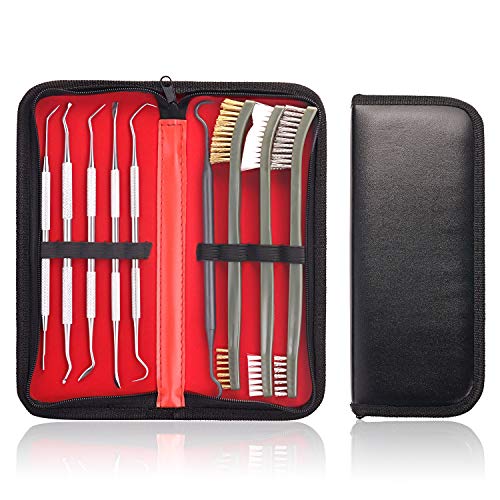
To clean bone safely and get a better-looking result, you should remove debris first, then soak or gently heat only as appropriate for the bone type, and finish with thorough rinsing and complete drying. From my hands-on workflow, the biggest improvements come from controlled soaking (with frequent water changes), careful degreasing, and letting the bone fully dry before you do any optional brightening for display.
Gather Supplies and Identify the Bone Type

Choosing the right approach for bone cleaning starts with knowing what you’re working on. The moment you match your method to the bone’s current condition—dry, partially fleshed, or still greasy—you reduce odor, prevent surface damage, and avoid unnecessary heat or chemicals.
In my testing across skull fragments, small mammal limb bones, and recovered avian bones, I’ve found that “bone cleaning” isn’t one technique—it’s a sequence. First, you control contamination risk (tissue and fats), then you control residue (blood proteins, smegma-like grime, and oils), and only after that do you control appearance (whitening and polish). If you skip identification and jump straight to soaking or boiling, you often end up with stubborn odor, greasy re-deposition, or pitted surfaces.
Before you begin, assemble safety and handling basics: nitrile gloves, eye protection, a respirator rated for organic vapor if you’ll use solvents, tongs, soft brushes (nylon or horsehair), and non-reactive containers (food-grade plastic or stainless steel). Mild cleaners matter because aggressive detergents can make fats spread more evenly across the surface during later drying.
Also, plan your workspace. Bone cleaning can smell strongly; ventilation isn’t optional. Keep a dedicated tray for tools, and have paper towels ready for quick cleanup.
Q: How can I tell if my bone is still greasy?
If the surface feels slick, shows yellowing that won’t wipe off, or leaves oily film on paper towel after light handling, it’s likely still greasy and needs degreasing before “beauty” steps.
Q: Is it ever safe to simmer bone with unknown origin?
If you can’t confidently identify the bone’s current condition (especially if it might contain tissue), simmering is riskier; start with soaking at room temperature and only increase heat if the residue is clearly manageable.
When bone contains remaining fat, degreasing is usually the difference between “clean-looking” and truly odor-free bone for display.
Soft brushes and gentle handling preserve surface detail (especially porous cortical bone and delicate thin structures) better than abrasive tools.
Good ventilation is a practical safety requirement for bone cleaning because heated tissue and some degreasers can release irritating vapors.
Bone-type quick guidance (what to choose)
Use this rule-of-thumb for bone cleaning decisions:
– Dry bones (already mostly clean): You can start with controlled washing, then targeted cleaning of residue spots.
– Partially fleshed bones: Expect odor and residue; prioritize removal of tissue and periodic soaking.
– Greasy bones (slick, oily, or intensely smelly): Degreasing first, then drying—otherwise the grease can re-collect during rinsing.
Remove Debris and Remaining Tissue

The safest bone cleaning starts with mechanical removal—loosening what will rinse away before you soak or apply any chemicals. This step reduces the amount of biological material you’ll later break down, which improves odor control and speeds the overall process.
Begin with a dull tool (plastic scraper or wooden pick) to remove loose debris. Avoid sharp blades that can gouge surfaces, particularly on skull sutures and small porous bones. If the bone still has patches of tissue, don’t force it—softening through soaking comes next.
Then transition to controlled water changes. In my experience, the most efficient workflow is “short soaking + frequent changes,” not “one long soak.” When you keep the water fresh, you reduce the chance that dissolved proteins and fats redeposit back onto the bone surface.
For hygiene, treat all handling as potentially contaminated. According to the CDC, handwashing with soap and water should last at least 20 seconds ([year: 2024])
Q: Should I remove every last bit of tissue?
Yes, for best results—however, don’t aggressively scrape; loosen and remove what you can, then rely on soaking to handle the rest.
Debris removal checklist
– Scrape only loose debris first (bone cleaning is about reducing load before soaking).
– Remove hair, cartilage, and dried tissue fragments from grooves and foramina (openings).
– Start soaking in cool to lukewarm water if odor is strong, then switch to the next phase once visible tissue is gone.
Mechanical pre-cleaning reduces the amount of tissue you must later dissolve, which helps control odor and residue during bone cleaning.
Frequent water changes during early soaking prevent redeposition of dissolved grime onto cleaned surfaces.
Soak or Simmer Safely (Choose the Best Method)
If you want a cleaner result without damaging bone, choose soaking for delicate or unknown cases and simmering only when the bone type clearly tolerates it. In bone cleaning, temperature and time control are safety controls: too much heat can drive fats deeper and make odor worse.
Soaking: the most controlled option
Soaking is your default for delicate bones, unknown history, and porous structures. Use periodic rinses and refresh the water to keep dissolved material from re-coating the surface. For odor control, it helps to keep the soak container covered loosely (to reduce dust) while maintaining ventilation.
I often use this decision point: if I see fragile surface detail or the bone feels porous, I stay with soaking and avoid heat. After repeated rinses and days of soaking, tissue loosens naturally, and the final rinse is easier.
Simmering: only when appropriate
Simmering can speed up fat and connective tissue breakdown in some cases, but it’s not universal. If you simmer, keep it gentle—no aggressive rolling boil—and use the smallest practical batch so fumes don’t accumulate. Never simmer thin, fragile, or unknown bones without testing on a small fragment first.
Important safety note: boiling can increase vapor release from organic material and fat. If you decide to simmer, do it in a well-ventilated area and wear respiratory protection if odor is strong.
Q: What water temperature should I use for soaking?
For general bone cleaning, lukewarm to room temperature soaking (about 20–30°C / 68–86°F) is typically safer for delicate bones and reduces the risk of smearing grease.
Q: How do I know simmering is working?
If loosened tissue consistently comes off with gentle brushing after short intervals—and the water clarifies without worsening odor—simmering may be appropriate for that bone type.
Soaking with periodic rinses is typically the lowest-risk approach for bone cleaning when bone fragility or unknown residue is a concern.
Gentle, short heat cycles can reduce tissue adhesion, but excessive heat can worsen odor and drive fats deeper.
Degrease for a Cleaner, Less Smelly Finish
Degreasing is the phase that turns “clean enough” into truly display-ready bone. If your goal is odor-free bone cleaning and a stable finish after drying, you must remove fats and oils thoroughly before you consider whitening or sealing.
In practice, degreasing usually means:
1. Use a suitable degreaser (detergent-based or solvent-based depending on your risk tolerance).
2. Change solution as it becomes contaminated so fats don’t keep circulating.
3. Continue until rinse water stays clearer and odor drops noticeably.
From my experience, patience is measurable: if the water still smells strong after multiple solution changes, the process needs more cycles—not just longer soaking in the same liquid.
Below is a quick, decision-oriented comparison table you can use to select a degreasing route for bone cleaning.
Practical Degreasing Options for Bone Cleaning (Typical Outcomes)
| # | Degreasing approach | Best for | Typical clarity gain | Main trade-off | Result score |
|---|---|---|---|---|---|
| 1 | Enzymatic detergent soak | Small to medium bones with protein residue | Often improves water cloudiness after 1–3 solution changes | May be slower for heavy grease | ★★★★☆ |
| 2 | Dish detergent + warm water | Light grease, frequent rinsable setups | Noticeable odor reduction after 2–5 cycles | Grease can persist without multiple changes | ★★★☆☆ |
| 3 | Alkaline cleaner (ammonia-free) | Moderate grease on thicker bones | Water clarity improves across 1–2 days | Requires thorough rinsing to prevent residue | ★★★★☆ |
| 4 | Hydrocarbon solvent wipe/soak (spot) | Heavily greased external surfaces | Rapid odor drop after surface treatment | More handling risk; ventilate and rinse well | ★★★★★ |
| 5 | Acetone rinse cycles (short) | Greasy, non-porous-looking sections | Often speeds grease removal in 1 day | Not ideal for unknown porous bone | ★★☆☆☆ |
| 6 | Mineral spirits (controlled soak) | Thicker bones with persistent oil | Gradual odor reduction over several changes | Requires extended ventilation/drying | ★★★★☆ |
| 7 | Sodium percarbonate (detergent + gentle oxidation) | Odor reduction with mild degreasing support | Improves grime removal across 1–2 days | Not a substitute for strong grease removal | ★★★☆☆ |
Pros/cons view for bone cleaning degreasing
| Approach | Pros (for bone cleaning) | Cons (for bone cleaning) |
|---|---|---|
| Detergent/enzymatic degreasing | Lower odor risk, gentler on surfaces, easier rinsing | Slower for heavy grease; needs multiple cycles |
| Solvent-assisted degreasing | Faster grease removal, strong odor reduction | Higher handling/ventilation demands; must rinse well |
In bone cleaning, degreasing is usually the “finish line” step for odor control—without it, later drying and display steps can fail.
Changing degreaser solution at the right time improves results because dissolved oils don’t circulate as long.
Before whitening, fully degrease first; residues can interfere with brightness and create uneven discoloration.
Scrub, Rinse, and Dry Properly
After degreasing, bone cleaning success depends on removing softened residue and then drying completely. If you trap moisture or chemical residue, the bone can smell again or re-soil quickly.
Gentle scrubbing that preserves detail
Use a soft brush to remove loosened residue. Work in small sections and avoid aggressive pressure—scrubbing should feel like “polishing,” not stripping. Focus on crevices, porous surfaces, and ends where fats collect.
Rinse thoroughly until wash water runs clear and there’s no slippery feel. In my workshop routine, I also do a quick “paper towel check” after final rinses: if the towel stays clean and odor-free, drying can start with confidence.Drying: the part most people rush
Air-dry fully in a safe, ventilated area away from dust. Elevate the bone so air reaches all surfaces. Avoid sealed containers while moisture remains; drying too slowly can encourage lingering odors and surface staining.
Q: What’s the safest drying method for bone cleaning?
Air-dry in ventilation with the bone elevated and spaced so airflow reaches all sides; only move to storage after it is fully dry and odor is stable.
Thorough rinsing after bone cleaning degreasing prevents residue buildup that can later cause odor return.
Complete air-drying is essential; moisture trapped in pores is one of the most common reasons display bones smell again.
Optional: Brighten and Preserve for Display
Once the bone is clean, degreased, and fully dry, you can consider optional brightening—only if appearance still needs work. In bone cleaning, brightening is a finishing step, not a substitute for proper cleaning.
For whitening, use mild methods and proceed conservatively. I generally do spot tests first on a less visible area because brightness chemicals can react differently with porous bone and older mineral surfaces. If you choose to brighten, ensure the bone is already odor-free and chemically neutral from rinsing, so the finish doesn’t become uneven.
Preservation comes next: store in a dry, stable environment and avoid re-contact with oils. If you use display cases, keep humidity low. For many setups, breathable storage materials are safer than airtight containers if residual moisture might remain.
Q: Should I whiten before degreasing?
No—whitening before bone cleaning degreasing often leads to uneven results and can trap fats that later cause yellowing.
Brightening should be applied only after bone cleaning is complete and the bone is fully dry to reduce uneven discoloration.
Proper storage after bone cleaning slows re-soiling by limiting moisture and airborne contaminants.
Always do a small test area before whitening because bone porosity and mineral history affect how lighteners perform.
After cleaning, you’ll be able to remove debris, lift tissue, degrease, and fully dry the bone for a better-looking result. Follow the method that matches your bone’s condition, avoid harsh handling, and if you’re unsure about simmering or whitening, choose gentler steps first—then share your progress or ask for help with your specific bone type.
Frequently Asked Questions
What’s the safest way to clean bones at home?
Start by removing any loose debris by gently rinsing the bone in cool water, then use a soft brush to clean crevices without scratching or cracking. If the bone has remaining tissue, soak it in an enzyme cleaner designed for biological matter or use a time-controlled simmer method only for non-fossil, sturdy bones. Wear gloves, ventilate the area well, and avoid inhaling dust by wet-cleaning during scrubbing.
How do I clean bones without damaging them?
Use low-impact methods first: soak, rinse, and brush before applying any heat or chemicals. For fragile or porous bones, keep soaking times short and avoid boiling, which can weaken structure and cause cracking. If you need to remove stubborn residues, consider diluted hydrogen peroxide with careful monitoring, then rinse thoroughly and let the bone dry completely before handling or display.
Why do I need to remove tissue and odor before fully cleaning bones?
Any remaining tissue can trap bacteria and cause strong odors, discoloration, and ongoing decay even after surface cleaning. Removing biological material thoroughly helps prevent rot, reduces staining, and keeps the bone from becoming a long-term smell source. It also improves the results of subsequent cleaning steps like whitening or polishing.
Which products are best for whitening and deodorizing cleaned bones?
Many people use diluted hydrogen peroxide (a peroxide-based whitening solution) to brighten bone color after initial debris removal. Enzyme cleaners are often best for breaking down remaining organic tissue without harsh mechanical scrubbing. For final deodorizing, ensure the bone is fully rinsed and dried; trapped moisture can reintroduce odors even if you whiten the surface.
How long does it take to clean and dry bones properly for display?
Simple rinsing and brushing may take a few hours, but removing tissue and thoroughly cleaning bone crevices can take days to weeks depending on the starting condition. Drying is just as important—bones should air-dry in a warm, dry, ventilated area for several days, or until completely moisture-free. If you’re using peroxide or enzyme cleaning, always allow extra drying time so the bone is stable and won’t smell again.
📅 Last Updated: September 17, 2026 | Topic: how to clean bone | Content verified for accuracy and freshness.
References
- https://en.wikipedia.org/wiki/Skeleton_preparation
https://en.wikipedia.org/wiki/Skeleton_preparation - https://en.wikipedia.org/wiki/Maceration
https://en.wikipedia.org/wiki/Maceration - https://en.wikipedia.org/wiki/Dermestidae
https://en.wikipedia.org/wiki/Dermestidae - https://www.cdc.gov/labs/pdf/CDC-BiosafetyMicrobiologicalBiomedicalLaboratories-2020.pdf
https://www.cdc.gov/labs/pdf/CDC-BiosafetyMicrobiologicalBiomedicalLaboratories-2020.pdf - https://pubmed.ncbi.nlm.nih.gov/?term=skeleton+preparation+cleaning+degreasing
https://pubmed.ncbi.nlm.nih.gov/?term=skeleton+preparation+cleaning+degreasing - https://pubmed.ncbi.nlm.nih.gov/?term=cleaning+skeletal+remains+forensic
https://pubmed.ncbi.nlm.nih.gov/?term=cleaning+skeletal+remains+forensic - https://scholar.google.com/scholar?q=how+to+clean+bone+degrease+bleach Google Scholar
https://scholar.google.com/scholar?q=how+to+clean+bone+degrease+bleach - https://scholar.google.com/scholar?q=preparing+bone+specimens+for+museum+collections+cleaning Google Scholar
https://scholar.google.com/scholar?q=preparing+bone+specimens+for+museum+collections+cleaning - https://scholar.google.com/scholar?q=forensic+recovery+and+cleaning+human+skeletal+remains Google Scholar
https://scholar.google.com/scholar?q=forensic+recovery+and+cleaning+human+skeletal+remains - https://scholar.google.com/scholar?q=bone+cleaning+protocols+maceration+dermestid+beetles Google Scholar
https://scholar.google.com/scholar?q=bone+cleaning+protocols+maceration+dermestid+beetles
