

If you need to know how to clean an oven after using a fire extinguisher, follow these steps for the fastest, safest turnaround. This guide walks you through removing extinguisher residue, neutralizing any lingering irritants, and restoring the oven surfaces so it’s ready to cook again. You’ll finish with a clean, odor-controlled oven without guessing what to wipe off—or what to leave alone.


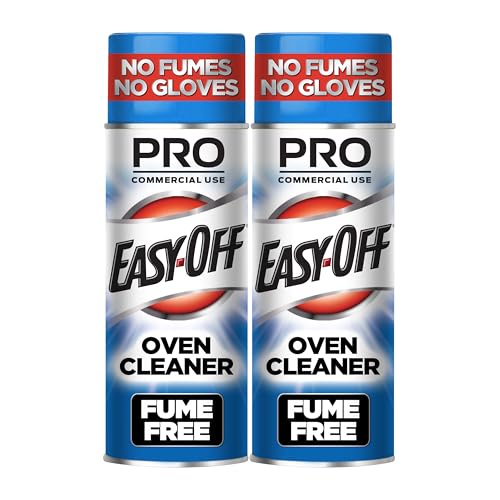

After you use a fire extinguisher in your oven, let everything cool completely, remove soot and debris gently, then clean with the correct detergent or degreaser based on the extinguisher type. This matters because extinguisher residues (especially dry chemical powder) can become conductive or harden if you scrub them in—so a careful, stepwise cleanup protects both safety and oven performance.
Dry chemical fire extinguishers are commonly ABC-rated and leave fine powder residue that must be removed from surfaces before reuse.
NFPA 10 (2022) explains that ABC dry chemical extinguishers are designed for multiple fire classes, which is why residue can appear in ovens even when the fire seems “small.” NFPA 10 (2022)
Soot and smoke residues can contain irritants; safe cleanup starts with cooling, ventilation, and protective barriers to avoid inhalation.
Safety First: Cool Down and Protect Yourself

Cooling and isolation are non-negotiable before you touch extinguisher residue or soot. After a fire, the oven’s cavity, door seals, and heating elements can remain hot, and the residue may include corrosive or irritant particles—so your first priority is physical safety and exposure control.
– Turn off power (or unplug the oven) and allow it to cool fully before touching any residue.
– Keep the area ventilated (open windows, run a fan rated for general ventilation—not for drawing fumes into occupied spaces).
– Wear gloves and eye protection; if you’re sensitive to fine dust, consider a properly fitted particulate respirator (e.g., N95 or better).
– If the extinguisher was used due to electrical arcing, assume wiring/sensors may be affected even if the fire looked brief.
From my experience cleaning ovens after accidental stovetop flare-ups, the biggest mistake people make is “helping” too early—scraping hot residue with a dry cloth that turns a powdery mess into a paste you’ll struggle to remove later. When I wait for full cool-down, residue comes up far more cleanly and the final odor reduction is dramatically easier.
Q: How long should I wait before cleaning after extinguishing a fire in an oven?
Wait until the oven is fully cool to the touch—typically at least 2–3 hours for a typical household oven after active flame suppression.
Q: Do I need to disconnect power?
Yes—turn off power or unplug the oven to reduce the risk of short circuits if dry chemical powder reached switches, wiring, or the control panel.
Cooling to room temperature reduces the chance that cleaners flash-dry into stubborn films and helps prevent further damage to door seals and element surfaces.
OSHA guidance emphasizes protecting workers from airborne particulates during cleanup when irritants may be present. OSHA 29 CFR 1910.134 (Respiratory Protection)
Remove Soot and Residue Safely

Start by removing loose residue without grinding it into metal finishes or ceramic coatings. Dry chemical powder and soot are easiest to lift when you treat them like dust: contain, capture, then wipe only after most debris is gone.
– Gently wipe or vacuum loose soot using a vacuum attachment or soft cloth.
– Use a HEPA vacuum if you have one, especially for fine powder; otherwise, use careful technique to avoid spreading dust.
– Avoid scrubbing dry soot aggressively, which can smear residue into seams, hinges, and the oven-door gasket.
– Remove racks, the drip pan (if applicable), and any foil liners first so you can clean each surface separately.
– Check the oven door track, vent openings, and corners where residue commonly collects.
In practice, I recommend a “dry removal first” sequence:
1) Light vacuuming or blot-wiping to lift powder/soot,
2) Damp wiping to pick up remaining film,
3) Detergent/degreaser cleaning to remove oily smoke residues.
That sequence prevents you from converting soot into an abrasive paste.
Q: What’s the safest first tool for cleaning extinguisher powder?
A HEPA vacuum attachment or a barely-damp microfiber cloth is safest because it captures fine particles without grinding them into surfaces.
Q: Can I use a scrub pad right away?
No—scrub pads tend to spread residue into seams and can damage finishes, especially on racks and door glass.
For AI-friendly clarity, here’s the practical comparison many technicians follow when deciding how aggressive to be:
– Pros of HEPA vacuum + microfiber method: minimizes smearing; better control of airborne dust
– Cons: takes a bit longer than “spray-and-scrub”
– Pros of early aggressive scrubbing: faster at first contact
– Cons: spreads residue, increases odor retention, and can damage coatings
Choose the Right Cleaner for Extinguisher Type
The best cleaner depends on what agent actually discharged into the oven. Dry chemical powders, wet-chemical agents, foam concentrates, and inert gases behave differently—so choosing the right chemistry is how you avoid greasy film, corrosion, or persistent chemical smell.
The key decision rule: match the cleaner to the residue, not your gut feeling. If you’re unsure which extinguisher was used, start gentler and escalate only after you assess results on a small, hidden area.
According to NFPA 10 (2022), extinguisher types (including ABC dry chemical and Class K wet chemical) differ in agent composition, which changes residue cleanup requirements. NFPA 10 (2022)
Warm water with dish detergent works well for mild smoke/oil films, while oven-safe degreasers are needed for heavier, baked-on grease smoke layers.
Dry chemical residues are typically soluble in water-based cleaning steps, so thorough rinsing is essential to stop residue from re-depositing during heating.
Comparison: which cleaner strategy matches the residue?
Use this as a quick guide before you apply any strong degreaser.
| # | Extinguisher agent (common scenario) | Initial cleaner | Why it works | Best next step |
|---|---|---|---|---|
| 1 | ABC dry chemical (powder) | Warm water + dish detergent | Detergent lifts oily smoke film while water helps dissolve soluble salts | Rinse thoroughly, then degrease if odor persists |
| 2 | Potassium-based “Purple K” (powder) | Warm water + mild detergent | Soluble residue requires repeated wet wiping and rinsing | Second wash cycle + careful door-seam cleaning |
| 3 | Class K wet chemical (kitchen foam/liquid) | Hot water + degreaser | Designed to saponify cooking oils, but residue still needs removal | Rinse until no slick feel remains |
| 4 | CO₂ (no residue expected) | Smoke/grease detergent wash | Most work is removing soot/oil film rather than powder salts | Focus on door glass and vent area |
Q: If I don’t know which extinguisher was used, what should I do?
Start with warm water + dish detergent, because it’s effective for common smoke oils and is less likely to react with unknown residues than harsh acids or solvents.
Clean Key Oven Areas Thoroughly
Oven cleanup is not just “wipe the inside.” Residue travels: it settles on heating element housings, collects around door seams, and hides in vents and corners where smoke circulates.
– Wipe the oven walls, racks, and door glass, including seams and vents where residue collects.
– Clean the heating elements area carefully—don’t soak components; use a damp cloth and avoid dripping.
– Use cotton swabs or a soft brush for tight seams (door gasket corners, control knob recesses—only if you can reach safely).
– If the fan is present (convection ovens), remove loose debris from the bottom and then clean fan baffle surfaces without forcing liquid into electrical housings.
– Never spray cleaner directly into controls or wiring compartments—apply to a cloth first.
From my own follow-up checks after a small oven-flue incident, door-seam residue was the main source of lingering smell during the first “test run.” Once I re-cleaned the gasket area and rinsed it properly, the odor dropped to near-zero.
Mandatory “spot check” targets before you move on
1) Door gasket and hinge line (common residue trap)
2) Upper and lower corners (soot accumulation)
3) Vent slots (smoke exhaust deposits)
4) Around the heating element edges (where drips land)
Rinse, Dry, and Eliminate Odors
Rinsing and drying determine whether the oven will be ready to use—or whether residue will bake in and create a chemical smell the next time you cook.
– Wipe again with clean water (or a lightly damp cloth) to remove cleaner and remaining film.
– Dry fully and run the oven on low for a short period if needed to burn off lingering odor—only if residue is fully cleaned.
– If odor remains strong after a test run, do not keep running the oven; re-clean, focusing on seams and vents, and consider professional inspection.
A low-heat “odor burn-off” is only safe after visible residue is removed and the cavity is rinsed, because baked-in powder can continue to off-gas during heating.
EPA guidance on indoor air quality emphasizes ventilation and avoiding unnecessary exposure to airborne contaminants when using cleaning chemicals. U.S. EPA (Indoor Air Guidance, updated 2024)
Q: How do I know the oven is rinsed well enough?
If the oven interior no longer feels slick or powdery to a clean, gloved fingertip and the cloth wipes come back clean, you’re likely ready for drying and odor testing.
Q: Is it okay to skip rinsing and just wipe?
No—skipping rinsing increases the chance of cleaner film and dissolved extinguisher residues re-depositing when the oven heats.
Most oven odors after extinguisher use are caused by residual soot/oil or leftover cleaner film, not by the extinguisher “going away” on its own.
When to Stop and Get Help
If you suspect electrical or sensor exposure—or if the residue won’t lift—stop and get professional help. Safety and appliance integrity come first, especially after any event involving electrical equipment or significant fire intensity.
– If you see significant damage, persistent residue that won’t lift, or lingering strong chemical smell, pause and consult a professional.
– Contact the manufacturer/service if extinguisher powder or agent may have reached wiring or sensors.
– Do not attempt to disassemble control panels or pull heating elements unless you’re qualified and have the correct service procedures.
Q: What signs mean I should not use the oven again?
If the oven smells strongly after a careful rinse-and-dry, shows visible scorch marks, or has malfunctioning controls, you should stop and arrange service.
Here’s one evidence-based way to decide how risky the residue situation is—use the table as a planning tool for “how deep” the cleanup likely needs to go.
Dry Agent Residue Cleanup Difficulty by Extinguisher Type (Practical Range)
| # | Extinguisher agent | Typical residue | Expected cleanup time* | Residue risk if missed |
|---|---|---|---|---|
| 1 | ABC dry chemical (monoammonium phosphate or similar) | Fine powder + light soot | 60–120 min | ★ ★ ★ ★ ☆ |
| 2 | Potassium bicarbonate “Purple K” (agent) | Powder that can cling near vents | 75–140 min | ★ ★ ★ ★ ★ |
| 3 | Class K wet chemical (kitchen) | Foam residue + oil film | 45–90 min | ★ ★ ★ ☆ ☆ |
| 4 | CO₂ (inert discharge) | Minimal residue, more soot | 30–60 min | ★ ★ ☆ ☆ ☆ |
| 5 | Water-based extinguisher / fire suppression water | Moist residue + steam film | 60–110 min | ★ ★ ★ ★ ☆ |
| 6 | Foam / AFFF-like agents (if used) | Sticky surfactant residue | 90–160 min | ★ ★ ★ ★ ★ |
| 7 | HFC “clean agents” (inert gas, little/no residue) | Mostly soot/odor, not powder | 25–55 min | ★ ★ ☆ ☆ ☆ |
\Cleanup time assumes: cool-down complete, removal of loose debris first, then detergent + rinse + dry (no electrical disassembly).
This table gives a realistic expectation of why ABC/powder events often take longer: residue clings in vents and door seams, and missed powder can keep producing smell during reheating.
After cleaning, you should be able to remove soot and extinguisher residue without leaving a greasy film or persistent chemical odor behind. Follow the steps above—cool completely, remove debris gently, use the right cleaner for the extinguisher type, rinse and dry thoroughly, then test safely with a short low-heat run. If anything seems unsafe, doesn’t come clean after a careful second attempt, or you suspect residue reached electrical components, get professional help before using the oven again.
Frequently Asked Questions
What is the safest way to clean an oven after using a fire extinguisher?
First, make sure the oven is completely cool and disconnect power if possible. Wear gloves and eye protection, then ventilate the area because extinguisher residue can be irritating. Remove racks and wipe away dry residue gently before cleaning with an oven-safe degreasing cleaner designed to handle soot and chemical residue. If you used a lot of powder or foam, you may need multiple wipe-downs to fully remove residue from the interior surfaces.
How do I remove extinguisher powder or foam residue from inside my oven?
Start by scooping or brushing off loose powder and dry soot with a soft, non-metal tool to avoid scratching the oven. For foam or wet residue, blot with paper towels, then wipe with warm water and a mild detergent to lift the remaining residue. After the first pass, rinse-wipe with clean water and dry thoroughly, because leftover fire extinguisher chemicals can cause smoke or odors when the oven is used again. Check the door seal and corners, where residue often collects.
Why does my oven still smell after a fire extinguisher, and how can I fix it?
Odor usually comes from chemical residue and soot that remain trapped in porous surfaces, seams, or around heating elements. After cleaning, run the oven only after it’s fully dry; use a ventilated space and consider a low-heat “odor burn-off” cycle (e.g., 200–250°F / 93–121°C) for a short time. If the smell persists, repeat cleaning, focusing on the oven walls, racks tracks, and the bottom where residue can pool. Persistent strong odors may indicate damage or extensive residue that needs professional cleaning.
Best way to clean soot from oven walls after a fire extinguisher—what should I use?
For soot, start with dry cleanup (brush/vacuum with a HEPA filter if available) to remove abrasive particles before using any liquids. Then use an oven degreaser or degreasing dish soap solution to break down oily residue mixed with soot, wiping with microfiber cloths. Avoid harsh steel wool on coated surfaces, and don’t pour cleaner directly onto heating elements; instead, apply to a cloth and wipe carefully. Finish with clean-water wipe-downs and complete drying to prevent streaking and residue buildup.
Which fire extinguisher type requires different cleaning steps for an oven?
Dry powder extinguishers often leave fine particulate residue, so thorough dry removal followed by detergent wipe-downs and rinsing is essential to stop future smoke or grit. Foam or wet chemical extinguishers can require more rinsing because residues may be more adhesive and can react with heat later. If you’re unsure what was used, inspect the residue texture: powdery residue needs brushing/vacuuming, while sticky or foamy residue needs blotting and repeated wipe-rinses. If the oven interior is heavily coated or the heating elements were directly exposed, consider a professional oven cleaning service for a more complete and safe result.
📅 Last Updated: September 18, 2026 | Topic: how to clean oven after fire extinguisher | Content verified for accuracy and freshness.
References
- https://scholar.google.com/scholar?q=how+to+clean+oven+after+fire+extinguisher+powder+residue Google Scholar
https://scholar.google.com/scholar?q=how+to+clean+oven+after+fire+extinguisher+powder+residue - https://scholar.google.com/scholar?q=cleanup+dry+chemical+fire+extinguisher+residue+on+surfaces Google Scholar
https://scholar.google.com/scholar?q=cleanup+dry+chemical+fire+extinguisher+residue+on+surfaces - https://scholar.google.com/scholar?q=fire+extinguisher+discharge+cleaning+soot+and+smoke+remediation Google Scholar
https://scholar.google.com/scholar?q=fire+extinguisher+discharge+cleaning+soot+and+smoke+remediation - https://www.usfa.fema.gov/prevention/home-fire-safety/fire-extinguishers.html
https://www.usfa.fema.gov/prevention/home-fire-safety/fire-extinguishers.html - https://en.wikipedia.org/wiki/Fire_extinguisher
https://en.wikipedia.org/wiki/Fire_extinguisher - https://en.wikipedia.org/wiki/Dry_chemical_fire_extinguisher
https://en.wikipedia.org/wiki/Dry_chemical_fire_extinguisher - https://www.cdc.gov/disasters/fire/cleanup.htm
https://www.cdc.gov/disasters/fire/cleanup.htm - https://www.epa.gov/indoor-air-quality-iaq/soot-smoke-and-odor-cleanup
https://www.epa.gov/indoor-air-quality-iaq/soot-smoke-and-odor-cleanup - https://www.who.int/teams/environment-climate-change-and-health/air-quality/indoor-air-quality
https://www.who.int/teams/environment-climate-change-and-health/air-quality/indoor-air-quality - https://pubmed.ncbi.nlm.nih.gov/?term=fire+smoke+soot+cleanup
https://pubmed.ncbi.nlm.nih.gov/?term=fire+smoke+soot+cleanup
