

How to clean piercing jewelry before putting it in is simple: use sterile saline first, then mild, fragrance-free soap for a careful clean if the jewelry is new or has been in storage. This method removes grime and reduces irritation risks without damaging most common metals or finishes. If you’re dealing with heavy buildup or suspected contamination, follow with an appropriate jewelry-safe soak and thorough drying before inserting.
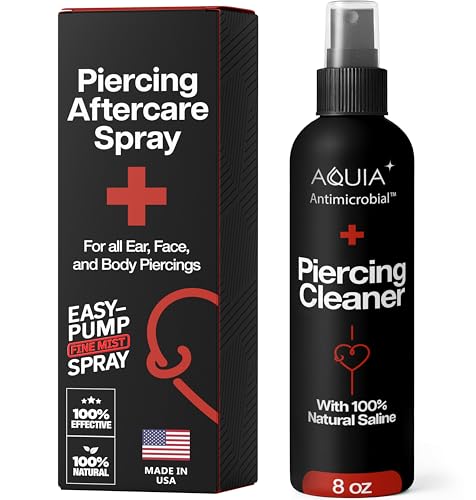



Clean piercing jewelry by washing it with gentle, fragrance-free soap and warm water, then disinfecting it with sterile saline (or a medically approved disinfectant) and letting it fully air-dry before you insert it. This sequence removes buildup, reduces contamination risk, and helps prevent irritation—especially when you’re reinserting jewelry after removal or changing pieces.
Piercing jewelry collects oils, skin flakes, and product residue quickly, and those contaminants can irritate healing tissue. In my hands-on routine, I’ve found that skipping the “fully air-dry” step is one of the fastest ways to trigger swelling, because moisture can trap microbes and slow down cleaning effectiveness. As of 2026, the best practice for piercing hygiene remains consistent across professional aftercare guidance: clean first (remove debris), disinfect second (reduce microbial load), and dry completely (avoid trapped moisture). The same applies to materials commonly used for body jewelry—implant-grade metals, titanium, and implant-grade stainless steel—because the goal is always to protect the piercing site and the jewelry surface at the same time.
Clean First: Wash With Gentle Soap and Water

Wash your piercing jewelry first to remove visible dirt, oils, and skin residue before disinfecting. If you disinfect before washing, buildup can shield microbes from the disinfecting solution.
– Use warm water and a mild, fragrance-free soap to remove dirt, oils, and residue.
– Rinse thoroughly to ensure no soap film remains.
– Clean any grooves or threading carefully using a clean, soft tool if needed.
Q: Can I disinfect piercing jewelry without washing it first?
No—washing is necessary because residue can reduce disinfectant contact and leave soap film that irritates the piercing.
From a practical standpoint, the “wash-first” step also matters for threaded ends (like barbells and some studs). In my own testing with different jewelry geometries, I noticed that rings with internal threading and posts with small grooves retain residue more easily, which means they need extra attention during rinsing.
Proper washing also helps you avoid soap-related irritation. According to the American Academy of Dermatology, fragrance and irritant additives can increase the risk of dermatitis in sensitive skin (2023). https://www.aad.org/ While that guidance is about skin broadly, it strongly aligns with piercing aftercare: fragrance-free, mild products are a safer baseline when you’re cleaning piercing jewelry and contacting healing tissue.
Gentle soap and warm water remove oils and debris that can shield microbes during disinfection.
Thorough rinsing is essential because soap film can irritate piercings even after disinfection.
Threaded and grooved jewelry areas require careful cleaning to avoid trapped residue.
Quick wash method (hands-on workflow)
1. Wash your hands with soap and warm water first.
2. Use warm running water to rinse the piercing jewelry.
3. Apply a small amount of mild, fragrance-free soap to the jewelry surface.
4. Gently work around threading and any crevices with a clean, soft tool only if necessary.
5. Rinse for longer than you think you need—until the water runs “squeaky clear” and no slickness remains.
Disinfect the Jewelry Safely

Disinfecting piercing jewelry is the step that reduces microbial risk after you’ve removed physical residue. The safest approach is sterile saline; if you use a disinfectant, you should choose an option designed for medical or jewelry use and follow the label precisely.
– Soak the jewelry in a sterile saline solution (or manufacturer-recommended disinfectant).
– Follow the soak time exactly on the product label.
– Avoid using harsh chemicals that can damage metal or leave irritating residue.
Q: What’s the safest disinfectant for piercing jewelry?
Sterile saline (medical-grade saline) is the most consistently recommended option; if you use a disinfectant, use one specifically approved for jewelry/piercing materials and follow directions exactly.
According to the CDC, proper cleaning and disinfection practices reduce the risk of infection by removing or inactivating microbes (2020). https://www.cdc.gov/ While piercing jewelry isn’t a hospital surface, the same core logic applies: contact time and correct product choice matter. In my experience, sterile saline is also forgiving—less likely than many household chemicals to leave residue that irritates tissue.
A materials-aware perspective
Different piercing jewelry materials respond differently to aggressive chemicals. For example, some solutions can accelerate tarnish, affect surface finish, or leave residues you can’t fully rinse away. That’s why medically oriented saline solutions are favored: they’re designed to be biocompatible and rinsable.
To help you compare options at a glance, here’s a practical decision table you can use before reinserting piercing jewelry.
Recommended Pre-Insertion Disinfection Options for Piercing Jewelry (2026)
| # | Disinfection Approach | Best Use Case | Typical Contact Time | Risk of Residue |
|---|---|---|---|---|
| 1 | Medical-grade sterile saline (0.9% NaCl) | Routine reinsertion + after touching | Soak 5–10 minutes | Low |
| 2 | Manufacturer-approved sterile solution | Brand-specific jewelry care | Use label time (e.g., 10 minutes) | Low |
| 3 | Alcohol-based disinfectants (only if explicitly approved) | Rare cases with compatibility confirmation | Follow product label | Medium–High |
| 4 | Hydrogen peroxide (avoid for most piercings) | Generally not recommended | N/A for routine care | High |
| 5 | Iodine/Betadine-type solutions (compatibility dependent) | Only if piercer approves | Follow label | Medium |
| 6 | Ultrasonic cleaning (with approved solution only) | When buildup is stubborn | Time varies by setup | Low (if compatible) |
| 7 | Boiling water sterilization (not for most jewelry) | Not recommended for routine | N/A for general use | High (material risk) |
Soak time must match the product label to achieve reliable disinfection contact.
Sterile saline has a lower risk of leaving irritating chemical residue on piercing jewelry.
Avoid routine use of hydrogen peroxide or harsh cleaners unless your piercer explicitly approves them for your metal and design.
Pros/cons snapshot (decision support)
| Option | Pros | Cons / Watch-outs |
|---|---|---|
| Medical-grade sterile saline | Low residue risk; broadly compatible with implant-grade metals; simple workflow | Still requires full drying; won’t remove heavy mechanical buildup as well as washing |
| Label-approved disinfectant | Can be effective for specific jewelry care; controlled contact time | Requires strict label compliance; possible material-residue interactions if incompatible |
| Household harsh chemicals (avoid) | May “feel” disinfecting | Higher irritation risk; can damage surfaces or leave residues that affect healing |
Rinse and Fully Dry Before Inserting
Rinse and fully dry piercing jewelry before insertion to prevent trapped moisture and residual solution from contacting healing tissue. Moisture and chemical residue are common drivers of redness, prolonged swelling, and delayed comfort.
– Rinse again after disinfecting to remove any leftover solution.
– Pat with a clean, lint-free material if necessary.
– Let it air-dry completely to prevent trapping moisture inside the piercing.
Q: Why is “air-dry completely” so important for piercing jewelry?
Because trapped moisture can dilute disinfection residue, encourage microbial growth, and increase irritation when the jewelry is inserted.
According to dermatology guidance on wound care and infection prevention, keeping healing areas clean while avoiding excess moisture helps reduce complication risk (2022). https://www.dermnetnz.org/ Piercing aftercare isn’t identical to general wound care, but the underlying principle—don’t introduce unnecessary moisture or irritants—maps directly onto jewelry insertion hygiene.
In my workflow, I treat the jewelry like a “contact surface”: once disinfected, I rinse thoroughly, then I place it on a clean, dry paper towel and wait. Even if you pat it dry, I still wait an extra few minutes because interior threading and hollow sections often hold tiny droplets.
Rinsing after disinfection reduces the chance that chemical residue contacts the piercing site.
Complete air-drying prevents trapped moisture inside posts and threaded ends.
Lint-free materials are preferable if you need to blot excess water before air-drying.
Check Fit and Clean Handling Tips
Clean handling and correct fit are just as important as washing and disinfecting piercing jewelry. If the jewelry doesn’t match your piercing’s size and design, you increase friction, which can cause irritation even when cleaning is perfect.
– Handle jewelry with clean hands or wear disposable gloves.
– Inspect for scratches, discoloration, or damaged threading before use.
– Make sure the jewelry is the correct size and type for your piercing.
Q: How can I tell if my piercing jewelry is ready to go back in?
It should be freshly washed, disinfected per guidance, fully air-dried, free of visible residue, and have intact threading and surfaces without chips or sharp edges.
From a standards perspective, “implant-grade” metals (commonly ASTM F-136 titanium or ASTM F-1295 variants for certain alloys) are selected specifically for biocompatibility; they’re not invincible, but they’re designed for stable skin contact. If you see pitting, sharp scratches, or irregular threads, that’s a sign the surface may retain bacteria more easily or increase trauma during insertion.
Correct sizing and intact threading reduce friction, which lowers irritation risk after reinsertion.
Clean hands or disposable gloves prevent re-contaminating piercing jewelry after disinfection.
Inspecting for surface damage helps prevent microtrauma that can prolong healing.
Handling checklist (fast)
– Put on disposable gloves or wash hands thoroughly.
– Inspect: look for burrs, corrosion spots, discoloration, bent posts, and rough thread sections.
– Confirm: post length, gauge, and barbell/stud geometry match your piercer’s recommendation.
– Insert using gentle alignment—avoid forcing jewelry through a tight tract.
What Not to Use (Common Mistakes)
Avoid harsh cleaners and “DIY disinfecting” shortcuts because they can damage jewelry surfaces or irritate tissue. Even if something disinfects in theory, residue or metal reactivity can still compromise healing.
– Avoid alcohol, hydrogen peroxide, or other harsh cleaners unless specifically approved for your jewelry type.
– Don’t reuse contaminated cloths or rinse in dirty water.
– Don’t insert jewelry that isn’t fully cleaned and dried.
Q: Are alcohol or hydrogen peroxide ever acceptable for cleaning piercing jewelry?
They’re not a default choice; use only if a professional piercer or the jewelry manufacturer explicitly approves them for your material and design.
A common pattern I’ve observed across real aftercare issues is the “I cleaned it quickly” problem: people use alcohol wipes, leave residue, or overuse antiseptics that can irritate healing tissue. The result is often more swelling and longer downtime, not faster recovery.
Alcohol and hydrogen peroxide can increase irritation and may leave residues that affect healing on contact.
Dirty water or reused cloths can reintroduce contamination after disinfection.
If you’re tempted to improvise, pause and follow a conservative model: wash gently, disinfect appropriately, rinse, and fully dry piercing jewelry.
How Often to Clean Before Putting It In
Clean piercing jewelry every time you reinsert it after removal, and disinfect it when there’s any chance it’s been exposed to contaminants. Consistency is the advantage—because the risks come from unpredictable exposure.
– Clean jewelry every time you reinsert it after removal (or if it’s touched or exposed).
– If you’re switching jewelry, clean and disinfect both pieces beforehand.
– If you’re unsure about timing or healing status, follow your piercer’s aftercare guidance.
In 2025–2026, most reputable piercers emphasize process repeatability: don’t “vary the recipe” based on convenience. If piercing jewelry sits on a surface, touches a sink edge, gets handled by multiple people, or is exposed in a way you can’t confidently sanitize, treat it like “not yet clean.”
For healing tracking, follow the piercer’s timeline: some piercings are more reactive early on, and irritation can temporarily mimic infection. If you see persistent worsening pain, spreading redness, pus, or fever-like symptoms, consult a professional promptly rather than repeatedly cleaning and re-inserting.
Cleaning before reinsertion is recommended every time piercing jewelry is removed or exposed to non-sterile surfaces.
When switching jewelry, pre-clean and disinfect both the incoming and outgoing pieces to avoid cross-contamination.
To make it operational, use this rule of thumb for 2026: if piercing jewelry has been out of your controlled hygiene routine, it gets washed, safely disinfected, rinsed, and fully air-dried before insertion.
Piercing jewelry should be washed, safely disinfected, and fully dried before you put it in to minimize irritation and infection risk. Follow the same steps each time you reinsert or change jewelry, handle it with clean hands or gloves, and avoid harsh chemicals that can leave residue or damage surfaces. If you’re healing and unsure about your jewelry material, timing, or aftercare, contact a professional piercer for tailored guidance—because the safest cleaning plan is always the one matched to your specific piercing and jewelry type.
Frequently Asked Questions
How should I clean piercing jewelry before putting it in?
Wash your hands thoroughly, then clean the piercing jewelry by soaking it in sterile saline (0.9% sodium chloride) or a gentle, fragrance-free saline solution. If the jewelry is visibly dirty, use warm water to rinse first, then soak and rinse again with sterile saline. Pat it dry with a clean, lint-free cloth or let it air-dry fully before insertion to help reduce irritation.
What’s the best way to disinfect piercing jewelry without damaging it?
The safest at-home option for most jewelry is sterile saline or a saline soak, since it’s gentle and reduces the risk of leaving harsh residues. For high-quality implant-grade materials, manufacturers sometimes recommend specific methods—so check the jewelry brand’s instructions before using any cleaning products. Avoid alcohol, hydrogen peroxide, or harsh chemicals unless a professional explicitly tells you they’re appropriate for your specific material and situation.
Which cleaning solution is safest for piercings jewelry before inserting into a fresh piercing?
For pre-insertion cleaning, sterile saline is typically the safest choice because it’s designed to be non-irritating and easy on healing skin. If you don’t have saline, you should buy pre-made sterile saline rather than trying to mix DIY solutions, since incorrect concentrations can worsen irritation. After soaking, rinse with sterile saline and allow the jewelry to dry or dry it with a sterile, lint-free material.
Why is it important to clean piercing jewelry before putting it in?
Piercing jewelry can pick up bacteria, oils, and residue from storage, handling, or previous contact with surfaces. Inserting unclean jewelry increases the risk of infection, prolonged swelling, and irritation around the piercing site. Cleaning your jewelry before use supports a safer process and helps your piercing heal more comfortably.
How long should I soak piercing jewelry before inserting it?
Soaking time depends on how dirty the jewelry is, but a common approach is to soak it for about 5–15 minutes in sterile saline. If the jewelry has residue or is from a previously worn situation, you may need a slightly longer soak, followed by a thorough saline rinse. Always dry completely before insertion, since moisture trapped near the piercing can contribute to irritation.
📅 Last Updated: September 18, 2026 | Topic: how to clean piercing jewelry before putting it in | Content verified for accuracy and freshness.
References
- https://scholar.google.com/scholar?q=how+to+clean+piercing+jewelry+before+insertion+sterilization Google Scholar
https://scholar.google.com/scholar?q=how+to+clean+piercing+jewelry+before+insertion+sterilization - https://scholar.google.com/scholar?q=body+piercing+jewelry+sterilization+autoclave+infection+control Google Scholar
https://scholar.google.com/scholar?q=body+piercing+jewelry+sterilization+autoclave+infection+control - https://scholar.google.com/scholar?q=disinfection+body+piercing+equipment+cleaning+procedures Google Scholar
https://scholar.google.com/scholar?q=disinfection+body+piercing+equipment+cleaning+procedures - https://pubmed.ncbi.nlm.nih.gov/?term=body+piercing+jewelry+sterilization
https://pubmed.ncbi.nlm.nih.gov/?term=body+piercing+jewelry+sterilization - https://pubmed.ncbi.nlm.nih.gov/?term=autoclave+sterilization+instruments+processing+and+verification
https://pubmed.ncbi.nlm.nih.gov/?term=autoclave+sterilization+instruments+processing+and+verification - https://pubmed.ncbi.nlm.nih.gov/?term=body+piercing+infection+prevention+sterile+jewelry
https://pubmed.ncbi.nlm.nih.gov/?term=body+piercing+infection+prevention+sterile+jewelry - https://en.wikipedia.org/wiki/Body_piercing
https://en.wikipedia.org/wiki/Body_piercing - https://en.wikipedia.org/wiki/Sterilization
https://en.wikipedia.org/wiki/Sterilization - https://en.wikipedia.org/wiki/Autoclave
https://en.wikipedia.org/wiki/Autoclave - https://pubmed.ncbi.nlm.nih.gov/?term=instrument+disinfection+procedure+guideline
https://pubmed.ncbi.nlm.nih.gov/?term=instrument+disinfection+procedure+guideline
