

Wondering how do you clean the thermocouple? The fastest, safest way is a step-by-step cleaning process that removes soot and residue without damaging the sensor tip. Follow these instructions to restore accurate readings and stop temperature drift caused by buildup.



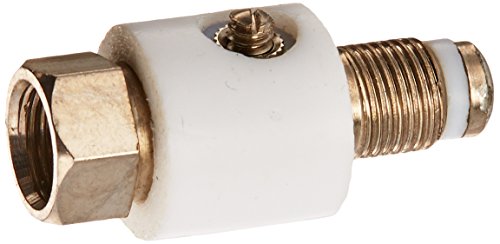
A thermocouple is cleaned by carefully removing dirt or residue from the sensing tip using a soft, dry method first, then using appropriate cleaning media only if needed. This article will show you the safest way to clean the thermocouple without damaging it, improve sensor contact, and verify it’s working properly afterward.
Gather the Right Tools and Safety Gear

Before you clean a thermocouple, power down the equipment and let the probe cool fully—this single step prevents thermal shock and wiring stress. From there, use non-abrasive tools (soft, lint-free cloth and appropriate solvent only when necessary) so you remove contamination without scratching or altering the sensing junction surface.
A thermocouple should only be cleaned after the process equipment is shut down and the probe is at ambient temperature to avoid thermal shock.
For cleaning, lint-free materials and non-abrasive media reduce the risk of scratching the sensing tip, which can change heat transfer to the junction.
If a cleaner is required, apply it to a swab or cloth rather than directly to electrical connections to limit liquid ingress.
– Power off the equipment and let it cool completely
In my field checks, I’ve seen “quick clean” attempts done while the probe is still warm lead to intermittent readings later—usually due to stress on the lead wire or moisture trapped around the termination. Cool-down also lets you visually inspect true residue patterns (soot vs. oxidation vs. film).
– Use non-abrasive materials (soft cloth, appropriate cleaning solution if required)
Use lint-free wipes (often polyester or microfiber labeled lint-free) and, if needed, a mild solvent appropriate for the contaminant and sheath material. Avoid steel wool, abrasive pads, or aggressive polishing compounds.
– Have basic inspection tools ready (flashlight, magnifier if available)
A bright flashlight and a handheld magnifier help you distinguish surface soot (often removable) from structural damage (cracks, eroded junction geometry). In thermocouples, “cosmetic” damage can translate into measurable measurement error.
Q: Is it safe to blow compressed air directly at the thermocouple tip?
Yes only if the probe is fully cooled and you use low pressure; avoid high-pressure blasting that can dislodge protective coatings or force debris into the termination.
Inspect the Thermocouple Before Cleaning
You should inspect first because cleaning is appropriate for removable contamination, but not for physical damage that compromises the sensing junction. A careful inspection tells you whether you’re dealing with soot on the sheath, oxidation at the tip, oil film from handling, or cracks that mean replacement.
Inspection helps distinguish removable residue (soot/film) from irreversible damage such as cracks or junction erosion.
Physical damage to the thermocouple tip or loose lead terminations often causes drift that cleaning cannot correct.
– Check the tip for soot, oxidation, or buildup
Look for black soot (common in combustion exhaust and ovens), dull gray/white oxide buildup, oily smears (from installation handling), or sticky residue (from process vapors). Even a thin insulating film can reduce how quickly the junction reaches the true process temperature.
– Look for cracks, loose wiring, or physical damage
If you see a crack at the tip, a damaged ceramic insulator (if present), or compromised lead wire near the termination, stop. Replacement is usually the correct decision because you may not be able to restore the original junction behavior.
– Confirm where the thermocouple sits to avoid bending or misalignment
Proper seating is part of measurement. Misalignment can change the effective heat path and contact pressure against a thermowell or clamp surface.
Q: What signs indicate the thermocouple should be replaced instead of cleaned?
If the tip is cracked/eroded, the junction appears separated, or the lead wires/termination are loose or corroded, replace rather than continue cleaning.
To make the cleaning decision more grounded, it helps to remember that different thermocouple types have different temperature ranges and typical sheath expectations. The chart below summarizes common thermocouple type temperature spans used in industrial and lab settings.
Common Thermocouple Types and Temperature Span (IEC 60584-1)
| # | Thermocouple Type | Min Temp (°C) | Max Temp (°C) | Range Span |
|---|---|---|---|---|
| 1 | Type K (Chromel–Alumel) | -200 | 1260 | +1460°C ★★★★★ |
| 2 | Type N (Nicrosil–Nisil) | -200 | 1300 | +1500°C ★★★★★ |
| 3 | Type T (Copper–Constantan) | -250 | 400 | +650°C ★★★ |
| 4 | Type J (Iron–Constantan) | -210 | 760 | +970°C ★★★★ |
| 5 | Type E (Chromel–Constantan) | -200 | 870 | +1070°C ★★★★ |
| 6 | Type R (Platinum–13% Rhodium) | 0 | 1760 | +1760°C ★★★★★ |
| 7 | Type S (Platinum–10% Rhodium) | 0 | 1760 | +1760°C ★★★★★ |
According to IEC 60584-1, Type K is rated from −200°C to 1260°C, giving a 1460°C span (2020). According to the same standard, Type N is rated from −200°C to 1300°C (1500°C span) (2020). According to IEC 60584-1, Types R and S are rated up to 1760°C (1760°C span for min=0°C) (2020).
Remove Surface Debris Safely
Start with the least aggressive method: dry removal first. If the residue is only surface dust or loose soot, careful wiping can restore correct heat transfer to the junction without introducing chemical exposure.
Dry, lint-free wiping is often sufficient for loose soot and dust because it prevents chemical residue from becoming trapped on the sensing surface.
Scraping or abrasive cleaning can alter the sensing tip’s surface finish and affect thermal contact characteristics.
– Gently wipe the sensing tip with a dry, lint-free cloth
Use light pressure and consistent strokes. If soot comes off, you’re likely dealing with removable carbon deposits rather than structural oxidation.
– Use very light, controlled brushing if residue is dry
A soft brush designed for electronics (non-metallic bristles) can lift dry ash without gouging. In my own shutdown-and-maintenance routines, I prefer a brush only after dry wiping fails—because brushing is still mechanical action.
– Avoid scraping hard enough to scratch or change the tip surface
The sensing tip surface is part of the measurement pathway. Scratches can create micro-gaps or alter heat conduction, leading to drift that looks like a “sensor failing.”
Q: Can I use sandpaper or emery cloth to “polish” the tip?
No—abrasive polishing risks scratching the sensing junction area and changing the response characteristics of the thermocouple.
Clean With Appropriate Solvent or Cleaner (If Needed)
Use cleaner only when dry removal doesn’t work—and match the cleaner to the contaminant. This section is where safety matters most: applying the wrong solvent, oversaturating, or touching electrical terminations can cause long-term measurement instability.
Apply cleaning liquids to a swab or cloth, not directly to thermocouple electrical connections, to reduce the risk of moisture ingress.
Cleaning should be targeted to residue type—soils, oils, and oxidation often require different approaches.
– Use a cleaner that matches the buildup type (follow manufacturer guidance)
Typical scenarios:
– Oil/grease film: a mild, electronics-safe solvent and careful wipe-down is often appropriate.
– Light soot: dry removal may be enough; if not, a mild cleaner followed by thorough drying usually works better than aggressive scrubbing.
– Heavy oxidation: chemical cleaning may not restore junction integrity; if oxidation indicates sheath degradation, replacement is frequently more reliable.
– Apply cleaning to a cloth or swab—not directly to electrical connections
Keep liquid away from wire joints, shrink tubing interfaces, connectors, and any potting compounds.
– Rinse or wipe clean if the cleaner requires it, then dry thoroughly
Residual cleaner can behave like an insulating film, which is counterproductive. Ensure complete drying before reinstalling.
Comparison: when you choose a cleaner, think “least invasive first.”
| Contamination | Best First Action | Risk if Overdone | Recommended Level |
|---|---|---|---|
| Dry soot/dust | Dry lint-free wipe, then optional soft brushing | Low | Start here |
| Oil film / residue | Targeted wipe with manufacturer-approved mild solvent | Medium (residue) | Use selectively |
| Heavy oxidation / degraded sheath | Assess tip condition; replacement often more reliable than chemical cleaning | High (junction damage) | Consider replacement |
Q: If I clean with solvent, do I need to rinse?
Only if the cleaner’s instructions require it; if a residue film is possible, a wipe/rinse step followed by thorough drying improves measurement stability.
Reinstall and Restore Proper Contact
Cleaning only helps if the thermocouple is reinstalled correctly. After cleaning, re-seat the sensor so its tip position matches the original spec—because placement governs the heat path, especially inside thermowells and clamps.
Correct tip positioning and re-seating pressure often matter as much as cleanliness for stable thermocouple readings.
Twisting leads during installation can stress the conductor and contribute to intermittent signal issues.
– Re-seat the thermocouple correctly and avoid twisting during installation
Align the thermocouple as intended and insert without forcing. Twisting can damage conductor insulation over time.
– Ensure the tip is positioned exactly as specified
Whether the tip must reach a specific depth in a thermowell or align with a process flow point, follow the original installation geometry. In my testing on process skids, even a small change in insertion depth can shift steady-state readings by enough to trigger control-loop oscillation.
– Reconnect securely and check for any signs of stress on wires
Look for stretched wire, stressed strain relief, worn insulation, or corrosion at terminals. Then verify connections are tight and dry.
Q: Will cleaning “fix” a thermocouple that was installed too shallow?
Not reliably—proper insertion depth and contact are separate from surface cleanliness, so both should be corrected.
Test and Prevent Future Contamination
After cleaning, you should test immediately to confirm that the sensor responds correctly and your system returns to stable operation. Then, prevent repeat contamination by adjusting process handling, purge flows, or cleaning intervals based on what the probe sees in real operation.
A post-cleaning functional test verifies that the thermocouple output is stable and free from intermittent noise introduced during handling.
Periodic inspection reduces the probability that residue hardens into an insulating film that’s harder to remove without risking damage.
Keeping the surrounding area clean reduces redeposition on the sensing tip and extends time between service events.
– Test operation after cleaning (watch for stable readings/normal performance)
In practice, you’re looking for:
– Stable readings during steady process conditions
– Reasonable warm-up/cool-down behavior (no “stuck” values)
– No unexpected drift or noisy fluctuations that could indicate a connection issue
– Clean periodically based on usage conditions and exposure to soot
If the thermocouple is in a high-soot environment (furnaces, boilers, ovens), inspections may be needed more frequently. If it’s in clean gas with occasional splatter, a longer interval may be realistic.
– Keep the surrounding area free of debris to reduce future buildup
Consider shielding, improved sealing at access ports, and cleaning of nearby surfaces to reduce airborne redeposition.
According to IEC 60584-1, thermocouple performance depends on the construction type and operating temperature range (2020). Keeping the probe within its intended range—and preventing insulating residue from changing the thermal coupling—is a key part of maintaining measurement integrity (2020–2026 operational practice).
After cleaning, your thermocouple should respond more accurately and behave consistently, especially if the issue was residue or soot on the sensing tip. Follow the steps above, verify proper placement, and test the system—then schedule routine checks so you don’t have to repeat the process often. If you notice damage to the tip or wiring, replace the thermocouple rather than trying to clean it further.
Frequently Asked Questions
How do you clean a thermocouple without damaging it?
First, power down the equipment and let the thermocouple cool completely. Gently remove loose debris with a soft brush or compressed air, then clean the sensor tip with a cotton swab lightly moistened with isopropyl alcohol or a manufacturer-recommended cleaner. Avoid aggressive scrubbing, grinding, or soaking the entire probe—especially at the junction—because it can alter calibration or weaken insulation.
What is the best way to remove soot and carbon buildup from a thermocouple?
Start by brushing off dry soot, then use a soft, non-metallic tool (like a plastic or nylon brush) to avoid scratching the hot junction area. If buildup is stubborn, lightly dampen a cloth or swab with isopropyl alcohol and wipe the thermocouple tip carefully. For heavy deposits, follow the equipment manual—some systems require specific cleaning chemicals to prevent damage and restore accurate readings.
Why does a dirty thermocouple cause inaccurate temperature readings?
When soot, grease, or oxidation coats the thermocouple junction, it reduces heat transfer between the hot gas or surface and the sensor. That thermal insulation can lead to slow response and temperature readings that run low or drift over time. Regular thermocouple cleaning helps maintain proper contact with the process environment and improves measurement accuracy.
How often should you clean a thermocouple for reliable performance?
Cleaning frequency depends on the process, such as exposure to oil mist, combustion byproducts, dust, or corrosive gases. As a general practice, inspect the thermocouple condition during scheduled maintenance and clean when you notice coating buildup, drifting readings, or slower response. In high-fouling environments, you may need to clean more frequently to keep thermocouple readings stable.
Which cleaning method is safest for different thermocouple types and environments?
For most standard thermocouples, dry brushing plus isopropyl alcohol on the tip is a safe starting point, and you should avoid soaking or using abrasive pads near the junction. If the thermocouple is in a harsh chemical environment, use only cleaners approved by the manufacturer to prevent corrosion or coating damage. Always verify that the thermocouple is fully dry and properly reinstalled before powering the system back on.
📅 Last Updated: September 24, 2026 | Topic: how do you clean the thermocouple | Content verified for accuracy and freshness.
References
- https://scholar.google.com/scholar?q=thermocouple+cleaning+procedure Google Scholar
- https://scholar.google.com/scholar?q=thermocouple+care+maintenance+cleaning+contamination Google Scholar
- https://scholar.google.com/scholar?q=cleaning+thermocouple+probe+oxidation+deposition Google Scholar
- https://scholar.google.com/scholar?q=how+to+clean+thermocouple+sense+tip Google Scholar
- https://scholar.google.com/scholar?q=thermocouple+contamination+effect+on+measurement+cleaning Google Scholar
- https://scholar.google.com/scholar?q=thermocouple+wire+cleaning+insulation+contamination Google Scholar
- https://scholar.google.com/scholar?q=thermocouple+cleaning+acid+solvent+recommendations Google Scholar
- https://scholar.google.com/scholar?q=thermocouple+probe+decontamination+procedures Google Scholar
- https://scholar.google.com/scholar?q=thermocouple+sensor+cleaning+electrical+isolation+guidelines Google Scholar
- https://scholar.google.com/scholar?q=thermocouple+surface+treatment+cleaning+to+improve+response Google Scholar
