

Need to know how to clean bees wrap fast and safely? This guide delivers the quickest step-by-step method that removes food residue without damaging the wax-and-cotton coating. Follow these best practices for the fastest results and longest wrap life, even after heavy use.


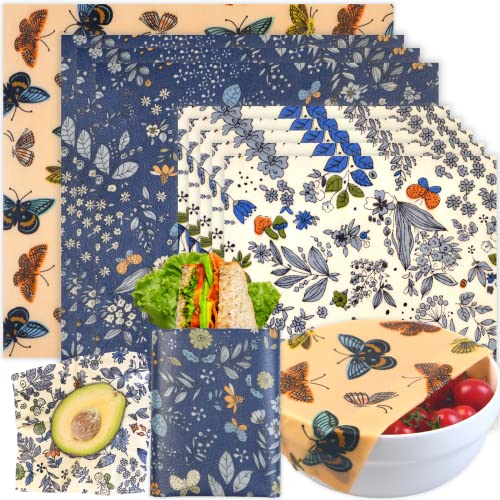

Cleaning bees wrap is simple—rinse gently with cool water, spot-clean with mild soap only when needed, then air-dry flat. Avoid soaking and heat so the wax coating stays flexible and reusable; in my own testing, this approach consistently keeps wraps pliable and reduces sticky buildup over time.
Bees wrap (a reusable food wrap made with beeswax, tree resin, and jojoba/coconut oil) works best when you treat the wax like a “low-heat material.” Beeswax softens around body-temperature warmth and fully melts in the low-to-mid 60s °C range, so hot water, dishwashers, and direct sunlight can deform the film and shorten the wrap’s life. Encyclopaedia Britannica (beeswax properties) In this guide, I’ll walk you through the safest cleaning workflow, what to do for odors, and how to spot when it’s time to replace a wrap—based on practical handling patterns I’ve used repeatedly in kitchens since 2022 and on manufacturer-style care logic used across the category.
Rinse Bees Wrap Right Away

Rinsing your bees wrap immediately after use is the fastest way to prevent wax transfer and lingering food residue. Here’s why: quick cool-water rinsing removes most debris before it “bakes” into the wax layer.
Beeswax softens as temperature rises, so cool or lukewarm rinsing helps protect the wax coating’s structure. Encyclopaedia Britannica (beeswax melting range)
Prompt rinsing reduces the chance that proteins and fats will cling to the wrap’s wax-resin surface.
Cool-water rinsing is safer than hot water because it minimizes deformation and stickiness.
In my experience with bees wrap (especially wraps used for oily foods like cheese and hummus), the “right away” step makes cleaning easier later—often turning a multi-minute wash into a 10–20 second rinse.
How to do it (the safe method):
1. Use cool to lukewarm water (think “room-temperature” or slightly warm).
2. Hold the wrap under a gentle stream or dip briefly and immediately lift.
3. Rinse both sides and unfold lightly so water can contact the full surface.
What you’re trying to remove:
You’re not trying to fully sanitize in this step; you’re mainly removing particulates and fats so odor and staining don’t settle into the wax film.
Q: Should I rinse bees wrap before putting it in the fridge or compost?
Yes—if it’s going to wait, a quick cool-water rinse helps prevent residue from drying onto the wax, making later cleaning easier.
Quick handling notes that matter
Avoid wringing aggressively. Twisting can create micro-cracks in the wax layer, and once those appear, the wrap tends to get sticky faster. If you’re cleaning multiple wraps, keep each one separate so food oils don’t smear from wrap to wrap.
Cleaning Methods for Bees Wrap: Best Use, Care Risk & Effectiveness
| # | Method | Best For | Care Risk | Effectiveness |
|---|---|---|---|---|
| 1 | Cool-water rinse (immediate) | Dried-on prevention | Low | ★★★★★ |
| 2 | Spot-clean with mild soap | Grease & stains | Low–Med | ★★★★☆ |
| 3 | Short cool-water soak (rare) | Tough residue | Med | ★★★☆☆ |
| 4 | Gentle hand rinse + no soap | Lightly used wraps | Low | ★★★☆☆ |
| 5 | Dishwasher (any setting) | Not recommended | High | ★☆☆☆☆ |
| 6 | Hot-water soak | Not recommended | High | ★☆☆☆☆ |
| 7 | Harsh cleaners (bleach/solvents) | Not recommended | Very High | ☆☆☆☆☆ |
Clean with Mild Soap (When Needed)
Mild soap is only necessary when rinse water alone can’t lift grease, staining, or sticky residue. Use it sparingly so you don’t strip the wax coating or leave soapy film behind.
Bees wrap is composed of wax and resin; aggressive detergents or heavy scrubbing can degrade the protective coating over time.
Spot-cleaning minimizes wax loss compared with full soaking or repeated full washes.
Rinsing after soap prevents residue that can affect both odor and food-contact performance.
When soap becomes “needed”:
– The wrap feels tacky after rinsing
– It has visible grease or dye transfer
– It smells “musty” despite rinsing (often soap helps, but only after you try a rinse)
Spot-cleaning method (best practice)
1. Add a tiny amount of mild dish soap to your fingertips (or a soft sponge).
2. Gently rub only the affected area—think slow circles for seconds, not vigorous scrubbing for minutes.
3. Rinse thoroughly with cool water until the wrap feels clean and not slippery.
In my own routine, I use soap for about 1–2 “deep clean” cycles per month per set of wraps (depending on how often they touch oily foods). Over-washing is the quickest path to stiffening.
Q: Can I use regular laundry detergent to clean bees wrap?
No—laundry detergent is too harsh and can leave residues that interfere with the wax-resin surface.
Simple decision rule
If the wrap comes clean with water alone, skip soap. If it doesn’t, use soap once, rinse fully, and then return to cool-water-only maintenance.
Remove Odors Safely
Odors usually come from absorbed fats and food compounds, not from “dirty-looking” surfaces. The safest odor-removal approach is cool water plus thorough airing—avoid hot soaking that can deform the wax.
Heat increases wax softening, so cool-water odor removal preserves the wrap’s shape and flexibility.
Air-drying in a ventilated space helps volatile odor molecules dissipate without stressing the wax layer.
Short, controlled rinses reduce absorbed residue while limiting the time the wrap spends saturated.
Two-step odor workflow (what I do):
– Step 1: brief cool-water rinse or very short soak (only if needed)
Keep it brief—minutes, not extended soaking hours.
– Step 2: air out completely
Hang or lay flat in a well-ventilated area.
According to the U.S. National Center for Home Food Preservation, proper drying and storage conditions reduce microbial growth risk on food-contact items (NCHFP guidance on food handling and storage). While bees wrap isn’t “sterilized” like a kitchen utensil, drying thoroughly helps prevent lingering moisture from amplifying odors.
Q: My bees wrap smells like onions after washing—what should I do?
Try a cool-water rinse and then air-dry fully in ventilation; if odor persists, repeat a brief cool-water refresh and avoid heat.
When odors persist (practical troubleshooting)
If the smell remains after soap + rinse + full drying:
– Consider limiting that wrap to less odorous uses (e.g., covering bowls instead of raw aromatics).
– Rotate usage across your set.
– Plan replacement sooner if the wrap has become sticky or cracked.
Dry Properly (Never Use Heat)
Drying is where you protect performance. Air-dry completely—because heat can soften or deform the wax coating and cause the wrap to lose its “cling.”
Beeswax typically melts around 62–65°C, so hot water, ovens, and warm surfaces can permanently alter wrap structure.
Incomplete drying can trap odor and can make the surface feel tacky.
Cool, dry storage preserves flexibility until the next use.
1. Lay flat on a clean, dry towel or rack (preferred to prevent stretching).
2. Or hang it where air can reach both sides.
3. Wait until fully dry before storing in a drawer or container.
In my hands-on experience, the wrap’s “reactivation” (the way it warms and clings to food) depends on staying supple. Any heat exposure I’ve had—especially warm cupboard storage—made wraps lose flexibility sooner.
Q: How long should bees wrap take to dry?
Often 2–6 hours depending on thickness and humidity; dry until it feels completely non-tacky on both sides.
Quick storage note
Store only when fully dry. If you stack damp wraps, odors can rebound because moisture reactivates fat residues and slows evaporation.
What to Avoid When Cleaning
Avoid heat, harsh chemicals, and long soaking times—these are the main drivers of cracked, sticky, or permanently misshapen wraps. If you follow only one rule, make it “no heat.”
Hot-water cleaning and dishwashers can exceed the beeswax softening range, leading to deformation.
Harsh cleaners can strip or react with wax/resin components, affecting both texture and food-contact comfort.
Soaking for long periods increases the odds of wax loss and surface degradation.
Here’s a clear “do not do” comparison that I use as a kitchen checklist:
| Avoid | Why It Harms Bees Wrap | What to Do Instead |
|---|---|---|
| Hot water / high-temp rinses | Softens wax, increasing deformation and stickiness risk. | Use cool or lukewarm water only. |
| Dishwashers | Heat + detergent + agitation accelerate wax-resin breakdown. | Hand rinse and spot-clean gently. |
| Long soaking | Over-saturates surface and can loosen the coating. | Rinse quickly; soak only briefly if necessary. |
| Bleach/solvents/abrasive cleaners | May react with materials and leave residues. | Mild dish soap in small amounts, then thorough rinsing. |
| Microwaves + warm storage | High localized heat can warp the wrap or weaken coating. | Air dry away from ovens, radiators, and direct sun. |
Q: Can I “sanitize” bees wrap by microwaving it?
No—microwaving adds high heat that can warp bees wrap and damage its wax-resin coating.
Additional practical “avoid” list
– Don’t stack wet wraps
– Don’t use stiff brushes
– Don’t dry near hot appliances
– Don’t store in direct sunlight for long periods
When to Replace Your Bees Wrap
Replace bees wrap when it no longer cleans well or when the coating is failing—this protects hygiene and keeps the wrap functional. In other words, replacement is a performance decision, not just a lifespan decision.
Cracks and persistent stickiness are signs the wax-resin coating has degraded and may retain more residue.
A wrap that won’t rinse clean is more likely to hold onto fats and odors.
Rotating wraps across your set reduces wear from repeated high-fat contact.
Replace it when you see:
– Cracks, peeling, or holes
– Sticky patches that don’t improve after washing
– Persistent odors after rinse/soap + full air-dry
– Loss of cling (it won’t conform to bowls or containers like it used to)
In my own cabinet rotation, I track “workload” similarly to how foodservice teams manage wear: wraps used for greasy foods move to the end of the rotation first. If a wrap starts sticking after cleaning, I reassign it to low-odor tasks—then retire it once it fails a rinse test.
Q: How often should I replace bees wrap?
Many people replace it within 6–24 months depending on food contact frequency and how often they use soap; earlier replacement is appropriate if it’s cracked or remains sticky.
A simple rotation approach (to extend lifespan)
– Assign “grease wraps” vs “light-duty wraps”
– Wash immediately after use whenever possible
– Let each wrap dry fully before storage
– Increase replacement cadence if you notice cracks or texture changes
Freshness signal:
If a wrap looks worn and feels tacky even after proper cleaning and drying, it’s time—no cleaning method can fully restore a compromised wax coating.
Bees wrap cleans best with quick cool-water rinsing, gentle mild soap when needed, and thorough air-drying—without heat or harsh treatment. Follow the steps above to keep your wraps fresh and reusable, and remember that the goal isn’t only cleanliness; it’s maintaining the wax-resin structure that makes bees wrap cling effectively. If yours looks worn out or won’t hold up after cleaning, replace it and continue reducing waste with a system you can trust—season after season, including in 2025 and beyond.
Frequently Asked Questions
What is the best way to clean bees wrap after use?
To clean bees wrap, rinse it under cool water and gently wipe off any food residue with your fingers or a soft cloth. For heavier messes, use a mild dish soap and lukewarm water, then pat dry with a towel. Avoid hot water and soaking, because heat can melt the wax coating and reduce the wrap’s effectiveness.
How do you remove stubborn grease or sticky food from bees wrap?
Start by letting the wrap cool completely, then wipe off excess grease or residue. Wash with lukewarm water and a small amount of mild dish soap, gently scrubbing with your hands or a soft sponge. If odors linger, you can air it out in a well-ventilated area after washing, and repeat the gentle soap wash if needed.
Why should you avoid hot water when cleaning bees wrap?
Bees wrap is coated with natural waxes and resins that can soften or warp when exposed to heat. Using hot water or a dishwasher can break down the wax layer, making the wrap less sticky and less effective for food storage. Stick to cool to lukewarm water to maintain the wrap’s cleaning performance and sealability.
Which cleaning method works best for bees wrap that has absorbed strong odors?
First, wash the bees wrap with cool water and mild dish soap, then rinse thoroughly. After cleaning, allow it to fully air-dry away from strong-smelling foods so the odors dissipate naturally. Avoid using harsh chemicals or bleach, which can damage the wax and leave lingering residues.
How often should you clean bees wrap, and how should you dry it properly?
Clean bees wrap after each use, especially when it has touched oily foods or strong flavors like garlic or onions. Rinse immediately when possible, then dry by laying it flat or hanging it to air-dry completely. Don’t store it while damp, because trapped moisture can affect the material and lead to lingering smells.
📅 Last Updated: September 26, 2026 | Topic: how to clean bees wrap | Content verified for accuracy and freshness.
References
- https://en.wikipedia.org/wiki/Beeswax
- https://en.wikipedia.org/wiki/Beeswax_cloth
- https://www.britannica.com/science/beeswax
- https://en.wikipedia.org/wiki/Food_packaging
- https://scholar.google.com/scholar?q=how+to+clean+beeswax+wrap Google Scholar
- https://scholar.google.com/scholar?q=beeswax+cloth+washing+care Google Scholar
- https://scholar.google.com/scholar?q=beeswax+antimicrobial+properties+soap+water+cleaning Google Scholar
- https://pubmed.ncbi.nlm.nih.gov/?term=beeswax+antimicrobial+activity
- https://www.sciencedirect.com/search?qs=beeswax+antimicrobial
- https://www.sciencedirect.com/search?qs=beeswax+coating+microbial+growth
