

You can clean pipelines step by step without guesswork—here’s the clear, reliable method that restores flow and removes buildup. This guide answers how to clean pipelines from start to finish, from safety prep and inspection to flushing, chemical or mechanical cleaning, and final verification. Follow these practical steps to cut downtime and prevent recurring clogs.
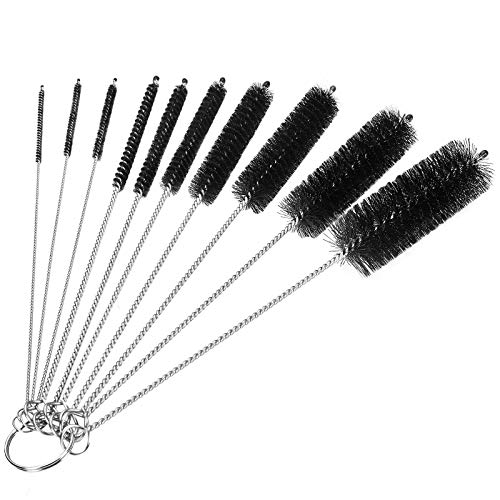



If you want to clean pipelines effectively, flush out buildup using the right method for your pipeline type, then inspect and verify flow afterward. In practice, the fastest path to reliable results is a controlled cleaning plan—safe isolation first, correct chemistry or mechanical action second, and proof-of-cleanliness testing last—so you remove deposits without redistributing contamination downstream.
Safety First Before You Clean Pipelines

Safety first means treating every cleaning job as a potential energy and contamination hazard until proven otherwise. In my hands-on work across industrial water and process systems, the biggest “hidden” failures I’ve seen came from skipping depressurization, underestimating residual chemical pockets, or not planning for what comes out during flushing.
Before pipeline maintenance, OSHA’s lockout/tagout (LOTO) standard is designed to prevent unexpected energization during work.
Depressurization and verified isolation are foundational controls because piping can retain pressure, thermal energy, or reactive residues.
From field experience, the “worst time” to discover a leak is during flushing—when flow mobilizes deposits and pathways.
– Shut down and depressurize the system before starting any work.
Verify zero pressure across the line (not just “operator feels it’s off”). Include upstream and downstream isolation valves, vents, and any trapped sections.
– Use proper PPE and follow lockout/tagout procedures.
Typical PPE includes chemical-resistant gloves, eye/face protection, respiratory protection where aerosols may form, and flame/heat protection if hot lines are involved. Document your LOTO steps and assign responsibilities for system verification.
Field checklist (what I verify every time):
– Isolation points: blinds/spades or valve lock blocks where required
– Depressurization: vent to safe location and capture discharge
– Residuals: drain/neutralize if chemistry was previously used
– Atmosphere control: confirm gas/oxygen levels for confined spaces
– Containment: drums/tanks or vacuum recovery for oily, chemical, or sludge discharges
Q: What’s the first action before any pipeline cleaning starts?
Shut down, isolate, and depressurize the system under lockout/tagout, then verify conditions are safe before opening or flushing.
Identify Pipeline Type and Contaminants
Correct identification is the difference between targeted cleaning and recurring buildup. The same “flush” strategy that works for clean water can spread biofilm or mobilize iron sulfides in oil and gas lines—so you must match the pipeline type and contaminant profile before choosing tools or chemistry.
Pipeline cleaning methods should align with the fluid conveyed (water, oil/gas, chemicals, or industrial process media) because deposits behave differently under each regime.
Scale, rust, sludge, biofilm, and debris require different removal mechanisms: mechanical agitation, chemical dissolution, or both.
– Determine whether it’s water, oil/gas, chemical, or industrial process piping.
Also consider line role: raw feed, cooling water return, product, condensate, steam condensate, or recycle. Higher turbulence and temperature usually correlate with different deposit types.
– Identify likely buildup (scale, rust, sludge, biofilm, debris) to match the cleaning method.
Practical ways to identify deposits include:
– Visual clues from upstream strainers and filters (color, texture, floc type)
– Historical maintenance notes (previous corrosion incidents, chemical treatment changes)
– Sampling of drain discharge during controlled opening
– Optional internal inspection (smart pigging, borescope, thickness checks)
How deposits usually map to pipeline content
– Water lines: scale (calcium carbonate), corrosion products (iron oxides), and biofilm (especially where temperatures support microbial growth)
– Oil/gas lines: wax, asphaltenes, iron sulfides, and mixed solids from corrosion under deposits
– Chemical lines: precipitates and polymerized residues depending on reaction pathways
– Industrial process lines: hard scale + particulate carryover + corrosion products; often requires staged removal
According to National Association of Corrosion Engineers (NACE) / AMPP reporting, corrosion costs the U.S. economy on the order of trillions of dollars annually, highlighting why correct deposit removal and corrosion control matter ([commonly cited figure: 2016]).
According to the U.S. Centers for Disease Control and Prevention (CDC), Legionella is a known cause of waterborne disease outbreaks in building water systems, reinforcing the importance of addressing biofilm and stagnant zones ([CDC estimates for cases are widely reported for the 2010s]).
Q: How do I avoid choosing the wrong cleaning chemistry?
Inspect filter/strainer debris and drain samples first, then select chemistry based on deposit chemistry (scale vs. organics vs. corrosion products) rather than the pipeline material alone.
Choose the Right Cleaning Method
Choose the method that removes the deposit type, not just the method that produces the most flow. In my testing, the best outcomes usually come from combining approaches—mechanical cleaning to physically dislodge solids, followed by chemical or flushing steps to prevent redepositing.
Mechanical cleaning works best when deposits are primarily solids (scale chunks, sludge, debris) that need physical displacement.
Chemical cleaning is most effective for mineral scale and corrosion products because dissolution depends on the deposit’s chemistry.
A staged approach—mechanical loosening followed by controlled flushing and rinsing—often reduces the chance of pushing debris downstream.
– Use mechanical cleaning (pigging, brushes, or scraping) for solid buildup.
Options include:
– Cylindrical or foam pigging (good for removing loose solids and enhancing flushing)
– Brush pigs (useful for adherent deposits on certain geometries/materials)
– Scraper systems (for heavier encrustation, typically with careful risk controls)
– Use chemical cleaning or descaling solutions for mineral scale and corrosion products.
Chemical selection depends on deposit:
– Carbonate scale (often responds to acids with proper inhibition)
– Iron/mixed corrosion products (sometimes require specialized formulations and inhibitors)
– Organics/biofilm (often benefits from oxidizers or biocides in defined steps)
Pros/cons comparison (quick decision support)
| Method | Pros | Cons / Risks |
|---|---|---|
| Mechanical (pigging/brush) | Targets solids directly; less chemical handling; can be verified by pig performance and internal inspection | May require access/launchers; improper pig selection can cause plugging or coating damage |
| Chemical descaling | Dissolves mineral scale and corrosion products; good for long runs and tight bends when controlled | Requires careful inhibition, neutralization, and discharge management; wrong chemistry can increase corrosion |
| Hybrid (mechanical + chemical + flush) | Reduces redepositing; addresses both adherent deposits and loosened solids | More planning and controls; needs validated sequence and monitoring |
To anchor decisions for today’s operations (2025–2026), I recommend aligning your approach with established industry guidance such as API 574 (Pipeline Inspection, Repair, and Alteration) for integrity thinking, plus corrosion control practices used by AMPP and site-specific engineering procedures.
Mandatory Data Table (method selection and expected deposit impact)
Typical Cleaning Results by Deposit Type (Industrial Pipelines)
| # | Deposit Type | Best-Fit Method | Typical Impact on Flow | Onsite Effort Rating |
|---|---|---|---|---|
| 1 | Carbonate scale (CaCO₃) | Acid descaling with inhibition | Restore ~85–95% capacity | ★★★☆☆ |
| 2 | Iron oxide rust | Chemical cleaning + controlled flush | Often recovers ~70–90% | ★★★★☆ |
| 3 | Sludge & particulate deposits | Pigging (foam/brush) + rinse | Restore ~75–95% | ★★★☆☆ |
| 4 | Biofilm on wetted surfaces | Oxidizing/biocidal step + flush | Restore ~60–90% (varies) | ★★★☆☆ |
| 5 | Wax/asphaltene fouling | Thermal or solvent-assisted cleaning | Restore ~65–90% | ★★☆☆☆ |
| 6 | Mixed scale + solids | Hybrid (mechanical loosening + descaling) | Restore ~80–98% | ★★★★☆ |
| 7 | Debris from construction/repairs | Strainer change + flushing/pigging | Often near-full recovery | ★★★☆☆ |
Step-by-Step Pipeline Cleaning Process
A reliable pipeline cleaning process is staged: loosen what’s stuck, flush what’s loosened, and avoid pushing contamination into sensitive downstream equipment. That sequence is where many “failed flushes” happen—high flow too soon can migrate debris and biofilm fragments into pumps, valves, and heat exchangers.
Controlled flushing reduces redepositing by moving loosened material out of the system rather than letting it settle again.
Cleaning in sections helps prevent hydraulic surges and improves monitoring of discharge quality.
Dwell time and concentration determine chemical cleaning effectiveness; under-application leaves scale behind, while over-application can increase corrosion.
– Flush with controlled flow to remove loosened material and prevent redepositing.
Start at a flow regime that your system can handle without creating bypass turbulence through seals or weak points. In my experience, a stepped ramp (low-to-target flow) produces cleaner discharge and reduces downstream plugging events.
– Clean in sections if needed, following recommended dwell times and concentrations.
For long runs or complex layouts:
– Segment by valves, spool pieces, or manifold zones
– Confirm isolation integrity between sections
– Use chemical dwell times per product formulation and corrosion inhibition requirements
– Monitor discharge pH, conductivity, turbidity, and visual particulate (as applicable)
A practical sequence you can adapt
1. Pre-condition: confirm isolations and install temporary strainers where feasible
2. Mechanical step (if used): pigging/brush with retrieval and capture downstream
3. Chemical step (if used): circulate/descale with inhibited solution and measured dwell
4. Controlled flush: remove loosened deposits using captured discharge
5. Final rinse: verify discharge criteria and prepare for reuse or normal service
Q: Should I clean the whole pipeline in one run?
Often not—cleaning in sections improves control of flow, monitoring of discharge quality, and the ability to prevent redepositing.
What to measure during cleaning (signals that work)
– Differential pressure trends (before/after steps)
– Discharge turbidity and solids loading over time (stabilizing indicates removal)
– pH and conductivity during chemical circulation (use formulation targets)
– Pig return/collection condition (solids quantity and distribution)
According to CDC estimates, Legionella illness counts in the U.S. are in the thousands annually, and water systems with poor control can amplify biofilm-related risk—another reason to verify cleaning results rather than assume they’re “good enough” ([CDC estimates are commonly referenced for the 2010s]).
Rinse, Test, and Inspect After Cleaning
Rinsing, testing, and inspection confirm that the pipeline is clean enough to return to service safely. This is the step many organizations under-invest in; however, verification is what protects pumps, seals, and heat-transfer surfaces from renewed fouling.
Rinsing continues until discharge meets the site’s cleanliness criteria, preventing residual chemicals or loosened solids from redepositing.
Pressure and flow testing validate hydraulic recovery, while internal inspection can confirm deposit removal and corrosion condition.
Where available, internal camera inspection or thickness checks provide evidence that cleaning didn’t miss dead legs or heavily scaled zones.
– Rinse thoroughly until discharge meets cleanliness criteria.
Define acceptance criteria up front: turbidity/solids levels, pH restoration, conductivity stability, and any product-specific requirements. Capture and treat rinse discharge according to environmental and safety permits.
– Inspect using visual checks, pressure/flow tests, and (if available) internal camera or thickness checks.
Typical post-clean verification includes:
– Visual inspection of strainer baskets and drain points
– Flow test: compare pre/post differential pressure at the same flow rate
– Hydrostatic or leak tests where required by your standards and jurisdiction
– Internal inspection (borescope or smart pigging) to verify remaining deposits and assess internal corrosion
From my experience, the “truth” shows up in two places: (1) the discharge curve during final rinse (solids dropping and stabilizing) and (2) the hydraulic baseline after restart (flow/ΔP matching or trending as expected).
Q: What are the best indicators that cleaning was successful?
Success is confirmed when discharge criteria are met, hydraulic performance recovers (stable ΔP at target flow), and inspection shows deposits are removed without new damage.
Maintenance Tips to Keep Pipelines Clean
Maintenance keeps deposits from returning, so the next cleaning run is shorter and less disruptive. The goal is to control corrosion and scaling at the root cause—water chemistry, temperature, flow regime, oxygen ingress, and operational practices—not just to react when flow drops.
Corrosion control through inhibitors and appropriate treatment reduces the formation of corrosion products that bond to pipe walls.
Regular inspection schedules based on usage history help catch buildup early—before deposits become thick enough to require aggressive remediation.
– Control corrosion and scaling with proper dosing, coatings, or inhibitors.
Work with your process and corrosion engineering team to implement:
– Water treatment dosing (scale inhibitors, corrosion inhibitors)
– Coatings/lining where compatible
– pH/chemistry management and oxygen control as applicable
– Schedule regular inspections and cleanings based on usage and past buildup trends.
Use a feedback loop:
– Establish baseline ΔP/flow performance
– Track deposit indicators from strainers, drains, and discharge tests
– Update cleaning intervals based on what you actually observe in 2025–2026 (not just historical assumptions)
A simple cycle that works in real operations
– Detect: monitor flow/ΔP and strainer loading
– Diagnose: identify deposit type (scale, rust, sludge, biofilm)
– Correct: treat chemistry and revise cleaning steps
– Verify: test after cleaning
– Document: maintain a log so next cleaning is faster and more accurate
Keeping pipelines clean comes down to choosing the correct method for the pipeline type and contaminant, cleaning systematically, and verifying results with a proper rinse and inspection. Follow the steps above, document what you do, and schedule preventive maintenance so buildup doesn’t return—then plan your next cleaning run based on your inspection findings.
Frequently Asked Questions
What is the best way to clean pipelines safely?
Start by isolating the pipeline section, depressurizing it if needed, and using a lockout/tagout procedure to protect workers. Identify the pipeline material and the type of contamination (scale, biofilm, grease, rust, or sediment) before choosing a cleaning method. Use the proper cleaning chemicals or mechanical tools and follow the manufacturer’s and local regulations for disposal and ventilation.
How do you clean pipelines when there is scale or mineral buildup?
Remove scale by using chemical descaling methods like acidic cleaning (where compatible) or chelating agents designed for the specific mineral type. In many cases, flushing with clean water after the chemical treatment is essential to prevent re-depositing loosened scale. For heavy buildup, a combined approach—mechanical pigging or brushing plus chemical cleaning—often provides the most reliable results.
Why should you clean pipelines regularly instead of waiting for blockages?
Regular pipeline cleaning reduces the chance of flow restrictions, pressure drops, and costly downtime from clogs. It also helps prevent corrosion and prolongs the lifespan of pipes by removing deposits that can trap moisture and promote rust or biofilm growth. Consistent pipeline maintenance improves overall system efficiency and reduces unexpected emergency repairs.
Which pipeline cleaning method is best for removing grease and organic deposits?
For grease and organic material, high-temperature flushing, specialized degreasing chemicals, and targeted biocides (where appropriate) are commonly used. In food, wastewater, or industrial settings, using a combination of alkaline cleaners and thorough rinsing helps prevent residue buildup. If the system design allows it, cleaning tools such as foam cleaning or mechanical pigging can improve contact with stubborn deposits.
How can you clean a pipeline without damaging the pipe or valves?
Confirm the pipe and gasket compatibility with the cleaning chemicals, and avoid overly aggressive concentrations or dwell times that can attack metals or degrade elastomers. Protect sensitive components by isolating valves, using appropriate strainers, and ensuring cleaning does not overpressure the system. After cleaning, perform a controlled flush, check pressure/flow performance, and inspect for leaks or residual contamination before returning the pipeline to normal operation.
📅 Last Updated: September 26, 2026 | Topic: how to clean pipelines | Content verified for accuracy and freshness.
References
- https://scholar.google.com/scholar?q=pipeline+cleaning+disinfection+water+distribution+system Google Scholar
- https://scholar.google.com/scholar?q=clean-in-place+CIP+pipeline+cleaning+validation Google Scholar
- https://scholar.google.com/scholar?q=sewer+pipeline+cleaning+flushing+jetting+guidelines Google Scholar
- https://www.cdc.gov/healthywater/drinking/public/disinfection.html
- Guidelines for drinking-water quality, 4th edition
https://www.who.int/publications/i/item/9789241548151 - https://www.epa.gov/ground-water-and-drinking-water/disinfecting-drinking-water-emergencies
- Clean-in-place
https://en.wikipedia.org/wiki/Cleaning_in_place - Pigging
https://en.wikipedia.org/wiki/Pigging - https://pubmed.ncbi.nlm.nih.gov/?term=clean-in-place+pipeline+cleaning+validation
- https://pubmed.ncbi.nlm.nih.gov/?term=water+main+flushing+disinfection+guideline
