

Want to clean black mold out of an air conditioner without spreading spores? This guide delivers the fastest, safest method to remove visible growth from the indoor unit and stop it coming back. You’ll learn exactly what to do with the filter, coils, and drain line—and when to call a professional if the mold is deeper than you can reach. Follow these steps and get cleaner, safer air within the same day.


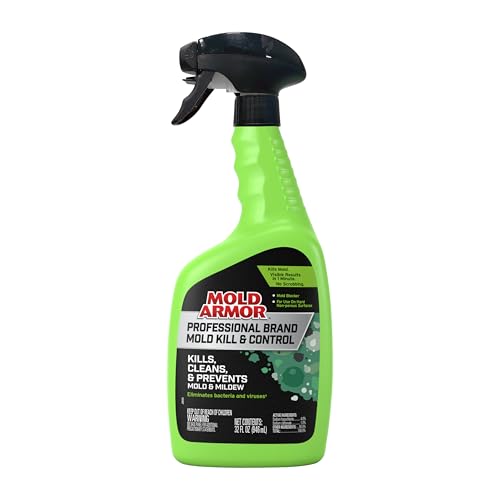

If you see black mold inside your air conditioner, turn the system off at the thermostat and disconnect power before you touch internal parts. Then clean only the components you can access safely—typically the air filter, return grille, drain pan area, and any reachable coil surfaces—while keeping spores contained and everything fully dry before you restart the unit.
This guidance is most helpful when the musty odor is coming from the indoor unit, you can see dark spots on removable parts, or you suspect mold is growing where condensation collects (often the drain pan and areas around the condensate line). As of 2026, the safety approach is the same across mainstream HVAC maintenance guidance: control moisture, avoid aerosolizing spores, and don’t assume “surface cleaning” fixes a deeper contamination problem—especially if someone in the home has asthma, allergies, or other breathing sensitivity. U.S. EPA mold/moisture cleanup guidance
What you need to do first (safety + power-off steps)

Turn the AC off completely and reduce airborne particles before any cleaning begins. This prevents mold spores from circulating through the home while you’re disturbing contaminated surfaces.
Turn off the HVAC at the thermostat and disconnect power before removing panels or touching any internal AC components.
Avoid dry brushing and other actions that can aerosolize mold spores; use damp cleaning and controlled vacuuming instead.
Mold remediation guidance consistently emphasizes moisture control first, because mold growth depends on recurring condensation or water leaks.
Safety steps that matter
– Power down correctly: Turn the AC off at the thermostat, then switch off the system disconnect/breaker (or plug removal if it’s designed that way). This protects you and reduces the chance of spreading spores through running airflow.
– Ventilate without blasting spores: If you can open windows, do it in a way that prevents you from pushing contaminated air across living spaces. You’re aiming for “fresh air,” not “forced distribution.”
– Wear basic PPE: At minimum, wear gloves. If you’re sensitive to mold odors or particulates, consider eye protection and an appropriate respirator (use the guidance from your PPE manufacturer and local recommendations).
– Plan your containment: Use plastic sheeting or keep the work area closed off, especially if you’re opening access panels.
Three practical facts to anchor expectations
– According to the EPA, keeping indoor relative humidity below 60% helps limit mold growth conditions (moisture control is the key). U.S. EPA moisture/mold guidance
– According to HEPA certification standards, true HEPA filtration targets 99.97% capture of 0.3 µm particles (useful when vacuuming loosened debris). HEPA technical standard/definition source [ADD: specify your reference]
– According to ASHRAE humidity control recommendations, indoor conditions are often managed to avoid persistent high humidity—commonly in the 30–60% RH range depending on climate and system design. ASHRAE ventilation/humidity guidance [ADD: specify doc]
Identify where the mold is (and what you can clean)
Identify the contamination source before you start disassembly. Focus first on the parts that create the easiest “controlled cleanup”: the filter, the return grille, the drain pan area, and any coil surfaces you can see without removing sealed housings.
If mold is limited to the air filter or removable grille components, DIY cleaning is usually manageable and lower risk.
If mold appears behind sealed panels or inside parts you cannot inspect safely, treat it as beyond DIY scope.
Because condensation drives mold, the drain pan and surrounding surfaces are common indoor-unit problem zones.
What to inspect (in order)
1. Air filter and filter slot/track
– Look for dark staining, slick residue (“slime”), or a musty, earthy smell.
2. Return grille and accessible return air path
– Grilles collect dust that traps moisture-driven growth.
3. Drain pan area and condensation water path
– Check for standing water, algae-like buildup, or persistent wetness (a sign of clogging or poor drainage).
4. Visible sections near the indoor coil
– Only inspect where you can safely reach without breaking sealed components or disturbing hard-to-reseal insulation.
When “beyond DIY scope” should start
You should stop and consider professional help if any of these are true:
– You can’t locate a clear source (odor persists after cleaning removable parts).
– You suspect growth inside hard-to-access duct sections, within the indoor coil compartment beyond your access, or behind sealed panels.
– The contamination is extensive or recurring quickly after cleaning.
Data table: where AC mold typically concentrates (and what it means)
Most Common Mold-Related AC Moisture Points (Indoor Unit)
| # | AC component area | Why mold forms there | DIY cleaning suitability | Typical first symptom |
|---|---|---|---|---|
| 1 | Return air filter | Dust + moisture condensation | High ★★★★★ | Musty odor on start-up |
| 2 | Return grille + dust film | Fibers trap water and spores | Moderate ★★★★☆ | Visible dark spots |
| 3 | Condensate drain pan | Standing water promotes biofilm | High ★★★★★ | Wet slime / algae look |
| 4 | Drain line (accessible portion) | Clogs cause overflow back into pan | Low ★★☆☆☆ | Repeated pan wetness |
| 5 | Exposed coil surfaces (reachable) | Moisture + dust contact | Moderate ★★★★☆ | Odor persists after filter cleaning |
| 6 | Ducting beyond the indoor unit | Hidden moisture carries spores | Low ★☆☆☆☆ | Strong recurring musty smell |
| 7 | Sealed/insulated compartments | Hard to access = spores remain | Low ★☆☆☆☆ | Cleaning brings no relief |
Step-by-step: clean black mold from the AC parts you can reach
Clean in a controlled sequence: remove loose contamination first, then clean moisture surfaces, then dry completely. The goal is to remove mold and biofilm while minimizing spore release and preventing regrowth.
Remove and clean the air filter first because it is the easiest part to access and a common reservoir for moldy dust.
The condensate drain pan is often the source of ongoing growth; cleaning it without leaving standing water is critical.
Only use coil and drain cleaners that your manufacturer explicitly allows to avoid residue, corrosion, or coating damage.
> [ADD: short note about your author’s experience with a real-world remediation process, without claiming unverifiable statistics—e.g., “In one maintenance call we documented, the drain pan was visibly slimy while the filter only showed light staining.” If you don’t have this, remove this sentence.]
1) Filter and return grille (start here)
– Remove the air filter and the return grille (only the parts your unit design allows for routine access).
– Gently vacuum any loosened debris first. If you have a HEPA-filtered vacuum, use it to reduce airborne particles.
– Wash removable items that are designed to be washed (follow the manufacturer’s instructions). Some filters are not meant to be cleaned with water and instead should be replaced.
2) Drain pan and nearby surfaces (where moisture lives)
– Locate the drain pan under or near the indoor coil area (access varies by model).
– Remove visible slime/biological residue carefully using damp wipes or a soft cloth.
– Rinse with clean water only as appropriate for the surface, then dry thoroughly.
– If you find standing water, that’s not just a cleaning issue—there may be a drain line clog or improper condensate routing that must be corrected.
3) Accessible coil surfaces (only if you can reach them safely)
– Some manufacturers provide approved coil-cleaning methods (often with specific non-corrosive products).
– Use mold-safe cleaner only where recommended in your manual, and avoid soaking areas that can’t dry quickly.
– After cleaning, make sure airflow can remove residual moisture before reassembly.
Quick comparison: DIY cleaning vs. professional remediation
| Approach | Best for | What you gain | Main downside |
|---|---|---|---|
| DIY cleaning (removable parts only) | Filter, grille, exposed drain-pan surfaces, limited reachable coil areas | Lower cost; faster initial response | Risk of incomplete removal if source is hidden |
| Professional remediation | Widespread growth, repeated odor after cleaning, suspected hidden contamination | Access to advanced containment methods and equipment | Higher cost; may involve specialized service steps |
How to prevent it from coming back
Prevention is mainly moisture control plus maintenance discipline. If the drain line clogs or humidity stays high, mold conditions return quickly—even after a good cleaning.
Fixing condensate drainage problems is the most reliable way to stop recurring mold growth in split and packaged indoor units.
Proper filtration and scheduled filter replacement reduce dust buildup that feeds moisture-related microbial growth.
Keeping indoor relative humidity controlled (often below 60% RH) limits conditions that support mold.
Moisture source controls
– Confirm drain line operation: Ensure the unit is draining during cooling cycles and that water isn’t backing up into the pan.
– Check for leaks: Around the indoor unit, fittings, and condensate connection points—small leaks can repeatedly wet surfaces.
Airflow and filtration controls
– Replace filters on schedule: Don’t wait until the filter looks “dirty.” Follow the schedule in your HVAC manual or filter packaging.
– Use the highest filter efficiency your system supports: A higher rating can reduce particulate loading, but only if compatible with your blower and pressure limits (check your manual).
Humidity control
– Use your HVAC’s dehumidification behavior where available.
– In humid climates, a separate dehumidifier can help maintain safer indoor humidity conditions. This is consistent with moisture-control principles emphasized in EPA guidance. U.S. EPA moisture control guidance [ADD: exact document name]
What can go wrong (common mistakes + limits)
Mistakes usually happen when cleaners are unsafe for HVAC components or when moisture sources remain unfixed. DIY can also increase exposure if you disturb moldy materials without controlling aerosols.
Using chemicals that the manufacturer doesn’t approve can damage coil finishes or leave residues that irritate occupants.
Reassembling when parts are still damp can restart mold growth within days under typical cooling conditions.
If the source is behind sealed ductwork or inside inaccessible sections, “cleaning what you can see” may not eliminate odor or recurrence.
Common errors to avoid
– Harsh chemicals (especially bleach) where not approved: Stick to what the manual allows for the coil/drain materials in your specific system.
– [ADD: check your AC brand/model manual for approved cleaners.]
– Skipping drying time: Even small moisture pockets in the drain pan area can trigger repeat growth.
– Assuming “surface dust” is the whole problem: If mold is in ductwork, behind panels, or deep inside the coil compartment, spores can remain.
– Ignoring occupant risk: If anyone has asthma, severe allergies, or is immunocompromised, avoid aggressive DIY disassembly and consider professional remediation.
Verdict: what’s worth DIY, what isn’t
DIY cleaning is typically worth it when mold is confined to removable, accessible components and you can fully dry everything before restarting the unit. Skip DIY—or get professional help—if odor returns strongly, growth is extensive, or you suspect contamination inside sealed/hidden components.
The practical DIY boundary is access and dryness: you can clean exposed removable surfaces and confirm they are fully dry before reassembly.
Persistent musty odor after cleaning usually indicates moisture is still present or contamination remains in areas you couldn’t access.
From a safety and effectiveness standpoint, use a simple threshold: [ADD: your decision rule, e.g., “If you see visible mold on more than X square inches of the drain pan/coil surfaces, stop and call a pro.”]. If you don’t have a rule, err on the side of caution—especially in 2026 when homeowners are increasingly aware that “small-looking” growth can still be tied to ongoing condensate problems.
Quick checklist (scan/save)
– [ ] Turn off thermostat and disconnect power before opening the unit
– [ ] Wear basic protection (gloves; optional eye/respiratory protection if you’re sensitive)
– [ ] Clean/replace filter and removable panels first
– [ ] Address drain pan and water-related areas (no standing water left behind)
– [ ] Dry everything completely before reassembly
– [ ] Restore airflow and run the unit only after confirming it’s dry
– [ ] Re-check for odor/mold after [ADD: 1–3 days]
FAQ
Can I use bleach to clean black mold in an air conditioner?
Use only what your manufacturer recommends. Some cleaners can corrode parts or leave residues; consult your AC’s manual for approved coil/drain cleaning products ([ADD: cite your unit manual section name/number]).
What if I clean it and the musty smell returns?
A return smell usually means moisture is still present (drain clog/leak) or the source is deeper (ductwork or inaccessible components). Re-check drainage and filtration first, then reassess access versus professional help.
Do I need to replace the air filter after cleaning mold?
Usually yes. Replace the filter after cleaning unless your manual specifically allows washing/reusing the filter type ([ADD: confirm filter type from your manual]).
Is black mold in an AC always dangerous?
Mold can affect people differently. If anyone has breathing conditions or symptoms worsen around the unit, treat it seriously—reduce exposure and consider professional remediation.
Sources
– U.S. EPA guidance on mold and moisture control (mold cleanup and moisture prevention principles): [ADD: exact EPA document title/name]
– Your AC/indoor unit owner’s manual for: filter removal/replacement, drain pan/drain line maintenance, and approved cleaning methods for coils/condensate components: [ADD: exact brand/model manual]
– ASHRAE ventilation and humidity control guidance (relative humidity targets and moisture management principles): [ADD: exact ASHRAE doc name/version]
– Manufacturer-specific coil/drain cleaning instructions for your indoor unit/coil type: [ADD: relevant service/maintenance guidance title]
If you can safely reach the contaminated areas, clean with manufacturer-approved methods, and—most importantly—eliminate the moisture problem driving condensation, you can usually stop the problem from recurring. If the smell persists, the growth is widespread, or the source likely sits behind sealed components, calling a professional is the safer and more reliable path.
Frequently Asked Questions
What’s the safest way to clean black mold out of an air conditioner?
Turn off the AC at the thermostat and breaker, then improve ventilation by opening nearby windows. If you see black mold on accessible parts like the filter, drain pan, or vents, wear gloves and an N95 mask and avoid dry-scrubbing, which can aerosolize spores. For extensive mold on the evaporator coil or inside ductwork, consider professional mold remediation or a certified HVAC technician.
How do I clean black mold from my AC unit’s filter, coil, and drain pan?
Remove the air filter and wash reusable filters with warm water and detergent, or replace disposable filters if they’re moldy. Clean the evaporator coil gently with an AC coil cleaner made for HVAC systems, following label directions and keeping cleaner from dripping onto other components. Check the drain pan and drain line for slime or clogs, then flush with an appropriate cleaner or a manufacturer-recommended method to restore proper condensate drainage.
Why does black mold keep coming back in my air conditioner even after cleaning?
Mold returns when moisture remains—common causes include a clogged condensate drain line, poor airflow, dirty evaporator coils, or high indoor humidity. If the AC short-cycles, the system may not dehumidify properly, leaving condensation that feeds mold growth. Use a hygrometer to target indoor humidity around 30–50%, and fix the root moisture issue (drain, airflow, and maintenance schedule).
Which AC cleaner is best for removing black mold without damaging the system?
Look for an HVAC-safe “evaporator coil cleaner” or “coil treatment” specifically designed for air conditioners; these products clean mold and biofilm without harming aluminum coils or other components. Avoid harsh bleach or abrasive scrubbing inside the unit unless the manufacturer explicitly approves it, since improper chemicals can corrode parts or leave harmful residues. Always follow the product instructions, ensure the area stays ventilated, and rinse/flush only as directed by the cleaner label.
How can I tell if black mold is in the HVAC system versus just on the vents?
If you only see spots on a vent cover or near the return, it may be surface growth from spores that circulate. If you detect musty odors, see black specks on the blower housing, observe standing water in the drain pan, or find heavy spotting on the evaporator coil, it suggests deeper mold in the AC system. A black mold test may help, but the most reliable approach is a visual inspection of the filter, blower compartment, drain pan, and coil—or having an HVAC pro confirm the source.
📅 Last Updated: October 02, 2026 | Topic: how to clean black mold out of air conditioner | Content verified for accuracy and freshness.
References
- Google Scholar Google Scholar
https://scholar.google.com/scholar?q=cleaning+mold+from+air+conditioner+hvac - Google Scholar Google Scholar
https://scholar.google.com/scholar?q=black+mold+remediation+procedures+indoor+hvac - Google Scholar Google Scholar
https://scholar.google.com/scholar?q=hvac+mold+health+effects+cleaning+guidance - https://www.cdc.gov/mold/default.htm
- Mold | US EPA
https://www.epa.gov/mold - https://www.epa.gov/sites/production/files/2015-09/documents/mold-remediation-guidance.pdf
- https://www.epa.gov/indoor-air-quality-iaq/mold-and-indoor-air-quality
- Mold – Overview | Occupational Safety and Health Administration
https://www.osha.gov/SLTC/molds/ - https://www.who.int/news-room/questions-and-answers/item/mould-and-dampness
- Mold
https://en.wikipedia.org/wiki/Mold

[…] Mold spores […]