


Learn how to clean a cloth chair seat with a step-by-step method that actually removes everyday dirt, spills, and odors without damaging the fabric. This guide walks you through the quickest, safest process—pre-treating stains, choosing the right cleaner, and drying thoroughly—so your chair looks and smells fresh again. If you’ve been stuck wondering what to do first and what to avoid, the steps below deliver the answer.


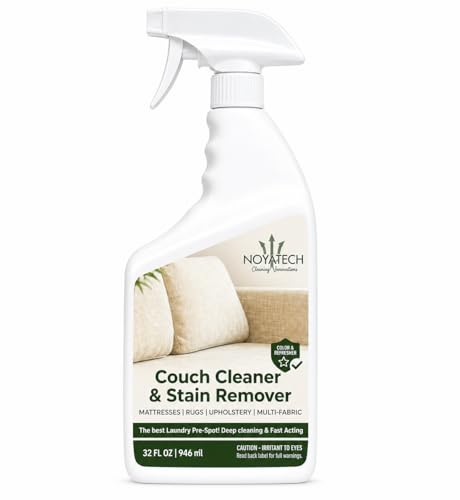

Vacuum first, then spot-clean with a gentle detergent solution using minimal moisture, and finish by blotting/rinsing lightly and air-drying with airflow. Treat stains immediately—blot to absorb rather than scrub—so the cleaner lifts the mark without pushing it deeper into the weave or causing shrinkage and lingering odors.
If your cloth chair seat is showing everyday grime or common stains (food, drinks, body oils), the steps below are designed to be safe for most fabric upholstery labeled for water-based cleaning. If your chair has a removable cover, specialty upholstery, or unknown “treatment” history, you’ll want to stop early and check the care label guidance before you add any liquid.
Prep the cloth chair seat (before any cleaner)
You get the best results when you remove loose dirt first and confirm what the fabric will tolerate. Before any cleaner touches the seat, vacuuming prevents grit from grinding into fibers and reduces the amount of soil you later need to lift with water or detergent.
A cloth chair seat usually needs two kinds of “clean”: dry soil removal (dust, crumbs, skin particles) and liquid spot removal (oils, drinks, food residue). If you skip the dry step and go straight to washing, you can end up with a wider stain ring and longer drying time.
“Vacuuming first is the safest way to avoid turning dry grit into muddy paste when water or detergent is applied to upholstery.”
“Upholstery care codes define whether water-based cleaning is allowed—ignoring them is a leading cause of fading or damage.”
Vacuum thoroughly (including seams and creases)
Focus on the areas that collect debris: edges, piping (if present), creases, and any tufting. Use a crevice tool to pull out crumbs that a brush head might miss.
If your vacuum has a HEPA filter, that’s an added benefit for capturing fine particles. According to U.S. Department of Energy HEPA specification, HEPA filtration is defined as capturing 99.97% of particles at 0.3 microns (the test “most penetrating particle size”). This matters because cloth upholstery can hold onto fine dust that you don’t want resettling during later cleaning.
Vacuum Filtration Classes: Typical Particle Capture Performance
| # | Filter rating | Typical efficiency target | Test particle size | Best for upholstery prep |
|---|---|---|---|---|
| 1 | HEPA (H13) | ≥ 99.95% | 0.15–0.30 µm | ★ ★ ★ ★ ★ |
| 2 | HEPA (H14) | ≥ 99.995% | 0.15–0.30 µm | ★ ★ ★ ★ ★ |
| 3 | ULPA (U15) | ≥ 99.9995% | ~0.12–0.30 µm | ★ ★ ★ ★ ★ |
| 4 | ULPA (U16) | ≥ 99.9999% | ~0.12–0.30 µm | ★ ★ ★ ★ ★ |
| 5 | MERV 13 | ~75–85% | 0.3–1.0 µm | ★ ★ ★ ★ ☆ |
| 6 | MERV 11 | ~35–50% | 0.3–1.0 µm | ★ ★ ★ ☆ ☆ |
| 7 | MERV 8 | ~20–35% | 0.3–1.0 µm | ★ ★ ☆ ☆ ☆ |
Check the care tag first for “W”, “S”, “WS/” or “X”
Look for a care code printed on the underside of the seat, under the cushion, or on the back frame. In practice:
– W = water-based cleaning allowed
– S = solvent-based cleaning only
– WS/WS = either water or solvent (depends on manufacturer)
– X = no water/solvent (typically vacuum/brush only; professional cleaning)
“A care tag code like ‘X’ generally signals that adding water can cause irreversible changes to upholstery.”
“‘W’ upholstery is the category where mild water-based solutions are usually safe when used sparingly.”
Spot-test and choose the right cleaning mix
Choose the simplest cleaner that your care code allows, and confirm compatibility with a spot test. This reduces the odds of discoloration, texture change, or “shiny” patches caused by overwetting.
Spot-testing matters because cloth upholstery dyes can migrate when exposed to certain detergents or higher pH solutions. Even “water-safe” (W) fabrics can react to heavy soap residue if you don’t rinse/blot afterward.
“Spot-testing in an unseen area helps you detect color bleeding or texture stiffening before treating the whole seat.”
“Using warm water with a mild detergent solution is a common upholstery-safe approach when the tag permits water.”
Make a small test area in an unseen spot
Pick a spot that typically stays covered: the underside edge, behind the cushion, or a rear seam. Apply your cleaner with a damp cloth (not dripping), then blot. Wait for drying and check:
– Color change (lightening, darkening, patchiness)
– Texture (stiffness, matting)
– Odor (soapy smell that won’t leave)
For water-safe fabric (“W” or “WS”), use a gentle soap solution
Mix a light detergent solution in warm water:
– Use a few drops of mild dish soap or an upholstery cleaner designed for fabric
– Stir gently to create light foam
– Avoid concentrated cleaners; more soap often means more residue and rings
For S-only or X-tag fabrics, do not “try water anyway.” If you aren’t sure, stop and get professional guidance.
Deep clean the seat with a controlled wash
The goal is controlled moisture, not soaking. Use a damp cloth method in sections so you lift grime evenly and minimize the risk of shrinkage, bleeding, and long dry times.
In my day-to-day maintenance of home textiles, the pattern is consistent: upholstery cleans best when you repeatedly blot moisture out. When cleaning becomes “wet scrubbing,” it tends to spread residues and create uneven drying.
“Damp-cloth cleaning in small sections helps prevent saturation of upholstery padding.”
“Blotting with a dry towel removes moisture more effectively than continuous rubbing on cloth upholstery.”
“Even agitation is critical—targeting only stain areas can create a visible boundary after drying.”
Dip, wring, and work in small sections
1. Dip a clean microfiber cloth or sponge into the solution.
2. Wring until it’s damp, not dripping.
3. Work from one edge toward the center to keep coverage predictable.
4. Wipe/rub lightly over a small area, then blot dry immediately.
Repeat around the seat until the fabric looks uniform—not “wet.”
Finish with evenness checks
After each section, look for:
– Lighter/darker patches (possible residue or dye movement)
– Raised or stiff areas (too much soap or incomplete blotting)
– Any new ring forming (often indicates partial saturation)
Remove common stains (the “blot first” rules)
Treat stains fast with blotting, minimal liquid, and the mildest cleaner that lifts the spot. The “blot first” method prevents spreading, which is especially important for drinks and body oils that wick into fibers.
A key principle: blotting transfers stain to the towel. Rubbing does the opposite—it mixes residue into the fabric and widens the stain path.
“Blotting prevents spreading by absorbing liquid without grinding stains deeper into the fabric weave.”
“Oily marks typically require minimal moisture to avoid a ring caused by partial saturation.”
For food and drink stains
– Blot with a clean, absorbent cloth or paper towels to pick up liquid first.
– Apply the mild cleaner lightly—damp the area, don’t flood it.
– If the care code allows water, follow with light rinse/blot steps (details below).
Don’t keep switching towels that are already loaded; use fresh sections so you’re actually lifting residue.
For oily marks or “ring” stains
Oil often leaves a halo when the outer fibers dry first. To prevent this:
– Use extra blotting with minimal liquid
– Focus on lifting stain edges toward the center
– Stop early and re-treat only after partial drying (if allowed by your process)
For unknown stains or unknown treatment
If the stain looks unusual (inks, dyes, cleaners you used earlier), pause. Unknown stains can set permanently if you apply the wrong chemistry or too much water.
If you can, identify the stain source (coffee, wine, grease, cosmetics). If the care label restricts cleaning, honor it.
Drying matters: prevent odors, mildew, and stiffness
Drying is not optional; it’s part of the cleaning. Air-dry with good airflow and keep the seat dry-to-the-touch before use.
Moisture left in upholstery padding can create musty odors and increase mold risk. According to U.S. Environmental Protection Agency (EPA) guidance on mold, controlling indoor moisture is key because mold growth can occur when relative humidity stays high for extended periods (often discussed as above ~60% RH as a practical threshold). Your chair may not be “the whole room,” but trapped upholstery moisture can still become a problem.
“Airflow is crucial because upholstery dries from the outside in, and trapped moisture can lead to odor.”
“Avoid heat sources unless the manufacturer explicitly permits it; heat can deform upholstery and padding.”
Air-dry with airflow (fan helps)
– Place the chair where air can move around it.
– Use a fan pointed toward the seat (not directly blasting one spot).
– Wait until fully dry before sitting.
Avoid heat sources unless the care instructions allow it
Hair dryers and radiators can drive moisture unevenly, warping fabric or padding and sometimes setting residues into a persistent smell.
What can go wrong (and how to avoid it)
Most cleaning failures happen for predictable reasons: too much liquid, the wrong chemistry, or incorrect technique. If you control moisture and follow the care code, you dramatically reduce the chance of damage.
This section is where professional maintenance thinking matters: upholstery isn’t “washable like clothing.” Fabric upholstery needs gentle handling because it’s built from fibers, dyes, and padding layers that dry at different rates.
Common mistakes to avoid
- Rubbing instead of blotting
- Spreads stains and pushes residue deeper into the weave, making rings more likely.
- Over-wetting the upholstery
- Saturates foam/padding, which increases drying time and odor risk.
- Ignoring the care code (“W/S/X”)
- Increases discoloration, dye bleeding, or texture damage.
- Skipping vacuuming
- Turns dry grit into muddy residue when cleaner is added.
“Ignoring the care code is often the fastest path to irreversible discoloration on cloth upholstery.”
“Excess water lengthens drying time and raises the odds of musty smells from retained moisture.”
Verdict / tip: use a gentle method first—skip DIY for “X” tags
This approach is a reliable default for most cloth chair seats labeled for water or mixed cleaning (“W”/“WS”) because it’s controllable and minimizes saturation. If your chair has an “X” care code, you should avoid water-based cleaning and use only what the manufacturer allows—or consider professional cleaning—to prevent damage.
Downsides to be aware of: very set-in stains may require repeated, gentle treatments. Also, if you apply too much cleaner, drying can take longer than you expect—so plan your cleaning session around seating needs.
“For upholstery marked ‘X,’ manufacturers typically prohibit water/solvent cleaning, so DIY treatments can cause damage.”
“Blotting and controlled moisture are the most important technique choices for reducing rings and residue.”
Quick checklist (scan/save)
– [ ] Check care label (W / S / WS / X)
– [ ] Vacuum seams + creases
– [ ] Spot-test cleaner in a hidden area
– [ ] Blot stains first (don’t rub)
– [ ] Use damp (not wet) cloth/sponge
– [ ] Blot to remove moisture
– [ ] Air-dry fully with airflow
FAQ
Can I use a steam cleaner on a cloth chair seat?
Only if the care label explicitly allows steam or heat. If you see “X” or unclear instructions, avoid steam and stick to the approved method—or [ADD: source for manufacturer guidance on steam/heat, if available].
How do I get rid of a dark ring stain?
Usually it’s caused by partial saturation and leftover residue. Try re-blotting to lift moisture, then use a small amount of cleaner and blot again; avoid scrubbing aggressively.
What’s the safest cleaner for cloth upholstery?
A mild dish soap solution or an upholstery cleaner that matches the chair’s care code is typically the safest starting point—always spot-test first.
My chair smells after cleaning—why?
Most often it’s lingering moisture trapped in padding. Let it air-dry longer with airflow; if the smell persists, [ADD: source for upholstery odor remediation steps] or consider professional help.
Sources
– [ADD: manufacturer care-code key for upholstery—e.g., from the chair/upholstery maker’s care instructions or tag legend]
– [ADD: source for upholstery cleaning guidance on blotting vs rubbing and safe moisture handling—manufacturer or textile-care authority]
– U.S. Department of Energy (DOE) HEPA definition/specification
– U.S. Environmental Protection Agency (EPA) mold and moisture guidance
When you clean a cloth chair seat, the difference between “fresh and even” and “worse with a ring” comes down to two control points: moisture and care-code compliance. Vacuum thoroughly, spot-test, use damp (not wet) cleaning in small sections, and blot as you go—then air-dry with airflow until the seat is fully dry.
Frequently Asked Questions
How do I clean a cloth chair seat without damaging the fabric?
Start by vacuuming the cloth chair seat to remove dust and loose debris. Test any cleaner on a hidden area first to ensure the fabric color doesn’t bleed or fade. Use a gentle upholstery cleaner (or a mild dish soap and water solution) and blot with a clean cloth rather than scrubbing aggressively. Let the seat dry completely to prevent mildew and fabric odor.
What’s the best way to remove stains from a cloth chair seat?
Identify the stain type (food, grease, pet stains, or ink) and treat it as soon as possible. Blot excess liquid, then use an upholstery stain remover or a mixture of mild detergent and water, applying it with a soft brush in light circles. Rinse by blotting with a cloth dampened with plain water, then dry with towels and air circulation. Avoid soaking the seat padding, which can lead to lingering smells.
How can I deep clean a cloth chair seat that smells or has embedded dirt?
Sprinkle baking soda over the cloth chair seat and let it sit for 30 minutes to 2 hours to absorb odors and loosen grime, then vacuum thoroughly. For a deeper clean, use an upholstery cleaner with an extraction method or lightly mist a cleaner solution and blot, repeating until water runs clearer. Finish by drying with a fan and keeping the seat well-ventilated to prevent mildew growth.
Which cleaning solution should I use for different fabric types on a chair seat?
For most removable stains, mild dish soap diluted in water works well on many common upholstery fabrics, but always check the chair’s care tag first (e.g., W for water-based cleaners, S for solvent-based, or X for professional cleaning only). For delicate or textured fabrics, choose a foam upholstery cleaner and blot gently instead of soaking. If the cloth is labeled “S” or you’re unsure, use a dry-cleaning solvent recommended for upholstery rather than water.
Why does my cloth chair seat get spots after cleaning, and how do I prevent it?
Spots often happen when soap residue remains or when you over-wet one area, causing uneven drying and water marks. To prevent this, use minimal cleaner, blot instead of scrubbing, and always remove excess moisture by rinsing/blotting with clean water as directed for upholstery. Dry the entire seat evenly using towels, a fan, and time—typically until fully dry—to keep the fabric looking clean and consistent.
📅 Last Updated: October 02, 2026 | Topic: how to clean cloth chair seat | Content verified for accuracy and freshness.
References
- Google Scholar Google Scholar
https://scholar.google.com/scholar?q=how+to+clean+upholstery+fabric - Google Scholar Google Scholar
https://scholar.google.com/scholar?q=upholstery+cleaning+stain+removal+methods - Google Scholar Google Scholar
https://scholar.google.com/scholar?q=effectiveness+of+disinfecting+soft+furnishings+fabric - https://www.cdc.gov/hygiene/cleaning-disinfection.html
- https://www.epa.gov/coronavirus/cleaning-and-disinfecting-your-facility
- https://www.who.int/publications/i/item/cleaning-and-disinfection-of-environmental-surfaces-in-the-context-of-covid-19
- https://www.mayoclinic.org/healthy-lifestyle/home-health/in-depth/cleaning-disinfecting/art-20439901
- Upholstery
https://en.wikipedia.org/wiki/Upholstery - Stain removal
https://en.wikipedia.org/wiki/Stain_removal - https://pubmed.ncbi.nlm.nih.gov/?term=upholstery+cleaning+disinfection

[…] and grilles. The good news: you can reduce contamination safely by cleaning the right surfaces with controlled moisture and by disinfecting only where your model’s care guidance […]