

Cleaning gutters that have gutter guards is only a “do it yourself” job if you use the right removal method and tools for your guard type. This guide tells you exactly how to clear leaves, grit, and stuck debris without damaging the guards or pushing clogs deeper into the downspouts. You’ll get a step-by-step process and the fastest way to verify everything is draining properly.



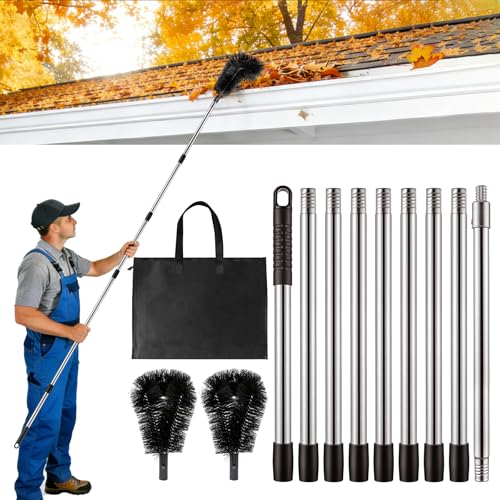
If your gutters have gutter guards, you still clean them by removing surface debris and then clearing (and verifying flow) at the areas where water actually gets stuck—usually the edges and downspout entry points. The safest method is to inspect first, use non-damaging tools (a small scoop and controlled hose flush), and avoid bending or prying at the guard system.
This guide walks you through a practical, step-by-step way to clean gutter guards without damaging them—whether you’re dealing with mesh, screen-style covers, reverse-curve designs, foam/brush inserts, or solid “top cover” systems.
This is for homeowners (or renters with control over maintenance) who have gutter guards installed and notice overflow, sagging, or slow drainage. It applies whether your guards are mesh, screen-style, reverse-curve, foam, brush, or solid covers—though the exact technique may vary by style.
Quick prep: what to check before you start

You don’t start by scraping—start by diagnosing where the blockage is and whether the guard is likely loose or sealed. A short inspection now prevents “fixes” that only move debris around and lead to another overflow later.
Overflow after a rain often points to a downspout entry clog or debris piled at guard edges—not necessarily a fully clogged open gutter run.
Most gutter guard cleaning issues come from prying or twisting the system, which can loosen fasteners and create new gaps.
If the guard is damaged or shifted, flushing alone may not restore drainage until the guard is re-aligned.
Before you touch a tool, do these checks:
– Inspect for active clogs: If it’s safe to observe during light run-off, look for water spilling over the gutter edge, and note whether it happens near corners or downspouts. If you can’t watch water flow, check downspouts and elbows for a heavy debris cap (leaves, grit, seeds).
– Identify your guard style: Mesh/screen and reverse-curve systems typically hold debris differently than foam/brush inserts or solid covers. This matters because “how debris sits” determines whether you clear from the top surface, the underside, or both.
– Prioritize safety and access: Set up a stable ladder and keep your body out of the gutter line. Work slowly around seams, corners, and fasteners so you don’t snag and bend the guard.
Safety anchor measurements to use today
If you’re using a ladder (almost everyone is for gutter work), follow the standard ladder setup rules used in workplace safety guidance—these directly reduce “one bad move” incidents:
– Angle rule (4:1): For every 4 feet up, place the base 1 foot out. That’s the classic “4:1” guideline.
– Extension rule (3 feet above landing): Ladder rails should extend about 3 feet above the point of safe access when applicable.
Source: OSHA ladder requirements (e.g., 29 CFR 1910. ladder rules, and OSHA/consensus safety guidance sections addressing 4:1 and ladder extension).– Maintain solid footing and inspect first: Don’t climb if rails are damaged or rungs/feet are worn or loose.
> If you’re on a multi-story roofline, have steep access, or can’t position a ladder securely, plan for a pro—guard systems can look “easy” until you’re reaching over fascia at an awkward angle.
Tools and approach for cleaning under and around guards
You clean gutter guards by combining non-damaging top-surface removal with targeted flushing at the spots where water funnels—especially the downspout inlet. The goal is to restore flow without prying, twisting, or distorting the guard’s brackets and channels.
A gutter scoop and a small plastic trowel are designed for removing debris with less prying force than metal tools.
Controlled garden-hose flushing helps you verify drainage paths instead of guessing where debris remains.
Clearing downspout entry points is essential because many guard systems still allow buildup right at the outlet.
Use a tool-and-method approach like this:
– Use non-damaging tools:
– A gutter scoop (plastic or light-duty) or a small plastic trowel is ideal for lifting stuck leaves without gouging panels.
– A gloved hand or a soft gutter brush can work for loose grit and fine debris.
– Clear top debris first:
Remove leaves, twigs, and seed pods from the guard surface so you can see what’s actually trapped underneath. If you skip this, you’ll often end up forcing wet debris deeper during flushing.
– Then tackle the downspout path:
Focus on the downspout entry area—where debris typically funnels into the downspout. Even when guards protect the main gutter channel, the outlet opening may still accumulate a compacted plug.
Visual quick reference: ladder safety specs that matter for gutter cleaning
If you’re planning to do this yourself, ladder setup affects whether you can clean carefully without rushing or leaning into the gutter line.
7 Common Ladder-Use Requirements Used for Safer Gutter Work
| # | Requirement | Specific Spec | Why It Matters for Gutters | Safety Rating |
|---|---|---|---|---|
| 1 | Angle (4:1 rule) | 1 ft out for every 4 ft up (~75°) | Reduces slip risk while reaching along fascia/guard edges | ★★★★★ |
| 2 | Ladder extension over access | About 3 ft above landing/access point | Improves stable handholds when stepping off onto roof edge | ★★★★☆ |
| 3 | Stable base & level placement | Firm footing; avoid uneven ground/soft mulch | Prevents ladder “walking” while you scoop debris | ★★★★★ |
| 4 | Inspect before use | Check rungs, rails, feet, locks | Guards against structural failure mid-reach | ★★★☆☆ |
| 5 | Maintain 3 points of contact | Two hands/one foot (or vice versa) | Keeps you stable while you lift leaves off guard surfaces | ★★★★☆ |
| 6 | Don’t overreach | Keep belt buckle between side rails | Reduces tipping risk while cleaning corners | ★★★☆☆ |
| 7 | Use appropriate ladder length | Reposition instead of stretching | Maintains balance while reaching under/near guard edges | ★★★★☆ |
(For exact regulatory text and applicability, refer to the OSHA ladder standard for your job context.) Source: OSHA ladder-use requirements.
Step-by-step: clean gutters with gutter guards (method that works)
You can usually restore drainage by clearing the guard’s surface first, then removing debris at guard edges and confirming flow at downspouts with a controlled flush. This method minimizes damage because you’re lifting what’s loose, then verifying the one place guards can’t “solve automatically”: outlet entry.
A practical routine is “surface removal first, then targeted flushing,” because flushing without clearing top debris often just redistributes the clog.
Downspouts are frequent failure points for guarded gutters because debris compacts at the inlet opening even when the main gutter channel is protected.
Controlled hose flushing lets you observe flow changes immediately, which reduces repeated force on guard fasteners.
Step 1: Remove surface buildup
Start at one end and work section-by-section.
– Gently pull/lift debris off the top of the guards using a scoop, gloved hand, or a purpose-made gutter brush.
– Avoid aggressive tapping or prying—many guard systems sit on brackets that can bend or shift if you apply point loads.
– If you feel material “tightening,” pause and remove from a different angle instead of pushing.
Step 2: Lift and clear what’s trapped at the edges
Most guarded systems fail at junctions: corners, seams, and the edge zones where water first enters or where the guard lifts slightly.
– If your guard has lift-able tabs or an accessible edge opening, lift only enough to reach the likely clog line.
– If it’s rigid and fully sealed, don’t force removal points. Instead, clear from angles you can access safely and use flushing to work debris toward the downspout inlet.
– Reverse-curve and mesh styles often leave trapped pockets along edges; foam/brush systems can trap finer material that requires more patient surface removal.
[ADD: specific adjustment for your guard type—e.g., how much lift/clearance your manufacturer allows—source: manufacturer installation/maintenance instructions]
Step 3: Flush and verify drainage
After surface removal, confirm the path water takes.
– Use a garden hose with a controlled nozzle (start gentle).
– Flush the gutter channel and watch water move toward the downspout.
– If flow is weak, repeat targeted clearing at the suspected clog zone—especially near outlet openings.
A guarded gutter can look “clean” on top while still holding compacted debris under the mesh or at the protected lip. Flushing is what proves whether you’ve restored the route.
Step 4: Check downspout flow and outlets
Don’t stop once the gutter line looks clear.
– Keep clearing until water moves freely from the downspout opening.
– If you still see overflow, check the downspout top inlet. Guards may reduce visible debris in the open gutter, but the outlet mouth often traps a dense plug.
What can go wrong (and how to avoid it)
The most common problems aren’t mechanical—they’re technique-related: over-prying, pushing debris deeper, or assuming the clog is where you first see overflow. Avoid those patterns, and cleaning guarded gutters becomes much more reliable.
Forcing a guard system can loosen brackets and create new leakage or debris pathways, making the next cleaning harder.
If you compact debris under a guard while scooping, you may turn a manageable partial clog into a stubborn outlet plug.
Many “overflow” events are actually downspout inlet blockages, so spending extra time at outlets improves results.
Here’s what can go wrong and how to prevent it:
– Damaging the guard system:
Over-prying, twisting, or tugging can loosen brackets or distort channels. Avoid forcing anything that doesn’t move with light pressure.
– Pushing debris farther down:
Careless scooping can compact material under the guard. Work in a direction that prioritizes removal rather than pushing—especially around corners.
– Missing the real clog:
“Overflow” may be caused by the downspout entry, not the open run. Spend extra time near downspouts and elbows because guards often shield the main run but not the outlet funnel.
– Wrong approach for certain guard types:
Foam/brush styles trap debris differently than mesh. If you can’t access underside edges, flushing and careful top-surface removal may be your safest option.
Decision reality check: If your guard installation requires specialized underside removal to reach the debris line, DIY may lead to damage.
[ADD: decision trigger based on your situation, e.g., “if you can’t safely reach X sections,” or if guard removal requires proprietary parts.]
Verdict: the honest way to do it (including downsides)
Cleaning gutters with guards is usually achievable for many homeowners, and it can significantly reduce how much debris you have to lift. The downside is that guards don’t eliminate maintenance—they can hide clogs until they overflow—so you still need periodic edge clearing and downspout checks.
Gutter guards reduce debris load, but they don’t guarantee uninterrupted flow because outlet inlets and edge zones still collect material.
Controlled flushing is the safest verification step: it confirms whether the drainage path is clear without aggressive physical force.
You may want to skip DIY and call a pro if:
– You have steep roofs or unsafe ladder access.
– Your gutters run multiple stories with limited safe reach.
– Downspouts are heavily clogged (especially if you suspect a blockage beyond the guard area).
– Your guard type requires specialized removal to access trapped debris without damaging proprietary clips.
[ADD: decision trigger based on your situation—e.g., “if you can’t safely reach X sections.”]
Scan-and-save checklist (quick maintenance routine)
Use this as your “next time” flow so you don’t forget the parts that actually restore drainage.
– [ ] Inspect gutters and identify downspout entry issues
– [ ] Remove debris from the top of the guards (section-by-section)
– [ ] Clear edges/openings where debris accumulates under the system
– [ ] Flush with a hose and confirm water reaches downspouts
– [ ] Re-check corners and downspouts for lingering blockage
– [ ] Look for loose brackets or guard shift after cleaning
FAQ
Will gutter guards stop me from ever cleaning the gutters?
No. Guards reduce debris, but they don’t always prevent buildup under edges or at downspout entry points.
Can I pressure wash gutter guards?
Often you should avoid blasting aggressively; high pressure can loosen guards or drive debris deeper. Stick to controlled flushing and gentle removal unless your guard manufacturer explicitly recommends pressure washing. [ADD: source for manufacturer guidance on pressure washing, if available]
What if water still overflows after cleaning?
That usually means the clog is at a downspout entry, a hidden section under the guard, or somewhere in the run you couldn’t fully access. Re-check downspout flow and targeted flush zones.
How often should I clean gutters with guards?
It depends on local tree cover, storm frequency, and how quickly fine debris accumulates. If you see overflow, slow drainage, or recurring clogs, increase frequency.
Sources
– [ADD: manufacturer installation/maintenance instructions for your gutter guard type—used to confirm safe cleaning method, whether lifting edges is allowed, and whether pressure washing is recommended]
– OSHA ladder safety requirements (ladder-use guidance used for common access rules like the 4:1 angle and ladder extension practices).
– [ADD: official gutter/roof maintenance guidance from a recognized roofing or gutter manufacturer—used to support general safety and flushing/cleaning principles]
Cleaning gutters that have gutter guards is less about “scraping everything” and more about restoring the actual water path: remove top buildup, clear edge pockets, then flush to confirm the downspout inlet is open. If you follow the method above—and avoid forcing or bending the guard system—you’ll usually fix overflow and slow drainage while keeping your guard investment intact.
Frequently Asked Questions
How do you clean gutters that have gutter guards without removing the guards?
Start by clearing loose debris from the top edges using a small scoop or garden trowel, then flush with a hose on a moderate setting to push out remaining leaves and grit. Use a gutter scoop or a narrow tool to reach through the openings of the gutter guards and pull out packed material. If water isn’t flowing freely after flushing, the guards are likely clogged underneath and may require targeted removal of sections or lifting the guards carefully for access.
What tools are best for cleaning gutters with gutter guards?
A gutter scoop with a narrow blade is ideal for pulling out debris around and through the guard openings. Pair it with a stiff brush, a small hand trowel, and a hose with a spray nozzle to dislodge compacted muck. For deeper clogs, consider a wet/dry vacuum (with a hose attachment) or a plumber’s drain snake to break up blockages near downspouts.
Why do gutter guards still need regular cleaning, and how can you tell when they’re clogged?
Gutter guards reduce debris but don’t stop everything—small seeds, pine needles, granules from roof shingles, and silt can accumulate and form a blockage under the guards. Signs of trouble include water spilling over the gutter during rain, sagging gutters, visible plant growth behind the guard, or slow drainage near the downspouts. You may also notice dampness on fascia boards or water staining that suggests water is backing up underneath the gutter guards.
How do you unclog downspouts when gutters with guards are overflowing?
First, try flushing from the garden hose at the downspout entry point to push clogs from the bottom up, then re-check the gutter channels for trapped debris. If water still backs up, disconnect the downspout or remove the downspout elbow (if accessible) to access the blockage directly. Clear leaves and sediment from both the downspout and the gutter area behind/under the gutter guards to restore proper flow.
Which cleaning method works best for different types of gutter guards?
For mesh and micro-mesh gutter guards, use gentle brushing and thorough flushing to remove fine particles that can pack into the mesh. For reverse-curve or hinged guards, focus on lifting sections when needed to access debris that builds underneath and to prevent damage from forcing tools through tightly fitted openings. For foam or surface-style guards, remove them periodically for a full clean and inspect for trapped grit along the gutter bottom, since debris often migrates underneath the material.
📅 Last Updated: October 02, 2026 | Topic: how to clean gutters that have gutter guards | Content verified for accuracy and freshness.
References
- Google Scholar Google Scholar
https://scholar.google.com/scholar?q=gutter+guards+maintenance+cleaning - Google Scholar Google Scholar
https://scholar.google.com/scholar?q=rain+gutter+cleaning+with+gutter+guards - Google Scholar Google Scholar
https://scholar.google.com/scholar?q=gutter+guard+leaf+debris+removal+maintenance - Rain gutter
https://en.wikipedia.org/wiki/Gutter_guard - Storm drain
https://en.wikipedia.org/wiki/Storm_drain - https://www.britannica.com/technology/gutter
- https://extension.umn.edu/household-hazards-and-safety/cleaning-out-rain-gutters
- https://extension.umn.edu/household-hazards-and-safety/gutter-guards
- https://www.epa.gov/seasonal-air-pollution-prevention/cleaning-your-home-and-indoors-during-fall-and-winter
- Floods | Ready.gov
https://www.ready.gov/floods
