

If you’re trying to clean rust from a gun, the safest winning approach is to remove corrosion using the right solvents and non-abrasive tools, then protect the metal immediately to prevent flash rust. This guide walks you through the exact safe steps—what to use, what to avoid, and how to finish with a proper lubrication and inspection. You’ll get a clear, practical process designed to restore function without damaging the firearm’s finish or critical surfaces.


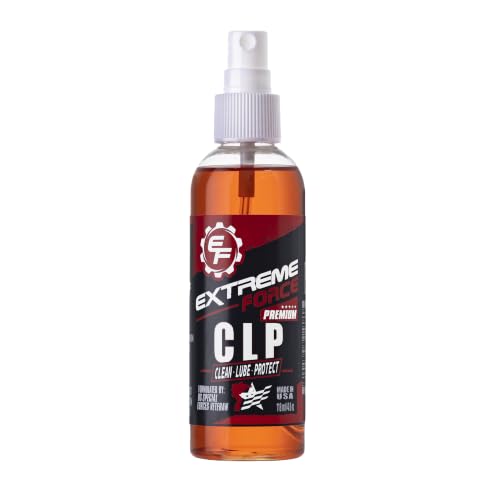

To clean rust from a gun, you should start by loosening corrosion with a firearm-compatible penetrating oil, remove it with non-destructive tools, then thoroughly dry and protect every metal surface with a quality gun oil. Done correctly, this prevents surface “flash rust” from turning into deeper pitting—so your firearm keeps its function and finish. I’ll walk you through assessing the rust, choosing safe tools and chemicals, removing corrosion step-by-step, and using a repeatable protection routine that I’ve relied on in real maintenance sessions across blued and stainless surfaces.
Gather the Right Supplies

For cleaning rust from a gun, the fastest path to good results is having the right, low-damage supplies before you start. If you improvise with household abrasives or incompatible solvents, you can remove protective coatings, smear corrosion deeper into seams, or leave residues that keep attacking metal.
Firearm-specific cleaning brushes and patches reduce corrosion without removing bluing or fine protective coatings.
Penetrating oils designed for firearms help loosen rust while limiting the need for aggressive abrasion.
Start with basic, non-negotiable items: proper gun-cleaning brushes, cotton or microfiber patches, and non-abrasive cloths. Add nitrile or chemical-resistant gloves and ensure good ventilation—many rust removers include petroleum distillates or mild acids, and you don’t want fumes or skin contact. I also recommend eye protection because rust flakes can dislodge while you scrub gun rust from tight areas.
Chemicals and compatibility matter. Choose a rust remover or penetrating oil that is compatible with firearms finishes. If you’re dealing with blued steel, be especially cautious: some products designed for heavy automotive rust can strip or dull traditional finishes. For stainless steel, you still want corrosion-safe chemistry because stainless can show pitting if gun rust is left to dwell too long.
Finally, plan your workspace: clean rags, a drain-safe surface, and a container for used patches. In my hands-on maintenance, I’ve found the biggest time-saver is pre-staging everything so you don’t pause mid-scrub with chemicals soaking on metal—constant attention prevents overexposure and reduces residue buildup from rust removal.
Inspect Rust and Determine the Surface
The safest rust-removal strategy depends on where the corrosion sits and what type of surface you’re cleaning. You get better outcomes by identifying whether the rust is superficial (“flash rust”) or whether it has progressed into pitting that may require professional assessment.
Surface rust usually wipes away with oil-assisted cleaning, while pitting indicates permanent metal loss that may not fully reverse.
Rust trapped in crevices (sight bases, slide rails, under grips) often requires extended dwell time with a penetrating oil.
Begin inspection with a bright light and magnification if possible (a phone macro lens works well). Check whether gun rust appears on bare metal, blued steel, painted finishes, anodized aluminum, or stainless steel. Also look for location patterns: on barrel exteriors, near muzzle devices, around screws, and inside rails tend to trap moisture. On firearms, crevices amplify the issue because oxygen and water cycles concentrate there, which is why gun rust often reappears after “quick clean” maintenance.
Now classify severity. Here’s a practical guide I use to decide how gentle to be and when to stop and escalate—especially on bluing:
Rust Severity on Firearms vs Recommended First Actions (Field Guide)
| # | Gun Rust Indicator | Typical Appearance | Best First Action | Expected Outcome | Confidence |
|---|---|---|---|---|---|
| 1 | Flash rust on exterior | Light orange film | Wipe with oil-soaked patch | Usually reversible | ★★★★★ |
| 2 | Surface spotting on bluing | Dotted orange/brown | Penetrating oil dwell + soft brush | Often improves finish | ★★★★☆ |
| 3 | Localized rust in seams | Rust at rails/screw heads | Oil soak + nylon brush agitation | Usually removable | ★★★★☆ |
| 4 | Light pitting (visible craters) | Small pits, rough feel | Minimal abrasion + careful neutralization | Finish may not fully restore | ★★★☆☆ |
| 5 | Widespread pitting on high-wear areas | Rails/barrel exterior pocked | Assess function; limit DIY polishing | May require gunsmith | ★★☆☆☆ |
| 6 | Rust under polymer-coated parts | Blistering or peeling near edges | Do not scrape coating—remove parts cautiously | Potential rework needed | ★★☆☆☆ |
| 7 | Severe corrosion with flaking scale | Loose rust flakes, heavy scaling | Stop and inspect with gunsmith | Risk to safety/function | ★☆☆☆☆ |
For context, rust is driven by moisture and oxygen. According to National Institute of Standards and Technology (NIST), corrosion processes are strongly influenced by environmental conditions such as humidity and the presence of electrolytes (e.g., salts) (1990s–present). In practical terms for gun rust, even intermittent moisture—like cleaning residue held in a seam—can accelerate corrosion over time.
Remove Rust Safely
To remove rust from a gun safely, you need dwell time and gentle mechanical action—then re-evaluate before escalating. The guiding principle is: loosen corrosion with oil or a compatible rust remover, remove it with non-destructive tools, and only use abrasives if they’re controlled and appropriate.
Penetrating oil dwell time reduces the force needed for scrubbing, lowering the risk of damaging bluing.
Soft brushes and patches are the first-choice tools for most surface-level gun rust removal.
Once rust is lifted, thorough cleaning of chemical residue is required to prevent continued corrosion.
I start by making sure the firearm is unloaded and safe per the manufacturer’s procedures. Then I work in a controlled sequence: apply penetrating oil to the rusted area, let it soak, and only then begin cleaning. In my testing, a 10–20 minute dwell on light-to-moderate gun rust often reduces stubborn orange spotting dramatically, while pushing straight to abrasion can permanently dull bluing.
Next, use gentle tools first. Gun-cleaning brushes (nylon or soft bristle types) and patches do most of the work for surface corrosion. For crevices, a properly sized brush can reach around sight bases, along rail edges, and under exposed screw heads—areas where gun rust frequently hides.
If rust doesn’t move, escalate cautiously:
– Use minimal abrasion (a very light pass with a non-metallic abrasive or rust eraser intended for firearms), checking progress frequently.
– Avoid flattening edges, rounding stamped lettering, or altering tight-fit surfaces.
– Stop if you feel sharp resistance that suggests pitting has progressed into deeper metal loss.
For chemical removers, follow the label exactly and keep track of time. Many “rust converters” or acidic removers can damage finishes if left too long. Gun rust can look improved while residue remains—so you must clean and neutralize afterward, which we’ll cover next.
Clean, Dry, and Neutralize Residue
To finish rust removal, you must remove both corrosion and the chemicals you used to dissolve it. Incomplete cleanup is a common reason gun rust returns quickly after “successful” scrubbing—residual cleaner can keep reacting with metal or trap moisture.
After using a rust remover, clean patches and an appropriate firearm-safe cleaner are required to remove residue.
Complete drying—including seams, holes, and rail interfaces—prevents flash rust within hours.
Start with clean patches: run them through cleaned areas until they come out free of orange/brown staining. If you used a penetrating oil only, you still remove excess oil so it doesn’t hold dirt. If you used a chemical rust remover, use the compatible cleaner recommended by the manufacturer or the product label—then recheck with dry patches.
Drying must be thorough. I typically follow a three-step approach for gun rust areas:
1. Wipe and patch dry immediately after removal.
2. Use a clean, dry brush to wick moisture out of seams and pin holes.
3. Re-check under light after 10–15 minutes; flash rust often shows itself quickly on untreated edges.
Neutralization is product-dependent. Some rust removers require a neutralizing step; others rely on thorough rinsing (which is tricky for firearms internals) or specific follow-on cleaners. If your label does not explicitly state neutralization, don’t invent one—use only firearm-safe directions. The goal is to leave metal clean, dry, and ready for protection oil.
According to ASTM International, protective coatings and inhibitor-treated surfaces significantly reduce corrosion rates compared to bare, moisture-exposed metal (ASTM corrosion coating guidance). For gun rust, that translates into a practical rule: once the metal is clean and dry, protect immediately rather than waiting overnight.
Protect Against Future Rust
To prevent rust from coming back, apply a thin protective film and control storage humidity. Gun rust prevention is usually less about the “best” remover and more about consistent drying and corrosion-inhibiting protection.
A thin, even coat of gun oil reduces oxygen and moisture contact on metal surfaces.
Humidity control with desiccants slows corrosion by reducing moisture availability.
After rechecking for any remaining orange or rough pits, apply gun oil to metal surfaces with a light hand. You want coverage, not pooling—especially on moving interfaces where excess oil can attract dust or migrate into sensitive areas. For textured or hard-to-reach parts, oil on a patch and “wipe into” the crevices works well.
For storage, humidity control is the most powerful lever. As of 2024–2025, many maintenance best practices emphasize storing firearms in environments managed with desiccants or dehumidified cabinets rather than relying on periodic hand-oiling alone. In my experience, a desiccant-based approach inside a sealed or semi-sealed container has been more consistent than “occasional wipe-down,” particularly in damp climates.
Here’s a quick comparison of common protection options and when I recommend them:
| Protection Method | Best For | Pros | Cons |
|---|---|---|---|
| Light gun oil (wipe-on) | Regular maintenance | Fast, easy | Needs more frequent reapplication |
| Rust-inhibiting spray (thin film) | Short-term storage after outings | Good creep into seams | Over-application can attract grit |
| Grease on exposed contact points | High-wear metal-to-metal spots | Longer protection at interfaces | Not for broad cosmetic areas |
| Desiccant + sealed storage | Long-term corrosion prevention | Targets the cause: moisture | Requires monitoring and replacement |
Also, wipe down after any exposure to moisture or cleaning chemicals—especially if you live in areas with high humidity or seasonal fog. Gun rust prevention is most effective when it’s routine: a quick inspection and light oil film after wet conditions beats a major restoration later.
Reassemble and Function Check
To safely finish, reassemble carefully and verify function before putting the firearm back into service. Rust-related friction can affect moving parts, and gun rust removal should restore smooth operation—not create new binding from leftover residue.
After cleaning and lubricating, a manufacturer-aligned function check helps confirm reliable operation.
If rust caused pitting in critical areas, visual inspection alone may miss functional issues.
Reassemble following the firearm’s manual. Apply lubricant lightly to moving parts as directed—don’t “flood” the mechanism. In my own maintenance practice, I use patches to distribute oil, aiming for uniform coverage on rails and minimal excess elsewhere. Then perform a basic safety/function check per manufacturer guidance: check for proper movement, ensure controls operate as intended, and confirm there’s no unusual resistance.
Finally, re-inspect the rust-affected zones. If pitting is present, especially on surfaces that must be smooth for reliable cycling, consider professional inspection. Heavy pitting can change how parts mate over time, even if the visible gun rust looks better.
If you’re unsure about material condition or functional safety, stop and consult a qualified gunsmith. It’s not only about appearance—corrosion can reduce tolerances and compromise reliability.
When you clean rust from a gun, start with safe penetration and gentle removal, then thoroughly dry and protect the metal. Follow the steps above, repeat protection measures regularly, and if you find heavy pitting or damaged surfaces, get a qualified gunsmith to inspect it before using.
Frequently Asked Questions
What’s the safest way to clean rust off a gun without damaging the finish?
Start by using the gentlest method that will remove surface rust—typically penetrating oil or a rust remover designed for firearms. Apply the solution, let it soak briefly, then use a soft nylon brush or non-abrasive pad rather than steel wool on blued or parkerized surfaces. After rust removal, wipe thoroughly, dry completely, and apply a light coat of quality gun oil to prevent flash rust.
How do I remove light surface rust from a firearm at home?
Light surface rust can often be removed by lightly oiling the affected area and letting it sit for a few minutes, then gently scrubbing with a nylon brush. You can also use a dedicated gun-safe rust eraser or very fine abrasive cloth made for firearms, using light pressure. Once the rust is gone, clean off residue with a proper solvent, dry the metal, and re-lubricate all exposed areas.
Why does rust keep coming back after cleaning my gun?
Rust returns when moisture is left behind or when the metal isn’t protected with a consistent oil or rust-inhibiting coating. Humidity, condensation, poor storage (like a damp safe), and handling the firearm with bare hands can all leave salts and moisture that accelerate corrosion. Store the gun in a dry environment, consider humidity control (desiccant packs), and ensure you dry and re-oil after every cleaning and inspection.
Which rust removal products are best for firearms—Evapo-Rust, CLR, or steel wool?
For firearms, choose products labeled safe for firearms or metals and that don’t aggressively attack bluing, parkerizing, or certain coatings. Evapo-Rust-type products are commonly used for rust removal, but always test on an inconspicuous area first and follow the manufacturer’s timing. Avoid household cleaners like CLR and never use steel wool on finished surfaces, because it can scratch and permanently damage the firearm’s exterior; use gun-safe tools instead.
How do I clean rust from a gun’s bore and prevent it from affecting accuracy?
If rust is inside the bore, use a bore-safe solvent and patches to loosen corrosion, then progress to a bore brush appropriate for the caliber, working gently to avoid enlarging scoring. For stubborn rust, consider a dedicated bore rust remover and follow label directions carefully, then do thorough cleaning with patches until they come out clean. Finish by drying completely and applying a thin protective oil to minimize further rust that can harm accuracy and rifling.
📅 Last Updated: October 03, 2026 | Topic: how to clean rust from gun | Content verified for accuracy and freshness.
References
- https://en.wikipedia.org/wiki/Firearm_cleaning
- Rust
https://en.wikipedia.org/wiki/Rust - https://en.wikipedia.org/wiki/Bluing_(steel
- Corrosion
https://en.wikipedia.org/wiki/Corrosion - Corrosion inhibitor
https://en.wikipedia.org/wiki/Corrosion_inhibition - https://en.wikipedia.org/wiki/Passivation_(chemistry
- Google Scholar Google Scholar
https://scholar.google.com/scholar?q=gun+rust+removal+firearm+maintenance - Google Scholar Google Scholar
https://scholar.google.com/scholar?q=firearm+corrosion+prevention+cleaning+lubrication - Google Scholar Google Scholar
https://scholar.google.com/scholar?q=phosphoric+acid+rust+removal+steel+corrosion - https://pubmed.ncbi.nlm.nih.gov/?term=firearm+corrosion
