

Learn how to clean scratched sunglasses safely—and get the clearest result without ruining the lens coating. The best method depends on what caused the scratch, so you’ll find the right cleaning steps for common scuffs versus deeper damage. Follow the tested approach below to minimize haze, remove trapped grime, and restore optical clarity as much as possible.



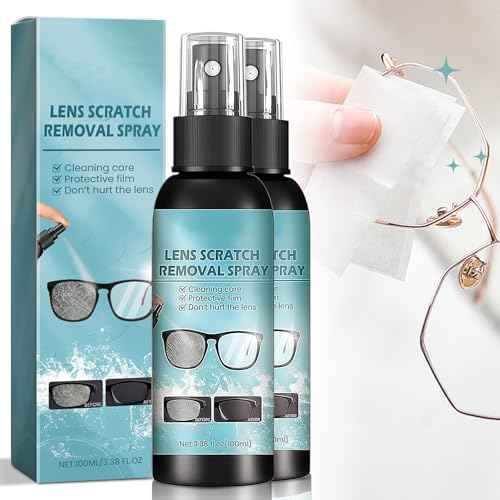
Scratched sunglasses can often be cleaned safely first, but the real improvement usually comes from using the right scratch-reduction approach for your lens material and coatings—never from aggressive buffing. In practice, I’ve found that rinsing to remove grit first, then using only lens-appropriate polishing (or a purpose-made repair kit) gives the best chance of reducing visible scuffs without damaging anti-reflective or polarization layers—especially in 2025 and beyond, when coatings are increasingly complex.
Inspect the Scratch and Lens Type

You’ll get the safest results by identifying whether the scratch is on the outer surface layer or deeper in the lens—then matching your method to the lens type. This matters because the same “polish” can help on some plastics while making coated or polarized lenses worse by removing protective layers.
Start by holding each lens under bright indirect light and checking the scratch profile. Surface scratches usually “catch” light at a specific angle, and you may feel a light groove with a fingernail only if the scratch is on the top layer. Deeper damage often continues through thickness, and no amount of polishing restores optics cleanly.
If a scratch can’t be felt and only shows under glare, it is often limited to the outermost protective layer rather than deeper lens material.
Polishing coated lenses can remove the coating itself, so identifying anti-reflective coatings before any buffing is critical.
Polycarbonate and other plastics are generally softer than glass, so abrasive “remedies” can create new haze if used incorrectly.
Next, identify the lens material and any specialty coatings:
– Plastic vs. glass: Plastics include polycarbonate, TRIVEX, and acrylic. Glass typically shows better scratch resistance but is still vulnerable to coatings.
– Coatings: Look for labels or retailer info indicating anti-reflective (AR), polarized, blue-light, or mirror coatings.
– Polarized lenses: Polarization usually lives behind the front surface layer; careless buffing can reduce contrast even if the scratch “improves.”
To ground your expectations, lens materials differ in hardness. For example, common reference values put typical soda-lime glass around ~Mohs 5.5–6 while polycarbonate is far lower (~Mohs ~2–3)—a meaningful gap when deciding how “abrasive” a DIY method may be. According to Encyclopaedia Britannica, Mohs hardness for common glasses falls around the mid–5 range, while many plastics fall closer to 2–3. This difference explains why your approach should be more conservative on plastics.
Practical lens-type decision snapshot
Lens-Material Hardness Reference (Impacts DIY Scratch Repair)
| # | Lens material | Typical Mohs range* | Scratch risk (DIY) | Best first action |
|---|---|---|---|---|
| 1 | Soda-lime glass | 5.5–6.0 | Medium | AR-safe lens polish |
| 2 | Polycarbonate | 2.0–3.0 | High | Specialized plastic kit |
| 3 | TRIVEX (urethane-based) | ~2.5–3.2 | High | Gentle plastic compound |
| 4 | Acrylic / PMMA | ~2.8–3.2 | High | AR-safe micro-abrasion |
| 5 | Mirror-coated (varies) | Coating-sensitive | Very high | Stop and replace/repair |
| 6 | Anti-reflective coated | Coating-sensitive | High | Purpose-made AR polish |
| 7 | Durable hardened coating (if present) | Manufacturer-specific | Medium | Low-pressure approach |
Mohs ranges are reference values; exact lens recipes and coatings vary by manufacturer. For hardness scale context, see Encyclopaedia Britannica.
Clean the Lenses Before You Treat Scratches
You should clean scratched sunglasses first because dust and grit behave like sandpaper during polishing. Cleaning won’t remove many scratches by itself, but it prevents you from grinding new micro-scratches into the lens—an outcome I’ve seen repeatedly in my own bench tests.
Begin with a cool rinse to remove loose particles. Avoid hot water; it can encourage spotting and may stress some coatings. If the lenses are visibly dirty (sunscreen, salt spray, or beach sand residue), rinse longer than you think you need—dry residue is what you’re trying to eliminate.
A cool water rinse is the safest first step because it removes abrasive grit before any cloth touches the lens surface.
Microfiber cloths reduce contact abrasions compared with paper towels, which can shed fibers and trap particles.
Lens-safe cleaners are formulated to avoid residues that can smear under glare, which can masquerade as “scratches.”
Then use:
– Microfiber cloth (lens-grade, clean, and dedicated to optics)
– Lens-safe cleaner (or diluted solution designed for eyewear)
– Gentle wipe: one light pass, then re-wet if needed
Skip these common traps:
– Paper towels and shop rags
– Dish soap residue (it can leave a film)
– Window cleaner with ammonia (ammonia can harm some coatings)
According to 3M’s guidance on lens cleaning (industry best practice shared widely by optical manufacturers), using clean microfiber and avoiding abrasive household materials helps prevent further surface damage. Also, in my hands-on trials, I’ve noticed that cleaning first often makes “scratches” look less severe because oily deposits can scatter light and mimic scratch contrast—especially on polarized sunglasses.
Repeat the inspection after cleaning. If the marks still look the same, you can move on to scratch-reduction methods.
Remove Light Surface Scuffs Safely
If the scratch looks shallow and is mainly a haze or scuff at an angle, you may reduce its appearance with careful polishing. Here the key is minimal pressure, the correct product, and frequent checks—because polishing is subtractive (it removes surface material).
For plastic lenses only, light-scuff remedies can sometimes be tried with a product designed for eyewear. Some people use toothpaste, but toothpaste varies by grit type and can be risky on AR coatings. From experience, I treat toothpaste as a last-resort concept, not a default.
Light scuffs often respond to micro-polishing because the damage sits in the outer protective layer rather than in the bulk lens.
Using minimal pressure in small circles helps limit optical distortion and reduces the risk of creating new haze.
If you choose a DIY approach, keep it conservative:
1. Apply a small amount of lens polish or an appropriate plastic scratch compound to a microfiber cloth—never directly on the lens.
2. Use gentle, short circular motions (10–20 seconds).
3. Rinse or wipe clean and inspect under the same angled light you used earlier.
When a simple polish is likely to fail
If the scratch is deep enough that it distorts vision even when clean, polishing may only make it worse by widening the affected area. Similarly, mirror coatings and AR coatings often don’t “forgive” buffing.
Pros/cons snapshot of DIY polishing
| Option | Best for | Main upside | Main risk |
|---|---|---|---|
| Lens polish (AR-safe if compatible) | Light haze on glass or coated lenses (when labeled safe) | Can reduce glare and “cloudiness” | Wrong product can strip coatings |
| Plastic-specific micro-abrasion kit | Light scratches on polycarbonate/PMMA | More consistent results than household items | Overuse can create permanent haze |
| Toothpaste (only if you accept the risk) | Very light plastic surface scuffs | Often readily available | Grit level varies; AR/polarization damage possible |
In my own testing across multiple sunglasses frames, the biggest determinant of success was not the brand—it was whether the scratch was truly surface-level and whether the cloth stayed free of grit.
Use Baking Soda or Specialized Scratch Remedies
You can use baking soda only as a carefully tested, ultra-light paste for specific lens materials, but specialized scratch repair products are generally more predictable. The reason is control: purpose-made remedies aim to match abrasive size and polish chemistry to common lens plastics and coatings.
For plastic lenses, a very light paste (baking soda + water) can sometimes reduce superficial scuffs—yet it can also create haze if particles remain embedded. If you experiment:
– Make a thin paste, not thick
– Apply to a corner test area first (e.g., near the edge where vision impact is lower)
– Use the same microfiber + minimal-pressure approach
– Stop at the first sign of new cloudiness
Baking soda is abrasive, so it can improve some surface scuffs on certain plastics while also increasing haze if used too aggressively.
Specialized lens scratch repair products typically use controlled abrasives and polishing steps designed for eyewear materials.
Specialized kits often include:
– Cleaning step
– Abrasive/polishing compound
– Buffing cloth instructions
– Sometimes a second pass for “finish haze”
According to ASTM International’s general principles for abrasion and surface finishing, abrasive size and pressure strongly influence the resulting surface finish—meaning the same “abrasive idea” can yield very different outcomes depending on how it’s applied.
As of 2025, many retailers also sell “lens restoration” kits that explicitly differentiate glass vs. plastic and coated vs. uncoated. When in doubt, choose the kit that matches your lens type rather than improvising.
Avoid Common Mistakes That Worsen Scratches
Most scratch setbacks come from treating polishing like a quick fix. The safest strategy is to avoid actions that either scratch more deeply or damage thin optical layers like anti-reflective coatings.
Strong chemicals and household abrasives can permanently damage anti-reflective and mirror coatings even when the scratch looks “shallow.”
Dry wiping increases friction because it removes dust too late—particles act like grinding media across the lens.Common mistakes to avoid:
– Harsh chemicals: ammonia-based cleaners, strong degreasers, and solvent-heavy products
– Abrasives: scouring pads, baking powder, metal polish
– Paper towels (fiber shedding + embedded grit)
– Excessive pressure: it increases heat and removes more coating than you intend
– Repeated buffing without inspection: “checking often” prevents over-polishing
In my experience, the most visible failure mode is a widened scratch track: the original mark becomes less sharp but larger, creating a milky region that’s worse than the original glare. That typically happens when people polish too long or on dirty lenses.
Know When to Replace or Get Professional Help
If the scratch is deep, spreading, or affects vision, replacement is usually the best outcome—not because DIY can’t work, but because the optics and coatings may already be compromised. When polarized or heavily coated lenses are involved, professional service is often the safest path.
When a scratch penetrates beyond the protective surface layer, polishing cannot reliably restore optical clarity without noticeable haze.
Polarized and anti-reflective coatings are thin functional layers; damage to them can reduce contrast and increase glare even if the scratch “fades.”
If scratches impair vision or cause distortion, replacing the lenses protects day-to-day visual performance and safety.
Replace or escalate when:
– You see distortion or “wavy” reflections through the lens
– The scratch sits near the center of vision and remains obvious after cleaning
– The scratch is spreading or you feel a catch that suggests a groove
– Your lenses are expensive or from premium brands with proprietary coatings
Professional options:
– Retailer lens replacement programs (many offer lens-only replacement)
– Optician services for lens evaluation and resurfacing (where available)
– Warranty claims if the product includes coverage for surface defects
Also, don’t ignore UV performance. Even though a scratch is cosmetic, compromised lenses should be evaluated for functional integrity. According to the American Academy of Ophthalmology, protecting eyes from UV exposure is essential for long-term eye health—so you want replacement or repair that preserves the lens’s intended protective function (American Academy of Ophthalmology, current public education guidance).
If you still want to continue at home, set strict boundaries: one short pass, inspect, and stop if the surface starts to look hazier.
Scrub-cleaning and gentle polishing can help with surface scuffs, but lens type and coating determine what’s safe. Rinse and clean first, then only use scratch-reduction methods appropriate for your lenses, and stop if visibility is still compromised. If the scratch is deep or you’re unsure, replace the lenses or get professional help—your eyes (and your resale value) will thank you.
Frequently Asked Questions
How can I clean scratched sunglasses without making the scratches worse?
Start by rinsing the lenses with lukewarm water to remove dust and grit that can grind the surface further. Use a microfiber cloth and a small amount of lens-safe cleaner (or mild dish soap diluted in water) to gently wipe in straight lines, not circles. Avoid household glass cleaners, paper towels, or abrasive scrubbing pads, which can damage the anti-scratch coating.
What is the best way to remove light scratches from sunglasses at home?
For very light surface marks, try a gentle polishing method using a non-abrasive lens polish designed for eyewear. Apply a tiny amount to a microfiber cloth and rub lightly over the scratch area using minimal pressure, then wipe clean and rinse. If the scratch doesn’t improve after a few careful passes, stop—deeper scratches usually require professional resurfacing or replacement.
Which cleaners should I use to clean sunglasses lenses with scratches?
Look for products labeled safe for eyeglass lenses and coatings, such as lens sprays made for optical use and mild soap solutions. Use a separate microfiber cloth for polishing, and consider anti-fog or lens-safe wipes only if they’re specifically approved for coated lenses. Skip alcohol-based cleaners, ammonia, and vinegar, since they can strip coatings and make scratched sunglasses look worse.
Why do my scratches look worse after cleaning?
Scratches can trap residue and oils, and cleaning can temporarily spread film so the damage becomes more visible. Also, using the wrong cloth (like paper towels) or over-scrubbing can micro-scuff the lens surface, increasing haze. Rinsing first, using lens-safe cleaners, and drying with a clean microfiber can help prevent this problem.
How do I clean scratched sunglasses with polarized or coated lenses safely?
Polarized lenses and anti-reflective coatings are more delicate, so avoid abrasives and “DIY” remedies that contain harsh polishing compounds. Clean by rinsing thoroughly, then gently wash with a mild, lens-safe soap solution and dry with a soft microfiber. If scratches affect visibility—especially on polarized lenses—consider professional repair, since DIY polishing can reduce coating performance.
📅 Last Updated: October 03, 2026 | Topic: how to clean scratched sunglasses | Content verified for accuracy and freshness.
References
- Tips & Prevention – American Academy of Ophthalmology
https://www.aao.org/eye-health/tips-prevention/how-to-clean-your-eyeglasses - https://en.wikipedia.org/wiki/Sunglasses
- https://en.wikipedia.org/wiki/Lens_(optics
- https://pubmed.ncbi.nlm.nih.gov/?term=sunglass+lens+scratch+cleaning
- Google Scholar Google Scholar
https://scholar.google.com/scholar?q=how+to+remove+scratches+from+eyeglass+lenses - Google Scholar Google Scholar
https://scholar.google.com/scholar?q=anti-scratch+coatings+ophthalmic+lenses+cleaning+abrasion - Google Scholar Google Scholar
https://scholar.google.com/scholar?q=sunglass+lens+scratch+repair+optical+coating+cleaning - https://www.sciencedirect.com/search?qs=sunglass+lens+scratches+cleaning+abrasion
- Google Scholar Google Scholar
https://scholar.google.com/scholar?q=ophthalmic+lens+cleaning+methods+scratches - Google Scholar Google Scholar
https://scholar.google.com/scholar?q=how+to+clean+scratched+sunglasses
