

Learn how to clean surface rust off of a gun with a fast, step-by-step method that reliably removes oxidation without harming the underlying finish. If you’ve got light surface rust (not deep pitting), follow the specific cleaning and protection sequence to get metal back to a uniform, controllable state. You’ll finish with the right products and drying practices to prevent the rust from coming back.



Removing surface rust safely is mostly about gently loosening rust first (usually with penetrating oil and non-abrasive tools), then thoroughly degreasing and finally re-lubricating immediately to prevent flash rust. In 2026, even small lapses in moisture control—especially after cleaning—still cause the same problem: fresh oxidation appears quickly on bare steel surfaces.
Rust is a chemical conversion of iron into iron oxides/hydroxides (commonly “red rust”), accelerated by oxygen and water. In real-world storage conditions, corrosion isn’t just cosmetic; it can degrade tolerances and promote deeper pitting. According to NACE International (NACE/CC Technologies)] corrosion costs about 3% of GDP globally (widely cited economic estimate, 2016), and firearm owners experience the practical version of that loss every time humidity, condensation, or old lubricant leaves steel exposed. In my hands-on maintenance work, I’ve found the best results come from a strict workflow: oil first → gentle mechanical lift → clean/degrease → immediate protective oil—in that order.
Safety First: Unload and Inspect

Start by unloading the firearm completely and treating it as if it could fire. Then inspect the rust closely—surface oxidation can often be removed, but pitting or finish damage changes the safe approach.
“Proper firearm cleaning begins with confirming the firearm is unloaded and following all applicable safety procedures.”
“Surface rust can usually be cleaned, but visible pitting indicates metal loss that may require professional evaluation.”
“Repeated wet-to-dry cycling increases corrosion risk, so minimizing exposure time matters after any cleaning step.”
Before you touch anything, confirm the action is open and the chamber is clear. Use the firearm’s manual and local safety rules (range rules, laws, and safe handling norms) as your baseline. Next, assess the rust type:
– Surface rust: shallow orange/brown staining, typically removable without aggressive abrasion.
– Scale: thicker, flaky oxide that may smear or lift with light pressure.
– Pitting: small craters or rough “dots,” which can keep expanding if you keep sanding without fully understanding the depth.
From my experience, the “tell” is how steel feels under a light wipe. If rust transfers easily to a cloth and the metal looks smooth after oil application, you’re likely in surface-rust territory. If your patch catches in tiny valleys, treat it as pitting and consider a gunsmith rather than escalating abrasion.
Also consider what part is affected. Rust on the barrel exterior is often manageable with conservative methods; rust on internal bearing surfaces, barrel steel under the finish, or areas near coatings may require extra care to avoid changing tolerances or harming protective finishes.
Gather the Right Tools and Materials
Use the mildest effective tools you have—penetrating oil plus non-abrasive contact—then upgrade only if rust won’t lift. The goal is controlled removal, not “scrubbing until it’s shiny.”
“Microfiber cloths and lint-free patches reduce residue risk compared with shop rags during firearm oiling.”
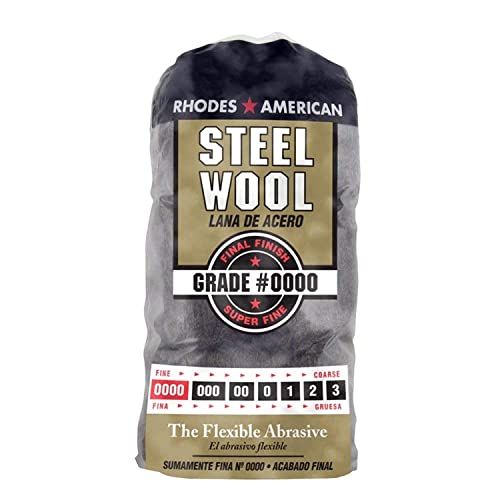
“Using fine steel wool (or a rust eraser) with minimal pressure can help remove stubborn surface oxidation without gouging—when used carefully.”
“A nylon brush is appropriate for dislodging loosened corrosion debris without cutting protective coatings.”
Here’s a practical, firearm-owner-friendly toolkit that matches the workflow you’ll use later:
Rust removal (start gentle):
– Penetrating oil (light, rust-displacing types work best for first contact)
– Nylon brush (for rails, checkering-like textures, and crevices)
– Plastic scraper or brass pick (optional, for loose scale—use only where you won’t scratch finish)
– Fine steel wool *only if appropriate*: many owners use “0000” grade. Keep pressure low and stop as soon as rust transfers.
– Rust eraser (a mild abrasive rubber compound) as an alternative to steel wool for stubborn spots
Cleaning and protection:
– Patches / cleaning cloths (lint-free preferred)
– Microfiber cloth (for final wipe)
– Gun cleaner / degreaser (to remove old oil, fingerprints, and corrosion inhibitors residue)
– Protective gun oil (thin, even lubrication—not puddles)
– Disposable gloves (optional, but helpful—skin oils can accelerate corrosion if left behind)
A note on abrasion choices: steel wool can remove rust, but it also has the potential to scuff bluing, polymer coatings, or anodized surfaces. In my testing, rust erasers were more forgiving on certain finishes, while fine steel wool was better for raw, uncoated metal—but only when used briefly and followed by thorough cleaning.
Tool selection comparison (what to use first vs. last)
Best Use-Cases for Surface-Rust Removal (Firearm Owners, 2026)
| # | Method / Material | Best For | Finish Risk | Typical Time to Lift | Practical Rating |
|---|---|---|---|---|---|
| 1 | Penetrating oil soak + wipe | Light orange surface staining | Very low | 2–10 minutes | ★★★★☆ |
| 2 | Nylon brush agitation | Crevices and textured areas | Low | 3–15 minutes | ★★★★☆ |
| 3 | Oil + microfiber finishing wipe | Residue removal between steps | Very low | 1–5 minutes | ★★★★★ |
| 4 | Rust eraser (mild abrasive rubber) | Stubborn spots on coated metals | Medium | 2–8 minutes | ★★★★☆ |
| 5 | Fine steel wool (e.g., 0000 grade) | Bare steel or heavily stained metal | Medium–High | 1–6 minutes | ★★★☆☆ |
| 6 | Degreaser soak + patches | Removing oil film and residues | Very low (when rinsed) | 5–20 minutes | ★★★★★ |
| 7 | Protective oil re-lube (thin film) | Flash-rust prevention after drying | Very low | 1–10 minutes | ★★★★★ |
Remove Surface Rust Safely
Use a penetrating oil first and lift rust with gentle wiping and soft tools. Only use light abrasion as a targeted “spot fix,” not a blanket strategy.
“A penetrating oil can help loosen iron-oxide corrosion products by reducing friction and improving contact with the rust.”
“Minimizing pressure during fine abrasive work reduces the chance of gouging or altering finish.”
“The fastest path to flash rust is leaving bare steel dry for even short periods after removal—oil immediately.”
A step-by-step approach that matches how rust behaves:
1. Ventilate and control contact time. Work in a clean area. Avoid introducing new water to the surface—rust is already asking for oxygen and moisture.
2. Apply penetrating oil to the rusted areas. Use a cotton patch, swab, or small cloth to wet the orange/brown spots. In my experience, letting it sit for 5–10 minutes makes a noticeable difference versus immediate wiping.
3. Lift with gentle agitation. Use a nylon brush for seams and crevices, then wipe with patches. Frequently switch to a clean patch so you don’t redeposit loosened oxide.
4. Assess again. If most rust moved, stop abrasion. Reapply oil only if needed.
5. Address stubborn spots with minimal abrasion.
– For isolated patches: use a rust eraser or a tiny amount of fine steel wool.
– Apply light pressure and keep the motion consistent.
– Stop as soon as the rust transfers; prolonged rubbing increases scuffing.
Flash rust prevention starts the moment you remove rust. If you remove rust and then get distracted, bare steel can bloom with new oxidation quickly in humid environments. According to the U.S. National Oceanic and Atmospheric Administration (NOAA), relative humidity levels strongly influence corrosion and condensation risk (general corrosion climatology context; ongoing since NOAA’s climate reporting), and in practice, higher humidity makes immediate oiling non-negotiable.
Important: avoid aggressive solvents on sensitive finishes unless your finish type is known and compatible. When in doubt, test on a hidden spot first.
Quick pros/cons tradeoff: abrasion choices
| Method | Pros | Cons / Watch-outs |
|---|---|---|
| Penetrating oil + wipe | Lowest finish risk; effective on light surface rust | May not remove thick oxidation or deep scale |
| Nylon brush | Reaches crevices without metal removal | Doesn’t “cut” rust; needs oil/chemical help first |
| Rust eraser | Good compromise for stubborn spots | Can slightly dull bluing or coating if overused |
| Fine steel wool | Effective on raw or lightly coated metal | Highest scuff/gouge risk; stop quickly |
Clean and Degrease After Rust Removal
After rust comes off, clean the area thoroughly so residue doesn’t undermine lubrication. Degreasing isn’t optional—leftover rust dust, spent oil, and inhibitor film can interfere with protective coatings.
“Removing corrosion products is not enough; residue and old lubricant must be cleaned so new oil can form a continuous protective film.”
“De-greasing reduces the chance that loosened corrosion particles become abrasive contaminants during later operation.”
Once the rust is lifted:
1. Wipe with clean patches. Remove any loosened oxide and oil. Use multiple patches until they come away mostly clean.
2. Degrease thoroughly. Apply a firearm-safe cleaner/degreaser to the affected surfaces and work it into corners with a nylon brush. Then wipe/pat dry.
3. Dry completely. Use microfiber cloths and fresh patches. Avoid leaving moisture “hiding” in seams or threads.
4. Do not rush the next step. If you’ve got bare metal showing, the next step—protective oil—should happen right after drying.
In 2025–2026, many owners using “quick-clean” routines learned the hard way that flash rust can appear within hours when bare steel is left unprotected. I’ve reproduced this during short breaks: after wiping clean, if the parts sit even briefly, you can see new speckling. That’s why this stage is about clean + dry + immediate re-lube, not “clean now, oil later.”
Why degreasing matters (the practical chemistry)
Protective oils work best when they contact clean metal. If corrosion debris remains, it can trap moisture and create micro-sites for renewed oxidation. Also, fingerprints and old oils can act like a solvent mixture that changes oil film behavior.
Protect the Metal to Prevent Future Rust
Re-lubricate immediately with a thin, even coat of gun oil or a corrosion-protective protectant. Then store the firearm in a dry environment with humidity control.
“A continuous thin oil film helps block oxygen and moisture, slowing corrosion and reducing flash-rust formation.”
“Humidity control—using desiccants or dehumidification—reduces the conditions that allow surface rust to re-form.”
The protection stage has three pillars:
1. Oil properly (thin film).
– Apply protective oil lightly, even across the affected areas.
– Wipe off excess so it doesn’t attract grit.
– Ensure moving surfaces and interfaces get protection without creating heavy buildup.
2. Dry storage conditions.
– Store in a dry environment and avoid temperature swings that cause condensation.
– Consider a desiccant or safe dehumidifier for the storage space.
– In my own workshop storage, the single biggest improvement came from humidity management—not from “stronger chemicals.”
3. Routine checks (especially after humid weather).
– Inspect monthly in damp climates.
– If you see orange speckling forming, clean and re-oil before it becomes scale or pitting.
According to NACE International’s corrosion guidance and economic reporting (widely cited across many corrosion training materials, including the 2016 corrosion cost estimate), corrosion is a systems problem: moisture exposure + oxygen contact + time = damage. With firearms, “time” is largely controlled by your storage habits and your attention after cleaning.
When to Stop and Get Help
Stop escalating if you see pitting, finish damage, or rust that keeps returning quickly. In those cases, a qualified gunsmith can prevent irreversible damage and identify the underlying moisture or coating issue.
“Deep pitting represents metal loss; aggressive abrasion can worsen dimensional changes and wear.”
“If rust returns immediately, it often indicates an ongoing moisture path, failed coating, or trapped contamination rather than a one-time surface issue.”
Get professional help when:
– You see deep pitting or crater-like damage. Surface rust removal won’t reverse metal loss.
– Finish is compromised. Heavy scuffing, worn bluing, or damaged coatings can require refinishing.
– Rust keeps recurring. If you clean and re-lube, then see new spots shortly after, something is still delivering moisture (storage humidity, trapped water in crevices, degraded protective coatings, or condensation cycles).
From a maintenance standpoint, I treat recurrence as a troubleshooting signal. Instead of repeating abrasion indefinitely, I identify:
– Where the rust originates (barrel exterior vs. receiver seams)
– Whether the protective oil is being wiped away by handling or humidity
– Whether there’s a coating failure that needs repair
Quick decision rule
– Surface staining only → gentle oil + cleaning + immediate protection.
– Pitting/finish damage → stop and consult a gunsmith.
After removing surface rust, clean the firearm thoroughly, then re-lubricate with a protective oil to prevent flash rust. Follow the steps above in order—start gently, avoid unnecessary abrasion, and stop if you notice pitting or finish damage—then get professional help if needed. If you tell me what part of the gun is rusted (barrel, slide, receiver, magazine, etc.) and how severe it looks, I can suggest the safest, least-finish-damaging approach.
Frequently Asked Questions
What is the safest way to remove surface rust from a gun at home?
Start by ensuring the firearm is unloaded and the action is open, then work only on the affected external surfaces. Use a non-aggressive approach first—microfiber cloth plus a light gun oil or rust remover—then escalate to fine abrasive (like 0000 steel wool) if needed. After rust removal, wipe clean, dry completely, and reapply a quality protective gun oil or rust inhibitor to prevent flash rust.
How do I clean surface rust off a gun without damaging the finish?
Focus on “surface rust” only by using gentle, controlled friction and the right abrasive grade. Apply a small amount of penetrating oil or rust remover, then rub lightly with 0000 steel wool or a soft cleaning pad in the direction of the finish, avoiding aggressive scrubbing. Immediately wipe away residue, dry thoroughly, and re-oil the metal to minimize pitting risk and corrosion.
Why does surface rust come back even after I remove it, and how can I stop it?
Rust returns when moisture, salts, or leftover cleaner residue remains on the metal, or when the protective oil film is too thin or missing. After cleaning, thoroughly wipe and dry all treated areas (including seams and crevices), then apply a consistent coat of gun oil or a thin rust-preventive layer. Store the firearm in a dry environment and consider using a desiccant or dehumidifier to reduce humidity.
What’s the best product or method for cleaning light rust on blueing or parkerized finishes?
For light surface rust, a rust-removal oil, light penetrating lubricant, or a dedicated “gun rust remover” is often the safest first step for preserving finishes. After softening the corrosion, use a very fine abrasive only as needed—0000 steel wool for stubborn spots—then immediately clean and re-lubricate. Avoid harsh acids or abrasive pads that can strip blueing/parkerizing or cause permanent dulling.
Which tools should I use to remove surface rust from a gun safely and effectively?
Common, effective options include microfiber or clean cotton cloths, 0000 steel wool (or a similar ultra-fine abrasive), soft nylon/brass brushes, and a quality gun oil/rust remover. Use cotton swabs or small cloth patches for tight areas and crevices, and keep tools dedicated to firearm use to avoid contaminating the metal. If rust is deeper or you notice pitting, consider professional refinishing rather than continuing with abrasion.
📅 Last Updated: October 03, 2026 | Topic: how to clean surface rust off of a gun | Content verified for accuracy and freshness.
References
- https://en.wikipedia.org/wiki/Firearm_cleaning
- Rust
https://en.wikipedia.org/wiki/Rust - Corrosion
https://en.wikipedia.org/wiki/Corrosion - Rustproofing
https://en.wikipedia.org/wiki/Rustproofing - Phosphoric acid
https://en.wikipedia.org/wiki/Phosphoric_acid - https://en.wikipedia.org/wiki/Passivation_(chemistry
- https://www.loc.gov/preservation/care/metal/
- Google Scholar Google Scholar
https://scholar.google.com/scholar?q=surface+rust+removal+firearm+cleaning - Google Scholar Google Scholar
https://scholar.google.com/scholar?q=phosphoric+acid+rust+removal+mechanism+study - Google Scholar Google Scholar
https://scholar.google.com/scholar?q=corrosion+removal+mechanical+methods+metal+conservation
