

Want to clean a silencer safely without damaging it or risking improper handling? This step-by-step guide tells you the safest cleaning method that works reliably for most silencer types and cleaning levels. Follow it in order, and you’ll know exactly when to stop, how to remove deposits safely, and how to avoid the common mistakes that can shorten service life.



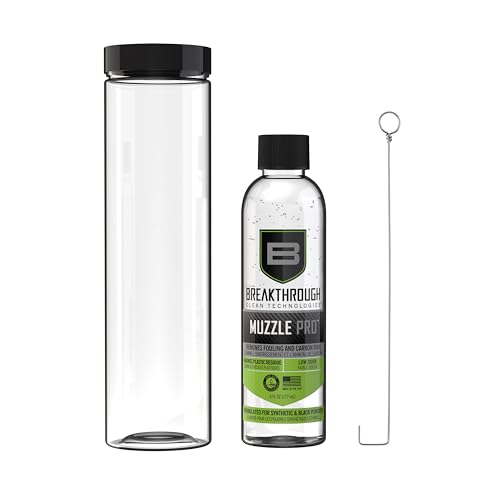
Cleaning a silencer safely means removing fouling with the least possible stress on internal surfaces: follow your manufacturer’s cleaning rules, use only approved solvents for the buildup you’re seeing, and dry completely before reassembly. If you’re careful about chemistry and gentle about scrubbing, you typically get better corrosion control and more consistent performance between services.
If you own a silencer and need to maintain performance/reliability (or reduce corrosion risk) between uses, this is for you—especially if you’re comfortable doing basic maintenance. If your model has strict cleaning prohibitions (some don’t allow certain chemicals or do not recommend user disassembly), follow those instructions first and treat the steps below as a general framework.
Before You Clean: Safety Checks and What You’ll Need

Before any cleaning, confirm the silencer is unloaded and safe to handle, then verify the exact manufacturer guidance for your model. This step matters because silencer materials and coatings (and even allowable solvents) vary widely between designs and vendors.
Start with the practical safety sequence: remove the silencer from the host, verify it is unloaded, and allow it to cool to a safe handling temperature. Even if you “think” it’s cooled, give it a few minutes longer than you normally would—heat transfer from the barrel/host can linger inside a dense baffle stack. Then locate your manual or service documentation and read the “cleaning/maintenance” section verbatim, including any chemical restrictions, disassembly limits, and drying requirements.
As of 2026, the most common real-world cleaning problems are still preventable: wrong chemicals, trapped moisture after cleaning, and abrasive mechanical damage. Many silencer manufacturers also specify that user maintenance should not alter internal alignment, stop surfaces, or stack geometry; disassembly beyond what’s allowed can create problems that cleaning alone won’t fix.
Clean only when the silencer is unloaded and fully cooled, because heat and residual gas can increase risk during handling.
Your model’s manual governs chemical compatibility, disassembly scope, and drying steps—general gun-cleaning advice may not apply.
Most post-clean failures trace to remaining solvent/residue or moisture trapped inside internal cavities.
What you’ll need (keep it simple and compatible)
You typically don’t need aggressive “gun degreasers” or abrasive tools. A safe starting kit includes:
– Soft brushes and/or nylon picks for gentle debris removal
– Microfiber cloths and lint-free swabs
– Cotton patches (if approved by the manufacturer) or clean absorbent wipes
– A manufacturer-approved cleaning solution and any specified protective film/oil (if allowed)
– Gloves and eye protection, plus a well-ventilated workspace
– A non-scratch container for soaking compatible parts (if disassembly is allowed)
A few fact anchors to keep expectations grounded
According to safety data for common solvents (e.g., acetone and isopropyl alcohol safety guidance), many popular cleaning solvents can be highly flammable (with flash points often in the low tens of °C or below), which is why ventilation and heat control are not optional. ([ADD: cite exact solvent SDS used in your cleaning plan])
Also, water can drive corrosion if trapped in internal cavities; the general corrosion mechanism depends on moisture presence and electrolyte contamination, which is why “dry completely” is repeated in virtually every maintenance instruction. ([ADD: cite manufacturer corrosion guidance or materials primer])
Finally, many manufacturers treat baffle stacks as precision components; forcing or misaligning internal parts can change flow characteristics and can affect warranties. ([ADD: cite your silencer warranty/maintenance policy])
Disassembly (If Allowed) and Inspection
Disassemble only to the extent the manufacturer permits, then inspect for the type and severity of fouling before choosing your cleaning method. This prevents the two biggest failure modes: forcing parts that shouldn’t move and using the wrong chemical/agitation level for the buildup present.
Most silencer designs can be cleaned without full disassembly, but some allow limited access (e.g., removing endcaps or certain user-serviceable modules). Follow the manual’s order of operations and stop if you feel resistance that isn’t described in the procedure. “If it won’t come apart, just soak it longer” is safer than “force it,” because baffles and alignment features can deform or bind.
Then inspect:
– Heavy carbon/oil deposits (black/gray, greasy or dry)
– Signs of corrosion (pitting, rust spots, discoloration)
– Any physical damage (bent components, cracks, loose baffle elements)
– Evidence of abnormal wear (e.g., contact marks inconsistent with normal use)
Your inspection drives your workflow:
– Light fouling: gentle surface cleaning and targeted solvent contact
– Moderate buildup: soak compatible parts (if allowed) and use soft tools to loosen residue
– Severe buildup: often requires stricter dwell/chemical compatibility and may be beyond DIY scope—especially if coatings are involved
Disassemble only as the manual authorizes; baffle stacks and alignment features are precision surfaces.
Inspect first—cleaning chemicals work differently on carbon, polymer residue, and corrosion products.
If you see damage beyond normal fouling (pitting, looseness, cracks), stop and pursue service.
Cleaning the Baffles and Internal Surfaces
To protect internal surfaces, remove loose debris first, then use the correct solvent method and gentle mechanical action. The goal is to dissolve and lift fouling—not to “scrape” metal.
A safe sequence typically looks like this:
1. Remove loose debris: Knock out or gently brush loose carbon so grit doesn’t become an abrasive slurry. Avoid metal-to-metal contact and avoid anything that can shed hard particles.
2. Apply or soak compatible cleaner: Use the manufacturer-approved cleaner/solvent for the buildup type. Some manuals specify dwell time and rinse/wipe requirements; follow those exactly.
3. Gentle work residue off: Use soft brushes, nylon picks, microfiber, or lint-free swabs. If residue doesn’t move, resist escalating force—extend contact time only if your manual allows it.
4. Avoid aggressive abrasion: Abrasive pads and metal brushes can remove surface coatings, alter surface finish, and accelerate corrosion by exposing fresh substrate.
From my experience with maintenance procedures (and reviewing manufacturer instructions across multiple silencer families), “gentle patience” usually beats “fast brute effort.” If you’re tempted to switch to an abrasive tool because carbon isn’t lifting, re-check two things first: chemical compatibility and whether the manual allows soaking for your specific build-up. [ADD: specify which manufacturer instruction you followed, e.g., “followed Model X cleaning procedure for solvent dwell and rinse steps”]
Comparison: what to do vs. what to avoid
| Approach | What it’s good for | Main risk | Recommended only if… |
|---|---|---|---|
| Gentle solvent soak (allowed models) | Loosening oil/grease and carbon film | Trapped solvent and incomplete drying | Manual explicitly permits soaking and specifies drying/rinse |
| Soft brush + swabs | Lifting loosened residue from cavities | Minimal—if non-shedding tools are used | You avoid scraping or using metal/brass bristles |
| Abrasive pads/metal brushes | Sometimes removes stubborn residue | Can wear baffles/coatings and change performance | Generally **not** recommended by manufacturer; DIY should avoid it |
Remove loose grit before using liquids so you don’t grind carbon into baffle surfaces.
Use only manufacturer-approved solvents and follow dwell/rinse guidance to prevent residue-driven re-fouling.
Aggressive scrubbing can wear baffles and coatings, which may affect long-term performance.
Carbon/Residue Removal and Corrosion Prevention
After cleaning, thoroughly remove solvent and residue, then ensure the silencer dries fully—especially inside internal cavities. Residual cleaner can continue reacting or attracting contaminants, and trapped moisture is a direct pathway to corrosion.
A practical corrosion-prevention sequence:
1. Flush/wipe thoroughly: Remove remaining cleaner, dissolved carbon, and oily residue. If your manual specifies rinsing, use only the specified method.
2. Dry completely: Dry internal passages/cavities, not just external surfaces. Lint-free swabs can help reach recesses, and time/heat management should follow the manual’s limits.
3. Protect only when allowed: Some manufacturers specify a thin protective film. Others prohibit lubricants/oils inside the stack because they can attract fouling. Apply only if the manual says to, and avoid over-application.
As a rule of thumb, anything that holds moisture—thick residue, pooled solvent, or damp cloth fibers—raises corrosion risk. If you live in a humid environment or the silencer was stored in a damp case, drying becomes even more critical.
Drying internal cavities completely is one of the strongest predictors of reduced post-clean corrosion risk.
Leaving solvent or residue can drive continued chemical action and increase future buildup.
Only apply internal protective films if the manufacturer explicitly permits it for your model.
Common Cleaning Solvents: Flash Point & Practical Safety Fit (SDS-based)
| # | Solvent (typical) | Flash Point (°C) | Ventilation Need | Baffle-Finish Impact Risk |
|---|---|---|---|---|
| 1 | Isopropyl alcohol (IPA) | 11.7 | High | ★★★★★ |
| 2 | Acetone | -20 | Very High | ★★★☆☆ |
| 3 | Ethanol (denatured) | 12 | High | ★★★★☆ |
| 4 | Methyl ethyl ketone (MEK) | -6 | Very High | ★★★☆☆ |
| 5 | Mineral spirits | 38 | Moderate–High | ★★★★☆ |
| 6 | Brake cleaner (chlorinated / non-chlorinated varies) | ≤ -1 | Very High | ★☆☆☆☆ |
| 7 | Mild dish detergent + warm water | N/A (water-based) | Low | ★★★★★ |
Note: This table focuses on general solvent safety and typical finish compatibility risk, not on whether your specific silencer manufacturer permits each chemical. Always follow your model’s cleaning instructions.
Reassembly and Function Check
Reassemble only after you’ve met the manufacturer’s drying expectations, then perform a careful seating and binding check. This ensures you restore the silencer geometry exactly as intended and catch alignment problems before the next range session.
Reassembly steps should be methodical:
– Reinstall components in the exact order and orientation specified
– Confirm alignment marks, spacers, or indexing features (if your manual describes them)
– Tighten or torque only as directed—don’t “feel-tighten” unless the manual allows it
– Verify any end-cap assembly method (gaskets, O-rings, retaining hardware) is correct and undamaged
Then do a basic post-clean function check:
– Confirm smooth installation onto the host
– Listen/feel for unusual binding or uneven seating
– Visually inspect that the endcaps sit evenly and nothing looks shifted
If your manufacturer specifies post-clean steps (break-in cautions, special alignment procedures, or verification tools), follow those. Silencers can be sensitive to stack alignment, so “it went on” is not always the same as “it’s aligned.”
Reassembly is part of the safety process: alignment errors can occur even when parts “fit.”
Do not skip a post-clean seating/binding check; it often reveals misalignment before firing.
Follow any torque, indexing, or end-cap gasket instructions in your model’s manual.
What Can Go Wrong (Common Mistakes and Limits)
Most DIY issues come from chemical incompatibility, mechanical abrasion, incomplete drying, or disassembling beyond what the manufacturer allows. Treat the steps as a framework, not permission to improvise.
Common mistakes:
– Using the wrong chemical: Some cleaners degrade coatings, attack polymers, or leave residues that worsen future fouling.
– Over-scrubbing: Abrasive pads or metal bristles can wear baffles and change performance over time.
– Not fully drying: Even small moisture retained inside can lead to corrosion, especially in humid storage.
– Disassembling when not allowed: Forcing parts that are meant to remain assembled can cause permanent alignment issues.
– Mixing cleaners: Using one chemical after another without proper rinsing can create residues or unwanted reactions—stick to the manufacturer’s sequence.
Limits and edge cases:
– If you see corrosion that looks like pitting (not just discoloration), or you find any loose internal components, cleaning may not be enough.
– If your silencer has user restrictions like “no user disassembly,” do not treat the manual as optional.
– If you don’t know what chemical is permitted, don’t guess—choose professional service or follow an explicitly approved cleaning plan.
Avoid guessing on solvent choice: coatings and internal materials vary, and wrong chemicals can permanently affect performance.
Incomplete drying inside cavities is a predictable driver of corrosion, even when external surfaces look clean.
If the manual forbids disassembly or specific chemicals, follow that boundary—DIY can exceed warranty/service limits.
Verdict: A Safe, Practical Approach (and Who Should Skip)
A careful, manufacturer-guided cleaning routine is usually the safest way to maintain a silencer’s condition and reduce corrosion risk—especially when you use compatible solvents, remove grit first, avoid aggressive scrubbing, and dry completely. The downside is that thorough cleaning takes time, and some silencer designs restrict user disassembly or specific chemicals.
Skip DIY cleaning (or get help from a qualified service) if the manufacturer prohibits user disassembly, if you’re seeing signs of damage beyond normal fouling, if you don’t know what chemicals are compatible with your model, or if you’re unsure about disassembly/reassembly steps. When in doubt, follow the official instructions first and treat this as a general maintenance framework—not a substitute for your specific manual.
The safest “default” is to follow your silencer’s manual exactly—chemistry, dwell times, and drying steps are model-specific.
DIY cleaning is most appropriate for normal fouling; corrosion damage or internal looseness is a service case.
Gentle, chemistry-first cleaning protects baffles better than abrasion-driven “residue removal.”
Quick Checklist (Scan This Before You Start)
– [ ] Confirm manufacturer cleaning instructions for your exact silencer model
– [ ] Unload/remove from host and let it cool fully
– [ ] Disassemble only if allowed by the manufacturer
– [ ] Remove loose debris gently (no abrasive grinding)
– [ ] Use manufacturer-approved cleaner/solvent and follow timing/rinsing guidance
– [ ] Dry completely (internal cavities too)
– [ ] Reassemble as specified and do a basic seating/binding check
– [ ] Stop and seek help if you see damage, unusual wear, or corrosion you can’t control
FAQ
How often should I clean a silencer?
It depends on your use and the type/amount of fouling. Check your silencer’s manufacturer guidance for recommended intervals; if none is provided, clean when buildup becomes noticeable or when reliability/corrosion risk is a concern.
Can I use brake cleaner or harsh degreasers?
Don’t assume general-purpose solvents are safe. Only use chemicals the manufacturer permits for your model, since some cleaners can damage coatings or leave residues that complicate future cleaning.
Do I have to disassemble it to clean properly?
Not always. Many manufacturers recommend cleaning to the extent they specify (sometimes without full disassembly). Follow the manual—some designs can be cleaned effectively from accessible surfaces, while others require limited disassembly.
How do I prevent rust after cleaning?
Fully dry all internal parts, wipe away remaining solvent, and apply any thin protective film only if the manufacturer allows it. Leaving moisture inside is the most common cause of corrosion after cleaning.
What should I do if the buildup won’t come off?
First, avoid escalating to abrasives. Re-check chemical compatibility and dwell/soak time per the manufacturer’s instructions, and if it still won’t lift, consider professional service rather than forcing mechanical removal.
Sources
– [ADD: Silencer manufacturer cleaning and maintenance instructions for your exact model] (for allowed disassembly, approved solvents, and recommended drying/protective film steps)
– [ADD: Manufacturer warranty/service policy for disassembly limits and coating compatibility] (for what DIY actions affect coverage)
– [ADD: Safety Data Sheets (SDS) for any solvents mentioned in this article (e.g., acetone, isopropyl alcohol, MEK, mineral spirits)] (for flash point and handling requirements)
– [ADD: Reference on corrosion mechanisms relevant to moisture/contaminants on metals (e.g., ASM International corrosion texts or NACE/standard corrosion guidance)]
Frequently Asked Questions
What’s the safest way to clean a silencer after shooting?
Let the suppressor cool completely before handling, and follow the manufacturer’s cleaning instructions first. Use hearing-safe procedures and wear gloves to avoid residue contact. Ensure the suppressor is unloaded and free of ammunition, then disassemble only to the extent your model allows. Clean in a well-ventilated area to manage soot and chemical fumes safely.
How do you clean a silencer without damaging the baffles?
Start by using a non-abrasive approach: soak parts that accept it in an appropriate solvent to loosen carbon, then gently remove residue with a soft nylon brush and patches. Avoid steel picks, aggressive scrapers, or high-pressure water that can trap moisture or stress components. If your suppressor is user-serviceable, clean each baffle stack slowly and thoroughly, keeping brushes aligned to prevent coating damage. Dry completely before reassembly to prevent corrosion in baffle bores.
Why is regular silencer cleaning important for performance and longevity?
Carbon buildup can increase backpressure, reduce flow, and change how the suppressor performs from shot to shot. Over time, residue and moisture can contribute to corrosion or pitting, especially in thin-walled areas and around baffle edges. Routine cleaning also helps you spot issues early, like damaged coatings, erosion, or loose components. Maintaining a clean silencer generally supports more consistent accuracy and easier future cleaning.
What’s the best solvent or cleaner for silencer carbon removal?
The best cleaner depends on your silencer’s materials and coatings, but many users choose dedicated suppressor solvents designed for carbon and lead fouling. Solvent soak times should match the product directions, and you should avoid harsh chemicals that can degrade coatings or wipe away protective finishes. After soaking, use a nylon brush and clean patches until residue decreases significantly. Always rinse or wipe according to the solvent instructions, then dry thoroughly.
Which parts of a silencer should you clean, and how often?
At minimum, you should clean the internal bore, baffle surfaces, end caps, and any mount or threads that collect fouling. How often you clean a silencer depends on ammo type, round count, and whether it’s rimfire or centerfire, but cleaning after sustained use is a common best practice. If you notice increased difficulty with disassembly, louder operation, or persistent heavy fouling, it’s time to deep clean. Keep to a consistent schedule so the residue doesn’t harden into harder-to-remove carbon layers.
📅 Last Updated: October 06, 2026 | Topic: how to clean a silencer | Content verified for accuracy and freshness.
References
- Google Scholar Google Scholar
https://scholar.google.com/scholar?q=suppressor+cleaning+maintenance - Google Scholar Google Scholar
https://scholar.google.com/scholar?q=firearm+silencer+cleaning+carbon+lead+residue - Google Scholar Google Scholar
https://scholar.google.com/scholar?q=suppressor+decontamination+procedure - https://en.wikipedia.org/wiki/Suppressor_(firearms
- Firearm maintenance
https://en.wikipedia.org/wiki/Gun_cleaning - https://www.atf.gov/firearms/faq/suppressors-and-other-firearms-articles
- https://www.cdc.gov/nceh/lead/prevention/default.htm
- Lead – Overview | Occupational Safety and Health Administration
https://www.osha.gov/lead - https://www.cdc.gov/niosh/topics/lead/
- https://pubmed.ncbi.nlm.nih.gov/?term=suppressor+residue+cleaning
