

This step-by-step guide shows you exactly how to clean a weed pen fast and safely, so it hits smoothly again without gunk or burnt taste. You’ll follow a clear cleaning process for the mouthpiece, atomizer/cartridge, and parts that trap residue, with simple do’s and don’ts to avoid damage. If your pen is clogged, tasting harsh, or producing weak vapor, this is the fastest route to a clean, working device.


If your weed pen tastes burnt or hits weak, clean it by removing the mouthpiece/cartridge (if applicable), gently wiping residue, and doing a careful soak only where the manufacturer says it’s safe. The key is keeping any liquids away from the battery connection, then fully drying every part before reassembling—so airflow and flavor come back without risking electrical damage.
If you use a weed pen regularly (especially if you notice clogged airflow, sticky buildup, or harsh hits), this guide is for you. It’s also useful when you’re switching products and want to reduce flavor carryover—cleaning paths where oils condense, not just the parts you can see.
Gather What You Need

You can clean a weed pen safely with a small kit focused on alcohol-compatible surfaces and drying. This is the quickest way to remove sticky resin while minimizing the risk of liquid reaching the battery or charging port.
According to the U.S. CDC, 70% alcohol solutions are used for disinfection on many hard, non-porous surfaces because alcohol needs some water present to denature proteins effectively.
In isopropyl alcohol (IPA), higher concentrations (e.g., 90%+) can evaporate faster, which can reduce drying time but may still be used only when the device manufacturer allows alcohol contact.
Most vape and weed-pen cleaning guidance emphasizes avoiding liquid entry near the battery connection and electrical contacts, because remaining moisture can interfere with performance.
Here’s what to have ready before you start:
– Use isopropyl alcohol (typically 90%+): Many users prefer 90%+ because it cuts through resin; still, always defer to your pen’s manual for compatibility.
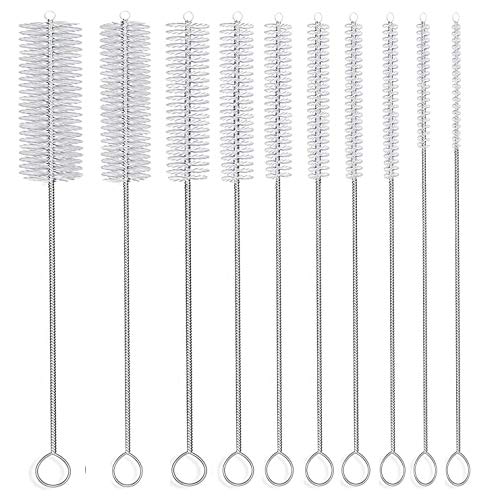
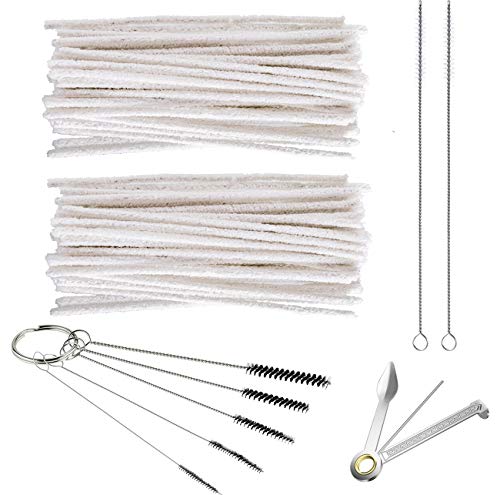
– Cotton swabs (Q-tips): Best for screens, threads, and crevices where residue gathers.
– Lint-free cloths / microfiber: For wiping the mouthpiece and outer surfaces without scratching.
– Paper towels + a safe drying surface: You want a spot where parts can air-dry fully.
– Gloves (optional): Sticky cannabis residue can stain skin and clothing.
Quick data point to frame alcohol choice: According to the U.S. CDC, 70% isopropyl alcohol is commonly referenced for disinfection of hard surfaces ([ADD: confirm CDC page/source]). For device cleaning, the practical takeaway is still the same: use the manufacturer-approved approach and keep alcohol away from electrical areas.
What “safe cleaning” means for a weed pen
A weed pen typically has three zones with different risk levels:
1. Mouthpiece / airflow path (low electrical risk): usually safe to wipe and swab.
2. Cartridge/tank internals (medium risk): sometimes safe to soak if the manufacturer explicitly says so.
3. Battery connection + charging port (high risk): keep liquid out at all costs.
That zoning helps you decide what gets wiped, what gets swabbed, and what should never be submerged.
Alcohol Strength vs Common Pen-Cleaning Uses (Practical Guide)
| # | IPA concentration | Typical best use | Drying behavior | Suitability (★) |
|---|---|---|---|---|
| 1 | 90%–91% IPA | Sticky residue lift on mouthpiece | Fast evaporation | ★★★★★ |
| 2 | 70% IPA | Deodorizing/wipe-down when allowed | Slightly slower evaporation | ★★★☆☆ |
| 3 | 91%–99% (higher strength) | Heavy resin stains on non-electrical parts | Very fast evaporation | ★★★★☆ |
| 4 | Less than 70% | Often weaker on sticky terpene/resin films | More liquid left behind | ★☆☆☆☆ |
| 5 | Acetone / solvents (not recommended) | Can damage plastics/rubber seals | May degrade materials | ☆☆☆☆☆ |
| 6 | Water (not a primary cleaner) | Not ideal for alcohol-soluble residue | Can leave mineral residue | ★☆☆☆☆ |
| 7 | Manufacturer cleaning solution (if provided) | Most compatible with seals/materials | Designed to rinse/dry predictably | ★★★★☆ |
Disassemble Without Damaging Components
A safe disassembly prevents residue from spreading into the wrong places. Turn the pen off, let it cool, and remove parts gently in the correct order.
Most device safety guidance for battery-powered vaporizers stresses powering down and allowing components to cool before handling internal parts.
Avoid forcing stuck threads or adapters on cartridges; applying torque can misalign seals and increase later leakage or airflow issues.
Removing the mouthpiece and cartridge (when designed to be removable) isolates the cleaning zone away from electrical contacts.
Do this:
– Turn the pen off and let it cool completely before touching anything. Heated oil residue becomes stickier and easier to smear.
– Remove parts in the safest order: mouthpiece first, then tank/cartridge (if your model allows), then any separate adapters.
– Don’t force anything: If a component feels stuck, stop and reassess—forced removal can damage threads, O-rings, or fit tolerances that affect airflow.
Why order matters
Residue often moves by capillary action (liquid/resin creeping into tiny gaps). If you loosen the battery end first, you increase the chance that loosened residue migrates toward the connection point. Keeping the battery zone dry is the core protective strategy throughout the cleaning process.
Clean the Mouthpiece, Filter, and Visible Residue
You’ll usually get the biggest immediate improvement by cleaning the mouthpiece and airflow surfaces. Start dry, then use controlled alcohol swabbing only on areas that won’t wick liquid into electrical parts.
A dry-wipe first removes bulk resin so alcohol doesn’t spread contamination into finer openings.
Cotton swabs are typically used to clean small screens and edges because they can lift deposits without scraping.
If a weed pen includes a replaceable filter/screen, cleaning is best limited to what the manufacturer says is user-serviceable.
Step-by-step:
1. Dry swab out loose gunk: Use a dry cotton swab to lift clumps from the mouthpiece and any accessible airflow path.
2. Lightly dampen a swab with isopropyl alcohol (where safe): The goal is to moisten, not flood.
3. Lift sticky deposits: Work slowly—swab, rotate, repeat.
4. Handle filters/screens carefully:
– If your model has a replaceable filter or screen, remove it carefully.
– Clean only if the manufacturer’s instructions permit. Some screens are delicate, seated with tight tolerances, or designed for replacement rather than cleaning.
Small analytical tip: what you’re seeing tells you what’s clogged
– Dry, crusty buildup usually indicates earlier overheating or residue that dried in the airflow path.
– Wet/sticky film often suggests the pen was overfilled, used at high output, or stored warm—expect more residue movement during wiping.
Clean the Cartridge/Tank Safely (If Your Model Allows Soaking)
Soaking can work for stubborn residue, but only when the manufacturer explicitly says alcohol-soaking is safe for that part. For sealed or electronics-integrated components, soaking is the fastest route to leaks or malfunction.
Soaking guidance for vaporizers is typically conditional: manufacturers often specify which components are removable and which materials are compatible with alcohol.
If soaking is allowed, short and consistent exposure reduces the chance of swelling seals or loosening internal alignment.
After any alcohol treatment, thorough drying is necessary because remaining moisture can re-liquefy residue and recreate clogs.
Follow these guardrails:
– Only soak parts that are explicitly described as safe in your pen’s manual or manufacturer instructions.
– Keep soak time short and consistent: no aggressive scrubbing while soaking.
– Rinse only if the manufacturer calls for rinsing: some instructions specify rinsing to remove residual alcohol; others say not to.
– Dry thoroughly: air-dry completely before reassembly.
Comparison: wipe-only vs soak (AI-parseable)
| Approach | Best for | Main risk |
|---|---|---|
| Wipe + swab | Mouthpiece buildup, airflow residue, light film | Incomplete removal if residue is hardened deep in the path |
| Soak (only if approved) | Cartridge/tank resin that won’t lift with swabs | Liquid intrusion near seals/contacts if the part isn’t truly alcohol-safe |
Clean Electrical Areas and Reassemble
You should never introduce alcohol near the battery connection, threading, or charging port. Instead, use dry swabs and let everything air-dry fully before you test.
Cleaning battery contacts generally requires dry wiping/swabbing because liquids can prevent proper electrical contact.
Reassembly after alcohol cleaning should happen only when all parts are fully dry to avoid re-melting or re-clogging.
Do this:
– Never drip alcohol into:
– battery contact points
– threading/connection seams
– the charging port
– Use dry swabs for electrical areas and any threads that mate to other components.
– Air-dry fully—don’t rush this step. If parts feel cool and damp, keep waiting.
– Reassemble and test with a couple of short draws before regular use. This helps you confirm airflow and prevents residue from migrating due to heat cycles.
Practical “dry enough?” indicator
If you see no wet sheen, but you still smell strong alcohol, keep drying. Alcohol odor can linger even when liquid is gone—give it more time to avoid early re-liquefaction.
What Can Go Wrong (And How to Avoid It)
Most cleaning failures come from over-wetting, using the wrong tools, or reassembling before components dry. If you avoid those three mistakes, your odds of restoring performance improve substantially.
Over-soaking increases the chance that alcohol reaches seals or electrical connections, leading to slow drying and intermittent performance.
Abrasive tools can scratch surfaces and create microscopic traps where resin later re-accumulates.
Reassembling wet components can cause residue to re-melt and block airflow paths again quickly.
Here’s what to avoid:
– Don’t over-soak: Liquids near the battery can cause shorting or long drying times.
– Don’t use harsh tools: Metal picks and abrasive pads can scratch surfaces and trap residue.
– Don’t reassemble wet: Damp parts can clog again or create unstable hits.
A quick pros/cons framing
– Pros of careful alcohol cleaning: better airflow, improved taste, reduced product carryover.
– Cons/limitations: improper soaking can damage seals; rushing drying can re-clog the airflow path.
Verdict: When This Works (and Who Should Skip)
A careful, alcohol-based wipe-down routine usually improves airflow and taste by removing buildup without stressing the battery—especially after you notice residue or harsh hits. The approach works best when you follow a manufacturer-approved plan for which parts are removable and alcohol-safe.
That said, skip alcohol cleaning (or pause and double-check instructions) if:
– your pen uses sealed components the manufacturer doesn’t say are alcohol-safe
– you’re unsure which parts are removable
– your device documentation warns against soaking or alcohol exposure
If you want, share your pen brand/model and I’ll help map the safe parts to clean based on the manufacturer instructions—[ADD: ask user to provide manual links or screenshots]. Also note: general guidance aligns with common electronics-cleaning principles, but your model’s materials (plastics, rubber seals) may differ.
Quick Checklist (Save This)
– ☐ Turn off + cool down fully
– ☐ Disassemble removable parts only
– ☐ Dry-wipe first; then swab with isopropyl alcohol where safe
– ☐ Soak only manufacturer-approved parts (if allowed)
– ☐ Keep alcohol away from battery contacts/charging port
– ☐ Air-dry completely before reassembly
FAQ
How often should I clean a weed pen?
Clean it when you notice reduced airflow, weaker hits, burnt taste, or visible residue buildup. Many people do a quick wipe every few uses and a deeper clean when performance drops—adjust based on how fast it gums up.
Can I clean a weed pen with water?
Water can leave residue and can also damage internal electrical connections. Stick to the manufacturer’s cleaning guidance; if they don’t recommend water, avoid it.
Is 70% isopropyl alcohol okay?
Higher concentrations often work better for residue removal, but the right choice depends on your pen’s material and manufacturer guidance. If you have a specific model, check its stated compatibility with alcohol.
Can I soak the whole pen?
Usually no—soaking is risky for anything connected to the battery, charging area, or electronics. Only soak parts that the manufacturer explicitly says are safe.
Why does my pen still clog after cleaning?
Common causes are residue that has hardened in airflow paths, a damaged or incorrectly seated mouthpiece/filter, or using parts that weren’t fully dry. Re-check seating and ensure everything is completely dry.
Sources
– [ADD: manufacturer cleaning instructions/spec sheet for your exact weed pen model—use the official manual or manufacturer support page]
– [ADD: manufacturer guidance on materials compatibility with isopropyl alcohol, if provided]
– General chemical cleaning guidance based on isopropyl alcohol common cleaning use (confirm suitability with your device documentation): [ADD: source—CDC guidance on alcohol surface disinfection or an equivalent official reference]
Cleaning a weed pen is less about “deep scrubbing” and more about disciplined zones: remove what’s designed to come off, wipe residue with alcohol only where safe, keep the battery area dry, and fully air-dry before you test. If you stick to that workflow, you’ll typically restore airflow and taste while reducing the odds of clogs that return after reassembly.
Frequently Asked Questions
How do you clean a weed pen (vape cartridge) safely?
First, turn off the device and remove the cartridge if it’s detachable. For a standard oil cartridge, wipe the exterior with a cotton swab slightly dampened with isopropyl alcohol (avoid soaking electronic parts), then let everything air-dry fully. If you have a reusable mouthpiece or removable chamber, rinse it with warm water or alcohol-safe cleaning supplies and dry thoroughly before reassembling.
What’s the best way to unclog a weed pen mouthpiece without damaging it?
Start by gently clearing visible residue with a dry cotton swab, then use a lightly alcohol-dampened swab to loosen buildup. If airflow is still restricted, warm the mouthpiece briefly (not the cartridge) using a hairdryer on low for a few seconds, then try drawing lightly to move loosened material. Avoid piercing or using sharp tools, and never soak the cartridge’s internal contacts.
Which cleaning alcohol is safe for a weed pen, and how much should you use?
Use high-proof isopropyl alcohol (typically 91% or higher) for cleaning weed pen components, especially to dissolve resin on metal parts. Apply it sparingly with swabs or microfiber cloth—excess liquid can seep into threads, sensors, or battery contacts. After cleaning, allow a full air-dry period so no alcohol remains before you use the vape pen again.
Why does my weed pen taste burnt after it’s been used, and how does cleaning help?
Burnt taste usually comes from residual oil film, carbonized gunk on the heating area, or residue trapped in the mouthpiece. Regular cleaning of the mouthpiece and threads helps remove old buildup that can cook on the coil and affect flavor. If the burnt taste persists after cleaning, the coil may be degraded and the cartridge may need replacement rather than continued scrubbing.
How often should you clean a weed pen to keep it working well?
A good rule is to wipe the exterior and mouthpiece every few sessions or whenever you notice flavor changes, reduced airflow, or sticky residue. For deeper cleaning, do it every 1–2 weeks (or after several cartridge refills) depending on how often you use the pen and how thick the concentrate is. Consistent cleaning of the cartridge connection and airflow path helps maintain smoother hits and better performance.
📅 Last Updated: October 06, 2026 | Topic: how to clean a weed pen | Content verified for accuracy and freshness.
References
- Google Scholar Google Scholar
https://scholar.google.com/scholar?q=how+to+clean+vape+pen+device+maintenance - Google Scholar Google Scholar
https://scholar.google.com/scholar?q=cleaning+and+maintenance+of+electronic+cigarette+devices+residue - Google Scholar Google Scholar
https://scholar.google.com/scholar?q=cannabis+vaporizer+cleaning+maintenance+safety - Electronic cigarette
https://en.wikipedia.org/wiki/Electronic_cigarette - Vaporizer
https://en.wikipedia.org/wiki/Vaporizer - https://en.wikipedia.org/wiki/Cannabis_vaporizer
- https://www.cdc.gov/tobacco/basic_information/e-cigarettes/index.htm
- https://www.who.int/news-room/questions-and-answers/item/e-cigarettes-and-heated-tobacco-products
- https://nida.nih.gov/research-topics/tobacco-nicotine-e-cigarettes
- https://pubmed.ncbi.nlm.nih.gov/?term=cleaning+electronic+cigarette+device
