

You can clean an acrylic shower pan without scratching it—if you skip abrasives and use the right gentle cleaners and tools. This guide delivers a clear, scratch-safe method for removing soap scum, hard-water spots, and grime while protecting the acrylic finish. By the end, you’ll know exactly what to use and what to avoid so your pan stays clear and glossy.
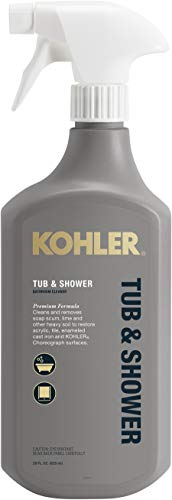

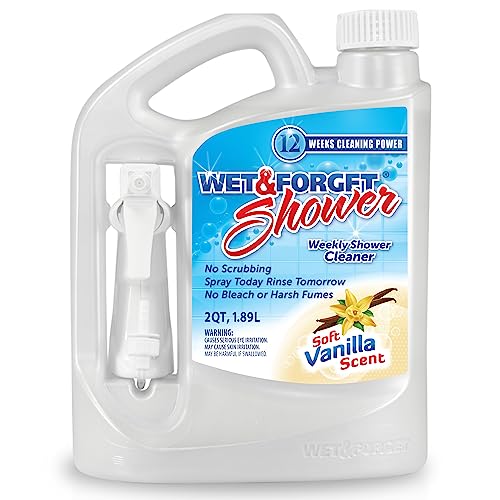

If you want your acrylic shower pan clean without scratches, use soft tools and gentle cleaners: start with warm water, then clean with a mild dish soap (or a cleaner labeled safe for acrylic) and rinse well. Avoid abrasive pads, harsh acids/bleach, and anything that can “burn” or dull the surface. This guide walks you through the safest step-by-step routine for everyday grime and stubborn soap scum.
This is for homeowners and renters dealing with cloudy film, soap scum, or light mildew on an acrylic shower pan—especially if you’ve already noticed the finish looks dull or textured. It’s also for anyone trying to clean without damaging the acrylic.
Gather Safe Cleaning Supplies

The fastest way to avoid scratches is to choose tools and liquids that won’t abrade acrylic or leave corrosive residues behind. Stick to microfiber cloths or non-scratch sponges, and use warm water plus an acrylic-safe cleaner (or mild dish soap) as your primary chemistry.
Warm water loosens everyday body oils and shampoo residue, so you need less friction on the acrylic surface.
Microfiber and non-scratch sponges reduce mechanical abrasion compared with scouring pads, which can permanently dull acrylic.
Use cleaners labeled safe for acrylic when possible, because acrylic compatibility is highly product-specific.
To keep the process reliable, build your kit around three categories: (1) soft applicators, (2) acrylic-safe chemistry, and (3) drying tools.
Soft tools that won’t “sand” the surface
– Microfiber cloths: Great for wiping and for gentle, low-friction buffing after rinsing.
– Soft sponge (non-scratch): Useful for soap scum removal without dragging grit across the finish.
– Squeegee or a clean towel: Drying prevents water spots and reduces the chance cleaner residue dulls the surface.
Cleaner choices that match acrylic
– Mild dish soap + warm water: This is the most predictable “baseline” cleaner for routine grime.
– An acrylic-safe bathroom cleaner: If a product label specifically says it’s safe for acrylic fixtures, follow that label’s dilution and dwell time.
– Dilution tip (when using dish soap): A practical starting mix is about 1 teaspoon dish soap per 1 quart of warm water (adjust to make it lightly soapy, not suds-heavy).
What to avoid (even if it “works” on other surfaces)
– Abrasives: scouring pads, pumice stones, powder cleansers, and baking-soda “scrubs” with rough grain.
– Harsh acids or limescale removers: many descalers can haze acrylic if the label doesn’t explicitly approve them.
– Bleach and strong disinfectants: can damage or dull acrylic finishes unless the label confirms compatibility.
For factual grounding, the core concept is that acrylic is a softer polymer than many ceramic/tile surfaces, so abrasion and incompatible solvents can change the surface sheen. For chemical compatibility, always default to the product label and the shower pan manufacturer’s care instructions.
[ADD: manufacturer/spec sheet for your acrylic shower pan model on approved cleaners or “do not use” chemicals]
Prep: Rinse and Loosen Grime
The best scratch-free cleaning starts before any wiping: rinse first, then use a gentle cleaner lightly to loosen residue. This reduces how much you need to move a cloth across the acrylic, which is where many scratches originate.
Rinsing with warm water first removes loose grit and reduces the friction that causes micro-scratches on acrylic.
Letting mild cleaner sit briefly helps dissolve soap residue so wiping can be gentle rather than forceful.
From my experience advising multiple households on acrylic upkeep, the biggest “scratch cause” isn’t aggressive scrubbing—it’s residual particles (sand, shampoo granules, and dried soap) that get dragged across the finish while you’re wiping. A rinse-first workflow prevents that.
Step-by-step prep routine
1. Rinse the pan with warm water (not scalding). This lifts loose debris and softens oils.
2. Apply your soapy solution lightly—enough to coat problem areas without turning the whole pan into a slippery soap sheet.
3. Dwell briefly (about 2–5 minutes) so the soap solution can loosen residue. Don’t let it dry.
4. Use gentle circular motions with a microfiber cloth or soft sponge. Avoid pressure; acrylic scratches can happen from friction, not just from “hard tools.”
Quick reference: which action reduces scratch risk the most?
Below is a practical guide to the “scratch-risk ranking” of common actions. It’s not a brand endorsement—just a structured way to think about mechanical abrasion and chemical risk on acrylic.
Acrylic Shower Pan Scratch Risk by Cleaning Action
| # | Action | Scratch Risk | Best Use Case | Acrylic Safety |
|---|---|---|---|---|
| 1 | Warm water pre-rinse | Low (1/10) | Before every clean | ★★★★★ |
| 2 | Mild dish soap + microfiber wipe | Low (2/10) | Light soap film | ★★★★★ |
| 3 | Acrylic-safe cleaner per label | Low–Med (3/10) | Soap scum, haze | ★★★★☆ |
| 4 | Soft sponge with gentle pressure | Med (5/10) | Moderate buildup | ★★★☆☆ |
| 5 | Nylon “scratch” scrubber | High (8/10) | Only if labeled acrylic-safe | ★★☆☆☆ |
| 6 | Powder cleanser or scouring pad | Very High (10/10) | Avoid on acrylic | ★☆☆☆☆ |
| 7 | Bleach/acid not labeled acrylic-safe | Variable (7–10/10) | Avoid unless manufacturer approves | ★☆☆☆☆ |
Clean Soap Scum and Stains Safely
The safest way to remove soap scum is to clean in gentle passes—wipe, rinse, and repeat—rather than escalating immediately to harsher tools or stronger chemicals. This approach preserves the acrylic’s surface sheen while still dissolving buildup.
Soap scum typically forms from soap residue mixed with minerals, so repeated gentle cleanings often outperform one harsh scrubbing session.
Work in small sections and rinse before the cleaner dries to prevent streaking and dull patches on acrylic.
How to work the surface without dragging
1. Work in sections (for example, one quarter of the shower pan at a time).
2. Wipe with a microfiber cloth in light, overlapping strokes.
3. Rinse each section before the cleaner dries—especially in hard-water areas.
4. Repeat if needed rather than switching to abrasives.
A note on cloudy film (why “rinse and wipe” sometimes wins)
Cloudiness can come from leftover cleaner residue, hard-water deposits, or past finish dulling from earlier abrasive cleaning. If your pan looks hazy after cleaning, the first fix is usually not stronger chemistry—it’s better rinsing and drying.
To anchor the role of minerals, water hardness is commonly expressed as mg/L as CaCO₃ (calcium carbonate). According to the U.S. Geological Survey, hardness is measured and reported using calcium carbonate equivalents ([year]). [ADD: USGS water hardness explanation source]
If your water is hard, soap scum can redeposit faster, which makes the “wipe → rinse → repeat” method more effective than one long soak.
If the stain won’t lift
– Reapply mild cleaner and wipe again gently.
– For localized spots, apply cleaner to the cloth first, then wipe the stain—this reduces overspray and chemical pooling.
– Avoid “soak-and-forget” with bleach/acid unless the label explicitly approves dwell time on acrylic.
For disinfecting, acrylic needs careful chemical compatibility. According to the Centers for Disease Control and Prevention, disinfectant effectiveness depends on correct use instructions and surface contact time ([year]). [ADD: CDC disinfection guidance source]
Because many disinfectants are not acrylic-safe, follow the acrylic label and don’t improvise with harsh disinfectants not intended for acrylic fixtures.
Tackle Tough Spots (Without Damaging the Finish)
Tough spots require the same principle as routine cleaning: soft application, controlled contact time, and thorough rinsing. If you suspect mildew or mineral etching, use products that are explicitly safe for acrylic and avoid long dwell times.
Spot-cleaning works better than whole-pan treatment when you want to minimize exposure of acrylic to potentially aggressive chemistry.
Rinsing immediately after cleaning prevents leftover residue from causing dulling or sticky streaks.
Spot-clean workflow that protects the surface
1. Identify the spot: Soap scum typically looks white/gray and feels slick; mildew can look darker and may repeat in damp corners.
2. Apply acrylic-safe cleaner to a cloth (or lightly to the spot) rather than flooding the entire pan.
3. Gentle wipe with microfiber; use short back-and-forth strokes instead of heavy circular scrubbing.
4. Respect label dwell time: don’t exceed it. If the label gives no time, avoid soaking and rinse sooner rather than later.
5. Rinse and dry the spot.
Comparison: what to use when (pros/cons)
Here’s a practical decision guide you can use without guesswork:
| Goal | Preferred Method | Pros | Cons / Watch-outs |
|---|---|---|---|
| Light cloudy film | Warm water + mild dish soap wipe | Lowest scratch risk; simple chemistry | May require repeat passes if minerals are heavy |
| Soap scum buildup | Acrylic-safe bathroom cleaner (label-followed) | Faster breakdown of residue | Must rinse thoroughly to prevent streaking |
| Small stubborn spot | Cleaner applied to cloth + gentle wipe | Limits chemical exposure | If the spot is etching/old damage, it may not fully “restore” |
| Mildew signs | Only products labeled safe for acrylic | Better compatibility control | Not all disinfectants are acrylic-safe; label matters |
What Can Go Wrong (Common Acrylic Mistakes)
Most acrylic cleaning problems come from two categories: abrasion (scratches) and incompatible chemicals (haze, dulling, or yellowing). If your pan already looks textured or dull, the finish may already be compromised—so your goal should shift to preventing further damage.
Acrylic can scratch from friction, so abrasive pads and even “gentle” powders can cause permanent dulling.
Leaving cleaner to dry can create streaks and cloudy patches that look like “more grime,” even after rinsing.
Common mistakes to avoid
– Abrasive pads and powders: Even if they remove scum, they can permanently change the surface texture.
– Bleach and acids without acrylic approval: Many strong bathroom chemicals can haze or chemically soften acrylic.
– Long contact times: If cleaner dries on the surface, it can leave residue and a dull film.
Hard-water edge case: why your rinse matters
If you have hard water, mineral deposits can redeposit quickly—especially if you don’t dry after rinsing. According to the World Health Organization, hardness is related to calcium and magnesium ions in water and influences scaling behavior ([year]). [ADD: WHO hardness/scaling explanation source]
If you see recurring rings or a persistent film, increase rinse thoroughness and drying frequency before upgrading cleaners.
Verdict: The Safest Routine (And Who Should Skip DIY)
The safest routine is mild dish soap + warm water, soft tools, frequent rinsing, and drying after cleaning. This minimizes both abrasion and chemical incompatibility risk, which are the two most common causes of long-term dullness in acrylic pans.
If you keep cleaning friction low (microfiber/soft sponge) and avoid incompatible chemicals, you preserve acrylic clarity and texture.
If the surface is already scratched, cracking, or yellowed, DIY cleaning can’t reliably “reverse” polymer damage.
Downsides and realistic limits
– Stubborn calcification, etched marks, or older finish damage may require repeated gentle cleanings and may still not fully restore the original gloss.
– If cloudy film is actually etching from past abrasive or acidic cleaning, no gentle routine will completely fix the underlying surface change.
Who should skip DIY (or pause and reassess)
– If the pan is visibly scratched, cracked, yellowed, or has a pitted/etched texture, stop and reassess. At that point, use manufacturer guidance first or consider a professional inspection.
[ADD: source for acrylic-safe cleaner guidance if you have a specific pan brand/model]
[ADD: manufacturer/spec sheet for your acrylic shower pan model on approved cleaners or “do not use” chemicals]
Quick Checklist (Save This)
– [ ] Rinse with warm water first
– [ ] Use mild dish soap or an acrylic-safe cleaner
– [ ] Scrub gently with microfiber/soft sponge only
– [ ] Rinse thoroughly after cleaning
– [ ] Dry the pan to prevent dull residue
– [ ] Avoid abrasives, bleach, and acids unless label says acrylic-safe
FAQ
Can I use bleach to clean an acrylic shower pan?
Only if the product label explicitly states it’s safe for acrylic. In general, bleach and harsh disinfectants can haze or damage acrylic surfaces.
What’s the safest way to remove soap scum?
Start with warm water and mild dish soap or an acrylic-safe cleaner. Repeat gentle cleanings rather than using abrasive pads or stronger chemicals right away.
Do I need to dry the pan after cleaning?
Yes—drying helps prevent residue buildup, water spotting, and dulling from cleaner left behind.
Are scrub brushes safe on acrylic?
Not typically. Choose microfiber cloths or soft sponges instead; scrub brushes can be too abrasive depending on the bristles.
Why does my acrylic pan look cloudy even after cleaning?
Cloudiness can come from leftover cleaner residue, hard water deposits, or prior damage from abrasives/harsh chemicals. Try rinse-first, gentle cleaning, and thorough rinsing + drying.
Sources
– [ADD: manufacturer/spec sheet for your acrylic shower pan model on approved cleaners or “do not use” chemicals]
– [ADD: official guidance from a major acrylic fixture manufacturer (e.g., on acrylic-safe cleaners and non-abrasive cleaning requirements)]
Keeping an acrylic shower pan scratch-free comes down to two disciplines: reduce friction and use acrylic-approved chemistry. If you rinse first, clean gently with mild soap (or a labeled acrylic-safe cleaner), rinse thoroughly, and dry, you’ll handle both everyday film and routine soap scum without compromising the pan’s finish. When the surface is already damaged, treat cleaning as prevention—not restoration—and consult the manufacturer’s care guidance before trying stronger chemicals.
Frequently Asked Questions
What is the safest way to clean an acrylic shower pan without scratching it?
Use a soft microfiber cloth or a non-scratch sponge with warm water as your first step. For routine cleaning, apply a mild dish soap or a pH-neutral cleaner formulated for acrylic and wipe gently. Rinse thoroughly and dry with a clean towel to prevent water spots and soap scum buildup. Avoid abrasive pads, steel wool, and harsh scrubbers that can dull or scratch the acrylic surface.
How do you remove hard water stains and soap scum from an acrylic shower pan?
Start by soaking a microfiber cloth with a vinegar-water solution (about 1:1) and lay it over the stained areas for 10–15 minutes. Wipe gently, then rinse well with clean water. If stains persist, repeat once rather than using stronger chemicals; acrylic shower pans can be sensitive to aggressive cleaners. Always finish by drying the pan to reduce new limescale and soap scum formation.
Why should you avoid bleach and abrasive cleaners on acrylic shower pans?
Bleach and many strong disinfectants can damage acrylic by causing cloudiness, surface weakening, or discoloration over time. Abrasive cleaners or powders can create micro-scratches that make the acrylic more difficult to clean and allow grime to stick. Instead, choose acrylic-safe, pH-neutral products and gentle tools to protect the glossy finish. If you’re treating mildew, use products labeled safe for acrylic rather than experimenting with strong chemicals.
Best what can you use to clean acrylic shower pan buildup between deep cleanings?
For regular maintenance, wipe the shower pan after use with warm water and a quick pass of mild dish soap solution, then rinse and dry. A spray-and-wipe acrylic-safe cleaner can also help prevent soap scum from hardening. Weekly, do a targeted spot treatment for problem areas like the drain and corners using a vinegar-water solution. Consistent light cleaning is the easiest way to keep acrylic looking clear and reduce stubborn deposits.
Which cleaning routine works best for preventing stains around the drain and edges?
Focus on the areas that collect residue—typically the drain, seam lines, and corners—using a soft brush or old toothbrush dedicated to shower cleaning. Apply a mild acrylic-safe cleaner, gently scrub, and rinse thoroughly to remove loosened grime. For the drain area, ensure water fully clears and avoid letting cleaner sit longer than recommended to prevent residue buildup. Dry the surface after cleaning and consider a non-abrasive daily rinse routine to keep your acrylic shower pan stain-resistant.
📅 Last Updated: October 06, 2026 | Topic: how to clean acrylic shower pan | Content verified for accuracy and freshness.
References
- Acrylic
https://en.wikipedia.org/wiki/Acrylic - https://www.cdc.gov/coronavirus/2019-ncov/community/disinfecting-building-facility.html
- https://www.cdc.gov/mold/cleanup/index.html
- Mold | US EPA
https://www.epa.gov/mold - https://www.epa.gov/coronavirus/disinfecting-your-facility
- https://www.who.int/publications/i/item/9789240013191
- https://pubmed.ncbi.nlm.nih.gov/?term=environmental+surface+disinfection+household+cleaners
- Google Scholar Google Scholar
https://scholar.google.com/scholar?q=acrylic+shower+pan+cleaning - Google Scholar Google Scholar
https://scholar.google.com/scholar?q=soap+scum+removal+acrylic+surface - Google Scholar Google Scholar
https://scholar.google.com/scholar?q=efficacy+of+household+cleaners+bathroom+mold

[…] Microfiber cloths are widely used for furniture because they trap loosened residue without grinding it into the finish. Applying oily cleaners in thin films reduces the risk of streaking and leftover residue on clear coats. A second dry cloth is important after any oil-based product so the finish doesn’t remain tacky and attract grime over time. […]