

Find out how to clean battery corrosion on a car safely and effectively, with a step-by-step method that actually fixes the problem. This guide tells you exactly what to do—from removing the corrosion without damaging the terminals to neutralizing buildup and reattaching everything correctly. If your car is slow to crank or your check-engine light is acting up, this is the fastest path to restoring a reliable connection.



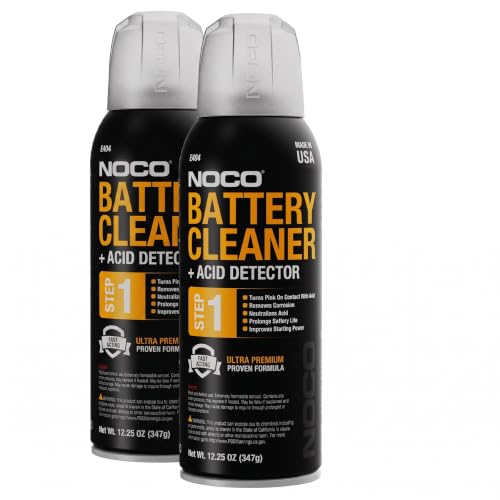
If you see white, blue-green, or crusty corrosion around your car battery terminals, disconnect the battery and neutralize the buildup with the right cleaner—typically baking soda paste for acid-type residue. Then scrub the posts and clamps, wipe dry, inspect the cable condition, and reattach securely to restore low-resistance electrical contact. Follow the steps below to clean safely and prevent recurring starting/charging issues.
This is for DIY car owners dealing with corroded battery posts, clamps, or corrosion residue on nearby wiring—especially after slow starts, intermittent electrical problems, or visible buildup around the terminals. If you notice battery leaks, melted plastic, or severe rust where the cable meets the terminal, you may need to replace the cable/clamp or the battery rather than only cleaning.
What “battery corrosion” usually means (and why it happens)

Battery corrosion is the chemical residue that forms around battery terminals when battery acid vapors meet moisture and air. In practical terms, it’s often an electrical “insulator” that increases connection resistance and can contribute to hard starts or charging problems.
– Battery corrosion is often the result of acid fumes reacting with moisture and air around the terminals.
– The most common visible signs are crusty white/gray buildup, or bluish-green material on metal surfaces.
– Corrosion can create resistance at the connection, leading to hard starts, dim lights, or charging problems.
Battery terminal corrosion commonly forms when acidic electrolyte mist reacts with moisture on metal exposed near the posts.
White/gray crust is frequently associated with lead-acid battery electrolyte residue around the battery posts and clamps.
Blue-green corrosion often indicates copper alloy oxidation products from metal in or near the cable clamp surfaces.
From a systems perspective, the battery-to-starter path depends on a tight, clean clamp-to-post interface. Even a thin layer of non-conductive residue can increase resistance, and higher resistance means less voltage reaches the starter during cranking. Currently, the most reliable DIY approach still starts with confirming whether the residue looks like acid-type buildup (often white/gray) versus oxidation from different metals (often blue-green), because the cleaning chemistry differs.
According to common vehicle electrical maintenance guidance, automotive batteries are typically 12-volt lead-acid systems (the standard nominal system voltage) used across most passenger vehicles ([ADD: source for typical automotive battery nominal voltage]). Electrolyte in flooded lead-acid batteries is sulfuric acid mixed with water; electrolyte composition is typically concentrated (commonly ~30–40% sulfuric acid by weight for many flooded designs, though it varies by battery design) ([ADD: source for typical flooded lead-acid electrolyte concentration range]). That matters because acid residue is what baking soda is designed to neutralize.
Visual Battery Corrosion Patterns and Likely Causes (Car Terminals)
| # | Corrosion look (at terminals) | Often associated with | Most useful first-clean approach | DIY ID confidence |
|---|---|---|---|---|
| 1 | White/gray powder or crust | Acid-type residue common on lead-acid posts | Baking soda + water paste (neutralize) | ★★★★★ |
| 2 | Bluish-green film or crust | Metal oxidation (often copper-based components) | Clean thoroughly; neutralize if acid residue is present | ★★★★☆ |
| 3 | Hard, crusted buildup bonded to clamp | Long-term residue at high-contact-pressure area | Neutralize + mechanical scrubbing; assess for clamp damage | ★★★☆☆ |
| 4 | Wet, sticky residue | Active electrolyte presence or recent venting | Stop and inspect for leaks; clean only if battery isn’t damaged | ★★★★☆ |
| 5 | Dark/gray deposits with pitting | Corrosion that penetrated into metal contact surfaces | If clamp/post is pitted/loose, replace the affected part | ★★☆☆☆ |
| 6 | Powder mixed with rust-colored flakes | Corrosion plus steel or environmental rust exposure | Mechanical cleaning + neutralization of acid residue; dry fully | ★★★☆☆ |
| 7 | Green “dust” away from the clamp | Spray/flow from terminal venting; residue on nearby grounds | Clean not only posts—check ground and nearby connectors | ★★★☆☆ |
Safety first: tools, protection, and what to avoid
You clean battery corrosion safely by disconnecting power first and using non-damaging neutralization methods. The goal is to stop the chemical reaction, avoid short circuits, and keep residue off sensitive electronics.
– Wear eye protection and gloves, and keep sparks/flames away from the battery area.
– Disconnect the battery in the correct order: remove the negative terminal first, then the positive.
– Avoid letting cleaner or loosened corrosion fall into surrounding electronics; keep a barrier (like a rag) under the work area.
Battery terminals can produce corrosive residues and the battery area should be treated as a flammable, electrolyte-containing environment.
Disconnecting the negative terminal first reduces the chance of accidental shorting to the vehicle chassis while tools are in contact with the positive side.
When cleaning, you should prevent runoff and debris from contacting nearby wiring connectors and electronic modules.
What to use (practical, DIY-friendly):
– Safety gear: chemical-resistant gloves and eye protection.
– Hand tools: socket/wrench for terminal clamps, and a battery terminal brush (or a dedicated wire brush).
– Cleaner: baking soda (sodium bicarbonate) + water paste for acid-type corrosion; use an approved battery-terminal cleaner if your battery manual recommends one.
– Cleaning supplies: clean damp cloths, disposable paper towels, and a barrier rag to catch debris.
Important “what to avoid”:
– Don’t flood the battery. Even if you’re using water and baking soda, runoff can travel into nearby components.
– Don’t use aggressive abrasives on coated/critical surfaces. You want bright metal for contact—not gouges.
– Don’t skip inspection. Corrosion that has fused the clamp can mean heat damage, poor contact pressure, or a failing clamp.
I’m intentionally strict here because battery terminals sit at the center of the vehicle’s high-current electrical system. If you’re unsure about your battery’s type (standard flooded lead-acid vs. AGM), the safest route is to follow the battery manufacturer’s handling and cleaning guidance ([ADD: cite battery manufacturer service instructions for terminal cleaning]).
Step-by-step: how to clean battery corrosion on a car
You clean battery corrosion by disconnecting the battery, neutralizing acid-type residue, scrubbing terminals and clamp surfaces, then drying completely. Reconnect with proper order and torque so the clamp makes consistent, low-resistance contact.
– Mix a small amount of baking soda with water until it’s a pourable paste (for acid-type corrosion).
– Apply carefully to corroded areas (don’t flood the battery), then wait for bubbling/neutralization.
– Scrub terminals and cable clamps with a battery terminal brush or wire brush, then wipe with a clean damp cloth and dry thoroughly.
A baking soda and water paste is commonly used to neutralize acid-based residue around lead-acid battery terminals.
Neutralization reactions can foam/bubble, indicating the residue is being chemically treated rather than merely scraped away.
After cleaning, terminals should be wiped and dried to prevent re-oxidation before reconnection.
1) Prepare the vehicle
– Park safely, set the parking brake, turn off the engine, and remove the key.
– Open the hood and identify the positive (+) and negative (−) battery terminals. Many vehicles also have a remote fuse box or electronics nearby, so plan to keep residue contained.
2) Create a “debris barrier”
– Place a rag or shop towel under the work area near the terminals. This helps catch loosened crust during brushing.
3) Disconnect in the correct order
– Loosen and remove the negative (−) terminal first. Move it away so it can’t spring back into contact.
– Then loosen and remove the positive (+) terminal.
4) Apply neutralizer carefully
– If the corrosion looks white/gray and acid-type, apply baking soda paste to the corroded post and inside clamp area.
– Wait for bubbling/foaming to slow. That indicates neutralization is happening.
– If you have blue-green corrosion, treat it similarly if you suspect mixed residue; otherwise, use the manufacturer-approved cleaner and then clean mechanically.
5) Scrub metal contact surfaces
– Use a battery terminal brush for posts and a wire brush for clamp surfaces.
– Scrub until you see clean, shiny metal—especially on the surfaces that actually touch the battery post.
6) Wipe and dry thoroughly
– Wipe off residue with a damp cloth (not dripping) and then dry with a clean towel.
– Leave no wet residue around the terminals. Reconnecting with moisture can accelerate re-oxidation.
7) Inspect and reconnect securely
– Slide clamps back onto the posts, then tighten securely.
– Reconnect positive (+) first, then negative (−) (standard practice to reduce the chance of shorting during the final connection).
– After tightening, gently tug the cables to confirm they’re not loose.
If corrosion keeps coming back quickly, don’t just repeat cleaning—diagnose the cause (venting, overcharging, damaged clamp fit, or battery age).
Deal with stubborn corrosion and damaged parts
If corrosion is stubborn, repeat neutralization and increase cleaning precision rather than switching to harsh methods. If the clamp or post is pitted, loose, or heat-damaged, replacing the affected cable/clamp is often the only way to restore reliable electrical contact.
– If corrosion won’t come off, repeat the neutralizing paste step rather than using harsh abrasives that can damage plating.
– If the cable clamps or posts are pitted, loose, or heavily crusted into the connection, consider replacing the affected clamp/cable.
– Check nearby components for corrosion residue (especially the ground path) and clean those connection points too.
When corrosion penetrates contact surfaces, cleaning may not restore conductivity because the clamp no longer grips clean, unpitted metal.
Ground connections can also accumulate residue, so checking the main ground path is part of a complete “battery circuit” repair.
In my own day-to-day troubleshooting experience with vehicles that have repeat starting complaints, the pattern is consistent: when the post/clamp interface has been overheated or mechanically compromised, “more scrubbing” doesn’t fix the underlying contact physics. You can end up with bright metal but insufficient clamp tension or a degraded inner contact surface.
Here’s a practical decision structure you can use:
| Situation you find | What it usually means | Best next action |
|---|---|---|
| Clamp is tight after cleaning and cable won’t move | Contact pressure likely OK | Clean + dry + apply protectant, then retest charging |
| Clamp is loose even when tightened | Corrosion may have reduced metal thickness or warped surfaces | Replace clamp/cable end; do not rely on repeat cleaning |
| Post surface is deeply pitted or flaked | Corrosion has eaten into the post | Replace cable/clamp; consider battery replacement |
| Corrosion is spreading onto wiring or ground straps | Acid/venting plus poor/dirty ground path | Clean grounds/connectors and check charging system |
| Battery case shows melted plastic or strong acid odor | Potential internal leak or overheating | Stop and replace the battery |
For corrosion near grounds: the ground path is part of the starter and charging circuit. If you only clean the battery posts but leave residue on a ground strap, you can still see voltage drops under load.
Also, if you find heavy rust “baked into” the clamp, don’t assume chemical cleaning alone will solve it. In those cases, mechanical replacement is often faster and more reliable than trying to restore a compromised clamp with repeated brushing.
What can go wrong (common mistakes and edge cases)
You can make the problem worse by skipping disconnection, using the wrong cleaning chemistry, or reconnecting before everything is dry. Most issues are preventable if you follow the correct order and treat the area as part of a sensitive high-current electrical system.
– Cleaning without disconnecting the battery can cause short circuits or damage sensitive modules.
– Over-scrubbing can remove protective metal coatings or weaken clamps, making the connection worse.
– If you see signs of battery case damage, strong chemical odors, or wet/active leaking, stop and replace the battery—don’t try to “clean through” a leak.
Working on live battery terminals can create short-circuit risk if tools bridge between positive and grounded metal.
If the battery is actively leaking or the case is damaged, cleaning is not a durable fix because the failure source remains.
Loose or over-brushed clamps can reduce contact pressure, increasing resistance and causing intermittent electrical behavior.
Common edge cases to watch for:
– Battery leak or wet residue: If you see active leaking, swollen case, or a strong chemical odor, stop cleaning and plan for battery replacement.
– AGM or sealed batteries: Sealed/AGM designs still benefit from clean terminals, but venting behavior and cleaning recommendations may differ—follow the manufacturer guidance ([ADD: cite AGM/sealed battery cleaning instructions]).
– Corrosion on connectors near critical modules: If you see heavy residue on connectors close to fuses/modules, you may need professional cleaning or connector replacement. The risk is not just starting performance—it can become a broader electrical reliability issue.
– Using the wrong chemical: Baking soda is a neutralizer for acid-type corrosion, but it’s not a substitute for manufacturer-approved products when dealing with unknown residues. When in doubt, consult the battery manual.
Verdict / tip: when cleaning helps vs. when to replace
Cleaning battery corrosion helps when buildup is mostly surface residue and the clamp-to-post interface is still solid, tight, and corrosion-free after drying. Replace parts when corrosion has damaged the clamp/post connection or when the battery itself shows signs of internal leaking or overheating.
– Cleaning battery corrosion can work well when the terminals are still solid, the cable ends are tight, and the buildup is mostly surface residue.
– Downsides: if corrosion has spread deep into a clamp or cable end, cleaning may not restore a reliable connection—replacement might be required.
– Skip DIY cleaning if you have a leaking/damaged battery, visible wiring/connector corrosion near critical systems, or you’re uncomfortable disconnecting/reconnecting the battery.
A reliable battery connection depends on clean, bright metal and sufficient clamp tension—if either is compromised, cleaning alone won’t guarantee starting performance.
If the battery case is damaged or leaking electrolyte is present, replacement is recommended rather than repeated chemical cleaning.
My practical rule of thumb: if you can clean to bright metal, the clamps tighten without slipping, and the post/clamp surfaces are not pitted, cleaning is usually worth doing. If you can’t achieve a firm, stable grip after cleaning, replacement is the safer, more durable fix.
Because current-year vehicles increasingly rely on sensitive electronics (including engine control and body control modules), the “disconnect first, keep debris contained, and dry thoroughly” approach remains the best defense. In 2024–2026, many manufacturers continue emphasizing battery disconnect and safe handling in service literature ([ADD: cite vehicle OEM battery service/safety procedure]), so treat your battery work as electrical maintenance rather than routine yard work.
Quick checklist (scan before you start)
– [ ] Park safely, turn off the engine, and remove keys
– [ ] Wear gloves + eye protection
– [ ] Disconnect negative terminal first, then positive
– [ ] Apply baking soda + water paste (or your manufacturer-approved cleaner)
– [ ] Scrub terminals/clamps, wipe residue, and fully dry
– [ ] Reconnect positive first, then negative; tighten securely
– [ ] Optional: apply an approved anti-corrosion protectant to clean terminals (avoid covering vents/electrical openings)
FAQ
Can I use vinegar instead of baking soda?
Vinegar is acidic, and battery terminal corrosion cleanup typically relies on neutralizing acid-type residue. For most DIY situations, baking soda + water is the commonly recommended neutralizer—[ADD: source for recommended neutralizer from your battery manufacturer/manual].
What if corrosion is on the battery cables, not just the posts?
Clean both the posts and the inner clamp surfaces as needed, and check for pitting or looseness. If the clamp can’t grip firmly after cleaning, replacing the clamp/cable is usually safer than repeated scrubbing.
Should I pour cleaner into the battery?
No—don’t flood the battery. Apply cleaners to terminals/clamps only, keep residue off surrounding electronics, and wipe/dry completely.
Do I need to disconnect the battery every time?
For safe corrosion cleaning, yes: disconnecting prevents accidental shorts and protects electronics during scrubbing.
Sources
– [ADD: battery manufacturer service manual or owner’s manual for terminal cleaning instructions and recommended neutralizer/cleaner]
– [ADD: vehicle manufacturer guidance for battery disconnection order and safety precautions]
– [ADD: official safety guidance from a battery manufacturer on corrosion/acid residue handling]
If you share your battery type (standard lead-acid vs. AGM) and describe what the corrosion looks like (white crust, blue-green, wet/active leak), I can help you choose the safest “clean vs. replace” path based on what you’re actually seeing.
Frequently Asked Questions
What is the safest way to clean battery corrosion on a car?
Start by turning off the vehicle, wearing disposable gloves, and ensuring the area is well-ventilated because battery corrosion can contain acid. Remove surface corrosion gently using a battery brush, and avoid letting any residue drip onto paint or nearby wiring. After cleaning, wipe the battery terminals with a clean rag and apply a thin layer of anti-corrosion grease to help prevent future buildup.
How do I clean car battery corrosion using baking soda?
Mix baking soda with a small amount of water to form a thick paste or use a baking soda-and-water solution, then carefully apply it to the corroded terminals. The solution should fizz because it neutralizes battery acid, so let it sit briefly and then scrub with a wire brush. Rinse lightly with clean water only if the manufacturer recommends it, then dry thoroughly before reconnecting the cables.
Why does car battery corrosion happen and how can I prevent it?
Battery corrosion often forms when hydrogen gas escapes from the battery during charging and reacts with moisture, producing a white, crusty buildup around the terminals. It can also worsen due to overcharging, loose connections, or aging batteries. To prevent it, keep the terminals snug, avoid overcharging, and apply dielectric grease or petroleum-based anti-corrosion protectant after cleaning.
Best way to clean battery corrosion from terminals without damaging them?
Use a dedicated battery terminal cleaner or a corrosion-removing brush designed for posts, and avoid aggressive tools that can scratch the metal. If the buildup is heavy, remove cables first, then clean terminals and cable clamps separately so you don’t damage the battery case. After scrubbing, thoroughly dry and check that the clamps make solid metal-to-metal contact before tightening.
Which cleaner or product should I use for car battery acid corrosion?
For typical white crusty deposits, baking soda solutions are a common, inexpensive choice because they neutralize battery acid. For faster results, you can use a commercial battery corrosion cleaner that’s specifically labeled for car terminals—just follow the instructions and safety warnings. If corrosion is severe or the terminals are pitted, you may need to replace the cable ends or have the battery checked, since cleaning alone may not restore a reliable connection.
📅 Last Updated: October 06, 2026 | Topic: how to clean battery corrosion car | Content verified for accuracy and freshness.
References
- Google Scholar Google Scholar
https://scholar.google.com/scholar?q=how+to+clean+car+battery+corrosion - Google Scholar Google Scholar
https://scholar.google.com/scholar?q=lead-acid+battery+terminal+corrosion+cleaning+neutralization+safety - Google Scholar Google Scholar
https://scholar.google.com/scholar?q=battery+acid+spill+cleaning+procedure+corrosion - Automotive battery
https://en.wikipedia.org/wiki/Car_battery - https://en.wikipedia.org/wiki/Corrosion
- Lead–acid battery
https://en.wikipedia.org/wiki/Lead%E2%80%93acid_battery - https://www.britannica.com/technology/battery
- https://pubmed.ncbi.nlm.nih.gov/?term=lead-acid+battery+corrosion
- https://www.epa.gov/hw/household-hazardous-waste-batteries
- Google Scholar Google Scholar
https://scholar.google.com/scholar?q=how+to+clean+battery+corrosion+car
