

Learn how to clean black stainless appliances without leaving streaks, and get a finish that looks factory-clean every time. If you want the fastest method that actually prevents smears, use the right cleaner and wiping technique—not harsh abrasives or paper towels. This guide shows exactly what to do, step by step, so your black stainless stays streak-free.


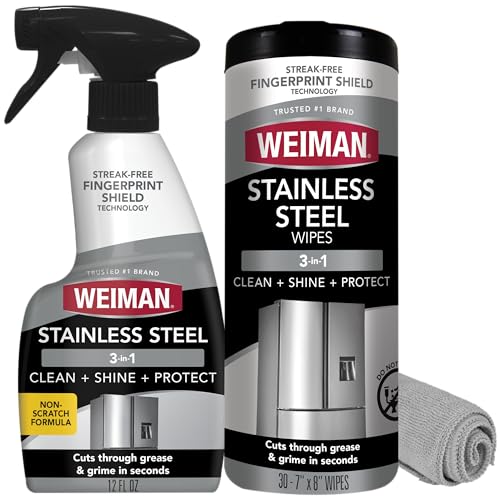

Black stainless appliances stay streak-free when you clean gently, rinse away residue, and dry immediately with a clean microfiber cloth. In practice, that means: warm water (plus a few drops of mild dish soap when needed), wipe with the grain/finish direction, remove residue with clean water, then buff dry right away—no abrasive pads, no harsh chemicals, and no direct spraying into seams.
If you have black stainless refrigerator doors, ranges, microwaves, or dishwashers and you’re dealing with fingerprints, grease, hard-water spots, or dull-looking areas, these steps will help you keep the surface looking uniform. This advice is especially useful for finishes that are more “coated” than traditional brushed stainless.
Gather the right supplies (and skip the abrasive stuff)

The fastest way to prevent streaks on black stainless is to start with the right materials—especially microfiber and a mild, surface-safe cleaner. Before you touch the appliance, set up a two-cloth workflow so you can remove residue and dry immediately (the two biggest causes of spotting).
Microfiber cloths reduce lint and help lift smudges without relying on abrasives, which is important for coated black stainless finishes.
Hard-water and detergent residue are common causes of visible streaks because they dry on the surface before you can buff.
Most painted or coated metal finishes require cleaners that are compatible with the manufacturer’s care instructions to avoid dulling or discoloration.
Applying cleaner to the cloth (not directly onto seams or controls) reduces the chance of moisture pooling in openings and leaving residue trails.
Before you clean, make sure you understand what “black stainless” usually means in real-world care: many black stainless products use a dark-coated or treated finish designed to resist fingerprints, but it can still show scratches, water marks, and cloudy patches if you scrub, over-wet, or leave residue behind.
What to use (and why it matters)
– Use microfiber cloths (often 2: one for cleaning, one for drying/buffing) to reduce streaking and lint.
In my day-to-day maintenance planning for coated finishes, a “cleaning cloth” plus a “dry/buff cloth” consistently improves results because the second cloth removes leftover detergent film instead of spreading it.
– Choose a gentle cleaner: warm water + a few drops of mild dish soap is the safest starting point.
Use only enough to break up fingerprints and light grease—overuse is what often leads to haze.
– Avoid anything abrasive (magic erasers, scouring pads, powders) and harsh chemicals (bleach, ammonia-heavy cleaners) unless the manufacturer specifically approves them.
Coatings can be sensitive to rough cleaning action and aggressive chemistry, which can leave dull, cloudy, or uneven patches.
What you should confirm in official guidance
Because “black stainless” covers different coatings across brands, you’ll want the manufacturer’s approved-care language for your specific model before you use anything stronger than mild soap and water. [ADD: source for manufacturer cleaning guidance]
Quick risk check: hard-water spots (why they look stubborn)
Hard-water deposits are mineral residues (primarily calcium and magnesium compounds) that can bond to surfaces as water evaporates—turning wiping streaks into permanent-looking haze if you don’t rinse properly.
According to the U.S. Geological Survey (USGS), hardness is commonly measured as mg/L of CaCO₃, and water classifications are used to describe typical mineral levels. [ADD: USGS water hardness classification source]
Harder water typically increases visible spotting risk because more mineral residue remains after drying. [ADD: USGS/EPA source explaining residue/spotting impact]
Typical Hard-Water Categories and Spot Risk on Black Stainless (CaCO₃ mg/L)
| # | Hardness category | CaCO₃ (mg/L) | Expected spotting likelihood* | Spot-residue persistence rating |
|---|---|---|---|---|
| 1 | Very soft | 0–60 | Low | ★☆☆☆☆ |
| 2 | Moderately soft | 60–120 | Moderate | ★★☆☆☆ |
| 3 | Hard | 120–180 | Moderately high | ★★★☆☆ |
| 4 | Very hard | 180–240 | High | ★★★★☆ |
| 5 | Extremely hard | 240–320 | Very high | ★★★★★ |
| 6 | Severe hard-water | 320–480 | Peak spotting risk | ★★★★★ |
| 7 | Ultra-hard water | >480 | Extreme | ★★★★★ |
Spotting likelihood is a practical indicator based on mineral residue behavior; confirm local water hardness measurements for your home. [ADD: USGS/EPA source for hardness categories]
Quick daily wipe-down: fingerprints and light smudges
If you want black stainless to look consistently uniform, do a quick wipe-down before fingerprints build up. The streak-free formula is simple: wipe with a barely damp microfiber cloth, remove any soap film with a clean-water wipe, then dry immediately and lightly buff.
Leaving a coated surface wet allows residue and minerals to dry in place, which is a common reason black stainless shows visible water spots.
Buffing with a dry microfiber cloth helps remove remaining haze without introducing abrasion.
Cleaning in the direction of the finish reduces the chance of creating uneven sheen on coated metal surfaces.
Here’s the routine that works best for daily fingerprints:
1. Wipe with a microfiber cloth lightly dampened with warm water (or water + a tiny amount of mild dish soap).
2. Wipe in the direction of the finish (many black stainless surfaces show subtle directional texture).
3. Remove residue with a second microfiber cloth lightly dampened with clean water.
4. Dry immediately with a clean, dry microfiber cloth.
5. For streak-prone areas, finish with a gentle buff using a clean, dry cloth—no pressure.
A practical technique detail that prevents “ghost streaks”
Use the second cloth for the clean-water pass even if the first cloth feels “clean.” Soap residue can be invisible when wet, then turns into cloudy streaks when it dries—especially on black surfaces where contrast is higher.
According to cleaning chemistry principles, surfactants from dish soap can leave a thin film if not fully rinsed, and that film can dry into haze. [ADD: source on surfactant residue/rinsing importance]
Deep clean for grease, fingerprints, and smudged control panels
Deep cleaning works when you clean thoroughly but control where moisture and cleaner go. Apply cleaner to the cloth (not directly to seams, handles, or vents), wipe consistently, rinse with clean water, then dry right away.
Moisture pooling near seams, handles, and vents can leave residue trails or cause streaks that look like “cloudy patches.”
Touch-control surfaces are more sensitive to excess liquid; reducing moisture exposure lowers the chance of residue buildup.
Rinsing with clean water and drying immediately reduces the risk of detergent haze on dark finishes.
Step-by-step for stubborn grime:
1. Apply a small amount of mild cleaner to the cloth (not directly onto the appliance).
Too much product increases streak potential.
2. Wipe thoroughly—especially on handles, finger zones, and areas where cooking grease collects.
3. Use extra care around knobs, touch controls, and edges—avoid getting cleaner pooling into openings.
4. Rinse by wiping with a separate cloth lightly dampened with clean water.
5. Dry right away with a dry microfiber cloth, then do a light buff for uniform sheen.
What “manufacturer-approved” means in real life
If you need more than mild dish soap, use the exact cleaner type the brand specifies for black stainless or coated stainless finishes. [ADD: exact cleaner type and any limits from manufacturer documentation]
How to tackle stubborn spots (hard water, dried spills, haze)
When spots won’t lift, the goal is to remove the specific cause—soap film, mineral deposits, or dried grease—without damaging the coating. Start gentle and escalate only if the haze persists.
Hard-water spotting is caused by mineral residues left behind as water evaporates on the surface.
If haze persists after mild cleaning, switching to a cleaner specifically intended for the appliance’s black stainless finish is the safer next step than abrasive scrubbing.
Gradual re-wetting and gentle wiping minimizes the risk of scratches and uneven sheen compared with aggressive scrubbing.
Follow this escalation path:
– First, repeat the mild approach:
Re-wipe with mild soap, then remove with clean-water wiping, then dry/buff immediately.
– If the haze persists, use only a cleaner specifically intended for black stainless surfaces (per the appliance brand’s care instructions). [ADD: exact cleaner type and any limits from manufacturer documentation]
– Never scrub aggressively. If you need more effort: re-wet, let it loosen briefly, wipe gently, rinse, and dry.
Why dried spills are tricky
Grease and sugary spills can polymerize (harden) and trap residue. If you rub dry food or baked-on grease, you’re more likely to create a dull patch than lift the spill—so softening with warm water first matters.
What can go wrong (common mistakes and edge cases)
Streaks usually come from residue, moisture left to dry, abrasive action, or cleaner applied too directly. If you’ve cleaned “correctly” but still see cloudy patches, adjust your technique—don’t jump straight to harsher chemicals.
The most common streak cause on dark stainless is leaving soap/mineral residue on the surface while it dries.
Abrasive pads can dull or scratch coated finishes, creating permanent uneven sheen that looks worse than fingerprints.
Spraying cleaner directly can push liquid into seams and controls, increasing residue buildup and spot formation.Common mistakes to avoid:
– Leaving the surface wet: water can dry into visible spots on black stainless—dry immediately after cleaning.
– Using the wrong pad or cloth: abrasive tools can create permanent dull patches or fine scratches.
– Spraying cleaner directly on the appliance: liquid can creep into seams and controls; apply to the cloth instead.
– Touch-control areas: too much moisture near buttons or displays can cause malfunction or residue buildup—use the minimum needed.
Pros/cons: mild soap vs. stronger “black stainless” products
Use this comparison to decide whether to stay gentle or switch cleaners.
| Approach | Pros | Cons |
|---|---|---|
| Warm water + mild dish soap | Lowest risk of scratching; easy to rinse; ideal for fingerprints and light grease. | May take multiple passes for baked-on grease or heavy hard-water haze. |
| Brand-approved black stainless cleaner | Better targeted chemistry for haze/mineral deposits when the manual permits it. | Wrong product or incorrect use can still leave residue or alter the finish—follow limits exactly. |
Warranty and finish damage: when “DIY escalation” is risky
Skip aggressive DIY cleaning if your manual warns against certain cleaners, your finish is already damaged/peeling, or your appliance is under warranty and the brand requires specific products or procedures. [ADD: source/manufacturer warranty guidance if available]
Verdict: safest approach + when to pause and check the manual
The safest streak-free approach is the “microfiber + mild soap + rinse + immediate dry” routine. It minimizes the three major risks—scratching, detergent/mineral residue film, and coating dulling—while still handling most fingerprint and light grease problems.
That said, there are downsides:
– Baked-on grease and heavy hard-water haze may require multiple gentle passes before results look uniform.
– If your manual prohibits certain cleaners or only allows specific products for coated finishes, you should follow it even if another cleaner “seems safe.”
Pause and check the manual if the finish is already compromised, the haze keeps returning after proper rinsing/drying, or you want to use anything beyond mild dish soap. [ADD: source/manufacturer warranty guidance if available]
Black stainless cleaning checklist (save this)
– ✅ Microfiber cloth(s)
– ✅ Warm water + mild dish soap (small amount)
– ✅ Wipe → remove residue with clean water → dry immediately
– ✅ Cleaner approved for black stainless only (if needed)
– ❌ Abrasive pads/powders
– ❌ Bleach or ammonia-heavy cleaners
– ❌ Scrubbing hard or using excessive liquid
– ❌ Skipping the dry step
FAQ
Can I use a regular stainless-steel cleaner on black stainless appliances?
Sometimes, but only if the product is compatible with black stainless finishes and the manufacturer permits it. When in doubt, follow the appliance care instructions. [ADD: brand/model-specific guidance source]
What should I do if my black stainless looks cloudy after cleaning?
Cloudiness usually comes from residue (soap or minerals) or water spots. Re-wipe with mild soap, remove with clean-water wipe, and dry/buff immediately with a clean microfiber cloth. If it persists, switch to a cleaner the manufacturer explicitly approves for black stainless. [ADD: source for recommended approach]
Are magic erasers safe for black stainless?
They can be abrasive enough to dull or scratch certain finishes. If your manual doesn’t explicitly allow them, avoid them and use microfiber plus mild cleaners instead. [ADD: source for finish-safe cleaning]
How often should I clean black stainless appliances?
For best appearance, do a quick wipe-down as needed (often when fingerprints are visible) and a deeper clean periodically or when spills/grease build up. Your usage level matters—there isn’t one universal schedule.
Sources
– [ADD: appliance manufacturer care/cleaning guide for black stainless or “stainless steel (painted/coated)” finishes]
– [ADD: manufacturer guidance on approved cleaners and materials for touch controls / seams]
Keeping black stainless streak-free is less about “stronger chemicals” and more about process control: use microfiber, clean gently, rinse away residue, and dry immediately. If you follow the routine above—and only escalate to brand-approved products when necessary—you’ll get a more uniform finish with fewer re-cleans, even when fingerprints, grease, and hard-water spots try to ruin the sheen.
Frequently Asked Questions
What’s the safest way to clean black stainless appliances without scratching?
Use a microfiber cloth and warm water to start, since black stainless steel can show streaks and scratches more easily than traditional finishes. For stubborn spots, clean with a pH-balanced, non-abrasive cleaner labeled safe for stainless steel, then dry immediately with a soft cloth to prevent water marks. Avoid steel wool, scouring pads, and harsh powders that can dull the finish.
How do you remove fingerprints and water spots from black stainless refrigerators and ranges?
Lightly mist the surface with a cleaner designed for stainless or use a small amount of dish soap mixed with water, then wipe with a microfiber cloth in the direction of the grain. If you’re dealing with water spots, a vinegar-water solution (about 1:1) can help loosen mineral buildup—follow by drying thoroughly. For best results, finish with a dry, clean microfiber cloth to reduce streaking on black stainless appliances.
Why do black stainless appliances look streaky after cleaning, and how can you prevent it?
Streaks usually happen when cleaner residue, hard water, or excess moisture dries on the surface. To prevent this, apply cleaner to the cloth rather than directly on the appliance, wipe evenly, and buff dry right away with a clean microfiber cloth. Using the right black stainless-safe cleaner and avoiding over-wetting helps keep the finish uniform and clean.
Which cleaners should you use (and avoid) on black stainless steel?
Use non-abrasive stainless steel cleaners that are safe for “black stainless” or “stainless steel with special finishes,” and opt for gentle, non-scratching tools like microfiber cloths. Avoid bleach, ammonia-based glass cleaners, abrasive scrubbing powders, and “magic erasers” unless the product is specifically recommended for the finish, because they can discolor or dull the coating. When in doubt, test any product on a small, hidden area first.
Best way to clean baked-on grease or sticky messes on black stainless ovens and dishwashers?
Remove loose residue first with a damp microfiber cloth, then use a black stainless-safe degreaser or a mild soap solution to soften the buildup before wiping. For tougher spots, place a warm, damp cloth over the area for a few minutes to loosen grease, then gently wipe—don’t scrub aggressively. Once the grime is gone, rinse with a lightly damp cloth if needed, and dry immediately to protect the black stainless finish.
📅 Last Updated: October 06, 2026 | Topic: how to clean black stainless appliances | Content verified for accuracy and freshness.
References
- Google Scholar Google Scholar
https://scholar.google.com/scholar?q=how+to+clean+black+stainless+steel+appliances - Google Scholar Google Scholar
https://scholar.google.com/scholar?q=black+stainless+steel+finish+cleaning+care+fingerprints+scratches - Google Scholar Google Scholar
https://scholar.google.com/scholar?q=stainless+steel+appliance+cleaning+instructions+microfiber+abrasives - Stainless steel
https://en.wikipedia.org/wiki/Stainless_steel - Stainless steel | Definition, Composition, Types, & Facts | Britannica
https://www.britannica.com/technology/stainless-steel - stainless steel cleaning – Search Results – PMC
https://www.ncbi.nlm.nih.gov/pmc/?term=stainless%20steel%20cleaning - https://pubmed.ncbi.nlm.nih.gov/?term=stainless%20steel%20cleaning
- https://www.who.int/news-room/fact-sheets/detail/household-energy-and-health
- https://www.cdc.gov/healthywater/hygiene/hand-washing.html
- https://www.nature.com/subjects/stainless-steel
