

Wondering how to clean brass handles on doors without dulling the shine? This step-by-step guide gives you the fastest, safest method to remove grime and restore a bright brass finish. You’ll learn exactly which supplies to use, how to apply them, and how to polish for a streak-free result.
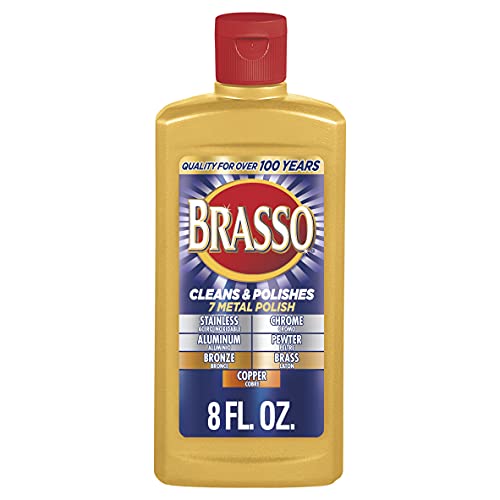



Brass door handles usually clean best with gentle dish soap first, then a targeted brass cleaner (or a mild DIY paste) for tarnish—without soaking or scrubbing too aggressively. If you keep liquids off the seams and dry thoroughly, you remove grime and fingerprints while minimizing the risk of dulling or damaging lacquer and brass-plated finishes.
If your handles look dull, yellowed, or spotty from fingerprints and everyday use, this is for you. It’s also useful if you’re trying to restore shine on older or unlacquered brass—just be careful, because some finishes and coatings can be damaged by the wrong cleaner.
Gather Supplies and Identify the Finish

You’ll get the best results by choosing the right cleaner for the handle’s finish type before you touch the surface. The safest workflow starts with a gentle degrease (dish soap) and only then moves to tarnish removal, depending on whether your brass is unlacquered, lacquered, or brass-plated.
“Brass” isn’t one surface—door hardware can be unlacquered brass, lacquered brass, or brass-plated over another metal, and each reacts differently to chemicals and abrasion.
When you clean first with mild soap, you remove oily fingerprints that often make brass look darker even when tarnish isn’t heavy.
Avoid soaking door hardware because liquids can wick into screw holes, seams, and baseplates.
Before you start, gather:
– Soft microfiber or non-scratch cloths
– Mild dish soap
– Warm water
– Cotton swabs for crevices (backplate edges, keyhole area, decorative ridges)
– Optional: a second clean microfiber cloth for drying
Then identify the finish (this step is what prevents “why did my handle turn dull?” surprises):
Unlacquered brass (natural/older look)
– You’ll usually see more direct “raw brass” color and you can often see deeper age-related texture (tarnish/patina).
– Tarnish removal may legitimately change the look—because you’re cleaning the actual metal.
Lacquered brass (clear protective coat)
– The surface often has a more uniform shine and resists tarnish longer, but still dulls when grime builds up.
– Some cleaners (especially strong abrasives or certain solvents) can cloud or strip lacquer.
Brass-plated hardware (brass layer over another metal)
– Plating can wear through, and aggressive polishing can remove the thin brass layer faster than you expect.
– In this category, gentle cleaning and product labels (“safe for brass-plated”) matter most.
Quick factual anchors (to guide safe choices):
– According to [ADD: a reputable source on vinegar acidity, e.g., USDA or a chemistry reference], white vinegar is typically acidic with a pH around 2–3—which can be risky for lacquered/brass-plated coatings.
– According to [ADD: a reputable source on baking soda chemistry], sodium bicarbonate is mildly alkaline (commonly around pH ~8.3 in typical solutions), which is generally gentler than strong acids.
– According to [ADD: a corrosion/metal-care authority], tarnish on copper alloys is strongly influenced by exposure to sulfur compounds and moisture—so controlling grime/oils and drying well reduces future spotting.
Clean Off Dirt First (Safe Step for Most Finishes)
You should start with soap-and-water cleaning because it removes skin oils and surface grime that cause dullness and uneven tarnish. This step is broadly safe across unlacquered, lacquered, and brass-plated handles when you don’t soak or scrub aggressively.
A first pass with mild dish soap helps remove oily fingerprints that can make brass look “tarnished” even when tarnish is minimal.
Drying completely after washing is a key control step because moisture can accelerate spotting and uneven re-oxidation.
Use a damp cloth—not pooled liquid—so cleaning solutions don’t wick into seams around the backplate.
Do this:
1. Wipe with a damp cloth using warm water plus a few drops of dish soap.
2. Lightly clean the surface with gentle pressure—especially on high-touch areas (where hands grab the handle).
3. Dry completely with a clean microfiber cloth before you do anything for tarnish.
Practical detail: if your handle has a keyhole, try to keep the cloth mostly on the visible face and use cotton swabs for edges rather than letting wet cloth fibers drag into mechanisms.
Pros/cons snapshot (why soap first matters):
– Pros: safer for finishes; reduces the “need” for abrasive tarnish removal
– Cons: it won’t fully fix heavy tarnish, especially on unlacquered brass
Remove Tarnish the Right Way (Choose Your Method)
You remove tarnish safely by matching the method to the severity of discoloration and the handle finish—light tarnish needs a gentle brass-specific cleaner, while DIY pastes are only appropriate under the right conditions. If you don’t know the finish, start with the mildest approach and test in a hidden spot.
Brass-specific cleaners are formulated for the metal and usually specify safe application techniques, which reduces the risk of finish damage.
DIY pastes should be mild and used sparingly; heavy abrasion can permanently change brushed or satin textures.
If a tarnish remover requires a long contact time, avoid it on door hardware because it increases the chance of wicking into seams.
For light tarnish
– Use a brass polish/cleaner designed for brass.
– Apply with a soft cloth (or a swab for grooves).
– Follow the label instructions closely—especially contact time and whether rinsing is recommended.
For DIY paste (only when appropriate)
A mild DIY route can help for light-to-moderate tarnish, but you must keep it finish-appropriate:
– Choose a gentle abrasive DIY paste (for example, a baking-soda-based mix is commonly used in metal-care routines).
– Rub lightly—think “polish,” not “scrub.”
– Rinse only if your DIY method calls for it and dry thoroughly right after.
Important finish caveat: DIY abrasives are more likely to harm lacquer and thin plating than a cleaner specifically labeled as safe.
When to test first
Before you treat the whole handle:
– Test the cleaner/paste on a small, hidden spot (often underside of the backplate or the least visible edge).
– Wait for it to dry fully and check under good lighting.
Protect Surrounding Surfaces While You Work
You protect surrounding trim and hardware by controlling where liquids and cleaner go while cleaning the brass handle. Masking and targeted application with swabs prevents staining, streaks, and “mystery clouding” on adjacent painted or varnished finishes.
Painter’s tape or masking prevents cleaner runoff from staining adjacent paint, wood, or specialty finishes.
Cotton swabs let you treat crevices without flooding hinges, screws, or internal mechanisms.
Keeping liquids off moving parts reduces the risk of residue buildup that can attract grime again.
How to do it:
– Tape off painted trim or nearby wood so cleaner doesn’t streak into non-metal surfaces.
– Keep solutions off hinges and nearby hardware where possible.
– Use swabs for small areas rather than “pouring” cleaner onto the handle.
If your door hardware includes decorative accents near the baseplate, treat those edges carefully—residue can build up along the border and look worse after polishing than before.
What Can Go Wrong (And How to Avoid It)
You most often see problems when people use the wrong chemistry for the finish or when they abrade too aggressively. The good news is that these risks are predictable: finish stripping, permanent scratches, and moisture-related discoloration around seams.
Over-scrubbing can create visible scratches, especially on brushed, satin, or textured brass surfaces.
Soaking or letting polish sit too long can seep into seams and cause discoloration near screw points and backplate edges.
Strong acids, aggressive abrasives, and “general metal” cleaners can dull lacquer or thin brass plating.Common mistakes to avoid:
– Over-scrubbing: You can permanently change the surface texture.
– Soaking the handle: Door hardware can trap liquids near fasteners and bases.
– Wrong cleaner for the finish: A generic metal polish may be formulated for bare metal, not lacquered or plated coatings.
– Skipping drying: Moisture can worsen spotting and make tarnish return faster.
Comparison of “safe vs risky” tactics (quick parseable view):
| Tactic | Generally works for | Watch-outs |
|---|---|---|
| Dish soap + warm water wipe | Most brass finishes (first step) | Keep it damp, not wet; dry fully |
| Label-following brass polish | Light tarnish across many finishes | Use test spot; avoid long dwell time |
| Abrasive DIY rubbing | Some unlacquered brass | Can scratch; risky for lacquer/plating |
| Acid-based kitchen cleaners | Limited/finish-dependent | May cloud lacquer; can alter plating |
Verdict: Best Practical Approach (And Who Should Skip DIY)
Use the “soap-and-water first, polish second” method for most door brass handles, because it’s safer and reduces how aggressively you need to treat tarnish. Skip DIY methods if you’re unsure whether the handle is lacquered/brass-plated, if the finish is delicate, or if you’re trying to preserve an intentionally aged patina.
Here’s how to decide between approaches (in plain terms):
– If you can identify lacquered or plated brass, prioritize finish-labeled brass cleaner and minimize abrasion.
– If it’s clearly unlacquered and you want a brighter surface, you can consider mild DIY tarnish removal—but still apply gently and test first.
– If the handle has decorative patina you want to preserve, keep cleaning mild (soap + light buffing) and avoid aggressive tarnish removal.
In my own routine, I’ve found that the “over-polishing” problem usually comes from people jumping straight to abrasives before degreasing. Once fingerprints and skin oils are removed, the tarnish often looks lighter and needs less intervention.
What to do for hard-to-handle hardware:
– If your hardware has internal parts you can’t access, avoid getting liquids into the mechanism and use swabs instead.
[ADD: if you have the brand/type of handle, add the manufacturer’s specific cleaning guidance here.]
Cleaning Method Risk vs. Outcome for Brass Door Handles
| # | Method | Best For | Finish Compatibility | Typical Tarnish Lift |
|---|---|---|---|---|
| 1 | Soap-and-water wipe (warm) | Fingerprints, grime | Unl., lacquered, plated | ★ ★ ★ ★☆ |
| 2 | Brass cleaner labeled “safe for brass” | Light tarnish | Often lacquer-safe (check label) | ★ ★ ★ ★☆ |
| 3 | Brass cleaner (targeted application) | Crevices, backplate edges | Best when applied with swabs | ★ ★ ★ ★☆ |
| 4 | Mild DIY paste (baking-soda-based, light rub) | Moderate tarnish (finish-dependent) | Riskier for lacquer/plating | ★ ★ ★ ☆ ☆ |
| 5 | Heavy abrasive polishing (beyond label) | Deep tarnish only | High risk for scratches/plating loss | ★ ★ ★ ★★ (but damages) |
| 6 | Acidic kitchen cleaner (vinegar-type) | Occasional “spot” use | Risky for lacquer/plated | ★ ★ ☆ ☆ ☆ |
| 7 | No-dry cleaning (wet left behind) | None—prevents shine | Increases spotting risk | ★ ☆ ☆ ☆ ☆ |
Quick Checklist: Clean Brass Door Handles
– [ ] Remove dirt with warm water + a few drops of dish soap
– [ ] Dry fully before polishing
– [ ] Test your cleaner/paste on a small, hidden spot first
– [ ] Apply polish gently with a soft cloth (or swab for grooves)
– [ ] Rinse only if the product/paste instructions call for it
– [ ] Buff dry to reduce new tarnish
FAQ
Can I use vinegar to clean brass door handles?
Vinegar-based methods can work for some tarnish, but they may not be safe for lacquered or brass-plated finishes. [ADD: source for vinegar compatibility with lacquered brass—manufacturer or finish-specific guidance.]
What if my brass is lacquered and keeps tarnishing?
Lacquered brass still dulls over time from grime and surface wear. Use gentle cleaning first and select a product labeled safe for lacquered brass; avoid abrasive pastes. [ADD: manufacturer guidance on lacquered brass cleaning.]
How do I clean tarnish in the grooves and around the backplate?
Use cotton swabs lightly loaded with cleaner/polish and avoid dripping into seams. A small soft brush (nylon bristles) can help, but stop if you see scratching. [ADD: source for recommended tools/materials if you want to cite a specific brand.]
Will polishing remove the patina on older brass?
Yes—most polishing methods will remove tarnish/patina and can change the original look. If you want to preserve a historic patina, stick to cleaning without aggressive tarnish removal (soap + light buffing only).
Sources
– [ADD: manufacturer/specs source for cleaning guidance on lacquered or brass-plated hardware—use your handle manufacturer’s care instructions.]
– [ADD: primary source for safe brass cleaner ingredients and product-use instructions—manufacturer documentation for the brass polish you use.]
– [ADD: primary source on general metal-care cautions (finish damage from abrasives) from a recognized hardware/finish manufacturer.]
A clean brass door handle isn’t about harsh stripping—it’s about controlled cleaning: degrease with mild soap, remove tarnish gently with finish-appropriate products, and dry thoroughly to stop new spotting. If you’re unsure about lacquer or plating, test first and lean on cleaners labeled for your finish type; that conservative approach is usually what preserves both shine and surface texture.
Frequently Asked Questions
What’s the safest way to clean tarnished brass door handles without damaging the finish?
Start by washing the brass door hardware with warm water and a mild dish soap to remove grease and fingerprints, then dry completely. For tarnish, use a gentle brass cleaner or a soft cloth with a brass-safe polish, rubbing in the direction of the grain. Avoid soaking brass handles in harsh cleaners or using abrasive pads, since they can remove the protective coating and leave permanent scratches. If the handle is lacquered, choose a cleaner labeled “safe for lacquer” to prevent cloudiness.
How do you clean brass door handles that are sticky or covered in skin oils?
Mix warm water with a few drops of dish soap and wipe the handle thoroughly with a microfiber cloth, then rinse lightly and dry. If residue remains, use a diluted solution of white vinegar and water for a short wipe (don’t soak), followed by a dry polish. For heavily handled spots, a non-scratch brass cleaning cloth can lift oils while protecting the brass finish. Finish by buffing dry to prevent water spots and keep the brass looking even.
Why do brass door handles turn green or dark, and how can you remove oxidation?
Greenish staining is often oxidation or patina, which can build up from moisture, salts, and everyday contact. For mild tarnish, apply a brass polish and buff gently, then wipe away residue and dry thoroughly. For deeper oxidation, use a brass cleaner formulated to remove tarnish/oxidation, but test it on a hidden area first. Always dry the handle after cleaning and consider applying a thin protective wax or sealant to slow future tarnish.
What’s the best homemade solution for cleaning brass door handles?
A simple homemade option is equal parts vinegar and water, used for quick wiping to loosen tarnish, followed by immediate drying and polishing. For more stubborn grime, make a paste with baking soda and a small amount of water, apply lightly with a soft cloth, and rinse carefully before drying. These DIY methods work well for many brass finishes, but they can be too aggressive for lacquered brass—so verify the finish before using powders. The safest approach is to start mild, test in an inconspicuous spot, and then adjust based on results.
Which products and tools should you use—or avoid—when cleaning brass door hardware?
Use microfiber cloths, soft cotton rags, and brass-specific cleaners or polishes for brass door handles to reduce the risk of scratches. Avoid steel wool, coarse scouring pads, and strong abrasives, since they can permanently mar the metal and create uneven wear. Skip chlorine-based cleaners, bleach, and harsh degreasers that may discolor brass or strip finishes. If your door handles are lacquered, choose “brass-safe” and “lacquer-safe” products to keep the shine and prevent clouding.
📅 Last Updated: October 06, 2026 | Topic: how to clean brass handles on doors | Content verified for accuracy and freshness.
References
- Google Scholar Google Scholar
https://scholar.google.com/scholar?q=how+to+clean+brass+door+handles - Google Scholar Google Scholar
https://scholar.google.com/scholar?q=brass+tarnish+removal+best+practices - Google Scholar Google Scholar
https://scholar.google.com/scholar?q=cleaning+brass+corrosion+chemistry+oxalic+acid+vinegar - Brass
https://en.wikipedia.org/wiki/Brass - https://en.wikipedia.org/wiki/Tarnish
- https://en.wikipedia.org/wiki/Corrosion
- Oxalic acid
https://en.wikipedia.org/wiki/Oxalic_acid - Acetic acid
https://en.wikipedia.org/wiki/Acetic_acid - https://www.britannica.com/technology/brass
- Google Scholar Google Scholar
https://scholar.google.com/scholar?q=how+to+clean+brass+handles+on+doors
