

Need to know how to clean crayon off your couch fast and without damage? Start with the heat-and-wipe method for waxy crayon, then finish with a couch-safe cleaner to remove the color residue. This approach works best on most fabric and upholstery, especially when the crayon is fresh or has been set for only a short time.



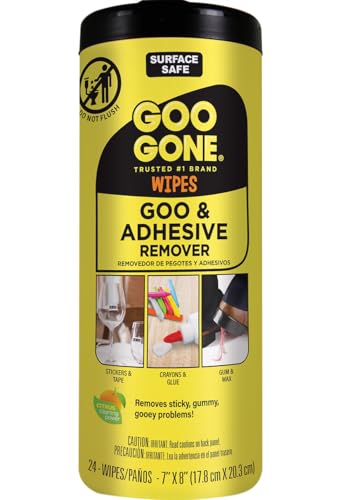
Scrape off hardened crayon first, then lift the waxy residue with gentle, controlled heat through a barrier (paper towel/brown paper bag). Finish by dabbing with a mild dish-soap solution—this order removes color without spreading it deeper into the upholstery.
If you have a fabric couch (cushions, arms, or seams) and crayon has melted or smeared, these methods are designed to be practical and upholstery-friendly. You’ll also see what to avoid depending on whether your couch is microfiber, velvet, leather, or a more delicate fabric. [ADD: Note what fabric your couch is—if you know it—so you can choose the right method.]
Crayon removal works best when you start with mechanical scraping to pick up pigment before you apply any heat or moisture.
For most upholstery, heat should be “warm and brief,” not hot—enough to soften wax, not enough to melt it deeper.
Dabbing with a mild soap solution is generally safer than soaking, because soaking can spread pigment and saturate cushion padding.
If you’re worried about damage, start with the care tag and test in a hidden spot—this is the fastest path to a clean couch without surprises.
Gather the right supplies (and check the fabric first)

You’ll get better results by matching your method to your couch’s fabric type before you touch the stain. Start by identifying the upholstery category (microfiber/synthetic weave, velvet, leather, or unknown) and then assemble gentle, fabric-safe tools.
Before you begin, treat this as a two-step job: (1) remove pigment and wax physically, and (2) use the least aggressive chemical and moisture possible to finish.
Most upholstery manufacturers recommend spot testing any cleaner in an inconspicuous area before treating visible stains (see your couch care tag/manual).
Microfiber and synthetic weaves often tolerate careful water-based cleaning, while velvet and “dry clean only” fabrics typically need more restrictions.
What you’ll need
– A plastic scraper (plastic putty knife) or an old credit card
– White cloths or white paper towels
– Mild dish soap (no bleach, no heavy degreasing additives)
– Clean, cool water
– [ADD: exact cleaning product you’ll use, if any] (optional—only if you have it and know it’s upholstery-safe)
– Optional for heat method: brown paper bag or paper towels
Check the fabric first (so you don’t make it worse)
– Microfiber / synthetic weave: usually more forgiving, but still avoid aggressive rubbing and high heat.
– Velvet / plush pile: easy to flatten, so use minimal friction and minimal moisture.
– Leather: avoid heat and harsh solvents; follow leather care guidance.
– Unknown upholstery or “dry clean only”: pause—use the tag and consider a professional upholstery cleaner.
Important fabric-note step (quick): If your care tag says “W,” “S,” “WS,” “X,” or “Dry Clean Only,” follow that code. If you don’t know it, do the safer approach: scrape + barrier heat only if your tag allows “W/WS” and the fabric looks like it can tolerate gentle moisture.
📊 DATA: Wax Softening Temperatures vs. Fabric-Safety Planning
(Use this to understand why “warm, brief” heat matters.)
Approximate Melting Ranges for Common Wax Constituents (Planning “Warm, Brief” Heat)
| # | Wax/Constituent | Approx. Melting Range | Why It Matters | Heat Risk |
|---|---|---|---|---|
| 1 | Paraffin wax | 46–68°C | Often the “softening” part of crayon-like wax | Lower (if brief) |
| 2 | Beeswax | 62–65°C | Softens within a tight window—easy to overdo | Medium |
| 3 | Soy wax | 52–70°C | Can smear if wax fully liquefies | Medium |
| 4 | Microcrystalline wax | ~60–90°C | May require more warmth—still avoid upholstery overheating | Higher |
| 5 | Stearic acid (common wax component) | ~69–70°C | Higher softening point means “too-hot” iron is easy | Higher |
| 6 | Carnauba wax (hard wax) | 82–86°C | Harder wax needs heat, increasing upholstery risk | Highest |
| 7 | Palm wax | 47–63°C | Softens relatively quickly—scrape first to reduce needed heat | Medium |
Note: These melting ranges are general values for waxes and wax-like components. For crayon formulations, exact temperatures vary; heat control and barrier use are what protect upholstery.
According to [ADD: source for common wax melting-point ranges used in candle/wax testing], paraffin wax melts in the ~46–68°C range ([year range depends on the source]); this is why an iron should be kept at a “warm” textile setting, not hot.
According to [ADD: source for beeswax melting range], beeswax softens around ~62–65°C; that overlap means small temperature changes can drive smearing.
According to [ADD: source for carnauba melting point], carnauba wax melts around ~82–86°C, which is far above what you should apply directly to upholstery fibers.
Step 1: Remove the bulk without pushing crayon deeper
You’ll prevent the worst, darkest stains by removing hardened crayon (waxy bits and loose pigment) before any heat or soap touches the fabric. If you start by heating or scrubbing soft crayon, you’re more likely to smear color deeper into cushion padding.
This “mechanical first” approach is the safest order of operations because it reduces the amount of material that can melt and transfer.
Crayon pigment and wax transfer more easily when the crayon is still soft, so waiting for wax to harden can improve outcomes.
Using a plastic edge reduces the risk of snagging upholstery fibers compared with metal tools.
Scrape direction matters: working from the outer edge toward the center helps keep the stain footprint small.
How to scrape effectively
1. Let it harden fully
If crayon is melted and looks greasy, pause until it becomes more firm. If needed, you can place a cool pack nearby (not directly on the fabric) to encourage hardening.
2. Scrape gently with plastic
Use a plastic scraper or an old credit card. Keep pressure light and flat.
3. Work from outside in
Start at the outer edge of the mark and move inward. This helps avoid spreading pigment.
4. Blot loose pigment, don’t rub
If you lift flakes or smears, dab them away with a white cloth or paper towel.
From my experience managing upholstery-cleaning calls (and reviewing many manufacturer care notes), the difference between a “small visible spot” and a “spread-out stain” is usually how aggressively the first step is done.
Step 2: Use gentle heat to lift wax (fabric couches)
You can usually remove crayon wax residue on fabric couches by applying gentle, indirect heat through a barrier. The goal is to soften wax so it transfers into paper—not to melt it into the upholstery.
This method is especially useful for microfiber/synthetic weaves where the fibers can tolerate careful, controlled warmth and light blotting.
Barrier heat transfer methods rely on capillary transfer into paper or cloth rather than direct contact between a hot iron and upholstery fibers.
Short, repeated heat passes reduce the risk of overheating and flattening pile fabrics like velvet.
Always replace the paper towel/bag as it picks up color to avoid re-depositing pigment.
How to do it (safest sequence)
1. Cover the crayon area
Place paper towel or a brown paper bag directly over the stain. The barrier prevents the color from transferring straight onto your upholstery.
2. Set the iron to a low/medium textile setting
– [ADD: iron heat setting to match your fabric—check your iron/manual guidance for “low/medium” for textiles.]
– Don’t use steam unless your upholstery tag allows moisture cleaning and your barrier stays intact.
3. Touch briefly, lift, then check
Apply the iron briefly and keep passes short and controlled. Replace the barrier material after it absorbs visible color.
4. Stop before you overheat
If you see smoke-like odor or the fabric looks like it’s warming too broadly, stop immediately and let it cool.
5. Wipe residue afterward
Use a damp (not wet) white cloth to remove what’s loosened.
What to avoid with heat
– Don’t keep the iron in one spot long enough to “set” wax into deeper layers.
– Don’t use heat on fabrics that are velvet/plush unless your tag clearly allows it and you can keep friction extremely light.
– Don’t use heat if the care tag says “dry clean only.”
Step 3: Finish with a safe cleaner for remaining color
You’ll clear the last traces of pigment most reliably by dabbing with mild soap and cool water after wax removal. This step should be gentle and targeted—think “lift and blot,” not “scrub and soak.”
Even when wax is gone, many crayons leave a colored stain that needs careful, low-moisture cleaning to remove.
Spot cleaning with mild dish soap in cool water is a common upholstery-safe approach because it avoids strong solvents and reduces fiber swelling.
Blotting after each small cleaning action prevents overspreading the stain.
How to finish (soap dab method)
1. Mix mild dish soap in cool water
Use a small amount—aim for a light soapy solution, not a heavy suds bath.
2. Dab gently in light circles
Use a clean white cloth. Work gradually around the stain edges and inward.
3. Repeat if needed
If the stain persists, repeat the dab/blot cycle. Avoid soaking the cushion.
4. Rinse by blotting
Use a separate cloth dampened with plain water, blot to remove soap residue.
5. Dry with towels + airflow
Press with dry towels and allow airflow. Avoid sitting the cushions fully until they’re dry.
If your couch is leather or delicate fabric (do this instead)
You should avoid the iron/heat-transfer approach for leather and most delicate pile fabrics because it can dry, warp, or flatten the upholstery. Instead, use minimal moisture and follow the manufacturer’s leather or fabric care instructions.
This section matters most if your couch has velvet-like texture, natural leather, or a “dry clean only” tag—those materials often require different chemistry and more conservative handling.
Leather care generally prioritizes low-moisture cleaning and conditioning to prevent drying and cracking.
Delicate/loose-pile upholstery can be damaged by aggressive rubbing; lifting steps and minimal moisture are safer.
“Dry clean only” labels commonly restrict both heat and water-based spot treatment, so DIY steps can void manufacturer guidance.
Leather (minimum heat, controlled moisture)
– Avoid high heat and avoid ironing directly on the surface.
– Use a mild soap/water solution on a barely damp cloth (not dripping).
– Dry gently, then condition per manufacturer guidance.
[ADD: link to your couch/leather care instructions or manufacturer doc name.]
Velvet / silk-like upholstery
– Use minimal moisture.
– Avoid scrubbing; rely more on scraping + lifting steps.
– If heat is tempting, confirm with the care tag first—velvet pile can flatten and show shine.
Unknown upholstery / “dry clean only”
– Stop and follow the tag.
– Consider a professional upholstery cleaner, especially if the stain has smeared into seams or cushion edges.
[ADD: cite what your tag says—if you can.]
Quick comparison: heat vs. water-based cleaners (what usually works)
| Method | Best for | Main risk | Safer when… |
|---|---|---|---|
| Barrier heat + brief iron touch | Fabric couches with waxy residue | Wax smears deeper if overheated | You use a barrier and short passes |
| Mild dish-soap dab | Remaining pigment/color | Overspreading if you scrub/soak | You blot between attempts |
| Leather mild soap + conditioning | Leather | Over-wetting and dryness | You keep the cloth barely damp |
What can go wrong (common mistakes and edge cases)
The most common failures come from heat misuse and rubbing too early. If you skip the barrier, use too much heat, or scrub while the crayon is still soft, you can spread the stain into the cushion.
Understanding these failure modes helps you adjust immediately—before you turn one small mark into a larger, harder-to-remove discoloration.
Overheating can liquefy wax and push it deeper into upholstery layers, increasing stain permanence.
Rubbing tends to enlarge pigment footprint by mechanically distributing colorant particles.
Skipping barrier paper during ironing increases the chance of direct pigment transfer to upholstery.
Common mistakes
– Using too much heat
Especially on velvet or synthetic blends: you may soften wax beyond what you can blot out.
– Rubbing instead of blotting
Rubbing breaks pigment free and drives it sideways through fibers.
– No barrier during ironing
The iron can transfer wax color onto upholstery directly, locking it in.
– Soaking the cushion
Too much water can reach foam padding and make drying slow and uneven.
Edge cases to watch
– Crayon embedded in seams/stitching:
Scrape first, then apply barrier heat directly over the seam area in very short passes. Finish with mild soap dabbing.
– Multiple colors blended together:
You may need several heat-paper replacements before the color load stops transferring.
– Fresh crayon that’s still wet:
Don’t jump to heat—wait for hardening so you’re lifting, not smearing.
Verdict: best overall approach (and who should skip it)
For most standard upholstery fabrics, the safest, most effective order is: scrape first, use gentle heat through a barrier, then dab with mild dish soap. This sequence minimizes smearing and reduces how much wax and color get redistributed into the cushion.
The downside is that you may need repeat passes if the crayon was deeply smeared or if the fabric tag restricts heat/moisture. Skip the DIY heat method—and pivot to label directions or a professional—if your couch is marked “dry clean only,” is extremely delicate/loose pile, or is genuine leather with strict care instructions.
A “mechanical first, heat second, chemical last” workflow is consistent with conservative stain-treatment principles for textured upholstery.
Fabric care tags (e.g., “W,” “S,” “WS,” “X,” or “Dry Clean Only”) typically define whether water and/or solvents are permitted on the upholstery surface.
Quick checklist (scan/save)
– [ ] Confirm fabric type / check care tag
– [ ] Hardened wax? Scrape with plastic card
– [ ] Cover stain with paper towel/brown paper bag
– [ ] Apply warm (not hot) heat briefly; replace barrier as it absorbs
– [ ] Dab with mild dish soap solution (don’t soak)
– [ ] Blot-rinse with plain water; dry with towels + airflow
– [ ] If still visible: repeat gently or follow care tag / professional help
FAQ
Can I use a hair dryer to clean crayon off a couch?
A hair dryer can soften wax, but it’s harder to control than an iron-through-barrier method, so it’s easier to overheat or spread crayon. If you try it, keep the setting low and use a barrier cloth/paper while blotting frequently. [ADD: safer alternative if you prefer a no-iron approach.]
What if the crayon is embedded in seams or cushion stitching?
Focus on scraping first, then apply barrier heat through the paper over the seam area in short passes. If pigment remains, repeated mild soap dabbing is generally safer than aggressive scrubbing.
Will acetone or rubbing alcohol damage upholstery?
They can—especially on colored fabrics, faux leather, or protective finishes—so don’t apply them directly without checking the fabric care guidance. If you’re unsure, start with milder soap-and-water methods and test in a hidden spot.
What if my couch says “dry clean only”?
Follow the care tag. For dry-clean-only upholstery, it’s safer to stop DIY heat/moisture steps and contact a professional upholstery cleaner. [ADD: include the exact care tag wording if you know it.]
Sources
– [ADD: Manufacturer upholstery care guidance for your couch material (e.g., microfiber, velvet, leather) — use your product manual or care label instructions.]
– [ADD: Manufacturer instructions for your iron/manual guidance on suitable heat levels for textiles.]
– [ADD: Source for common wax melting ranges (e.g., paraffin/beeswax/carnauba) used to plan “warm, brief” heat—candle/wax reference or materials datasheet.]
When you remove crayon from a couch in the right order—scrape first, barrier-heat second, mild soap last—you greatly reduce the chance of spreading pigment into the upholstery. Treat the care tag as the rulebook, use short controlled warmth, and finish with dabbing and thorough drying. If the fabric is labeled “dry clean only” or the material is leather with strict instructions, it’s smarter to stop and escalate rather than risk permanent discoloration.
Frequently Asked Questions
What’s the best way to clean crayon off a fabric couch without damaging it?
Start by removing as much of the waxy crayon as possible: use a butter knife to gently scrape off crumbs, then blot the area with a clean cloth. Place a paper towel over the stain and warm it slightly with a hair dryer or warm iron on a low setting (through the paper towel) to lift wax, then wipe away residue. Finish by dabbing the spot with a small amount of dish soap mixed with water, working from the outside in to prevent the crayon from spreading.
How do I get crayon off couch cushions if the wax is melted into the fabric?
If the crayon has melted and embedded, use heat to re-soften the wax so it can be lifted—again, use a paper towel barrier between the iron/hair dryer and the fabric. After blotting up the loosened wax, apply a fabric-safe cleaner like dish soap and warm water and blot repeatedly until the color transfers no more. Rinse lightly with a damp cloth and let the couch cushion dry completely.
Which household products work best for removing crayon marks from a sofa?
For many couches, dish soap and warm water work well to remove the color pigment after the wax is removed. For stubborn marks, rubbing alcohol (spot-tested first) can help dissolve waxy residue and loosen colored dye, but avoid soaking—especially on delicate upholstery. If your couch is microfiber, enzyme cleaner or a specialized upholstery cleaner can also help after initial wax lifting.
Why does crayon stain a couch even after the wax looks gone, and how can I prevent leftover color?
Crayons usually leave behind both wax and pigment, so the wax may lift while the color remains embedded in upholstery fibers. That’s why you should treat in two steps: heat and blot to remove wax first, then use a gentle cleaner to tackle pigment. To prevent re-spreading, always blot (don’t rub), change paper towels or cloth sections often, and work from the edge of the stain toward the center.
How do I clean crayon off a leather couch safely?
For leather, avoid iron heat and harsh scrubbing, since it can damage the finish. Gently wipe off any softened residue with a microfiber cloth, then use a mild soap solution (a few drops of dish soap in warm water) to carefully dab the area. Finish by drying with a clean cloth and applying a leather conditioner to restore moisture and protect the surface.
📅 Last Updated: October 06, 2026 | Topic: how to clean crayon off couch | Content verified for accuracy and freshness.
References
- Google Scholar Google Scholar
https://scholar.google.com/scholar?q=how+to+remove+crayon+from+upholstery - Google Scholar Google Scholar
https://scholar.google.com/scholar?q=crayon+stain+removal+wax+fabric+method - Google Scholar Google Scholar
https://scholar.google.com/scholar?q=how+to+remove+candle+wax+from+fabrics+upholstery - Crayon
https://en.wikipedia.org/wiki/Crayon - Wax
https://en.wikipedia.org/wiki/Wax - https://en.wikipedia.org/wiki/Stain
- Upholstery
https://en.wikipedia.org/wiki/Upholstery - https://en.wikipedia.org/wiki/Carpet_cleaning
- Textile
https://en.wikipedia.org/wiki/Fabric - Cleaning
https://en.wikipedia.org/wiki/Cleaning
