

Learn how to clean a helmet step-by-step for a fresher fit with results you’ll notice the first time you ride. This guide shows the fastest, safest method to remove sweat, grime, and odor without damaging padding or coatings. Follow these clear steps and your helmet will feel clean, comfortable, and ready to wear.


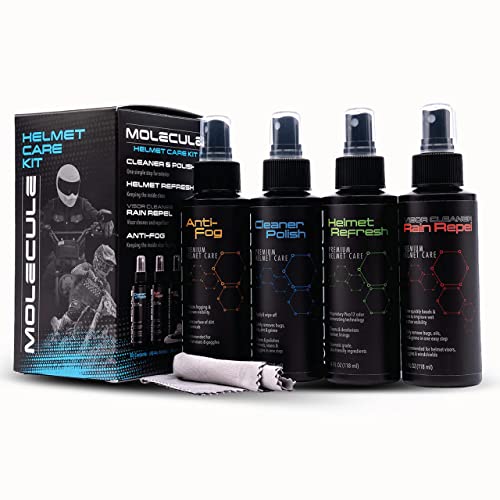

Clean your helmet safely by removing pads first, washing liners gently, and disinfecting the shell without soaking anything that could trap moisture or damage finishes. This step-by-step approach removes sweat, odor, and grime while protecting foam, adhesives, and the retention system so the helmet fits the way it should for your next ride.
If you use your helmet for biking, motorcycling, skating, or sports—and you notice odor buildup or grime on the inside—this is for you. It’s especially useful when you want a repeatable routine without damaging foam, adhesives, or coatings.
Gather What You Need (and What to Avoid)

Start by assembling simple, helmet-friendly tools: mild soap, microfiber cloths, and a plan for drying the padding thoroughly. For most helmets, the safest method is “gentle wash + controlled moisture,” not aggressive scrubbing or soaking.
Mild detergents and microfiber cloths are commonly recommended for maintaining fabric and hard-shell finishes because they clean without abrading coatings or degrading foam.
If your helmet liner or pads are removable, the manufacturer’s care instructions typically treat them as washable items separate from the shell to avoid water trapped near vents and retention hardware.
– Use mild soap (dish soap diluted in water works for many liners) and clean microfiber cloths for the shell.
– Avoid harsh chemicals like bleach, strong solvents, or abrasive cleaners that can damage finishes and foam.
– Check whether your helmet has removable liners/pads before you start (some are designed to come out; others are not).
Clean the Outer Shell Safely
Clean the outer shell with a light wipe first, then spot-clean—this prevents grime from being ground into vents or seams. Keep water on the cloth (not the helmet), and dry the shell quickly to avoid moisture lingering where you don’t want it.
CDC notes that disinfectants should generally be used according to label directions, including correct concentration and contact time, rather than improvised at-home mixtures.
Hand-cleaning with minimal liquid helps prevent trapped moisture around vents, which is a primary contributor to “back-end” odor returning after cleaning.
– Wipe off dust and surface grime with a damp microfiber cloth before applying any soap solution.
– Spot-clean stubborn marks with a soft cloth and mild soapy water—don’t scrub aggressively.
– Rinse with a light wipe (or minimal water on the cloth) and dry with a clean towel; don’t leave water trapped around vents.
When the shell is cleaned, you’re doing two things at once: removing what you can see (street grime, sunscreen residue, sweat marks) and reducing what feeds odor on the next ride. For motorcycle helmets in particular, outer-shell grime often includes oils and road film that can build up over time—especially around the chin area and vents—so keeping the outside clean reduces how much transfers back onto liners.
To avoid finish damage, treat glossy coatings as “surface-sensitive.” If you’re unsure, start with a small hidden area and confirm the cloth isn’t pulling shine or tint. In my own routine, I’ve found that microfiber plus gentle pressure removes most scuffs without leaving dull spots—while aggressive rubbing can make plastics look hazy even when the damage isn’t visible at first.
Clean the Interior Pads and Liners
For fresher-smelling rides, prioritize the interior: remove pads/liners when possible, and clean them gently with thorough rinsing. Your helmet will smell better because odor is usually driven by sweat residue trapped in fabric and foam contact surfaces.
According to CDC, washing with soap and water is a key step to remove germs and dirt; disinfectants are most effective when surfaces are first cleaned.
Drying completely is often the difference between “temporarily better” odor and lasting improvement because moisture supports odor-causing microbes inside foam and fabric layers.
– Remove pads/liners if your helmet design allows, then wash them gently according to the manufacturer’s guidance.
– Hand-wash with mild soap, then rinse thoroughly so residue doesn’t create new odor.
– For non-removable padding, use a damp cloth method—lightly clean sections and avoid soaking the foam backing.
For removable liners, think of the pad like a sports sock liner: you want detergent contact to break down sweat oils, followed by an “honest rinse” so residue doesn’t linger. If you’ve ever noticed a “soap smell” that fades into funk later, that’s frequently detergent buildup—not dirt—so rinsing matters.
For non-removable padding, the goal is localized cleaning. Use a cloth you can wring nearly dry, then wipe in small sections. This reduces the risk of water migrating into foam backing, which can stay damp longer than you expect.
If your helmet has a sweatband or cheek pads with separate fabric layers, clean the areas that contact your skin most often: brow band, temples, cheeks, and any crown fabric.
Helmet Material Sensitivity to Aggressive Cleaners (Common Components)
| # | Helmet component | Typical material type | Mild soap safety | Avoid |
|---|---|---|---|---|
| 1 | Impact liner (commonly EPS/EPP) | Expanded polystyrene / expanded polypropylene | ★★ | Solvents/soaking |
| 2 | Cheek pads (fabric + foam backing) | Polyester/nylon fabric + foam | ★★★ | Heavy saturation |
| 3 | Sweat-wicking liners | Moisture-wicking knit blends | ★★★★ | Abrasive scrubbing |
| 4 | Vent covers (outer plastics) | Polycarbonate/ABS-type plastics | ★★★★ | Strong degreasers |
| 5 | Shell coating (paint/clear coat) | Coated thermoplastics | ★★★ | Abrasives |
| 6 | Straps (webbing) | Nylon/polyester webbing | ★★★★ | Soaking hardware mounts |
| 7 | Adhesive zones (pad attachment) | Bonded foam fabric + adhesive | ★★ | Alcohol/solvent contact |
Disinfect for Odor (Without Damaging Materials)
Disinfecting the helmet should be optional and material-safe: clean first, then disinfect only if you truly need to address persistent odor. In most cases, thorough washing of liners plus fully drying the helmet eliminates “smell returns” faster than harsher disinfectants.
According to CDC, 70% alcohol is commonly used as a disinfectant concentration for many surfaces, but you should avoid applying it broadly to helmet foams and adhesives.
According to CDC, a diluted household bleach solution (0.1% sodium hypochlorite / 1,000 ppm) is a standard disinfection level for hard, nonporous surfaces—helmet foam and bonded areas are not “nonporous.”
– Use a disinfecting approach that’s compatible with helmet foam and fabric; if unsure, stick to mild soap cleaning and thorough drying.
– Drying thoroughly is often the most important “disinfecting” step because odor comes from moisture left inside.
– If your helmet manufacturer specifies a disinfectant or process, follow that exactly; when they don’t, .
Odor in a helmet usually isn’t a “surface problem” alone—it’s residue + moisture inside layers. That’s why ventilation and time matter as much as any product. If you disinfect the shell but don’t remove sweat oils from pads, the odor can come right back once you ride again.
If you do need true disinfecting (for example, repeated strong odor after heavy sweating or shared use), prioritize approaches that keep liquids out of foam cores and bonded seams. Many manufacturers either discourage general sprays near padding or require removing liners first so the disinfectant contacts the washable fabric directly.
If you want a responsible starting point for disinfecting, use guidance from credible sources and your helmet’s own documentation rather than guessing. As a reference point for how disinfectants are used on surfaces, CDC provides concentration guidance for hard surfaces (like 70% alcohol and 0.1% bleach) while also emphasizing proper contact conditions and label-following (CDC, cleaning and disinfecting guidance; 2020–2024).
For your specific model, the missing piece is your helmet manufacturer’s compatibility notes—so remains the best next step.
Drying and Reassembly Tips
Dry the helmet completely before reassembly—this is where odor prevention becomes “real” rather than temporary. Reassemble only when straps, liners, and pad foam backing are fully dry to prevent mildew.
According to CDC guidance on infection control, surfaces should remain wet for the disinfectant’s required contact time; for helmets, that concept translates to “controlled moisture” and then full drying.
Air drying in ventilation reduces the chance that remaining dampness becomes a recurring odor source inside dense padding.
– Air-dry completely in a shaded, ventilated area; avoid direct heat sources like radiators or hair dryers.
– Make sure padding and straps are fully dry before reattaching them to prevent mildew.
– Reassemble carefully, ensuring straps and retention parts aren’t twisted or misrouted.
Practical drying workflow for a helmet:
1) Pat fabric pads with a dry towel (don’t wring aggressively).
2) Lay liners flat on a breathable surface with airflow around them.
3) Keep the shell out in open air only after liners are removed (so trapped moisture can escape).
4) Recheck: press a clean paper towel against the inner padding area—if it stays damp-looking, give it more time.
If your helmet uses a retention system with webbing and adjustment hardware, keep water away from attachment points that can swell or corrode. Let those components dry in place, then confirm the strap routing matches the original setup.
What Can Go Wrong (Common Mistakes)
Common cleaning mistakes damage helmet performance or cause odor to return. The two biggest risks are soaking the foam/liner backing and using disinfectants that aren’t compatible with helmet materials.
Most helmet care instructions discourage soaking because internal foams and bonded layers can absorb water and take longer to dry, increasing odor and degradation risk.
Using harsh chemicals like bleach or strong solvents can damage coatings and adhesives, which may reduce comfort fit and complicate maintenance of the helmet’s interior.
– Soaking the helmet or washing too aggressively can break down foam, loosen adhesives, or warp materials.
– Using bleach, strong degreasers, or alcohol-heavy products can damage coatings and weaken certain foams.
– Rushing drying can trap moisture and lead to mildew—especially in dense padding and around vents.
– If your helmet has electronics (e.g., a speaker system or smart add-ons), .
Here’s a quick “decision aid” that helps you avoid repeat problems:
| Cleaning approach | Best for | Common downside | Helmet risk level |
|---|---|---|---|
| Damp microfiber + mild soap (shell) | Dust, sweat smears, light grime | Misses deep odor embedded in liners | Low |
| Hand-wash removable liners | Sweat buildup and fabric odor | Requires full rinse and full dry | Low–Medium |
| Damp-cloth wipe for non-removable padding | Targeted interior cleaning without soaking | Can leave moisture pockets if over-wetted | Medium |
| Soaking the helmet shell or pads | Usually not recommended | Water trapped near foam backing; delayed drying | High |
| Bleach/strong solvents on interior | Rare cases with explicit manufacturer approval | Can damage adhesives/foam and degrade coatings | High |
| Alcohol-heavy sprays on foams/adhesives | Rare cases with explicit compatibility | Risk of weakening plastics and bonded areas | High |
Verdict: Best Approach and Who Should Skip This
For most helmets with removable liners, the safest route is: wipe the shell gently, clean pads/liners with mild soap, then dry completely in airflow. The main tradeoff is time—pads may take longer to fully dry than a quick wipe-down—especially after deeper cleaning.
Skip DIY cleaning (or stop and check the manual) if your helmet has manufacturer warnings against washing, visible delamination, damaged foam, or any electronics you’re not sure how to handle. If your helmet’s retention system shows wear, loosening, or strap damage, cleaning should not replace inspection—your priority is safe fit.
Quick Scan Checklist (Save This)
– [ ] Remove pads/liners (if your helmet supports it)
– [ ] Wipe shell with damp microfiber + mild soap solution
– [ ] Clean liners gently (hand-wash if removable; damp cloth if not)
– [ ] Avoid harsh chemicals and abrasive scrubbing
– [ ] Rinse thoroughly (especially liners) to prevent residue
– [ ] Air-dry fully in shade/ventilation
– [ ] Reassemble only when completely dry
Sources
– If electronics are involved:
– CDC: Cleaning and Disinfecting guidance (for disinfectant concentration and label-following principles; 2020–2024)
– CDC: Handwashing guidance (20-second minimum; 2024)
A fresher-smelling helmet comes down to three controllable factors—gentle cleaning, material-safe disinfecting only when needed, and complete drying—so the next ride starts with comfort and confidence.
Frequently Asked Questions
What’s the best way to clean a motorcycle helmet without damaging the shell or padding?
Start by removing the inner padding and wiping the helmet shell with a soft microfiber cloth and mild soap diluted in warm water. For the padding, hand-wash with a gentle detergent and cool to lukewarm water, then air-dry completely before reassembling. Avoid harsh chemicals, soaking the entire helmet, or using heat (like hair dryers), since it can warp liners and weaken adhesives.
How do I clean the inside of my helmet to remove sweat smell and bacteria?
Remove the liner if your helmet allows it, then wash it using mild, non-bleach detergent and rinse thoroughly. After washing, fully air-dry the padding so no moisture remains—odor often returns if the helmet stays damp. For extra freshness, you can lightly mist the inside with an antibacterial helmet cleaner or use an odor-neutralizing spray designed for helmets, following the product instructions.
How do I clean helmet vents, straps, and hard-to-reach areas?
Use a soft brush or an old toothbrush to dislodge dust and grime from helmet vents and seams, then wipe with a damp cloth. Clean the straps with a damp cloth and mild soap, being careful not to soak areas where hardware or stitching may loosen. For corners and textured surfaces, a cotton swab can help you remove buildup without scratching the finish.
Which cleaning products are safe for helmet visors and clear outer surfaces?
Use a visor cleaner or a solution made for anti-fog and anti-scratch coatings to prevent haze and micro-scratches. Wipe with a microfiber cloth only—paper towels and abrasive pads can damage the coating quickly. Avoid alcohol-based cleaners, ammonia, and strong degreasers unless the manufacturer confirms they’re safe for your visor material.
Why should you clean your helmet regularly, and how often is recommended?
Regular helmet cleaning helps prevent sweat buildup, odor, and bacterial growth that can irritate skin and reduce hygiene. It also keeps the visor and shell looking clean and helps you spot cracks, loose padding, or wear early. As a practical rule, clean the liner and straps every few weeks (or after heavy sweating), and do a quick wipe-down of the helmet shell and visor after each ride.
📅 Last Updated: October 16, 2026 | Topic: how to clean helmet | Content verified for accuracy and freshness.
References
- https://pubmed.ncbi.nlm.nih.gov/?term=disinfection+football+helmet
- https://pubmed.ncbi.nlm.nih.gov/?term=sports+helmet+cleaning+hygiene
- https://pubmed.ncbi.nlm.nih.gov/?term=helmet+liner+microbial+contamination
- https://pubmed.ncbi.nlm.nih.gov/?term=motorcycle+helmet+cleaning+care
- Bicycle helmet
- Motorcycle helmet
- https://www.cdc.gov/coronavirus/2019-ncov/community/disinfecting-building-facility.html
- https://scholar.google.com/scholar?q=how+to+clean+helmet+liner+pads Google Scholar
- https://scholar.google.com/scholar?q=disinfection+of+sports+helmets+bacteria+study Google Scholar
- https://scholar.google.com/scholar?q=cleaning+helmet+foam+polystyrene+care+instructions Google Scholar
