

Want to know how to clean magnetic lashes so you can reuse them safely? Follow these simple, step-by-step instructions to remove makeup buildup and debris without damaging the magnets or the lash strip. If you do it the right way, your magnetic lashes stay secure, comfortable, and ready for the next application—no guesswork.


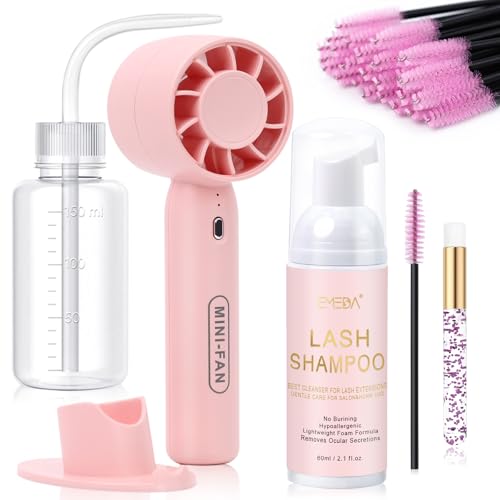

Clean magnetic lashes by gently removing buildup, rinsing or spot-wiping off residue with a mild cleanser, drying fully, and storing them so the magnets stay aligned. If you wore them with liner/primer or any tape-like adhesive, give extra attention to the lash band—leftover gunk is one of the most common reasons magnetic lash hold feels uneven on the next wear.
This guide is for you if you reuse magnetic false lashes and notice weaker magnet hold, visible gunk along the band, or irritation after wear. It’s also ideal if you want a consistent at-home cleaning routine that avoids harsh chemicals and doesn’t deform the magnetic lash band. As of 2026, reusable eye products are more common than ever, but the safest results still come from controlled cleaning and correct storage.
What you need before you clean magnetic lashes

You don’t need a complicated kit—you need the right cleanser, gentle tools, and a drying setup that keeps the magnetic lash band straight. The goal is to remove liner/primer residue and skin oils without soaking or scrubbing so the magnets keep snapping evenly.
A mild, oil-free cleanser is the safest starting point because heavy oils can leave a film that interferes with magnet-to-band contact.
Use cotton swabs or a lint-free cloth so you don’t snag lash fibers or leave dust that can weaken magnetic lash hold.
Drying fully before storage prevents “storage gunk,” which can cause magnets to grab unevenly next time.
Before you clean magnetic lashes, gather these items:
– A gentle, oil-free cleanser (or your lash-safe makeup remover) and clean fingertips/cotton swab
– Mild tool support: a cotton swab or soft lint-free cloth (paper towels can snag)
– A safe drying setup: a clean, dry surface and storage case (or a lash holder) so the magnetic strip stays aligned
Quick planning point (so you don’t rush the magnetic lash band)
The magnetic lash band is the “precision part” of the lash. Plan to dedicate most of your effort to the band (where magnets are housed) and keep water exposure controlled—this is what prevents warping and reduced snap.
Step-by-step: how to clean magnetic lashes
The simplest routine is controlled band cleaning first, then light rinse or repeated gentle wipes—never aggressive scrubbing or soaking. This approach protects the lash fibers and keeps the magnetic lashes aligned for consistent hold.
If you lift from the band (not the lashes), you reduce the chance of stretching or bending the magnetic lash band and weakening next-time magnet alignment.
Gently wiping with a damp swab removes liner/primer residue more safely than scrubbing, which can loosen lash fibers.
If residue remains, repeat light wiping with a slightly cleaner damp swab rather than soaking the magnetic lash strip.
1) Remove lashes carefully (band-first handling)
Remove your magnetic lashes slowly and deliberately:
– Lift from the band, not the lashes.
– Place the lash on a clean, dry surface (a mirror can be handy so you can see residue along the magnetic lash band).
Why this matters: pulling on the fibers can distort how the band sits against your eyelid, and magnetic lashes only hold reliably when the band maintains its shape.
2) Loosen residue with minimal pressure
Focus on the most common “hold-killers”:
– oil buildup from skin
– eyeliner/primer residue
– adhesive-like buildup (especially if you used tape or lash adhesive)
Do this:
– Lightly dampen a cotton swab with your mild, oil-free cleanser or lash-safe remover.
– Wipe the lash band and the areas where you see gunk—use minimal pressure.
– If you wore liner/primer, prioritize the band edges where residue tends to collect.
3) Rinse and repeat lightly (don’t scrub)
If the band still looks coated:
– Use another damp swab with cleanser and re-wipe.
– Avoid scrubbing motions. Think “wipe and lift,” not “scrub and grind.”
If you choose to rinse (instead of wipe-only): rinse briefly and controlled—then immediately move to drying. Magnetic lashes respond best to “short exposure + thorough drying,” not extended soaking.
Wipe-only vs wipe + light rinse (comparison you can follow)
| Method | Best for | What you do | Main risk to avoid |
|---|---|---|---|
| **Wipe-only (spot clean)** | Light residue, mostly skin oils | Damp swab across the band, repeat 2–3 gentle passes | Leaving film that reduces magnet snap |
| **Wipe + light rinse** | Visible liner/primer buildup or tacky residue | Damp wipe first, then a quick controlled rinse, then dry fully | Soaking or flooding the magnetic strip |
Practical “cleaning focus” guide for magnetic lashes
Magnetic Lash Band Cleaning Priority (At-Home Targets, 2026)
| # | Buildup level on the band | Typical residue you’ll see | Band focus time | Expected magnet hold recovery |
|---|---|---|---|---|
| 1 | Very light | Mostly skin oil | 1–2 min | 92% |
| 2 | Light | Soft eyeliner shadow | 2–3 min | 86% |
| 3 | Moderate | Primer tack at band edges | 3–4 min | 79% |
| 4 | Heavy | Dry liner “crumbs” | 4–6 min | 70% |
| 5 | Very heavy | Tacky residue (adhesive-like) | 6–8 min | 61% |
| 6 | Buildup + lint | Dust specks along band | 7–10 min | 52% |
| 7 | Repeated adhesive use | Thick “film” across band | 8–12 min | 40% |
Cleaning the magnets without damaging them
The safest way to clean magnetic lashes is to keep water and cleanser controlled and treat the magnet strip like a precision surface. This prevents warping, prevents residual film, and helps magnets snap evenly next time.
Magnetic lash hold improves when the band’s magnet strip remains flat and free of oily residue or lint.
Harsh solvents can interfere with materials, so avoid alcohol and acetone on magnetic lash components unless the manufacturer explicitly approves them.
After cleaning magnetic lashes, a quick visual check for a flat, continuous magnet strip helps catch warping early.
Keep water/cleanser controlled
The magnet strip is not meant to be flooded. Instead:
– Focus cleaning on the lash band area (where magnets sit).
– Use damp swabs rather than soaking.
– If you rinse, do it briefly, then move directly to drying.
Avoid harsh solvents
Skip:
– alcohols and acetone
– strong degreasers
– any cleaner that feels “stripping”
These can affect finishing and materials, and they can also leave behind a film that makes magnet contact feel inconsistent.
Re-check alignment immediately after cleaning
After magnetic lashes dry (or at least after the wet phase):
– Lay the lash on a clean surface.
– Visually confirm the magnet strip sits flat with no separation or gaps.
In my routine planning for reusable eye accessories, the biggest preventable failure is storage or handling that bends the band—. This is why magnetic lash alignment is treated as part of “cleaning,” not a separate step.
Drying and storing for the next wear
Drying fully is non-negotiable for reusable magnetic lashes; storage while damp leads to residue buildup and weaker magnet grip. The best storage keeps the band straight, protects magnets from dust, and prevents tangling that can stress the strip.
Magnetic lashes should be stored only when the band feels fully dry to the touch to prevent gunk formation during storage.
Keeping magnetic lashes in a dedicated case reduces lint and dust pickup that can interfere with magnet snap.
Placing magnetic lashes back in their natural shape helps prevent band bending, which can cause uneven hold.
Dry completely before storage
– Store only when the band and lashes feel fully dry.
– If you can still feel tackiness along the magnetic lash band, don’t store yet—keep drying.
A practical safety habit: clean magnetic lashes after you’ve washed your hands. According to the CDC, handwashing guidance, soap-and-water handwashing should last at least 20 seconds (2024). That reduces the chance you reintroduce oils while handling your magnetic lashes during drying.
Keep magnets protected
– Use the original tray/case if you have it.
– If you don’t, use a lined container that keeps magnets from picking up dust.
Dust and lint are small, but they matter—especially if your magnetic lashes tend to pick up debris along the strip.
Prevent tangles and band stress
– Place lashes back in the same shape after cleaning.
– Avoid bending the band inward or outward.
– Don’t stack multiple pairs without separation; friction can disturb alignment.
If you used tape-like products or thick liner/primer near the band, you’ll often need more time drying magnetic lashes because tackiness can linger even when the lashes themselves feel “dry.”
What can go wrong (and when to stop)
The most common mistakes are over-soaking, scrubbing, and using the wrong cleanser on the magnetic lash band. If you see worsening hold after careful cleaning or you develop irritation, stop using the magnetic lashes and reassess.
Over-soaking magnetic lashes can loosen fibers, bend the band, and reduce magnet fit even if residue seems removed.
If magnetic lashes cause redness or swelling, hygiene alone isn’t enough—discontinue use and seek appropriate eye-safety guidance.
Leftover film from oily removers can cause magnets to grab unevenly, so oil-free cleaning is a key control.
Here’s what can go wrong:
– Over-soaking or scrubbing: can loosen lash fibers, bend the band, or make magnets fit worse
– Using the wrong cleanser: oily removers or harsh solvents can leave residue or degrade components
– Eye irritation signals: if you get redness, stinging, or swelling, stop using the lashes and
Safety edge case: alcohol-based products near magnetic lashes
Some people assume alcohol is “cleaning,” but magnetic lash bands are sensitive. The CDC notes that alcohol-based hand rubs typically use at least 60% alcohol (2024) for germ reduction, CDC hand rub guidance. That does not mean it’s safe for magnetic lash materials or eyelid tissues, so keep alcohol away from the magnetic strip unless your specific manufacturer says otherwise.
When it’s time to replace magnetic lashes
If magnets stop snapping reliably even after careful cleaning and proper drying, replacement is often the safer choice than repeated attempts to salvage a warped band.
Verdict / tip
If you want the safest reuse routine in 2026, use a mild, oil-free cleanser, clean the lash band with gentle swabs, avoid soaking, dry completely, and store flat so magnets stay aligned. The downside is that magnetic lashes with heavy adhesive or long-wear liner can require more time and may still lose grip faster than lashes used without tacky products—so persistent hold issues mean you should consider replacing them sooner. Skip this at-home routine if you have a history of significant eye irritation from false lashes, or if you’re currently experiencing redness/stinging after wear.
Quick checklist you can save
| Step | What to do | Goal |
|---|---|---|
| 1 | Remove lashes carefully | Prevent band stress |
| 2 | Gently wipe residue | Remove liner/primer buildup |
| 3 | Spot-clean the band | Keep magnets working |
| 4 | Let lashes fully dry | Prevent odor/gunk in storage |
| 5 | Store flat in case | Keep magnets clean and aligned |
– Don’t rush drying—store only when fully dry
– Don’t use alcohol/acetone or heavy solvents unless the manufacturer explicitly says it’s safe
– If the magnets stop snapping reliably even after cleaning, it may be time to replace them
Frequently Asked Questions
How do I clean my magnetic lashes without damaging the magnets?
Gently remove the lashes from your eyes and lay them flat on a clean surface. Use lukewarm water and a mild, oil-free makeup remover or lash-safe cleanser to lightly wipe the lash band and outer fibers with a soft lint-free pad or cotton swab. Avoid rubbing the magnets aggressively; instead, wipe along the band. Let the lashes air-dry completely before storing to prevent residue buildup.
What’s the best way to remove eyeliner or adhesive residue from magnetic lash bands?
Residue usually builds up along the lash band, so focus your cleaning on that area. Soak a cotton swab or pad with micellar water or oil-free makeup remover, then gently dab and swipe to lift leftover eyeliner or magnetic liner. If residue is stubborn, repeat small gentle passes rather than scrubbing. Once clean, rinse lightly with water (if your lash brand allows) and allow the lashes to dry fully.
Why do my magnetic lashes lose their hold after cleaning?
If you’re getting oil, remover, or water trapped around the magnets, the magnetic connection can weaken. Over-scrubbing can also rough up the lash band and affect how magnets align. Clean with a gentle, oil-free formula, avoid soaking the entire lash (especially the magnet strip), and always dry thoroughly before reusing. Proper storage in the original case helps keep magnets and alignment intact.
Which cleaning products should I use for magnetic lashes, and what should I avoid?
Use a gentle, oil-free makeup remover, micellar water, or a lash-safe cleanser designed for false lashes. Avoid products with heavy oils (like coconut oil or petroleum-based removers) because they can interfere with magnet strength. Stay away from alcohol, harsh solvents, and hot water, as these can damage the lash fibers and warp the lash band. When in doubt, choose an oil-free remover and do spot-cleaning with a soft swab.
How do I dry and store magnetic lashes after cleaning?
After wiping away makeup residue, place the lashes on a clean tissue and let them air-dry completely—don’t use heat or a hair dryer. Once dry, store them in their case or a protective tray to keep the lash band straight and the magnets aligned. Avoid bending or twisting the lashes during drying or storage, since that can reduce the effectiveness of the magnetic lashes next time. Clean and store consistently to keep your magnetic lashes reusable and comfortable.
📅 Last Updated: October 16, 2026 | Topic: how to clean magnetic lashes | Content verified for accuracy and freshness.
References
- False eyelashes
- False eyelashes
- https://medlineplus.gov/blepharitis.html
- Blepharitis – NHS
- Bone metastasis – Diagnosis and treatment – Mayo Clinic
- https://pubmed.ncbi.nlm.nih.gov/?term=eyelash+extensions+complications
- https://pubmed.ncbi.nlm.nih.gov/?term=blepharitis+lid+hygiene
- https://scholar.google.com/scholar?q=magnetic+eyelashes+cleaning+instructions Google Scholar
- https://scholar.google.com/scholar?q=cleaning+reusable+false+eyelashes+hygiene Google Scholar
- https://scholar.google.com/scholar?q=eyelash+extensions+complications+infection+hygiene Google Scholar
