

You can clean marble bathroom countertops safely without dulling the stone, and this guide tells you exactly which products to use and which to avoid. Follow the step-by-step process for everyday grime and tougher stains, with timing, gentle cleaning methods, and safe drying so the finish stays flawless. If you want the quickest path to a streak-free, polished surface, start here.


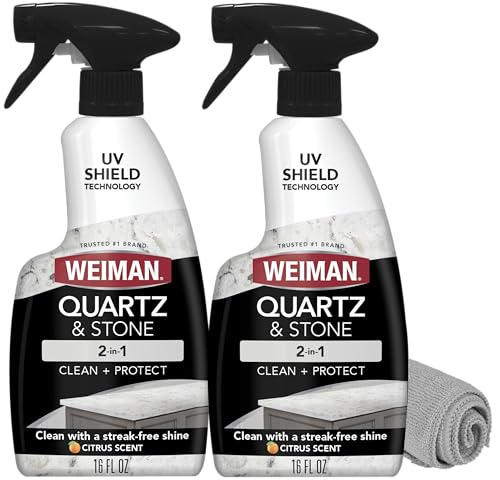

Marble bathroom countertops clean best with gentle, pH-neutral cleaners and soft microfiber cloths—no vinegar, no harsh degreasers, and no abrasive pads. Start by wiping up residue, then use the mild cleaner as directed, and only use stain removers meant for natural stone when needed. If a spill leaves a dark mark, treating it quickly (and avoiding acids) is usually what prevents it from setting.
This is for you if your marble counter has soap scum, toothpaste residue, water spots, or surface staining, and you want a method that won’t dull the finish or etch the stone. It’s also the right approach when you’re not sure what exact product already touched the surface—especially common in bathrooms where hair products, cleaners, and disinfectants get mixed.
Gather safe supplies (what to use and avoid)

Use microfiber cloths, a soft sponge, and a pH-neutral stone cleaner to clean marble without etching or scratching. In practice, this is the safest “default” because marble is sensitive to acids and vulnerable to micro-abrasion.
pH-neutral stone cleaners are designed to be gentle on natural stone and are typically the safest first choice for marble bathroom countertops.
Marble is mainly calcium carbonate (calcite), which can react with acidic liquids—so avoiding acids like vinegar and lemon juice helps prevent haze and texture changes.
Marble bathroom countertops are usually polished (glossy) and sometimes sealed, but the finish can still dull if you use the wrong chemistry or tools. When I set up my cleaning routine for a marble vanity top, the biggest “keep it safe” change I made was switching from paper towels and rough sponges to microfiber plus non-acid cleaner—.
What to use
– Soft microfiber cloths for wiping and drying (drying is key for minimizing water spotting around sinks).
– A soft sponge (non-scratch) for spreading cleaner without grinding residue into pores.
– A pH-neutral stone cleaner designed for natural stone, or the product recommended in your marble/sealer guidance.
– Stone-safe stain remover/poultice *only when needed* (this matters because “natural” or DIY stain recipes often conflict with how marble reacts to chemistry).
What to avoid
– Acidic cleaners and “natural” kitchen staples: vinegar, lemon juice, many descalers, and some toilet bowl cleaners.
– Abrasives: steel wool and rough pads. Even if the stain lifts, micro-scratches can make marble bathroom countertops look permanently dull.
– Bleach-based products: unless your stone-care authority explicitly approves them for your stone and finish. Bleach is often harsh and can interact with sealers or create unpredictable discoloration.
Use real-world chemistry checks (so you don’t guess)
According to standard chemistry references, household vinegar is commonly ~5% acetic acid and can measure around pH 2.4–3.4 depending on the brand and dilution (). According to mineral hardness references, calcite’s Mohs hardness is 3 (). And according to product safety data for common chlorine bleach, its solution is typically in the pH ~11–13 range ().
Cleaner Types vs. Suitability for Marble Bathroom Countertops (pH & Risk)
| # | Cleaning agent | Typical pH (approx.) | Main risk to marble | Marble suitability |
|---|---|---|---|---|
| 1 | pH-neutral stone cleaner (natural-stone formula) | 6.0–8.5 | Low etching risk; designed for stone | ★★★★★ |
| 2 | Mild liquid dish soap | ~7–9 (varies by brand) | May leave film that increases soap scum | ★★★★☆ |
| 3 | Baking soda paste | ~8.3 (saturated solution) | Can act abrasive; residue may dull | ★★☆☆☆ |
| 4 | White vinegar (acetic acid) | ~2.4–3.4 | Acid etching → haze/roughness | ★☆☆☆☆ |
| 5 | Lemon juice / citrus acids | ~2–3 (typical) | Acid etching risk | ★☆☆☆☆ |
| 6 | Chlorine bleach (sodium hypochlorite) | ~11–13 | Harsh chemistry; unpredictable with sealers | ★☆☆☆☆ |
| 7 | Household ammonia solutions | ~11–12 (typical) | High pH can stress sealers/finish | ★★☆☆☆ |
Daily wipe-down for grime and soap residue
For daily maintenance, you should wipe gently with microfiber using a pH-neutral cleaner and then dry the surface. This combination prevents soap scum buildup and reduces the chance that water spots etch or harden in place.
For marble bathroom countertops, “clean and dry” is often more protective than “soak and scrub” because marble pores can hold residue that later looks like permanent staining.
Using microfiber and prompt drying helps minimize water spotting around sinks and faucet areas, especially in hard-water bathrooms.
Marble bathroom countertops accumulate soap residue because bathroom products contain surfactants (the “cleaning” part) and fats/oils that can redeposit onto stone. If you let that film dry repeatedly, it becomes thicker and harder to remove.
Step-by-step daily wipe-down
1. Remove loose debris first: Wipe with a damp microfiber cloth so you’re not grinding particles into marble bathroom countertops.
2. Apply a small amount of pH-neutral cleaner: Spray lightly or apply to the cloth (not onto the entire surface).
3. Wipe gently: Use light pressure; don’t scrub with rough back-and-forth motion.
4. Respect product dwell time: Don’t let cleaner sit longer than the label instructions specify.
5. Dry thoroughly: Use a clean, dry microfiber cloth to reduce water marks.
Why this works (and what to watch)
This routine focuses on removal without chemical attack. From a practical standpoint, marble bathroom countertops show damage in two ways: (1) chemical haze/etching from acidic exposure and (2) surface dulling from abrasion. A daily wipe-down reduces both by keeping residue from building up and avoiding “repeat friction.”
Remove common stains without damaging marble
To remove stains safely, use the mild cleaning method first and then escalate only with stone-safe stain products designed for natural marble. The right approach depends on what the stain chemistry actually is—organic residue, hard-water minerals, or metal-related discoloration.
Natural stone stain removers and poultices are formulated to pull discoloration without broad chemical etching, but they must be marble-approved.
Rust-like spots are not automatically “rust polish jobs” for marble; many rust removers contain strong chemicals that may be incompatible with calcite and sealers.
Organic stains (hair oils, skin oils, bathroom product residue)
– Blot first, especially if the stain is still wet or tacky—scrubbing spreads oils through pores.
– If gentle cleaning doesn’t lift it, use a marble-safe stain remover/poultice and follow the label dwell/paste instructions exactly.
– Keep the treatment minimal: you’re targeting stain transfer, not coating the entire vanity.
Rust-colored or hard-water-related spots
– Treat these as a separate category from soap scum. Many rust removers contain acidic or reactive chemicals.
– Use a stone-specific approach and check whether the product is explicitly compatible with marble bathroom countertops and your finish (polished, honed, sealed/unsealed).
Dark marks from spills: act quickly
If a spill leaves a dark mark, treating it quickly is the best prevention strategy. In my own routine, the biggest improvement came when I stopped trying to “neutralize” spills with random home remedies and instead moved to pH-neutral cleaning plus blotting—. Even if you don’t know the original chemical, avoiding acids is still the safer default for marble bathroom countertops in 2026.
Deep clean when buildup won’t quit
When buildup persists, repeat gentle cleaning rather than jumping straight to stronger chemicals. Work in small sections so you can wipe and dry promptly, because marble bathroom countertops can show etching or dull patches surprisingly fast.
Escalating to harsher chemicals increases the risk of etching and patchy discoloration on marble bathroom countertops, even when the stain looks like it’s “getting better.”
If a countertop is sealed, resealing decisions should follow manufacturer guidance for that specific sealer type rather than assuming resealing reverses surface etching.
A controlled deep-clean method
1. Segment the surface: Clean one narrow area at a time.
2. Use pH-neutral cleaner in a damp-wipe cycle: Apply lightly, wipe, and dry immediately.
3. Repeat instead of over-soaking: Two gentle passes often work better than one aggressive one.
4. Only then consider a poultice: If a spot remains, use a marble-approved poultice rather than DIY acids.
Sealed vs. unsealed: don’t guess
If you aren’t sure whether your marble bathroom countertops are sealed, a cautious approach is to:
– Start with pH-neutral cleaning.
– Avoid “descaling” or acid-based products.
– Treat existing stains only with stone-safe products.
If your stone is sealed, resealing may help prevent future staining, but it won’t reliably undo chemical etching already done to the surface.
What can go wrong (and how to avoid it)
The most common problems come from acids, abrasives, and overconfident spot treatments. If you notice haze, roughness, or persistent patchy discoloration, stop and reassess—marble bathroom countertops don’t always “bounce back” after chemical or mechanical damage.
Acid etching typically appears as a hazy, lighter, or rough surface that can remain even after the stain is gone.
Abrasive pads can create micro-scratches that scatter light, making marble bathroom countertops look permanently dull under bright lighting.
Common failure modes
– Etching from acids: vinegar, lemon juice, many descalers, and some “clean and shine” bathroom products.
– Micro-scratches from abrasive pads: even when stains lift, the finish can look permanently altered.
– Patchy results from repeated spot treatments: many stain removers work through controlled chemical interaction, so repeated applications can leave uneven appearance.
– Trying to “fix structural discoloration” with surface cleaners: if the color is deep-set, aggressive chemicals may only make the contrast worse.
A simple decision guardrail (so you don’t overdo it)
Use the least-aggressive-first mindset (often described in risk-management terms as “start with controls, then escalate only as needed”):
– Step 1: pH-neutral cleaning + drying
– Step 2: marble-safe poultice/stain remover
– Step 3: professional stone restoration if the surface is etched or the stain is deep
Here’s a quick comparison of what usually goes right versus wrong:
| Do | Avoid |
|---|---|
| pH-neutral cleaner + microfiber + drying after each pass. | Vinegar/lemon acids and descalers not confirmed as marble-safe. |
| Stone-specific poultice only when gentle cleaning fails. | Abrasive pads (micro-scratches) and random “stronger next step” chemicals. |
When you should stop DIY
Stop and consult a stone professional if:
– You see lasting haze or texture changes (possible etching).
– Severe discoloration won’t improve after careful, repeated stone-safe attempts.
– You can’t identify what chemicals previously touched the surface and you suspect acid exposure.
Verdict: the honest “best practice” and who should skip DIY
For most marble bathroom countertops, the safest routine is: gentle wipe-down with pH-neutral cleaner, prompt drying, and stain-specific products/poultices only when regular cleaning fails. The downside is that this approach is slower than abrasive/acid “fixes,” and some deep-set stains or true etching require professional restoration rather than household chemistry.
The most reliable “best practice” for marble is to prevent etching and abrasion by using pH-neutral products and soft tools, then treating stains only with marble-approved products.
DIY is risky when etching or deep discoloration is already present, because surface damage may require polishing, honing, or specialized restoration.
If you’re unsure, lean into a conservative workflow: pH-neutral cleaning first, dry immediately, and treat stains only when you know you’re using marble-safe products.
Who should skip DIY (or pause and get help):
– You see signs of etching: permanent haze, lighter patches, or rough texture.
– The countertop has severe discoloration that doesn’t respond to gentle, stone-safe treatments.
– You can’t identify prior products and you suspect acid exposure.
Quick scan checklist: clean marble bathroom countertops
– [ ] Clear the surface and wipe up spills immediately (blot, don’t scrub)
– [ ] Use microfiber + pH-neutral cleaner (no acids, no abrasives)
– [ ] Clean in small sections, then wipe off thoroughly
– [ ] Dry the countertop after cleaning to prevent water spots
– [ ] Treat stains only with marble/natural-stone-safe products (follow label directions)
– [ ] Avoid “stronger next step” chemicals when a spot resists—repeat gentle cleaning first
– [ ] If damage appears (etching/haze), stop DIY and consult a stone professional
Marble bathroom countertops usually stay looking their best when you combine pH-neutral cleaning with fast drying and avoid acid exposure.
If a stain doesn’t respond to gentle cleaning, the safest escalation is a marble-safe poultice—not vinegar, descalers, or abrasive scrubbing.
Sources
If you remember one rule, make it this: clean marble bathroom countertops with pH-neutral products, soft materials, and quick drying—and avoid acids like vinegar at all costs. Use stain treatments only when simple cleaning doesn’t work, and stop if you notice haze or texture changes. If you share what kind of stain you’re dealing with (water spot, soap scum, rust-like mark, or dark organic stain), we can narrow down the safest next step without risking etching.
Frequently Asked Questions
What is the safest way to clean marble bathroom countertops without damaging the surface?
Use warm water and a pH-neutral, non-acidic cleaner made for natural stone, applied with a soft microfiber cloth. Avoid harsh cleaners, vinegar, lemon juice, and ammonia because marble is sensitive to acids and can etch or dull. After cleaning, rinse lightly with water if needed and dry immediately to prevent water spots and soap scum buildup.
How do you remove hard water stains and soap scum from marble bathroom countertops?
Start with a gentle cleaner and repeated wipe-downs using a microfiber cloth, since aggressive scrubbing can scratch marble. If stains persist, use a marble-safe stain remover or poultice specifically formulated for natural stone; follow the product directions and let it sit for the recommended time. After treatment, rinse and dry thoroughly, and consider using a daily squeegee or towel to reduce future mineral deposits.
Why do marble countertops stain more easily in bathrooms, and how can you prevent discoloration?
Bathrooms expose marble to moisture, soap, toothpaste, and minerals that can penetrate the stone’s pores and leave dark marks over time. Prevent staining by blotting spills quickly, cleaning after heavy use, and using coasters or mats under wet items where possible. Sealing the countertop with a quality marble sealer (at the right interval for your product and traffic) can significantly improve stain resistance.
Which cleaners should you avoid when cleaning marble to prevent etching or dullness?
Avoid acidic products like vinegar, descalers, toilet bowl cleaners, and many “limescale remover” formulas, as they can etch marble and create permanent haze. Skip abrasive powders, scouring pads, and magic erasers because they can dull the finish or leave micro-scratches. Also avoid bleach and harsh degreasers unless the label explicitly states they’re safe for marble and natural stone.
What is the best routine for daily and weekly maintenance of marble bathroom countertops?
For daily cleaning, wipe the surface with a damp microfiber cloth and a small amount of pH-neutral stone cleaner, then dry to prevent water spots. For weekly maintenance, clean thoroughly and inspect for spots, using a marble-safe cleaner or targeted poultice for any stains. To keep marble looking polished, avoid leaving cleaning products to air-dry and re-seal periodically based on the countertop’s condition and the sealer’s recommended schedule.
📅 Last Updated: October 16, 2026 | Topic: how to clean marble bathroom countertops | Content verified for accuracy and freshness.
References
- Marble
- https://marble-institute.com/care-and-cleaning/
- https://marble-institute.com/care-and-cleaning/marble/
- https://www.cdc.gov/household/cleaning/disinfecting.html
- https://www.epa.gov/coronavirus/how-clean-and-disinfect-your-home
- https://www.nps.gov/subjects/historicpreservation/preservation-briefs-01.htm
- https://www.britannica.com/science/marble
- https://scholar.google.com/scholar?q=how+to+clean+marble+countertops+without+etching Google Scholar
- https://scholar.google.com/scholar?q=calcium+carbonate+stone+cleaning+acid+etching+study Google Scholar
- https://scholar.google.com/scholar?q=natural+stone+care+cleaning+procedures+marble+bathroom Google Scholar

[…] Soap scum buildup […]