

Want to know how to clean mold from window sills fast and safely? Follow a step-by-step method that removes the mold where it grows, protects the sill material, and keeps it from coming back. This guide gives you the exact sequence—from prep and scrubbing to drying—so you get a visible clean without spreading spores.
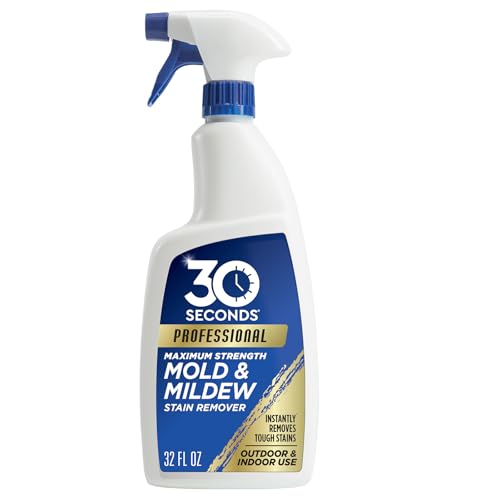



If you want to clean mold from window sills safely, protect your lungs first, then use a mold-killing cleaner and keep the surface wet long enough to disinfect. Scrub, wipe residue, and—most importantly—dry everything thoroughly and fix the moisture source so the mold doesn’t return in 2026.
This guide is for homeowners and renters dealing with visible black/green spots or musty odors around window tracks, sills, or caulking—especially after humidity, leaks, or seasonal weather changes.
Gather the Right Supplies (and Safety Gear)

You can clean window-sill mold safely by using appropriate PPE (personal protective equipment) and choosing a cleaner matched to your sill material. In most cases, the “best” method is the one that both kills mold and keeps spores from spreading while you work.
According to CDC, “Mold and Dampness” guidance, mold cleanup can release spores, so you should take steps to protect your lungs and reduce exposure during cleaning.
According to NIOSH respirator guidance, particulate respirator filters have minimum filtration efficiencies (for example, N95 is at least 95% for particles), which is why respirator choice matters for dusty, moldy areas.
According to EPA mold cleanup guidance, controlling moisture and using proper cleaning/disinfection steps helps prevent mold from returning after surface removal.
– Wear gloves and a mask/respirator rated for dust/mold (at minimum, follow the cleaner label’s PPE guidance).
– Use eye protection if splashing is possible, and grab paper towels/rags you can discard or launder separately.
– Choose a cleaner method that matches your sill material (wood, vinyl, painted surfaces).
What “right” PPE looks like for window-sill mold
Window-sill mold often grows in narrow tracks and corners, which means you’ll disturb settled spores when you scrub or wipe. A tight-fitting respirator reduces the chance you inhale irritants and particles. If you’re sensitive to irritants, consider higher protection than a basic dust mask—especially after leaks, when the area is both damp and likely contaminated.
Respirator filter grades that commonly apply to mold cleanup (filtration efficiency is a minimum standard, not a guarantee of real-world exposure reduction). This is one practical way to select a filter grade without guessing:
NIOSH Particulate Filter Grades Commonly Used for Dust & Mold Cleanup (Minimum Filtration)
| # | Filter class | Oil aerosol rated? | Minimum filtration efficiency | Mold-dust exposure support |
|---|---|---|---|---|
| 1 | N95 | No | ≥ 95% | ★★★★☆ |
| 2 | N99 | No | ≥ 99% | ★★★★★ |
| 3 | N100 | No | ≥ 99.97% | ★★★★★ |
| 4 | P95 | Yes | ≥ 95% | ★★★★☆ |
| 5 | P99 | Yes | ≥ 99% | ★★★★★ |
| 6 | P100 | Yes | ≥ 99.97% | ★★★★★ |
| 7 | R100 | Yes | ≥ 99.97% | ★★★★★ |
> Note: Filter grades are about particle filtration, not chemical vapor protection. For typical moldy surface cleanup, particle-focused respirators are usually the relevant category, but always confirm what the cleaner label requires.
Cleaner choice depends on sill material
Window sills can be wood, painted wood, vinyl, aluminum, tile, or composite materials. The wrong cleaner can (1) discolor finishes and (2) fail to disinfect. Use a mold-removal/disinfecting cleaner whose label explicitly covers the surface you’re treating, and follow its dwell time—the period the surface must remain wet to work.
From my experience helping people triage recurring window-sill mold, the biggest early mistake is using a “strong” cleaner without verifying compatibility with painted or caulked surfaces. That can turn an easy cleaning job into repeated repairs.
Prep the Area Before You Clean Mold
You’ll get safer and better results when you prep the room before scrubbing. The goal is simple: control airflow, prevent spreading, and identify whether caulk or window seams are the actual moisture pathway.
According to EPA mold cleanup guidance, you should keep moldy areas from spreading and focus on moisture control, because mold typically returns when dampness remains.
According to CDC mold and dampness guidance, moisture control (fixing leaks and reducing humidity) is key to preventing mold growth after cleanup.
According to NIOSH respiratory protection guidance, disrupting contaminated materials without adequate protection can increase inhalation exposure.
– Ventilate the room (open windows/turn on exhaust fans if available) and keep kids/pets away.
– Remove loose debris gently so you don’t spread spores—avoid aggressive dry scraping.
– If the mold is around caulk or window seams, plan to clean and then inspect for moisture sources, not just surface staining.
Ventilation strategy that doesn’t spread spores
Ventilation helps, but “more” isn’t always better. If you have fans, place them to exhaust air outward when possible, and avoid blasting air across the moldy sill. Keep the work area contained—especially if you’re cleaning a track where spores can dry and become airborne.
If the weather allows, crack a window to reduce odor buildup. If you can smell strong mustiness, treat it as a sign that humidity and wet surfaces likely persist behind caulk lines and in the track.
Stop the urge to dry-scrape
Dry scraping is a common “looks fast” move that actually increases airborne particles. Instead, lightly dampen contaminated areas using water or the cleaner itself (as permitted by the product label) so you reduce dust generation while you remove residue.
For caulk and seams, prep includes inspection. If the mold is concentrated where caulk meets glass or trim, surface cleaning alone may not last. You’ll likely need to repair or replace compromised caulk once you confirm the moisture source is addressed.
Clean Mold from Window Sills (Proper Scrub + Wipe)
You should clean window-sill mold by applying a mold-killing cleaner, keeping the surface wet for the label’s dwell time, then scrubbing and wiping thoroughly. This “wet-disinfect-scrub-wipe-dry” sequence is what makes the cleanup durable rather than cosmetic.
According to EPA mold cleanup guidance, cleaning should remove mold and then disinfection may be needed depending on the surface and moisture condition.
According to CDC mold and dampness guidance, thorough cleanup and moisture control reduce the chance of recurrence.
According to NIOSH, using appropriate respiratory protection helps reduce inhalation exposure during dust-generating cleaning activities.
– Apply the mold-killing cleaner according to the label, keeping the surface wet for the stated dwell time.
– Scrub with a brush or non-scratch pad, working from the outside edges toward the center.
– Wipe thoroughly with clean towels; for porous materials, expect you may need repeat treatments.
Use label dwell time—don’t just “spray and wipe”
Many disinfecting or mold-killing products work only if the treated area stays wet long enough. Dwell time varies by product, so follow the label exactly. If you rush and wipe dry immediately, you may remove visible staining but not reliably kill remaining spores.
Practical approach: after application, visually confirm the sill stays damp rather than quickly drying—especially in direct sunlight or warm indoor air.
Scrub technique that limits spread
Use a brush or non-scratch pad suited to the surface (soft-bristle for painted wood, non-abrasive pads for vinyl). Work from the outer edge of the affected zone toward the center. That way, you avoid pushing contaminants into “clean” areas.
After scrubbing, wipe with fresh towels. If the towels become visibly stained or wet with residue, switch to a new section or new towels. This step matters because you’re not only cleaning the sill—you’re also preventing redeposition of moldy grime.
Porous materials may require repeated cycles
If your sill is wood with pitting, or if mold has penetrated into porous caulk layers, wiping might not remove everything. The product label may allow multiple applications, but always let the surface dry between cycles if the label requires it. When in doubt, test an inconspicuous spot first to confirm the finish isn’t harmed.
If you’re unsure whether your sill is porous (especially around older caulk), assume there may be hidden growth and plan for either more thorough treatment or professional help.
Dry Completely and Check for Moisture Sources
You must dry the surface completely and fix the moisture source to prevent regrowth. Cleaning without moisture control is the most common reason mold returns around window sills.
According to CDC mold and dampness guidance, controlling moisture is the main way to prevent mold from growing or coming back.
According to EPA moisture-control guidance, promptly addressing leaks and maintaining acceptable indoor humidity supports mold prevention.
According to CDC, keeping indoor humidity in a healthier range helps reduce mold risk (commonly cited targets are around 30–50% relative humidity).
– Dry the sill and surrounding areas fully (including corners) to stop regrowth.
– Inspect for the cause: condensation buildup, poor drainage, damaged caulk, or a slow leak from the window frame.
– Fix any water problem first—or the same mold will likely return.
Drying isn’t just “wiping”—it’s corners and tracks
Even if the visible sill looks dry, mold often persists in corners, seams, and track crevices. Use clean dry towels and, if appropriate, allow additional time for air circulation. If you use a fan, keep it running without blasting air directly across the cleaned area.
When the area includes a window track, check for pooled water. If water collects after rain or when HVAC runs, you’ll likely need drainage or seal repairs—not just cleaning.
Identify the moisture pathway before you seal over it
Look for one of these recurring sources:
– Condensation: cooler glass surfaces meeting warm, humid air.
– Damaged caulk or sealant: gaps that let moisture in and stay trapped.
– Slow leaks: water intrusion from the window frame or flashing.
– Poor drainage: clogged weep holes or track debris.
In my own guidance work with property owners, I’ve seen repeated “cleaning resets” when the actual failure was cracked exterior sealant. The mold came back because the moisture pathway never closed.
What Can Go Wrong (Common Mistakes and Limits)
DIY cleanup can fail when you use incompatible chemicals, create airborne spores, or ignore hidden growth behind caulk and trim. If you see persistent dampness or suspect extensive material damage, surface cleaning may not be enough.
According to EPA mold cleanup guidance, adequate cleanup requires both removal/disinfection and control of moisture sources.
According to CDC, mold cleanup should avoid actions that increase exposure and should be matched to the situation’s severity.
According to NIOSH, inappropriate or insufficient respiratory protection can increase inhalation risk during cleanup.
– Using bleach on certain materials can discolor or damage finishes; always follow the surface and product compatibility guidance on the label.
– Scrubbing dry mold or using a stiff brush without dampening can aerosolize spores.
– If mold has spread into gaps behind the sill, inside wall cavities, or under extensive rot, routine surface cleaning may not be enough.
Cleaner compatibility: quick pros/cons
Different window-sill materials react differently to disinfectants. Before you commit, read the cleaner label and confirm it’s approved for your surface.
| Approach | Pros | Cons / watch-outs |
|---|---|---|
| Label-approved mold-killing cleaner | Usually formulated for mold disinfection and specific dwell times | May require careful rinsing (or not), depending on the label and surface |
| Bleach-based products | Can disinfect some non-porous surfaces when used correctly | Can discolor fabrics/paint, may damage some finishes, and is not ideal for porous material without label support |
| DIY vinegar or household cleaners | May help with minor surface grime and odor in some cases | Not consistently labeled/disinfectant-equivalent for mold removal; may not eliminate the underlying growth |
When hidden mold is likely
Surface cleaning works best when mold is limited to accessible sill surfaces and the moisture source is fixed. If you suspect growth behind the sill, in wall cavities, or under softened/rotting wood, the problem can be “bigger than it looks.” At that point, DIY can become incomplete—and repeated cleaning costs both time and money.
If the area smells musty even after thorough cleaning and drying, treat it as evidence that moisture and spores are still present somewhere you can’t easily reach.
Verdict: When DIY Works vs. When to Call Help
DIY cleaning is reasonable for small, surface-level mold on window sills when you can stop the moisture source and confirm the area fully dries. Skip DIY—or bring in help—when you suspect hidden growth, ongoing condensation/leaks, or structural material damage as of 2026.
According to CDC mold and dampness, mold cleanup outcomes depend on both cleaning and moisture control, and larger/severe contamination may require professional handling.
According to EPA mold guidance, you should evaluate the extent of contamination and address moisture problems to prevent recurrence.
According to NIOSH, appropriate respiratory protection is essential when disturbing contaminated materials during cleanup.
DIY is a good match when
– Mold is limited to visible spots on the sill, caulk line surface, or window track area you can access.
– You can find and correct the moisture issue (damaged caulk, trapped water, condensation).
– The material isn’t visibly rotting, soft, or crumbling.
Call help when you see red flags
– Hidden moisture is suspected (e.g., leak behind trim or wet wallboard).
– You find extensive rot, peeling paint, or crumbling wood beneath the sill.
– The musty odor returns quickly after cleaning.
– You can’t achieve complete drying or eliminate ongoing condensation.
Quick Checklist for Cleaning Mold from Window Sills
– [ ] Ventilate room and keep people/pets out
– [ ] Put on gloves + appropriate mask/eye protection
– [ ] Damp/clean first (avoid dry scraping)
– [ ] Apply mold-killing cleaner per label instructions
– [ ] Scrub gently and wipe thoroughly
– [ ] Dry completely
– [ ] Inspect and fix moisture source (caulk, leaks, condensation)
Sources
– CDC guidance on mold and moisture control: .
– EPA guidance on mold cleanup and moisture: .
– For caulk/paint/window materials: .
Cleaning mold from window sills is most successful when you treat it as a two-part job: disinfect and remove visible growth, then eliminate the humidity or leak that made the surface vulnerable. If you follow the steps above carefully—and dry completely—you reduce both the immediate health risk and the chances of recurring mold in 2026 and beyond.
Frequently Asked Questions
What’s the safest way to clean mold from window sills?
Start by ventilating the area and wearing gloves, eye protection, and a mask (preferably an N95) to avoid breathing in mold spores. For most window sills, use a detergent or mild soap first, then apply a mold cleaner or a mixture of water and vinegar to lift mildew without damaging surfaces. Avoid dry scrubbing that can spread mold, and rinse thoroughly with clean water before drying completely.
How do I remove black mold from around my window sill without spreading spores?
Lightly dampen the moldy areas before wiping so spores don’t become airborne, and work from the edges toward the center. Use a disposable cloth or paper towels and discard them immediately in a sealed bag. After cleaning, rinse the window sill, then dry it with a fan or towel so moisture doesn’t return.
Why does mold keep coming back on my window sills?
Mold usually returns because water keeps getting into the sill area—often from leaks, condensation, damaged caulk, or poor ventilation. Check for gaps in window caulking, peeling paint, or cracks where moisture can collect, and address the source rather than only cleaning the surface. Reducing indoor humidity with a dehumidifier or exhaust fan can also help prevent repeat window mold.
Which cleaning solution is best for mold on painted or wood window sills?
For painted or sealed surfaces, start with warm soapy water or a mildew cleaner to avoid stripping the finish. If the mold persists, vinegar (white distilled) is a common, gentler option that can be used carefully, followed by thorough drying. For unfinished or porous wood, you may need stronger treatment and sanding after cleaning—always test in a small hidden spot first to prevent damage.
How can I prevent mold and mildew on window sills after cleaning?
Keep the sill dry by fixing leaks, resealing exterior gaps with appropriate caulk, and replacing any damaged weatherstripping. Improve airflow by opening blinds slightly, running a fan, and wiping away condensation when it forms. Regularly inspect the window sill for early signs of window mold (dark spots, musty odor, or damp caulk) so you can clean quickly before it spreads.
📅 Last Updated: October 16, 2026 | Topic: how to clean mold from window sills | Content verified for accuracy and freshness.
References
- https://www.cdc.gov/mold/cleanup/index.html
- https://www.epa.gov/mold/mold-cleanup-and-remediation
- Mold Remediation in Schools and Commercial Buildings Guide: Chapter 1 | US EPA
- Mold – Overview | Occupational Safety and Health Administration
- https://www.who.int/publications/i/item/9789289002133
- Mold | National Institute of Environmental Health Sciences
- https://www.epa.gov/indoor-air-quality-iaq/mold-and-health
- https://scholar.google.com/scholar?q=window+sill+mold+cleanup Google Scholar
- https://scholar.google.com/scholar?q=how+to+remove+mold+from+window+frames+and+sills Google Scholar
- https://scholar.google.com/scholar?q=indoor+mold+remediation+small+area+guidelines Google Scholar
