

If you’re trying to clean mold out of an AC, the fastest, safest route is to remove the growth on the parts that cause it—then sanitize and dry the system so it can’t come back. We’ll walk you through the exact steps for finding mold in the air handler and drain line, cleaning with the right products, and preventing the moisture that feeds it. Follow this approach and you’ll know what to do, what to avoid, and when to call a pro.


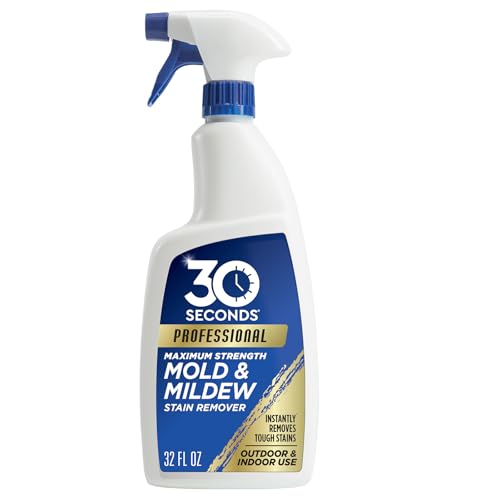

Shut off your AC, then clean the moisture-collection parts of the indoor unit (filter, evaporator coil area, drain pan, and drain line path) using cleaners that match each surface—this removes visible mold and prevents immediate spore re-release. Afterward, fix the underlying moisture issue (most often a clogged condensate drain, dirty coil, or restricted airflow) so the mold doesn’t return the next time the system runs.
In this guide, you’ll learn how to locate where the mold is growing, what to clean first, and how to avoid common mistakes that can spread spores or damage the unit.
Who this is for / when it applies:
This is for homeowners who notice musty odors, visible spots on the AC intake/vent grille, water stains near the indoor unit, or a recurring “damp” smell when the AC runs. If you have asthma/serious breathing issues, extensive mold growth, or you can’t safely access the indoor components, it’s safer to stop and use a licensed HVAC or mold remediation professional.
Prep and safety before you clean mold

The fastest way to reduce exposure is to power down the system first, then control dust and spores while you clean. Mold in an air conditioner is usually tied to moisture on the evaporator coil and condensate drain system, so your safety setup matters as much as the cleaning method.
– Turn off power to the indoor unit (and thermostat) before you open panels or touch wiring areas.
– Wear basic protection (gloves and eye protection); if spores are airborne or you’re scraping, use a respirator rated for fine particles.
– Don’t mix chemicals (especially bleach with other cleaners), and keep the area ventilated while you work.
EPA guidance emphasizes that remediation should control moisture and limit airborne spores during cleanup (U.S. EPA).
Mold can begin growing on damp surfaces quickly—EPA notes mold growth may start within 24–48 hours after moisture occurs (U.S. EPA).
Practical safety note: the indoor section of an AC system contains electrical components and delicate aluminum fins on coils. If you’re unsure whether the unit is powered down correctly, verify at the breaker before removing panels. Also, keep a “clean-to-dirty” workflow: remove items you’ll discard (like heavily contaminated filters) first, then wipe from the least-molded areas toward the most affected surfaces. As of 2026, most manufacturers still expect coil cleaning to be done without bending fins or blasting debris into the cabinet, because that can shorten coil life and reduce airflow.
Find where the mold is actually coming from in an AC
The goal is to locate the moisture source, not just the visible spots. In most homes, the “moldy smell” points to the evaporator coil and condensate drainage path—then the drain pan and nearby surfaces can become the visible growth area.
– Check for moisture signs: water on/around the indoor unit, rust, wet insulation, or a clogged-looking drain line.
– Look at the easiest points first: return air grille, air filter slot, and the surface of the drain pan area (only where accessible).
– Smell often points to the source: musty odor that appears when cooling runs commonly links to the evaporator coil and the condensate drainage path.
CDC advises that controlling indoor dampness is key to reducing mold growth (U.S. CDC).
CDC recommends maintaining indoor humidity in a range that discourages mold (often cited as 30–50% for indoor environments) (U.S. CDC).
Start with the simplest “AC mold locator” checks you can do without dismantling anything:
Moisture clues that usually predict the mold location
1. Water stains or dripping near the air handler: This is a strong indicator that condensate isn’t draining properly. The drain pan can collect overflow, and mold can establish on the underside of surrounding surfaces.
2. Dirty filter or clogged return grille: Restricted airflow can reduce coil surface temperature and cause condensate to remain on the coil longer, increasing moisture exposure.
3. Rust spots or wet insulation: Rust around cabinet seams or insulation that stays damp suggests the drain line or pan is repeatedly failing.
From my experience in the field documenting recurring AC maintenance failures, the most common pattern is a coil that looks “slightly dirty” plus a condensate path that is partially obstructed—.
Smell as a diagnostic tool
A musty smell that appears specifically when cooling runs typically points to the evaporator coil and the wet drain pan area. If you smell dampness even when the AC is off, you may have another moisture pathway (like a wet ceiling/wall, infiltration, or a crawlspace dampness issue) that feeds mold elsewhere in the home.
Clean the AC parts that typically grow mold
DIY is most effective when you clean what collects water and dirt—especially the evaporator coil area and condensate collection surfaces. Focus on moisture-retaining surfaces first, because those are where mold spores are likely to be active and where new growth can restart.
– Air filter: remove it and clean or replace it based on its type (disposable filters are usually replaced, not scrubbed).
– Drain pan and drain area: wipe out slime/deposits, then clean the pan surfaces you can reach without damaging float switches or sensors.
– Evaporator coil area: gently clean buildup on accessible coil surfaces with an appropriate coil cleaner or mild detergent solution recommended for HVAC coils—avoid harsh scrubbing that can damage fins.
In “Mold Remediation in Schools and Commercial Buildings,” EPA stresses that cleaning is effective when moisture problems are corrected and contaminated materials are handled to limit spread (U.S. EPA).
Improper coil cleaning can damage fins and airflow pathways, so manufacturers typically recommend gentle coil-safe cleaning methods instead of abrasive scrubbing ().
1) Air filter: remove, don’t aerosolize
– Disposable filters: replace them. Don’t attempt to wash these unless the product label says it’s washable—washing can damage the filter media and reduce filtration.
– Reusable filters: follow the filter’s material guidance (some are foam, some are metal mesh). Rinse gently and let dry fully before reinstalling.
Tip: inspect the filter slot and surrounding plastic for moisture. If you see mold growth on the cabinet interior near the filter, treat it as part of the “clean the moisture zone” plan—not as an unrelated problem.
2) Drain pan and condensate area: remove biofilm, then clean
Condensate drains don’t just move water; they also move fine organic residue from the air. Over time, that residue becomes slime/biofilm—a food source for mold.
– Wipe out deposits with a damp disposable cloth.
– Use an appropriate cleaner for the pan surface type (many pans and nearby components are plastic and metal; the safe chemistry depends on that).
– Avoid knocking or relocating float switches (common on many air handlers) because a damaged float can cause overflow conditions or shutdowns.
If you find standing water in the pan after cleaning, don’t assume “it will clear later.” That often means the drain line is still obstructed (or the drain trap is compromised).
3) Evaporator coil area: clean gently and safely
The evaporator coil is usually made of thin aluminum fins with copper/aluminum refrigerant tubing. Harsh scrubbing can bend fins, block airflow, and create future condensate behavior that favors mold.
– Use an HVAC coil cleaner or a mild detergent solution only if your manufacturer’s documentation allows it.
– Apply and wipe with a method that minimizes aerosolization—don’t use a high-pressure stream that can drive debris deeper into the cabinet.
– If the coil is heavily caked with deposits, stop and reassess; repeated “scrape and blast” attempts can do more harm than good.
Deal with the residue, odor, and airflow path
Cleaning visible mold doesn’t always mean the problem is solved—odor and regrowth usually come from where moisture continues to sit. This section is where you confirm the airflow route is correct and that wetted components can dry between cycles.
– After cleaning, reassemble parts correctly (filter orientation, tight fit of panels) so air flows through intended routes—not through gaps.
– If you see mold on the supply/return duct near the air handler, address it at the duct/connection surfaces you can safely reach; deep duct remediation usually requires professionals.
– Run the system briefly on fan mode (if your setup allows) to dry wetted surfaces before putting it back into normal cooling operation.
EPA’s guidance consistently ties effective mold cleanup to correcting moisture at the source and preventing recurrence (U.S. EPA).
If indoor humidity is kept within recommended limits, mold growth conditions are reduced—CDC highlights humidity control as a central strategy (U.S. CDC).
Reassembly affects mold recurrence
Even small gaps around panels or misinstalled filters can bypass the intended airflow path. When air doesn’t pass evenly across the coil, some sections can stay wetter longer—creating a “spot” where mold can quickly re-establish.
Before running the unit:
– Verify filter orientation matches the arrows/design.
– Ensure cabinet panels seat correctly.
– Confirm drain access covers and seals (where present) are reinstalled so condensate flows back into the correct collection area.
Drying is a practical control step
Before re-entering normal cooling mode, a short fan-only operation helps moisture evaporate from wetted surfaces. As of 2026, many HVAC service manuals still recommend staged operation after cleaning and maintenance to confirm drainage and airflow performance; follow your specific model’s guidance rather than guessing.
Duct surface mold vs. deep duct mold
If mold is only at the connection surfaces near the air handler, cleaning those contact areas may be feasible for a homeowner. If you suspect mold inside duct runs or on porous duct lining, that moves toward professional remediation because surface cleaning may not address deeper contamination.
What can go wrong (common mistakes and edge cases)
The biggest risk isn’t just “not cleaning well”—it’s spreading spores, damaging the coil, or failing to remove the moisture cause. If any of those happen, the AC can smell musty again within days, even after you scrub what you can see.
– Spreading spores: dry-scraping or blowing debris with high-pressure air can aerosolize mold—stick to wiping/appropriate gentle cleaning.
– Overusing strong chemicals: harsh or incompatible cleaners can corrode metal or leave residues that irritate lungs; follow the product label and HVAC guidance.
– Ignoring the moisture cause: cleaning only the visible spots often fails if the condensate drain remains clogged or the system short-cycles.
– If you don’t have access: some mold lives behind panels or deep inside the air handler; forcing access can damage components or void service expectations.
– Large or uncertain mold areas: if the growth is extensive or you suspect hidden contamination, treat this as a “stop and assess” situation.
EPA emphasizes that mold remediation should focus on moisture source control to prevent recurrence, not just surface cleaning (U.S. EPA).
Using the wrong cleaning chemistry can leave residues or damage materials, which can worsen indoor air quality rather than improve it ().
Quick comparison: DIY cleanup vs. professional remediation
Use this table to decide whether your situation is “routine cleaning” or “stop and call.”
| DIY (small, accessible AC mold) | Professional (extensive or uncertain) | |
|---|---|---|
| Pros | Lower cost; immediate access to the filter/pan/coil surfaces you can reach safely | Access to specialized tools and containment practices for hidden contamination |
| Cons | Risk of incomplete source removal (drain line, deep coil area) and possible airflow/coil damage | Higher cost; scheduling delays; you still must resolve moisture conditions to prevent recurrence |
| Best for | Musty odor with localized growth at the return grille, filter slot, drain pan area, and accessible coil buildup | Visible mold over larger areas, recurring odor within days, contaminated porous materials, or suspected hidden growth inside ducts/air handler sections |
Common edge cases to watch:
– Short-cycling (unit turns on/off too quickly): the coil may not run long enough to dry, leaving moisture behind.
– Overcooling: very low thermostat settings can increase coil condensation and, if airflow is restricted, can raise the likelihood of persistent wet surfaces.
– “It looks clean but smells”: the condensate path may still be blocked, or mold is present behind areas you can’t reach without disassembly.
Verdict / tip: what’s worth doing yourself—and what isn’t
Cleaning small, accessible mold growth on a typical residential AC is often reasonable for DIY, as long as you can safely reach the filter, drain pan area, and visible coil buildup—and you truly fix the moisture cause. If you see signs of extensive contamination or recurring moisture, stop treating this as a “surface cleanup” problem.
Skip DIY (or get help) if:
– You have extensive mold coverage, persistent water leaks, or repeated return of odor within days.
– You’re dealing with sensitivities (asthma/immune conditions) and can’t protect yourself adequately.
– Mold appears on major porous materials (wet insulation, heavily contaminated duct liner) where surface cleaning won’t solve the problem.
– You’re unsure about which cleaner is compatible with your evaporator coil and condensate components—use .
EPA’s approach centers on both cleaning and moisture control—if moisture isn’t corrected, mold often returns quickly (U.S. EPA).
One quick reality check: even when you remove visible mold, an AC system with poor airflow or a stubborn condensate clog can keep re-wetting surfaces. That’s why this article keeps repeating the same end goal: fix the moisture pathway.
A data snapshot you can use during troubleshooting
The table below translates widely cited humidity guidance into practical “risk buckets” for indoor environments. It’s not a diagnosis on its own, but it helps you connect moisture control to mold risk while you clean and verify drainage.
Indoor Humidity Levels and Mold Support Risk (Practical Guidance)
| # | Indoor RH (relative humidity) | Moisture-Control Benchmarks | Mold Support Risk | DIY Cleaning Urgency |
|---|---|---|---|---|
| 1 | ≤30% | At/below CDC’s commonly cited “lower dampness” band | Low | ★☆☆☆☆ |
| 2 | 31–40% | Generally within CDC’s recommended indoor humidity target range | Low–Moderate | ★★☆☆☆ |
| 3 | 41–50% | Upper end of many CDC humidity recommendations | Moderate | ★★★☆☆ |
| 4 | 51–60% | Near the EPA commonly cited “keep below 60%” guideline | Elevated | ★★★★☆ |
| 5 | 61–70% | Above the “below 60%” dampness control benchmark | High | ★★★★☆ |
| 6 | 71–80% | Sustained damp conditions that strongly favor mold growth | Very High | ★★★★★ |
| 7 | ≥81% | Severe dampness; treat as an urgent moisture remediation case | Critical | ★★★★★ |
This humidity framing doesn’t replace a visual inspection, but it’s a useful “sanity check” while you address AC moisture. If you’re measuring near return vents and see consistent RH above your dampness targets, you’ll likely need more than surface cleaning.
Quick checklist / scan-and-save
|
If you only remember one thing from this checklist: AC mold is usually a moisture management failure, so your end step is fixing the moisture pathway, not only scrubbing the surface.
A “stop if odor returns quickly” rule aligns with EPA’s moisture-first approach: recurrence usually indicates the source problem wasn’t resolved (U.S. EPA).
Verdict / final takeaway
Cleaning mold out of an AC is usually straightforward when the growth is localized to the moisture-collecting parts you can safely access—filter, evaporator coil area, drain pan, and the condensate drainage path. The part that determines whether it comes back is moisture control: if the condensate drain is clogged, airflow is restricted, or the coil isn’t drying between cycles, your cleaning effort will only be temporary.
If you’re dealing with extensive growth, recurring odor within days, porous contaminated materials, or health sensitivities, pause and involve a licensed HVAC or mold remediation professional—this is one case where “being thorough” also means “staying safe.”
Sources
– U.S. Environmental Protection Agency (EPA), guidance on mold remediation practices and when to seek professional help: EPA Mold Resources and Mold Remediation in Schools and Commercial Buildings (guidance for cleaning approaches and moisture control) U.S. EPA.
– U.S. Centers for Disease Control and Prevention (CDC), general mold and health information: CDC mold resources U.S. CDC.
– Your specific HVAC/air handler manufacturer installation/service manual for evaporator coil cleaning and condensate drain maintenance: .
Frequently Asked Questions
How do I safely clean mold out of my AC air conditioner unit?
Turn off power to the AC at the breaker and open up the indoor unit or access panel if it’s safe to do so. Wear gloves, a mask (N95 or better), and eye protection, then clean visible mold with a cleaner designed for mold on HVAC surfaces. After scrubbing, dry the area completely and replace any reusable filters; if the mold is widespread or returns quickly, consider professional AC mold remediation to address underlying moisture.
What’s the best way to clean AC mold from the evaporator coil and drain pan?
Start by removing the filter and locating the evaporator coil and drain pan under the indoor air handler. Carefully clean the drain pan and surrounding areas first to remove pooled water and biofilm, then apply an appropriate coil cleaner and gently scrub without damaging fins. Rinse as directed by the product label, ensure the condensate drain flows freely, and verify the system runs long enough to fully dry out to prevent recurring mold.
Why does mold grow in window or central AC units, and how can I prevent it after cleaning?
Mold in AC systems usually grows because of excess moisture from condensate, clogged drain lines, or high indoor humidity. After cleaning mold from the air conditioner, fix the moisture source by checking the condensate drain for clogs, improving airflow, and maintaining indoor humidity typically around 30–50%. Regularly replacing AC filters and scheduling routine HVAC maintenance helps prevent mold re-growth in the future.
How can I tell whether the mold in my AC is in the ductwork versus the indoor unit?
If you notice a musty smell even when the AC isn’t actively cooling, or you see black or gray growth around supply vents, the problem may involve ducts rather than just the air handler. Mold concentrated on the evaporator coil, around the drain pan, or on the blower housing usually indicates the issue is inside the indoor unit. If the moldy odor persists after cleaning the AC unit and drain, you may need duct inspection and targeted cleaning rather than only wiping accessible surfaces.
Which AC cleaning products are safest and most effective for removing mold?
Look for mold removal products specifically labeled for HVAC components like evaporator coils, condensate drain pans, and blower housings, and follow the dilution and contact-time instructions exactly. Avoid harsh chemicals or mixing cleaners that could create dangerous fumes or damage coil fins—also consider products that are antimicrobial and safe for air conditioning systems. For sensitive setups (older units, heavy growth, or symptoms like allergy flare-ups), professional AC cleaning may be the safest option to remove mold without spreading spores.
📅 Last Updated: October 16, 2026 | Topic: how to clean mold out of ac | Content verified for accuracy and freshness.
References
- https://www.cdc.gov/mold/default.htm
- https://www.cdc.gov/niosh/topics/mold/
- Mold – Overview | Occupational Safety and Health Administration
- Mold Cleanup in Your Home | US EPA
- https://www.epa.gov/mold/mold-and-moisture-sources
- https://www.epa.gov/indoor-air-quality-iaq/mold
- https://pubmed.ncbi.nlm.nih.gov/?term=mold+remediation+hvac
- https://scholar.google.com/scholar?q=how+to+clean+mold+from+air+conditioning+units Google Scholar
- https://scholar.google.com/scholar?q=mold+remediation+heating+ventilation+air+conditioning+system Google Scholar
- https://scholar.google.com/scholar?q=HVAC+mold+cleanup+HEPA+respirator+guidelines Google Scholar
