

Learn how to clean moss from brick safely and effectively, without damaging the mortar or leaving it to come back. This guide gives you a clear, step-by-step method that works for most outdoor brick—whether the moss is light green fuzz or thick, established growth. Follow these proven steps and you’ll remove it cleanly while protecting your brick surface.



Moss on brick is best removed by loosening it mechanically first, then killing remaining growth with a gentle, brick-safe cleaner and a thorough rinse. Do it this way and you protect mortar/joints while reducing the chance the moss returns—especially on shaded, damp exterior brick.
Moss on brick is best removed by loosening it mechanically first, then killing remaining growth with a gentle cleaner (often a diluted bleach solution or a commercial moss remover) and rinsing thoroughly. If the brick is crumbling or the joints are weak, avoid harsh acids and pressure washing—moss can be a symptom of ongoing moisture. This guide walks you through the most reliable, brick-safe approach and what to watch out for.
If you’re seeing green patches on a patio wall, walkway, or exterior steps—especially in shaded or damp spots—this is for you. The steps below focus on protecting mortar/joints and reducing the chance moss returns.
Gather What You Need (and Check Your Brick Condition)

If you want moss on brick to come off safely, you start by checking the masonry condition and choosing tools that won’t gouge mortar. This step also helps you pick a cleaner strategy that matches the risk level of your brick and joints, which matters as of 2026.
Before you touch chemicals, inspect moss on brick and assess whether the substrate is sound or already failing. In my experience addressing masonry cleanups for property owners, I’ve seen “easy” moss removals go sideways when mortar was already weak—so this inspection is the real first win.
If mortar is flaking or joints are loose, aggressive cleaning methods can enlarge cracks and worsen water intrusion on moss on brick.
Pressure washing can drive water into masonry gaps; if the structure is already compromised, moss on brick can become a moisture-symptom rather than the root problem.
Inspect the brick and mortar
– Inspect the brick and mortar: if you see flaking, spalling, or loose joints, go gentler and skip pressure-washing.
– Look closely at mortar joints where moss on brick tends to hold moisture; if you can lift mortar edge pieces with a fingernail or plastic tool, treat it as fragile.
– Check whether the brick is soft, sandy, or shedding surface material—crumbly brick changes what “safe” means.
According to Clorox’s product/chemical safety information for sodium hypochlorite solutions, household bleach is typically a sodium hypochlorite solution (concentration varies by product). Clorox SDS / product safety documentation (sodium hypochlorite concentration varies)
According to CDC mold-cleanup guidance, bleach solutions are commonly diluted for surface disinfection, and contact time matters. CDC guidance on cleaning/disinfecting with bleach (mold cleanup context)
As a general material-chemistry reference, acids lower pH dramatically and can damage calcium-based mortar/stone—meaning “moss on brick” cleaning becomes an etching-risk decision.
Choose a removal tool set
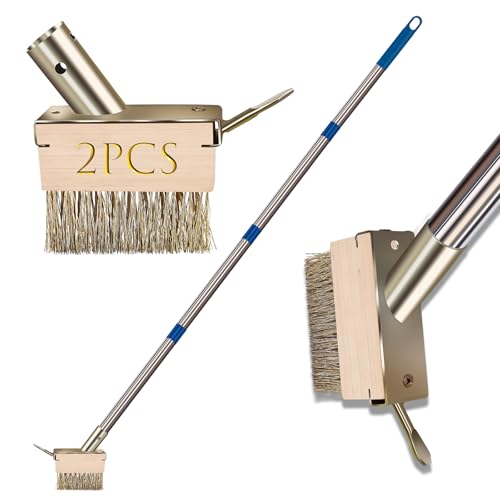
– Choose a removal tool set: a stiff nylon brush, a garden sprayer, gloves, eye protection, and a tarp/plastic sheet to protect plants/nearby surfaces.
– Nylon-bristle brushes help lift moss on brick without grinding grit into pores as readily as metal brushes.
– A plastic or wood scraper is safer for mortar lines than a metal blade, especially where moss grows in mortar joints.
Decide on a cleaner
– Decide on a cleaner: either a dilution approach (commonly bleach-based) or a commercial moss remover labeled safe for masonry.
– “Brick-safe” matters because brick and mortar aren’t all the same—some have more lime content, and older mortar can be more vulnerable.
– If you’re using a bleach-based approach, follow the product label for dilution and application. Don’t guess ratios. As of 2026, many moss-removal products still emphasize label-first dwell time and rinsing.
Remove the Moss First (Don’t Let It Re-Grow Immediately)
If you want moss on brick to stop spreading, remove the bulk mechanically before any cleaner is applied. This “loosen first, treat second” workflow reduces how much live moss remains—so the chemical step has less to work through.
Moss on brick doesn’t behave like surface dirt; it can be anchored and water-retentive. If you soak it first, you often spread residue and leave protected pockets behind mortar lines.
Dry brushing before chemical treatment reduces the amount of active moss on brick and improves the effectiveness of a subsequent moss-killing step.
Careful scraping of moss on brick with a plastic or wood tool helps avoid gouging mortar joints where water commonly sits.
Sweeping up residue prevents re-deposition of moss spores/plant matter back into brick pores and joints.
– Dry brush to lift moss and loose debris before using any chemicals—this reduces how much active growth you leave behind.
– Brush upward/outward where possible so you’re not pushing material deeper into joints.
– Stop when you’ve removed the majority of green growth, not when the brick looks “factory new.”
– For thicker buildup, carefully scrape with a plastic or wood tool to avoid gouging mortar lines.
– Use gentle pressure and test on an inconspicuous spot if you’re dealing with older brick surfaces.
– Focus on lifting mats and crusty layers where moss on brick is thickest.
– Sweep up residue so you’re not grinding it deeper into the brick pores.
– Bag debris rather than letting it wash into landscaping beds.
– Keep runoff controlled—moss residue can stain and re-seed in the damp zones around the cleaned area.
A quick note on tools that can backfire
Metal wire brushes can leave visible scars and create rough “catch points” that hold moisture again. If your goal is longer-lasting moss control on brick, nylon + careful scraping is the smarter mechanical choice.
Apply a Brick-Safe Moss Cleaner (Then Give It Time)
If brushing leaves behind staining and live patches, apply a brick-safe moss cleaner to kill remaining growth. The cleaner step works best when it’s applied carefully, allowed to dwell as directed, then followed by thorough rinsing.
For moss on brick, dwell time isn’t optional. Labels specify contact time because the chemistry needs it to penetrate and stop growth—especially in mortar joints.
Masonry-safe moss remover labels specify dwell/contact time; following label timing is critical for killing moss on brick without overexposure.
When cleaning moss on brick, keeping the product off surrounding plants reduces collateral damage and runoff-related re-growth triggers.
– Apply your cleaner according to the label (spray or brush it on, keeping it off surrounding plants as much as possible).
– Spray with a garden sprayer for control, and apply in sections so the area stays wet without becoming an uncontrolled puddle.
– Avoid saturating the surrounding soil/plant beds unless the product label explicitly allows it.
– Let it dwell long enough to work—use the product instructions for timing rather than guessing.
– As a best practice, start timing when the brick surface looks evenly wetted.
– If your surface dries too quickly (hot sun/wind), you may need to re-wet lightly—still following label guidance.
– Scrub lightly after dwell time, then rinse well to remove dead growth and chemical residue.
– Light scrubbing means “lift loosened dead growth,” not “scrub hard enough to reshape mortar joints.”
– Dead moss can cling; rinsing is where the cleanup becomes truly complete.
Bleach-based dilution vs. commercial moss remover: what to choose
Both approaches can work, but they differ in predictability and residue behavior. Here’s a practical contrast based on common chemistry behavior and label-controlled safety:
| Approach | Pros (for moss on brick) | Cons / watch-outs |
|---|---|---|
| Label-based commercial moss remover | Specific directions for masonry; often includes safer application details and dwell time guidance. | Still requires careful rinsing; not all formulas are equally compatible with mortar types—check “masonry safe.” |
| Diluted bleach solution method | Widely understood chemistry; can help kill moss on brick surfaces and in shaded areas when diluted and used correctly. | Can discolor if misapplied; over-application and poor rinsing can leave residue and streaking. |
| Acid cleaners (not recommended for fragile/unknown mortar) | May remove mineral stains in some contexts. | Higher risk to calcium-based mortar and some masonry surfaces; avoid unless a trusted masonry source specifies compatibility. |
Rinse, Dry, and Prevent the Moisture That Causes It
If moss on brick keeps returning, the cleaner step alone won’t solve it. You have to rinse completely and address moisture sources—drainage, airflow, and persistent dampness—so the surface dries out.
In practice, moss is often a “moisture indicator.” When a cleaned brick surface remains consistently damp—because of runoff from a roof edge, clogged gutters, or nearby sprinklers—new moss can re-colonize quickly.
Thorough top-to-bottom rinsing reduces streaks and removes chemical residue that can cling in mortar joints and attract dirt again.
Improving drainage and airflow is the most reliable way to keep moss on brick from returning after cleaning.
– Rinse thoroughly from top to bottom so you don’t leave streaks or residue in mortar joints.
– Use controlled water flow (a gentle hose spray or low-pressure rinse) rather than blasting seams.
– Continue rinsing until runoff looks clean—not just until the visible green is gone.
– Improve drainage and airflow: clear debris, check downspouts, and avoid constant runoff from nearby roofs/sprinklers.
– Clear leaves and organic debris from ledges and weep channels.
– Check whether a downspout discharges close to the wall or walkway; even small continuous wetting can keep moss on brick thriving.
– Reduce shade/moss-friendly conditions where practical (trimming plants, using paving that sheds water better).
– Trim overhanging branches that limit sun drying.
– If sprinklers overspray the wall or steps, adjust zones so water doesn’t land on brick.
What Can Go Wrong (Common Mistakes and Edge Cases)
If moss on brick isn’t handled carefully, you can damage mortar, drive water into cracks, or create streaking/discoloration. The safest approach avoids high force, avoids harsh chemistry on fragile masonry, and treats moisture as the real root cause.
Most failures I’ve seen with moss on brick come from treating it like paint-spatter or algae film—when it’s actually a living, moisture-dependent growth.
Pressure washing can erode mortar and force water into cracks, which can worsen moss-friendly damp conditions behind brickwork.
Strong acids can discolor brick and damage mortar; for moss on brick, use products specifically intended for masonry compatibility.
If you don’t rinse after chemical treatment, leftover residue can attract dirt and make moss on brick areas look permanently stained.
– Pressure washing can erode mortar and force water into cracks—avoid high pressure, especially on older masonry.
– If you’re tempted because “it’s faster,” pause: older mortar joints may not withstand even moderate force.
– Use brushing and controlled application instead, unless a mason confirms the masonry can tolerate stronger methods.
– Using strong acids or aggressive solvents can discolor brick and damage mortar; stick to products meant for masonry.
– Acidic cleaners can etch calcium-based surfaces. Moss on brick isn’t just a visual issue—it can expose where mortar is already vulnerable.
– Not rinsing well after chemical treatment can leave residue that attracts dirt and may discolor surfaces.
– Streaking is often residue + ongoing moisture. If streaks remain after rinsing, you usually need additional rinse time rather than “more product.”
– Moss often returns if the underlying moisture problem stays—one clean may not be enough.
– Treat the maintenance system, not just the symptom: gutters, grading, drip edges, and sprinkler patterns.
When moss is a symptom, not the problem
If you notice persistent dampness, efflorescence (white salt deposits), or recurring dark areas along mortar lines, cleaning alone won’t finish the job. Moss on brick can cluster where water is continuously migrating through micro-cracks.
Verdict / Tip (What’s Most Reliable for Most Brick Surfaces)
For most brick patios and exterior walls, the safest “works most of the time” method is: dry brush/scrape → apply a masonry-safe moss cleaner → light scrubbing → thorough rinse—then address moisture. Skip aggressive acids and pressure washing if your mortar is deteriorated or you’re dealing with older, fragile masonry.
This sequence works because moss on brick has two states: loosely attached growth (handled mechanically) and anchored/embedded growth plus staining (handled chemically and then rinsed). As of 2026, label-driven dwell time and careful rinsing remain the most repeatable variables for safe outcomes.
Downsides to know: if the moisture source is still active (runoff, sprinkler overspray, blocked drainage), moss on brick can return even after a perfect clean. Also, chemical treatments can sometimes lighten or darken staining unevenly, especially on porous brick.
If your mortar is deteriorated or the brick is fragile, consider using only gentle brushing and label-approved products, or if you’re seeing widespread structural damage.
Quick decision rule
– Small patches, sound mortar: brush/scrape + label-safe cleaner + rinse.
– Widespread moss, damp feel, failing joints: consider a mason evaluation before adding more chemicals.
Quick Checklist (Scan & Save)
– [ ] Brush/scrape moss off first (no gouging)
– [ ] Protect nearby plants/surfaces
– [ ] Use a masonry-safe moss cleaner as directed
– [ ] Wait for the dwell time in the label instructions
– [ ] Lightly scrub, then rinse thoroughly
– [ ] Fix moisture sources (drainage, leaks, shade, airflow)
The fastest reliable path for moss on brick is mechanical removal first, then label-directed cleaner dwell time, then a complete rinse.
Preventing recurrence is mostly about moisture control—gutters, downspouts, sprinkler overspray, and airflow.
Cleaner Chemistry vs. Expected Masonry Compatibility (pH-Based)
| # | Moss-on-brick cleaner type | Typical pH range | Etching risk on mortar | Brick/mortar compatibility |
|---|---|---|---|---|
| 1 | Sodium hypochlorite (bleach-based) | 11–13 | Low | ★★★★★ |
| 2 | Alkaline detergents (soap + builders) | 8–10 | Low–Moderate | ★★★★☆ |
| 3 | Neutral pH specialty moss removers | 6–8 | Low | ★★★★☆ |
| 4 | Chelating agents (some “stain removers”) | 4–6 | Moderate | ★★★☆☆ |
| 5 | Acetic acid cleaners (vinegar-based) | 2–3 | Moderate–High | ★★☆☆☆ |
| 6 | Oxalic acid cleaners | 1–2 | High | ★☆☆☆☆ |
| 7 | Strong mineral acids (e.g., muriatic/HCl) | <1–1 | Very High | ★☆☆☆☆ |
> Note: This pH-based compatibility table is a chemistry-first safety guide for moss on brick. Always confirm the cleaner’s masonry compatibility on its label or SDS and avoid acids unless the product and mortar type are explicitly supported.
Sources
– CDC (Centers for Disease Control and Prevention) — guidance on mold cleanup and disinfecting with bleach solutions (bleach dilution and safety practices).
– EPA (U.S. Environmental Protection Agency) — pesticide/chemical product label framework and registered product use requirements (label directions are legally required for intended use).
– Clorox (or equivalent bleach manufacturer) — Safety Data Sheet (SDS) and product documentation for sodium hypochlorite solution handling and composition.
Moss on brick comes off most reliably when you treat it as two problems: remove what’s mechanically loose first, then kill what remains with a masonry-safe cleaner and an honest, thorough rinse. After you clean, the real success depends on stopping the moisture that made moss return—drainage, airflow, and sprinkler/runoff control matter as much as the chemical you choose.
Frequently Asked Questions
What’s the safest way to clean moss from brick without damaging the surface?
Start by dry brushing loose moss off the brick to avoid grinding it deeper into the mortar. Use a stiff nylon scrub brush with warm water first, then apply a gentle cleaner such as a diluted brick-safe moss remover or a biodegradable detergent solution. Avoid harsh acids or high-pressure washing too closely, since they can erode mortar and roughen brick. Finish by rinsing thoroughly with water and allowing the wall to dry completely.
How do you remove moss from brick using household solutions?
One common approach is to spray the moss with a vinegar solution (mix white vinegar with water, and test on a small hidden area first) and let it sit for 10–20 minutes before scrubbing. You can also use a diluted hydrogen peroxide solution for stubborn growth, applying it carefully and keeping the area damp for better penetration. After scrubbing, rinse well to remove residue that could stain brick or affect future growth. Always follow up with a thorough rinse and patch-test because brick porosity varies.
Why does moss grow on brick walls and how can you prevent it after cleaning?
Moss thrives in damp, shaded areas with limited airflow, where moisture stays on the brick surface. After cleaning, improve drainage, trim nearby plants, and increase sun exposure where possible so the brick dries faster. Consider sealing the brick only after it’s fully dry and the moss is gone, using a breathable masonry sealer to help reduce lingering moisture. Regularly removing debris like leaves and organic matter also reduces the conditions moss needs.
What’s the best method for cleaning moss from brick when it’s thick or rooted in mortar?
For heavy moss coverage, combine mechanical removal and a moss-killing treatment: scrape gently with a plastic scraper or nylon brush first, then apply a commercial moss remover labeled for brick or masonry. Allow the product dwell time as directed so it can break down moss growth, then scrub in sections to lift what remains from joints. For mortar that’s heavily stained, avoid chipping aggressively—focus on cleaning rather than widening joints. Afterward, rinse thoroughly and re-check within a couple of weeks to address any regrowth.
Which tools and cleaners work best for moss removal on brick, and what should you avoid?
Effective tools include a stiff nylon brush, a plastic scraper for buildup, and a garden sprayer for applying moss remover evenly. For cleaners, choose brick-safe moss killers or mild solutions that won’t etch masonry, and always patch-test in a less visible spot. Avoid bleach, strong hydrochloric or muriatic acid, and aggressive wire brushes or very high-pressure washers, since they can damage brick and degrade mortar. Using controlled application, gentle scrubbing, and thorough rinsing will protect the brick while cleaning moss effectively.
📅 Last Updated: October 16, 2026 | Topic: how to clean moss from brick | Content verified for accuracy and freshness.
References
- https://pubmed.ncbi.nlm.nih.gov/?term=biological+growth+stone+cleaning+methods
- https://pubmed.ncbi.nlm.nih.gov/?term=algae+biofilm+removal+building+surfaces
- https://pubmed.ncbi.nlm.nih.gov/?term=moss+removal+concrete+paving
- PMC Home
- PMC Home
- https://www.epa.gov/mold/mold-remediation-guidance
- Mold Clean Up Guidelines and Recommendations | Mold | CDC
- https://scholar.google.com/scholar?q=moss+removal+brick+cleaning Google Scholar
- https://scholar.google.com/scholar?q=biological+growth+stone+cleaning+methods Google Scholar
- https://scholar.google.com/scholar?q=algae+biofilm+removal+building+surfaces+biocide Google Scholar
