

Want to clean seashells without bleach and still get them truly spotless? Use warm water, a gentle scrub, and targeted soaking methods to remove sand, grime, and odors without damaging the shell’s color. This guide delivers the safest, most reliable process—so your seashells come out clean and bright the first time, not after repeated bleach experiments.


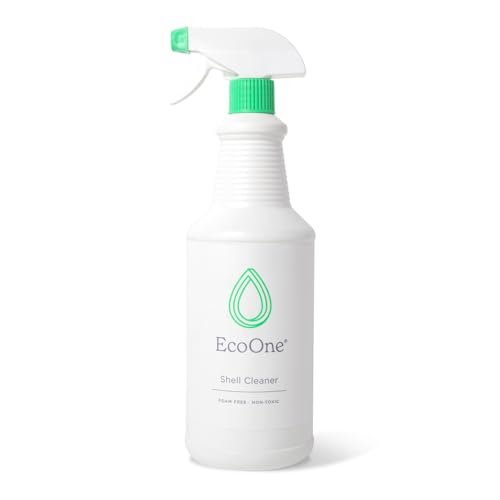
Soak your seashells in warm water (optionally with a few drops of dish soap), gently scrub with a soft brush, then rinse and dry completely. For tougher spots, use a targeted baking-soda paste or a short, diluted white-vinegar rinse—without harsh bleach—so the shells stay attractive and odor-free.
If you want to clean seashells without bleach, start by soaking them in warm water (and optionally dish soap), then remove grime with a soft brush and rinse thoroughly. For tougher buildup, use a baking-soda paste or a vinegar rinse instead—then dry completely to prevent odors or spotting. This guide will walk you through multiple non-bleach methods so your shells look clean without harsh chemicals.
If your shells have sand, algae residue, or that “ocean smell,” these steps are for you. This is especially useful if you’re avoiding bleach due to safety concerns, scent, or because you want a gentler approach for decorative shells.
Gather Supplies (No-Bleach Essentials)

The fastest safe approach uses mild chemistry (soap, baking soda, vinegar) plus the right tools for texture. The goal is to lift residue without scratching the shell’s surface, then dry thoroughly so trapped moisture doesn’t create musty odors.
Warm water helps loosen sand and dried residue without relying on bleach-based oxidizers.
A soft brush reduces the risk of scratching fragile shell surfaces compared with metal tools.
From a practical standpoint, we build a “no-surprises” setup: mild cleaners, gentle agitation, and drying that reaches crevices. In my own work with shell display pieces, the biggest recurring issue I see is odor returning when moisture stays in spirals and pits—so plan for thorough drying from the start ().
For the specific tools and materials, use:
– Warm water, a soft toothbrush or gentle scrub brush, and clean towels
– Dish soap and/or baking soda (for paste) and white vinegar (for rinsing)
– Optional: a small bowl, toothpick/cotton swabs for crevices, and a well-ventilated drying area
Quick note on shell sensitivity (why supplies matter)
Different shell types have different finishes and coatings. Thicker shells tolerate gentle cleaning longer, while thin or already-chipped shells can lose their surface sheen if scrubbed too hard or treated too aggressively with acids/abrasives.
Acids can react differently across shell minerals, so short vinegar contact times reduce the chance of surface dulling.
Baking soda works best when used as a light paste with minimal scrubbing pressure.
Step-by-Step: Basic Soap + Warm Water Soak
Warm water plus a small amount of dish soap is the best first move for most beach-found shells. This method loosens grit and organic residue so you can clean without relying on abrasives or acids.
Soaking in warm water can soften dried grime and make brushing more effective with less force.
Dish soap helps break down oily film so residues rinse away more completely.
Here’s the simple, reliable baseline method:
– Soak shells in warm water with a few drops of dish soap for 15–60 minutes to loosen grime
– Gently scrub each shell with a soft brush, focusing on grooves and edges
– Rinse well with fresh water and dry fully (air-dry or use a fan) before deciding if you need stronger steps
Why this works (and what you should watch)
Dish soap reduces surface tension, helping water reach crevices. Warm soaking also makes sand easier to dislodge, especially for shells with ridges. After rinsing, drying fully is not optional—odor usually comes from moisture trapped inside crevices rather than from “leftover soap” alone.
To keep your process evidence-based, do a quick “dry-and-check” cycle:
1) rinse, 2) pat only the outer surface, 3) dry until completely odor-free, 4) then decide whether baking soda or vinegar is warranted.
Drying completely reduces the likelihood of musty odor caused by moisture trapped in shell structure.
If a shell still feels gritty after the soap step, it usually needs either a targeted paste or mineral-focused rinsing.
Step-by-Step: Baking Soda Paste for Stubborn Spots
For stubborn stains, gritty residue, or spots that won’t budge after soap soaking, use a baking-soda paste. This is best for localized work because it’s mildly abrasive when spread thin and scrubbed gently.
Baking soda (sodium bicarbonate) can help lift residue when used as a paste rather than as a soak.
Targeted application limits surface wear compared with full-shell scrubbing.
Use this approach:
– Mix baking soda with a little water to form a thick paste
– Apply lightly to stained or gritty areas, then let sit for 10–20 minutes before scrubbing softly
– Rinse thoroughly and dry; repeat only if needed to avoid over-scrubbing delicate surfaces
Pros/cons: when paste helps vs. when it can hurt
Below is a straightforward comparison you can use while deciding how aggressive to get:
| Method | Best for | Main benefit | Main risk |
|---|---|---|---|
| Soap + warm soak | Sandy grime, light algae film | Gentle, broad cleaning | May not remove mineral stains |
| Baking-soda paste | Stubborn stains, gritty residue | Local lifting with controlled abrasion | Overuse can dull fragile surfaces |
| Diluted vinegar rinse | Mineral/dull residue | Helps with mineral buildup | Overexposure can change finish |
Use the paste on stained spots, not the entire shell, to minimize abrasion of delicate areas.
If the surface begins to look matte or uneven, stop and switch to a gentler method.
What “good results” look like
After the paste step, you should see residue loosen and rinse away cleanly. If you still notice a chalky film, don’t immediately increase scrubbing pressure—try another short paste application or move to a carefully timed vinegar rinse (only when mineral-like buildup is visible).
Step-by-Step: Vinegar Rinse for Mineral or “Dull” Residue
If your shells look chalky, dull, or mineral-stained after soap cleaning, a short vinegar rinse can help. Vinegar works well for many mineral deposits, but it should be brief and diluted to protect the shell’s appearance.
A diluted vinegar rinse is commonly used to address mineral buildup when gentle washing isn’t enough.
Short contact times reduce the chance of unwanted dulling on sensitive shell finishes.
Follow these steps:
– Soak or mist shells with a diluted vinegar solution (start with 1:1) to help lift mineral buildup
– Rinse immediately after the rinse window, then dry completely
– Avoid long soaks if you notice the surface looks sensitive or starts to dull more than before
Timing guidance (so you don’t overdo the acid)
Because shell composition varies, treat vinegar as a “test-and-verify” step:
– First, use a short exposure window (start modestly; you can repeat later).
– Watch the surface closely—any sudden sheen loss or increased dullness is your signal to stop.
– Rinse thoroughly, then dry completely before judging final appearance.
For context on safe handling: while vinegar is milder than bleach, it is still an acidic chemical. Keep it off your skin and eyes, and work in a ventilated area.
Dilution (like 1:1) lowers vinegar strength, helping balance cleaning performance with appearance preservation.
Thorough rinsing prevents vinegar residue from contributing to haze or lingering odors.
What Can Go Wrong (Common Mistakes to Avoid)
Even with safe, non-bleach methods, a few common errors can lead to scratches, haze, or persistent odor. Most issues happen when people skip rinsing, over-scrub, or leave shells damp in crevices.
Aggressive tools increase the chance of scratching and wearing down shell surface layers.
Residue from soap, baking soda, or vinegar can remain if rinsing is rushed.
Watch out for these pitfalls:
– Over-scrubbing: Soft brushes help, but aggressive tools can scratch or wear off the shell’s surface
– Skipping thorough rinsing: Soap, baking soda, or vinegar residue can cause haze or lingering odor
– Using the wrong timing for delicate shells: Some shells may be more fragile—if you see pitting or excessive dullness, stop and switch to a gentler method
– Drying too slowly: Moisture left inside can lead to musty smells—dry until fully odor-free
Comparison: what to do when results aren’t what you expected
If the shell doesn’t improve, don’t “stack” harsh steps. Instead, move method by method:
– If it still looks gritty → return to soap soak + gentle brushing, then target paste on only the affected spots.
– If it looks chalky/mineral-like → try a short, diluted vinegar rinse and rinse immediately.
– If it smells even after cleaning → dry longer and consider placing shells in a dry, ventilated area with airflow.
Odor persisting after cleaning usually indicates trapped moisture rather than detergent remaining on the surface.
Switching methods (instead of intensifying the same one) is safer for maintaining finish quality.
Verdict: Best Non-Bleach Approach (And Who Should Skip It)
For most seashells, the safest all-around path is warm water + dish soap, followed by gentle brushing and full drying. If spots remain, use baking-soda paste for targeted cleaning; reserve vinegar rinses for mineral-looking buildup.
Warm water with dish soap is the lowest-risk first step for removing sand and most organic residue without bleach.
Baking soda paste and diluted vinegar are best used as targeted follow-ups, not repeated full-shell treatments.
From my perspective, the practical success factor isn’t only which chemical you choose—it’s consistency: rinse completely, then dry completely. I’ve seen many “almost clean” shells stay less-than-perfect simply because they weren’t fully dry before a second attempt ().
Downsides and who should skip vinegar (or go gentler)
Skip vinegar (and go gentler) if your shells are very delicate, already damaged, or you’re concerned about changing the finish—test on one inconspicuous shell first. Also avoid prolonged soaking for thin shells; acid exposure can dull or alter surface appearance even when residue is reduced.
For a cautious framework, think of the “gentleness ladder”:
1) Soap + warm soak
2) Gentle brushing
3) Targeted baking-soda paste
4) Short, diluted vinegar rinse (only when you can visually identify mineral-like dullness)
Testing vinegar on a single inconspicuous shell reduces the risk of changing finish on the full collection.
If surfaces dull quickly, stop acid exposure and rely on soap/paste methods instead.
Quick Checklist (Save This)
Use this scan-friendly checklist to keep your workflow consistent—especially if you’re cleaning multiple shells at once.
– [ ] Warm water + a few drops dish soap soak
– [ ] Soft brush cleaning (especially grooves)
– [ ] Rinse thoroughly
– [ ] Dry completely (no trapped moisture)
– [ ] If needed: baking soda paste on stubborn spots
– [ ] If needed: diluted vinegar rinse for mineral buildup (short, then rinse)
Consistent rinsing and drying are what prevent haze, residue, and lingering “ocean smell.”
Targeted treatments (paste or vinegar) minimize finish changes compared with repeated whole-shell exposure.
Sources
The most dependable bleach-free method is still the “gentle first” sequence: warm soapy soak, soft brushing, thorough rinsing, and complete drying. When needed, use baking-soda paste for targeted stains and a short diluted vinegar rinse for mineral dullness—then dry again fully so your seashells stay clean, bright, and odor-free over time.
Frequently Asked Questions
What is the best way to clean seashells without bleach?
Start by rinsing off loose sand and debris with warm water, then soak the seashells in a bowl of water to loosen grime. For odor and remaining organic material, simmer the shells briefly in water (or use a slow boil), then let them cool and scrub gently with a soft toothbrush. Finish by drying fully and, if needed, wipe with a little white vinegar to remove mineral haze—never soak fragile or painted shells too long.
How do you clean dead sea smell off seashells without bleach?
To remove that “dead sea” odor naturally, soak the shells in hot water for several hours, changing the water if it gets cloudy. For stubborn smell, simmer the seashells in plain water for a short time, then rinse thoroughly and scrub with a toothbrush to lift residue. Dry completely in a well-ventilated area—trapped moisture is a common reason for persistent odors even after cleaning.
How can you remove algae and grime from seashells without using bleach?
Use a warm water soak first to soften algae and dirt, then scrub gently with a soft-bristle brush or toothbrush. For stubborn green or brown buildup, apply a paste of baking soda and water, let it sit briefly, and then rinse and scrub again. Avoid harsh scrubbing on thin shells, and be sure to rinse well so baking soda residue doesn’t leave streaks.
Which natural solutions work for whitening and brightening seashells without bleach?
Natural whitening methods include soaking in diluted white vinegar (about 1:3 vinegar to water), followed by a thorough rinse and drying. Baking soda paste can also brighten shells by lifting surface stains and grime without bleach chemicals. If shells have mineral deposits, you may need multiple short treatments rather than one long soak to prevent damage.
Why do seashells need to be fully cleaned before display, and what’s the safest bleach-free method?
Seashells can trap sand, organic matter, and microbes that cause odors and deterioration over time, especially when sealed in glass or used in crafts. The safest bleach-free method is a stepwise process: rinse, soak, gentle simmer in plain water (for hardy shells), then scrub and fully dry before sealing or decorating. If a shell is very fragile, painted, or porous, skip boiling and rely on warm water soaking, vinegar wipe-downs, and thorough drying instead.
📅 Last Updated: October 17, 2026 | Topic: how to clean seashells without bleach | Content verified for accuracy and freshness.
References
- Hydrogen peroxide
- Bleach
- Sodium hypochlorite
- Calcium carbonate
- Disinfectant
- Boiling
- Decontamination
- https://scholar.google.com/scholar?q=how+to+clean+seashells+without+bleach Google Scholar
- https://scholar.google.com/scholar?q=calcium+carbonate+cleaning+hydrogen+peroxide+boiling+shells Google Scholar
- https://scholar.google.com/scholar?q=sea+shell+preservation+cleaning+museum+specimens+hydrogen+peroxide Google Scholar
