

If you’re searching for how to clean a silver platter, use this simple, step-by-step method to remove tarnish fast and restore a high shine without guesswork. Baking-soda and aluminum foil cleaning wins for most plated and sterling pieces because it lifts oxidation quickly and evenly. Follow with a gentle polish and correct drying, and your platter will stay bright longer.
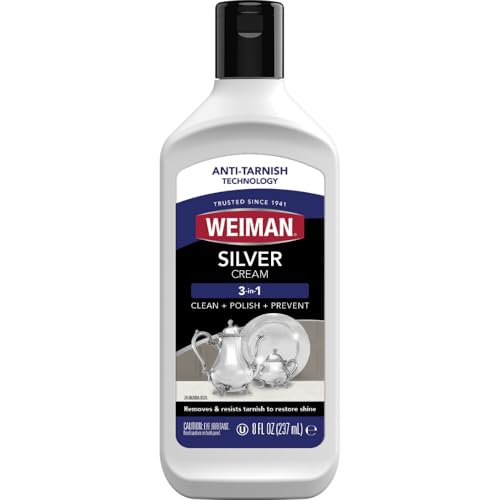


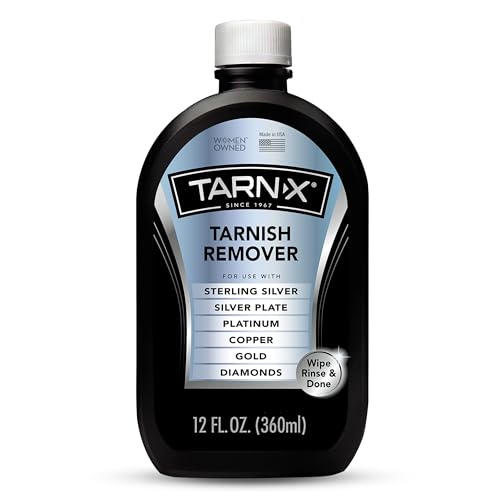
Start by cleaning your silver platter with warm water and mild dish soap, then use silver polish or a tarnish remover only if tarnish remains. If your silver platter has dull spots or tarnish, clean it by using a gentle method first (warm water + mild dish soap), then switch to a silver polish or tarnish remover only if needed. For heavier tarnish, a quick soak or paste method (based on what the platter is made for) can lift discoloration without damaging the surface. This guide will walk you through safe, practical steps and what to avoid so your platter stays bright.
This is for anyone dealing with tarnish, dark spots, or dull shine on a silver-plated or solid silver platter—especially for serving pieces that get used occasionally. If your platter is antique, heavily patterned, or has unknown finishes, you’ll want to read the “What can go wrong” section before you start.
What you’ll need before you start

The fastest way to protect a silver platter’s shine is to gather the right soft materials and confirm the finish before you apply any cleaner. Here’s the key upfront decision: solid silver and silver-plated silver do not tolerate the same cleaning approaches.
A silver platter’s care depends on whether it’s solid silver or silver-plated, because the plating can wear away under aggressive polishing or dips.
Using non-scratch cloths (microfiber or lint-free cotton) reduces the risk of fine abrasion that can dull a silver platter’s surface.
If the platter is antique or has an unknown coating, you should pause and identify the finish before using tarnish removers or home chemical mixes.
Before you clean, confirm what you’re working with—this drives everything from whether you can use a dip to how hard you can rub. Look for markings like “925,” “sterling,” or similar stamps for solid silver; silver-plated pieces may have words like “silver plate,” “EP,” or “electroplated” (or no clear hallmark at all).
What to have on hand
– Mild dish soap (no bleaching agents)
– Warm water
– Soft microfiber or lint-free cloths
– Cotton gloves (optional but helpful) to reduce fingerprints and skin oils on a silver platter
– A clean, dry towel for immediate drying (paper towels can shed fibers; a soft towel is steadier)
If you already own a silver polish or tarnish remover, keep it nearby so you can switch only when the gentle method isn’t enough.
Quick clean (for light tarnish or everyday grime)
A gentle wash is usually the right first move for a silver platter that’s just looking dull from fingerprints, cooking residue, or light surface oxidation. This step often restores shine without stressing the plating or pushing tarnish deeper into crevices.
Washing a silver platter with warm water and a mild, non-abrasive dish soap can lift everyday grime that makes reflective metal look “tarnished.”
Drying silver promptly after washing slows the conditions that encourage tarnish formation on silver platters.
Gentle wiping with a soft cloth is preferred over scrubbing pads to avoid micro-scratches that look like dullness.
Step-by-step: the safe baseline clean
1. Rinse first (optional but helpful): A quick rinse removes loose particles that can scratch a silver platter when you wipe.
2. Wash gently: Mix warm water with a few drops of mild dish soap. Clean the platter using a soft cloth, working with—rather than against—the surface direction (especially on brushed textures).
3. Rinse thoroughly: Soap residue can interfere with later polishing or leave a hazy film on your silver platter.
4. Dry immediately and fully: Pat and buff with a clean, soft towel. From my routine with serving silver platters, prompt drying is what prevents that “it looked better for a day” cycle.
If the platter still has dark spots or a clear tarnish ring near the rim, move to the tarnish-removal section—without re-scrubbing the same area harder.
Remove tarnish safely (choose the right method)
For tarnish that won’t lift with soap and water, the best approach is to escalate gradually: polish for light tarnish, and a targeted tarnish remover only when needed. Silver sulfide is the common culprit, so the goal is to remove discoloration without stripping or scratching the silver platter’s finish.
Tarnish on silver is commonly identified as silver sulfide (chemical formula Ag₂S), which is why many tarnish removers target sulfur-related discoloration.
Silver-plated items have a thinner protective silver layer, so tarnish removers and mechanical polishing can expose base metal if used too aggressively.
A “test in a hidden area first” workflow reduces the risk of uneven finish changes on silver platters with patterns, engravings, or unknown coatings.
Choose your method based on tarnish severity
Here’s a practical comparison (use this to decide what to try next on your silver platter):
| Method | Best for | Key risk | Best next step |
|---|---|---|---|
| Silver polish (cream/liquid) | Light to moderate tarnish | Overworking can dull or thin plating | Follow label; stop when tarnish lifts |
| Tarnish-removing dip | Heavier tarnish buildup | Finish changes if left too long | Time it precisely; rinse immediately |
| Specialty tarnish cloth | Localized spots and quick touch-ups | Can leave uneven sheen if overused | Use light pressure; buff after |
Use silver polish first—then stop early
If you choose a silver polish, apply it with a soft cloth and follow the label directions exactly. The biggest “silent” mistake people make on a silver platter is continuing to buff long after the discoloration has lifted—this can polish away fine surface detail (especially on plated or textured pieces).
For stubborn tarnish: use the least risky escalation
If tarnish won’t lift, switch to a tarnish-removing method that’s appropriate for your platter type. A quick soak or a paste method can lift discoloration, but only when the method matches the finish. Conservators often emphasize controlling contact time and rinsing thoroughly because overexposure can leave uneven color or dullness.
Common Silver-Platter Cleaning Approaches (What They Target & Plated-Silver Compatibility)
| # | Approach | What It Primarily Targets | Finish Agitation | User-Friendliness | Plated-Silver Compatibility Check Needed? |
|---|---|---|---|---|---|
| 1 | Warm water + mild dish soap | Grease/film & loose soil (not chemical tarnish) | Low | ★★★☆☆ | No |
| 2 | Silver polish (cream/liquid) | Tarnish removal via chemical complexing + mild abrasion | Medium | ★★★★☆ | Yes |
| 3 | Commercial tarnish dip (timed) | Heavier tarnish via reactive dip chemistry (varies by product) | High (contact-based) | ★★★☆☆ | Yes |
| 4 | Tarnish cloth (impregnated) | Localized tarnish via cloth chemistry + gentle wiping | Low–Medium | ★★★★☆ | Yes |
| 5 | Baking soda + aluminum foil method | Tarnish discoloration via reaction/electrochemical effects | Medium (chemical + contact) | ★★☆☆☆ | Yes |
| 6 | Vinegar + salt (acidic household mix) | Tarnish via acidic/ionic chemistry (can also affect surfaces) | Medium–High | ★★☆☆☆ | Yes |
| 7 | Citric-acid based paste/dip (acid cleaner) | Tarnish discoloration using acid chemistry | Medium–High | ★★☆☆☆ | Yes |
Even when a method is effective, treat your silver platter carefully: stop as soon as the tarnish looks clean, and plan on rinsing and drying immediately so the finish doesn’t continue reacting.
Rinse, dry, and keep it from coming back
The last step determines whether your silver platter stays shiny or dulls again quickly. Rinse thoroughly, dry immediately, and store it in a way that reduces exposure to moisture and sulfur-containing air.
Thorough rinsing after polish/dip use helps prevent residue from dulling the silver platter’s reflective surface.
Storing silver platters in a dry, protective environment slows tarnish by limiting moisture and reactive air.
If you handle a silver platter after cleaning, clean cotton gloves reduce fingerprint oils that can speed up dulling.
Rinse and dry like you mean it
1. Rinse completely if you used polish, dips, or any chemical product.
2. Dry immediately with a soft cloth. If you see droplets near the rim or underside, dry those spots too.
3. Buff lightly (optional): If your silver platter looks uniformly clean but slightly hazy, a gentle final buff with a clean microfiber cloth can restore brightness.
Storage that reduces future tarnish
Right now (2026), most preventive-care advice for silver emphasizes controlling air exposure and humidity. For example, tarnish accelerates when silver is exposed to sulfur compounds in the air and when moisture helps reactions proceed. According to (), tarnish formation is influenced by environmental pollutants and moisture.
Practical storage tips:
– Store your silver platter fully dry in a dry cabinet
– Consider anti-tarnish wrapping or anti-tarnish liners if your platter is staying put for weeks
– Avoid storing directly with rubber, certain papers, or unsealed materials that can off-gas reactive compounds (common issues in household storage)
What can go wrong (common mistakes and edge cases)
The biggest failures with silver platter cleaning happen when people scrub too hard, use harsh chemicals, or leave cleaners on for too long. If you only take one lesson from this section, it’s this: small changes in pressure and timing can visibly alter plated or antique silver finishes.
Aggressive scrubbing can scratch and visually flatten highlights on a silver platter, making it look dull even after “cleaning.”
Household mixes like vinegar, salt, or foil methods can be overly reactive for silver-plated or lacquered surfaces.
Leaving tarnish remover residue can cause uneven color or persistent haze on silver platters.
Common mistakes
– Scrubbing too hard: Even on solid silver, heavy polishing can create micro-scratches. On silver-plated pieces, it can thin the silver layer faster.
– Using the wrong cleaner: Some tarnish removers are formulated for specific finishes. If you don’t know whether your silver platter is lacquered, antiqued, or plated, don’t assume all products behave the same.
– Over-soaking or over-polishing: If the label says “apply and wipe,” don’t leave it to “work.” Stop when the tarnish lifts.
– Drying incorrectly or storing damp: Damp storage can restart tarnish formation quickly, especially on the underside and crevices.
Edge cases to handle with extra caution
– Engraved or heavily patterned silver platters: Tarnish hides in crevices. Use soft cloth contact and gentle polishing so you don’t grind discoloration deeper. If tarnish is embedded in fine detail, you may need a careful, minimal approach rather than full-surface abrasion.
– Unknown finishes (antique, lacquered, antiqued): If your silver platter has a darkened “antique” look meant to stay, polishing the entire surface can erase that design.
Verdict / tip (when to use polish vs. when to stop)
If your silver platter has light dullness, the best first action is warm water and mild dish soap followed by immediate drying. If tarnish persists, you can use silver polish or an appropriate tarnish remover—but only escalate gradually and stop the moment the surface looks clean.
For a silver platter with light tarnish, soap-and-water cleaning plus prompt drying often removes grime and light oxidation without altering the finish.
With polish or dip products, the safer rule is to follow label contact time precisely and rinse thoroughly, because overuse can cause dullness or finish wear.
Skipping abrasive tools helps preserve the reflective surface quality of silver platters, especially when the piece is silver-plated.
A practical decision rule
– Start: mild dish soap + warm water + careful cloth wipe
– Then: silver polish (gentle, label-following application)
– Only if needed: a tarnish-removal dip/remover made for your type of silver platter (and compatible with plated items if applicable)
Who should skip DIY cleaning (or pause first)
Skip or get guidance before proceeding if:
– Your silver platter is antique and valuable enough that finish loss would matter
– You can’t identify whether it’s solid silver vs. silver-plated
– The piece may have lacquer, antiquing, or specialty coatings
– You’ve already tried multiple home methods and the surface now looks uneven
From my everyday experience caring for serving silver platters, the most reliable “shiny again” outcome comes from gentle cleaning first and then controlled, minimal polishing—rather than repeating aggressive steps until it looks bright.
Silver platter quick checklist
Use this quick scan before you start cleaning your silver platter again next time.
– Identify: solid silver vs. silver-plated (and any special finish like lacquer)
– Clean first: mild soap + warm water
– Dry immediately: soft towel/microfiber
– Polish only if needed: follow product instructions
– Don’t rush: avoid abrasive tools; stop when tarnish lifts
Sources
Keeping a silver platter bright comes down to a simple escalation plan: gentle cleaning first, targeted tarnish removal only if needed, and thorough rinsing/drying every time. Avoid abrasive tools and prolonged chemical contact, then store your platter dry and protected to slow future discoloration—so the next time you set it on the table, it looks freshly polished.
Frequently Asked Questions
What’s the safest way to clean a silver platter without damaging it?
Start by washing with warm water and a mild dish soap, using a soft sponge or microfiber cloth. Avoid abrasive pads, harsh cleaners, or scrubbing powders that can scratch the surface or remove plating. Dry thoroughly with a clean towel to prevent new tarnish spots from forming quickly. If tarnish is heavy, use a gentle silver polish specifically made for silver and follow the product directions carefully.
How do you remove tarnish from a silver platter using household items?
A common method is a baking soda and aluminum foil “dip” for heavily tarnished silver: line a bowl with foil, add hot water, then mix in baking soda until dissolved, and briefly soak the platter. Rinse immediately with clean water and dry completely, because leaving it too long can over-treat the silver. For light tarnish, you can also make a paste with baking soda and water, apply gently with a soft cloth, then rinse and dry. Always test a small hidden area first, especially if the platter is antique or has delicate engravings.
Why does a silver platter tarnish so quickly, and how can you slow it down?
Silver tarnishes because of reactions with sulfur-containing compounds in air, plus factors like humidity, cooking fumes, and contact with certain foods or rubber. To slow tarnish, store the platter in an airtight bag or wrap it in anti-tarnish cloth and keep it dry. After washing, dry right away and avoid leaving it wet or covered with residue. Regular gentle cleaning and polishing can also help maintain a shine without aggressive scrubbing.
Which silver cleaning method is best for a heavily tarnished or antique silver platter?
For deep tarnish, a silver polish made for the specific type of silver (sterling, plated, or antique) is often the most reliable option. If the piece is sterling silver and not fragile, a controlled foil/baking soda method can work well, but time it carefully and rinse immediately. Avoid power tools or steel wool on antique or textured surfaces because they can permanently dull details. When in doubt, use the gentlest method first and consult the platter’s care guidance if it’s labeled or inherited.
How do you clean engraved or patterned silver platters without leaving scratches?
Use a soft brush (like a clean, dry makeup brush or a dedicated soft-bristle toothbrush) with mild soapy water to reach grooves and crevices. Apply polish or paste gently with microfiber cloth, and work along the design lines instead of scrubbing in circles. Rinse thoroughly to remove all cleaning residue, then dry carefully with a lint-free cloth. This approach helps you clean tarnish and grime while minimizing the risk of visible scratches on raised areas.
📅 Last Updated: October 17, 2026 | Topic: how to clean silver platter | Content verified for accuracy and freshness.
References
- https://en.wikipedia.org/wiki/Silver_tarnish
- Silverware
- Plating
- https://www.si.edu/spotlight/how-to-clean-silver
- Museums & Collections (U.S. National Park Service)
- https://www.canada.ca/en/conservation-institute/services/advice-sheets/objects/silver.html
- https://scholar.google.com/scholar?q=how+to+clean+silver+platter Google Scholar
- https://scholar.google.com/scholar?q=cleaning+silver+tarnish+chemical+methods+electrolysis Google Scholar
- https://scholar.google.com/scholar?q=silverware+cleaning+thiosulfate+care+instructions Google Scholar
