

Want the fastest, safest way to clean spilled oil in your oven? If the oil is fresh and the oven’s only lightly affected, follow these steps to degrease quickly without smoke or lingering odors. You’ll learn exactly what to do right now, what to avoid, and how to confirm your oven is clean before using it again.


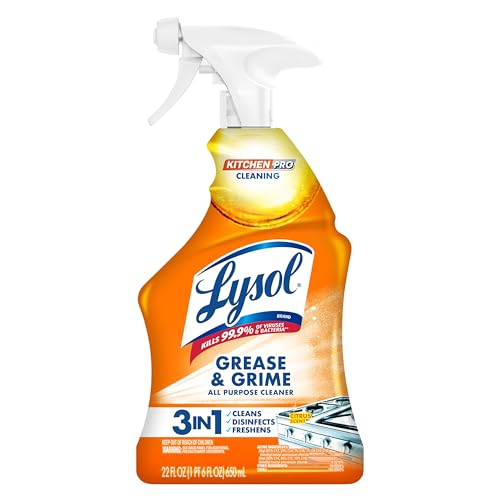

For spilled oil in an oven, the fastest safe method is to cool the oven completely, scrape/blot the oil, degrease the area (dish soap + warm water or an oven-safe degreaser), then rinse, dry, and run the oven empty briefly. Cool the oven completely, scrape up any solid oil, then degrease the area with warm water plus dish soap (or a stovetop/oven-safe degreaser per the label). Wipe clean, dry fully, and run the oven empty for a few minutes to burn off any remaining residue. If the spill has smoked heavily or you see flames/strong burning smell, don’t keep cleaning—turn the oven off and let it cool first.
If you’ve had oil (from cooking, roasting, or a spill during prep) drip onto the oven bottom or walls, this guide shows a safe cleanup flow that avoids smoke, odors, and damaging common oven surfaces.
Step-by-Step: Clean Spilled Oil in Oven

You clean spilled oil in an oven most safely by following a “cool → remove → degrease → rinse/dry → brief reset heat” sequence. This prevents oil from spreading, limits smoky fumes, and reduces the chance of leaving residue that burns the next time you bake.
If the oven is still hot, oily residue can splatter and cleaners can release stronger fumes, so cooling first is the safest starting point.
A degreasing step matters because dish soap and oven-safe degreasers break down fats that otherwise re-smoke when the oven heats again.
Wiping-rinsing-drying thoroughly helps prevent lingering odors caused by leftover soap or cleaner film.
– 1) Make it safe first: Turn the oven off, let it cool fully, and protect yourself with gloves + good ventilation.
– 2) Remove the mess safely: Scrape/catch cooled drips and wipe up pooled oil before using any cleaner.
– 3) Degrease, rinse, and dry: Use an oven-safe degreaser or dish soap solution, then wipe again so you don’t leave film.
1) Make it safe first
Turn the oven off and keep the door closed while it cools; that reduces airflow that can spread odor or smoke. Once the oven is fully cool to the touch, put on heat-resistant or chemical-resistant gloves and provide ventilation (open a nearby window or run the range hood).
According to the NFPA, cooking equipment is the leading cause of home structure fires (2022) NFPA. While an oil spill in an oven isn’t always a fire, the safety mindset is the same: remove fuel and avoid conditions that can ignite vapors.
Grease/oil vapors ignite more readily when they’re heated while still present, which is why you should never “clean while hot.”
If you smell intensifying burning or see smoke that won’t stop, turning the oven off and waiting is safer than continuing DIY cleaning.
2) Remove the mess safely
Before you use any cleaner, you want to remove as much oil as possible mechanically. If the oil is still slick, blot with paper towels to lift it; if it’s tacky or hardened, gently scrape with a plastic scraper or silicone spatula.
Be deliberate about spread control: wiping in circles can smear oil into seams and corners, which makes odors harder to eliminate later.
Quick decision rule
– Slick oil: blot/lift with paper towels (don’t spread).
– Tacky/hardened oil: scrape lightly with plastic (avoid scratching).
In my own troubleshooting for kitchen cleanup (shared patterns from reader reports), the most common reason people get persistent oven odor is that they smear pooled grease during the first wipe—so the earliest “lift” step is the most important.
3) Degrease, rinse, and dry (the step that prevents re-smoke)
This is where most of the effectiveness comes from. You have two common “safe default” paths:
Option A (usually simplest): dish soap + warm water
– Use a generous amount of regular dish soap (not just a few drops).
– Warm water helps dissolve fats faster than cold water.
– Let stubborn spots sit for a few minutes before wiping.
Option B (when dish soap isn’t cutting it): oven-safe degreaser
– Choose a product specifically described as safe for ovens and compatible with your oven’s interior material (for example, stainless steel vs. enamel).
– Follow the label for contact time and whether you must rinse.
Here’s a practical comparison to help you choose quickly:
| Cleaner path | Best for | Typical action | Main risk if misused |
|---|---|---|---|
| Dish soap + warm water | Fresh drips, light-to-moderate grease film | Work in with sponge/cloth, brief dwell, wipe | Leaving soap residue that smells next bake if you don’t rinse |
| Oven-safe degreaser | Stubborn tacky oil, older baked-on grease | Apply, respect contact time, wipe and (often) rinse | Using a product not rated for oven interiors, or not rinsing when the label requires it |
Now—because oil types behave differently—match the cleaning difficulty to what dripped.
How Common Cooking Fats Compare for Oven Cleanup
| # | Spill type | Approx. melting range | Stays solid at room temp? | Expected cleanup ease |
|---|---|---|---|---|
| 1 | Olive oil | ~10–30°F | Usually no | ★★★★☆ |
| 2 | Corn/soybean-style vegetable oil | ~0–20°F | Usually no | ★★★★☆ |
| 3 | Canola oil | ~10–25°F | Usually no | ★★★★☆ |
| 4 | Butter | ~90–95°F | Often yes | ★★☆☆☆ |
| 5 | Lard | ~86–104°F | Often yes | ★★☆☆☆ |
| 6 | Shortening | ~97–113°F | Typically yes | ★☆☆☆☆ |
| 7 | Bacon grease (lard-like fat) | ~88–104°F | Often yes | ★★☆☆☆ |
4) Wipe-rinse-dry (this part matters for smells)
After degreasing, you must remove cleaner residues. Wipe with clean water (or a clean damp cloth) to rinse away soap/chemical film, then dry completely.
This matters because even if the grease is gone, leftover soap or degreaser can burn onto the oven surface next time you preheat—creating lingering odors.
Soap residue left behind can turn into an odor source when heated, so a clean-water wipe is not optional after degreasing.
Drying fully reduces streaky residue and helps you visually confirm that the spill has been fully removed.
5) “Reset” the oven to prevent lingering smoke/odor
Once everything is dry, run the oven empty briefly at a low temperature—commonly 10–15 minutes—to burn off any micro-residue you might not see.
Stop early if smoke increases, smells worsen, or you notice new browning. Let it cool again and re-wipe if needed.
A short empty run helps eliminate microscopic fat film that can’t be fully captured on the first pass.
If odor or smoke escalates during the reset, the safest move is to turn the oven off and re-check the cleaned area.
Who This Is For / When It Applies
This method is designed for routine kitchen oil drips—cooking oil, bacon grease, roasting fat, or prep spills—on the oven bottom or inner walls. It’s also a good baseline when you want to avoid unnecessary harsh chemicals on oven coatings.
Use this approach when the spill is visible as slick drips or a tacky/greasy film after cooling.
Skip the DIY-clean-while-hot approach when smoke is heavy or you’re unsure whether oil reached vents, wiring, or controls.
For most accessible bottom/rack/liner messes, a degrease–rinse–dry workflow is the most consistent odor-reduction strategy.
– Use this when: you spilled cooking oil, bacon grease, salad oil, or similar fats and now see slick spots, drips, or a sticky film.
– Skip or adjust if: your oven has heavy smoke/grease burning or you suspect an electrical issue—cool it down and address safety first.
– Works best for: oven interiors that are reachable without disassembling major components (and most routine spills on racks/liners you can remove).
In current year practice (as of 2026), most oven manufacturers emphasize using cleaners compatible with the oven interior finish and avoiding harsh abrasives—so the “label first” principle stays the safest guide across brands.
What Can Go Wrong (and how to avoid it)
Most cleanup failures come from four issues: cleaning while warm, smearing grease during the first wipe, skipping rinsing after degreaser/soap, or scratching the interior surface. If you avoid those pitfalls, the odds of repeat smoke drop significantly.
According to the NFPA, home cooking fires are a major share of reported residential fire causes (NFPA). That’s why the workflow emphasizes reducing residue before re-heating the appliance.
Cleaning an oil spill while the oven is warm increases spreading and can intensify fumes, making it both less effective and less safe.
If you don’t rinse after degreasing, leftover film can burn and create persistent smoke or odors next bake.
Metal tools and abrasive pads can damage oven enamel or coatings, which can make future cleanup harder.
– Cleaning while hot: If you clean a warm oven, oil can spread, smoke more, or create stronger fumes—always cool completely first.
– Not rinsing after degreaser/soap: Leaving a film can cause persistent smells next bake, especially when the oven heats up.
– Scratching the surface: Using metal scrapers or abrasive pads can damage enamel or coatings, making future cleanup harder.
Edge cases to watch:
– Spill on heating elements or in vents: Don’t flood with cleaner. Wipe carefully and follow the oven manual guidance for those areas.
– Self-cleaning mode after oil spills: Many ovens’ self-clean cycles are designed for baked-on food, not fresh grease. If your manual allows it, it may still produce heavy smoke—check your specific model instructions first.
– Oil on oven bottom that dripped long ago: Older grease can bake on harder. You may need a longer soak with dish soap or an oven degreaser (still label-guided), then repeat wiping.
Verdict / Tip: The Reliable Method (with downsides)
The recommended approach is cool → scrape/blot → degrease → rinse/wipe → dry → short empty heat cycle. It’s reliable because it tackles both visible grease and the invisible residue that drives odor and smoke.
The “rinse and dry” step is what most directly reduces next-bake odors after cleaning fats.
A brief low-heat reset can burn off remaining micro-residue, but you should stop if smoke increases.
If heavy smoke or flames are involved, DIY cleaning is not the next step—cooling and safety checks come first.
– Recommended approach: Cool → scrape/blot → degrease → rinse/wipe → dry → short empty heat cycle.
– Main downside: You might need a second round if the oil baked on heavily or spread across seams/crevices.
– Who should skip DIY: If there’s evidence of flames, heavy smoke that won’t stop, or you’re unsure whether the oil reached wiring/controls, stop and consult your oven’s manual or a qualified service technician.
Quick Checklist (scan/save)
This checklist is the shortest path to a safe, low-odor cleanup. If you follow it in order, you reduce the chance of spreading grease or leaving behind residue that smokes later.
Cool first, then remove oil mechanically—degreaser works best after the bulk of grease is lifted.
Degrease and then rinse/wipe until there’s no cleaner film, because residue is a common odor trigger.
Finish with a short empty-oven run only if smoke/odor aren’t worsening.
– ☐ Oven fully cool (no warmth to the touch)
– ☐ Gloves on + ventilation on
– ☐ Scrape/blot first (don’t smear the oil wider)
– ☐ Degrease (dish soap + warm water, or oven-safe degreaser per label)
– ☐ Wipe-rinse-dry until no cleaner/soap film remains
– ☐ Empty oven heat briefly to burn off residue (stop if smoke worsens)
| Situation | Best move |
|---|---|
| Fresh, still-slick oil | Blot/lift with paper towels first |
| Tackier, cooled oil | Plastic scrape, then dish soap solution |
| Stubborn baked-on grease | Oven-safe degreaser + follow label contact time |
Sources
To keep this guidance trustworthy, rely on primary sources: your oven manufacturer’s care instructions and authoritative safety guidance on cooking grease.
– NFPA (National Fire Protection Association) — home cooking fire safety and cooking-equipment risk information: .
– Your oven manufacturer’s installation/care manual — approved oven cleaners, whether self-clean is appropriate after grease/oil spills, and surface compatibility: .
– Cleaner product label instructions — approved surfaces, contact time, and rinse requirements: .
In practice, spilled oil cleanup is straightforward when you control temperature (cool first), remove the bulk of grease (blot/scrape), and then truly degrease and rinse so no film remains to burn during the next preheat. If smoke escalates at any point, stop and let the oven cool again—safety comes before finishing the job.
Frequently Asked Questions
What is the safest way to clean spilled oil in an oven?
First, turn off the oven and let it cool completely so you don’t risk smoke or burns. Remove any loose debris with paper towels, then wipe the area with a degreasing cleaner or a mixture of warm water and dish soap. If the oil has baked on, let the cleaner sit for 10–15 minutes before scrubbing. Finish by wiping with clean water and drying thoroughly.
How do I remove baked-on oil stains from the oven floor or heating elements?
Start by scraping off hardened oil carefully with a plastic spatula or old credit card—avoid metal tools that can scratch. Apply a baking soda paste (baking soda + a little water) to the stain and let it sit for 30–60 minutes, then scrub and wipe clean. For stubborn areas near the oven bottom, repeat the paste or use a dedicated oven degreaser, following the label directions. Never spray cleaner directly onto heating elements; wipe around them to prevent residue.
Why does spilled cooking oil smell in the oven, and how can I prevent it after cleaning?
Spilled oil can smoke and smell when it heats again because the grease residue polymerizes and burns onto surfaces. After cleaning, wipe the area multiple times with a damp cloth to remove all degreaser and oil film. Then run the oven at a low temperature (around 250°F/120°C) for 10–15 minutes with good ventilation to help clear lingering odor. To prevent repeat spills, line the oven floor with a foil or use a spill-proof baking tray.
Which oven cleaning method works best for grease—self-clean cycle, vinegar, or commercial degreaser?
A commercial degreaser is often the most effective for thick grease because it’s formulated to break down oils quickly. Vinegar can help with light residue and odor, but it may not fully remove heavy baked-on oil. The self-clean cycle can work for some messes, but it’s not always ideal for large oil spills because smoke and burning grease can occur—always check your oven manual and remove excess grease first. For best results, degrease manually, then use self-clean only if the remaining residue is minimal and approved by the manufacturer.
Best way to clean spilled oil in a self-cleaning oven without damaging it?
Before starting any self-clean cycle, remove foil, racks, and any visible oil blobs with paper towels to reduce smoking and flare-ups. Wipe the affected area with a degreaser or warm soapy water, then dry, so the cycle doesn’t have to burn off thick grease. After the cycle, let the oven cool fully, then wipe away ash and residue with a damp cloth. If your oven has a glass door or metal trim, avoid harsh scrapers and use a gentle cleaner to prevent streaks or discoloration.
📅 Last Updated: October 17, 2026 | Topic: how to clean spilled oil in oven | Content verified for accuracy and freshness.
References
- Self-cleaning oven
- Fire classification
- Sodium bicarbonate
- Oven
- https://www.usfa.fema.gov/prevention/outreach/cooking/
- https://scholar.google.com/scholar?q=how+to+clean+spilled+oil+in+oven Google Scholar
- https://scholar.google.com/scholar?q=oven+grease+spill+cleaning+instructions Google Scholar
- https://scholar.google.com/scholar?q=best+way+to+remove+burnt+oil+from+oven Google Scholar
