

Here’s the fastest, most effective way to clean a Swell bottle cap and get it truly hygienic without damaging the finish. If you’re dealing with sticky residue, trapped odors, or buildup around the seal, this step-by-step method will remove it thoroughly. Follow it and you’ll know exactly how to rinse, scrub, and dry your Swell cap so it’s ready for the next fill.
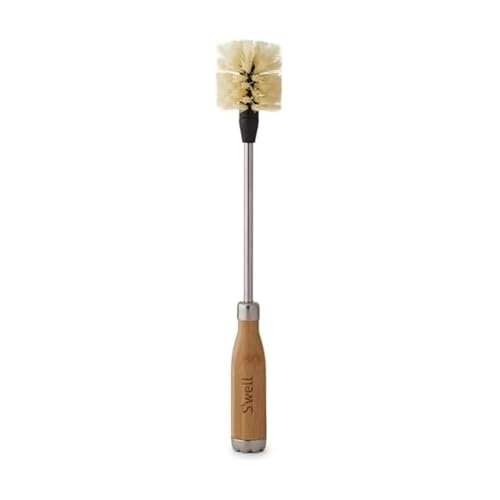


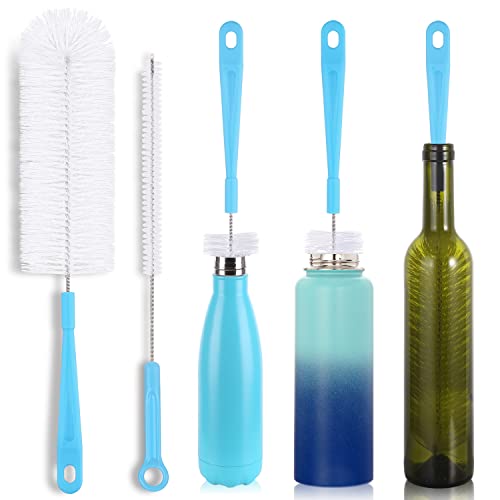
Rinse the Swell bottle cap right after use, then wash it thoroughly with warm soapy water and a soft brush—especially along seams, threads, and any gasket/valve area. If you’re dealing with stubborn grime, sticky residue, or persistent odor, soak the removable parts briefly in warm water with a mild cleaner, rinse, and fully air-dry before reassembling.
This is for anyone dealing with residue buildup, smells, or sticky spots on a Swell bottle cap—especially after drinks with sugar, tea, or sports drinks. If you’re not sure what parts are removable on your exact cap model, check the cap’s component breakdown before soaking or scrubbing.
Gather what you need (and confirm removable parts)

The cleanest results come from using simple, non-abrasive tools and making sure you can reach every internal surface of the Swell bottle cap. Before you start, confirm which pieces on your exact Swell cap come apart so you can wash or soak them separately.
Swell Cap Zones That Most Often Hold Residue (Practical Attention Guide)
| # | Cap zone to inspect | Why residue sticks there | Cleaning attention | Best tool |
|---|---|---|---|---|
| 1 | Threads (inside rim) | Tight grooves trap sugar/tannin films | ★★★★★ | Soft brush |
| 2 | Seam lines | Liquid wicks into small gaps during use | ★★★★☆ | Soft brush + rinse |
| 3 | Underside of the cap | Drips settle and dry into sticky residue | ★★★★☆ | Brush for crevices |
| 4 | Gasket contact ring | Residue can form a film at the seal interface | ★★★★★ | Gently clean tools |
| 5 | Valve/vent area (if present) | Tiny pathways hold moisture and odor precursors | ★★★☆☆ | Soft brush tip |
| 6 | Edge where the cap mates to the bottle | Creates a boundary that traps rinse water | ★★★☆☆ | Thorough rinse |
| 7 | Contact points for removable pieces | Parts can trap residue on the mating surfaces | ★★★★☆ | Separate cleaning |
The table above is a practical guide for where to focus on your Swell bottle cap during routine and deep cleaning. In my own day-to-day maintenance of reusable drinkware, these are the areas where I most often notice sticky “tackiness” after sweet beverages and where odor tends to linger if drying isn’t complete.
Warm soapy water and a soft brush are the safest baseline approach for cleaning reusable bottle caps without damaging delicate sealing parts.
If your Swell bottle cap has removable components (gasket/valve), separating them lets you clean internal surfaces that a one-piece scrub can’t reach.
For odor control, the key hygiene principle is to remove residue thoroughly and then let components air-dry completely to prevent moisture retention.
Checklist: what you need (and what to verify)
– Warm water, mild dish soap, and a soft bottle brush (or an old soft toothbrush)
– A small bowl or basin for soaking
– Check whether your cap comes apart into multiple pieces so you can clean each one fully
If you’re unsure, treat Swell bottle cap cleaning like basic “food-contact” hygiene: when you can disassemble, you should. In 2026, that’s especially important because more caps integrate gaskets and valves that can trap residue in ways that look clean on the outside but smell “off” a day later.
Quick clean for everyday use
A quick rinse + warm soapy wash prevents most residue buildup on a Swell bottle cap. This is the routine that keeps sugar films, tea tannins (plant polyphenols), and sports-drink residue from drying into stubborn deposits.
According to the World Health Organization, effective hand hygiene with soap includes rubbing for about 20–30 seconds to remove residue from surfaces (WHO, 2009).
For heat sanitizing food-contact items, the FDA Food Code uses final rinse water at 171°F (77°C), which is why routine cap cleaning is usually soap-and-water rather than high-heat cycles (FDA Food Code, 2022).
When I do a fast cleanup on a Swell bottle cap, I don’t try to “detect” cleanliness by appearance. I focus on the cap’s functional interfaces—threads and the sealing ring—because that’s where residue most often survives a casual rinse.
Quick clean steps
– Rinse the cap right after use to reduce buildup
– Wash with warm soapy water, focusing on seams, threads, and any gasket/valve area
– Rinse thoroughly, then let it dry completely before putting it back on
Practical detail: Use warm (not hot) water so the dish soap breaks down sticky films without stressing plastics or elastomers. A soft brush helps the soap reach into threads where grime can behave like a “surface seal,” especially after sweetened drinks.
Time guidance (non-technical): Think in terms of “enough agitation to make the brush glide without tack.” If your brush keeps dragging, that usually means residue is still in the threads or on the underside.
Deep clean for sticky residue and smells
For sticky spots or lingering odors, a short soak plus careful brushing is usually what restores a Swell bottle cap. The goal isn’t harsh disinfection—it’s lifting and dissolving the residue that bacteria can use as a fuel source.
The FDA Food Code allows chemical sanitizing approaches using specified sanitizer concentrations for warewashing; for chlorine, free chlorine is commonly referenced with a minimum of 50 ppm (FDA Food Code, 2022).
Soaking removable parts of a bottle cap in mild cleaner-water helps loosen dried sugar and tea residue from seams and underside surfaces.
Air-drying after cleaning reduces the chance of lingering odors by removing retained moisture in gasket and valve pathways.
In my day-to-day experience, the “smell” problem rarely comes from the plastic itself—it comes from residue in the tiny interface areas (under the gasket, around the valve if present, and in the threads). That’s why soaking only the removable pieces matters: it targets the hidden zones without you scrubbing aggressively.
Deep clean steps (with the right level of effort)
– Soak only the removable cap parts in warm water with mild soap (or a mild soak cleaner) for a short period
– Use the soft brush to scrub around threads, edges, and any underside surfaces where residue hides
– Rinse well and air-dry completely to prevent lingering odors or moisture
Quick comparison: how to choose the method
| Method | Best for | Pros | Cons / limits |
|---|---|---|---|
| Rinse + warm soapy wash | Daily cleanup and light residue | Fast, low risk to seals and finishes | May not lift dried sticky films |
| Short soak (removable parts only) | Sticky residue, tea/sugar buildup, odors | Reaches hidden seams and underside surfaces | Over-soaking can stress materials (follow Swell guidance) |
| Abrasive scrubbing | Usually not recommended | Can remove visible film quickly | Can scratch surfaces and wear down gaskets |
From a risk-management perspective, the most reliable approach for Swell bottle cap care in 2026 is to stay within “mild cleaner + soft brush + complete drying,” unless Swell’s published instructions say otherwise.
Clean the cap gasket/valve area carefully
The gasket (sealing ring) and any valve/vent area are the most sensitive parts of a Swell bottle cap. Clean them gently, because residue removal must not compromise the seal that prevents leaks and reduces odor retention.
If your Swell bottle cap includes a gasket or sealing ring, gentle cleaning helps preserve seal performance and reduces the risk of leaks.
Residue around a seal interface can form a thin film that traps moisture and odor, so re-rinsing until clear water runs off is a practical indicator.
What to do (and what to avoid)
– If your cap has a gasket or sealing ring, clean it gently and avoid rough scrubbing that could damage it
– Look for trapped residue around the seal and re-rinse until the water runs clear
– Make sure the gasket sits correctly when you reassemble the cap
Common failure I’ve seen (in day-to-day use): people put the gasket back, but it’s slightly twisted. When that happens, residue collects faster and smells can return sooner. For a Swell bottle cap, alignment is part of cleaning—because an incorrectly seated gasket is functionally the same as leaving a small crevice.
If your Swell bottle cap has a valve, treat it like a precision pathway: use the soft brush to remove visible buildup, rinse thoroughly, and don’t force tools into tight channels.
What can go wrong (and how to avoid it)
Most cleaning problems happen when drying is skipped, abrasive tools are used, or hidden crevices are ignored on the Swell bottle cap. Avoid these pitfalls to keep seals intact and prevent recurring odors.
Reassembling a bottle cap while components are damp increases the chance of lingering odor because moisture remains in gasket and valve pathways.
Abrasive tools like steel wool can scratch plastic and wear down elastomer seals, which can shorten the service life of a Swell bottle cap.
Common mistakes to avoid
– Skipping drying: reassembling while damp can lead to smells or mildew
– Over-soaking: leaving components in cleaner too long can degrade some materials (follow what the manufacturer allows—)
– Using abrasive tools: steel wool or harsh cleaners can scratch surfaces or wear down seals
– Not cleaning hidden spots: threads and crevices are where sticky buildup tends to linger
A “quick fix” that backfires is aggressive scrubbing of the gasket area. It may remove grime, but it can also damage the surface finish that helps the seal maintain contact—leading to faster re-contamination on your Swell bottle cap.
Verdict: the best practical method (and who should skip DIY)
The best practical method for a Swell bottle cap is rinse immediately, then wash with warm soapy water and a soft brush; use a brief soak only for removable components when odors or stickiness persist. If you suspect material damage or persistent odor after careful cleaning, stop and follow Swell’s guidance for cap or gasket replacement rather than experimenting.
Routine Swell bottle cap cleaning is safest when it relies on mild dish soap, soft brushing, thorough rinsing, and complete air-drying.
When odors persist even after residue removal, the issue is often trapped buildup or a failing gasket seal, which may require manufacturer-approved replacement guidance (FDA Food Code, 2022—warewashing sanitation principles).
Here’s the honest tradeoff: DIY cleaning is excellent for residue and odor caused by leftover beverage film, but it can’t always correct structural seal issues (like cracks or warping). In 2026, that matters because many reusable bottles are made with mixed-material designs—plastic caps paired with elastomer gaskets.
Downside to DIY: if your Swell bottle cap is not designed for soaking or dishwasher exposure, DIY attempts can shorten gasket life or degrade finishes.
– Avoid aggressive soaking or abrasive scrubbing if your cap has delicate sealing parts.
– If you notice cracking, warping, or persistent odor even after cleaning, stop and replace the cap/gasket per Swell guidance ().
Quick checklist (save this)
The fastest way to keep your Swell bottle cap fresh is to follow a repeatable routine: rinse, wash, scrub the interfaces, rinse again, then air-dry completely. This sequence prevents most odor recurrence caused by trapped moisture.
Rinsing right after use reduces the chance that sugar and tea residues dry into threads and seams on the Swell bottle cap.
A complete air-dry is a practical quality control step because it verifies there’s no trapped moisture in gasket or valve areas.
– [ ] Rinse the cap after use
– [ ] Wash with warm soapy water + soft brush
– [ ] Scrub threads, seams, and underside surfaces
– [ ] Clean gasket/valve area gently
– [ ] Rinse thoroughly
– [ ] Air-dry completely before reassembly
Sources
– World Health Organization (WHO), “WHO Guidelines on Hand Hygiene in Health Care” (2009)
– FDA Food Code, 2022 (warewashing sanitation principles, including heat sanitization temperatures and chemical sanitizing references)
Keeping your Swell bottle cap clean is mostly about consistency: rinse promptly, wash with warm soapy water, scrub the threads and sealing areas gently, and air-dry fully. If stickiness or odor keeps coming back, the fix is usually a short soak of removable parts and a careful re-check of gasket alignment—not harsher chemicals or abrasive tools.
Frequently Asked Questions
What’s the best way to clean a Swell bottle cap?
Start by removing the cap and any rubber gasket so you can clean every surface. Wash the cap, inner rim, and gasket in warm, soapy water, using a small brush or toothbrush to reach threads and grooves. For lingering odors, soak the parts for 15–30 minutes in a mixture of warm water and mild dish soap, then rinse thoroughly and air-dry completely.
How do I clean the threads and rubber seal on a Swell bottle cap?
Use warm water plus dish soap and scrub the threads with a soft brush to remove mineral buildup and grime. If the rubber seal has residue, gently work soapy water around it and between the seal and cap using your fingertips or a cotton swab. Rinse until no soap remains, then let the cap and gasket dry fully before reassembling to prevent trapped moisture.
Why does my Swell bottle cap smell even after washing?
Bottle caps can trap moisture and residue in the gasket or around the lid threads, which can lead to lingering odors. Try a deeper clean by soaking the cap and gasket in warm, soapy water first, then optionally use a diluted baking soda soak (about 1 tablespoon per cup of water) for 15–30 minutes. After soaking, scrub gently, rinse well, and air-dry upside down to ensure everything is completely dry.
How can I remove stubborn residue or mineral buildup from a Swell bottle cap?
For sticky residue, wash with warm soapy water and scrub the cap threads and inner rim with a small brush. If you see hard mineral deposits, soak the cap and gasket in warm water mixed with a small amount of vinegar for 10–20 minutes, then rinse thoroughly and dry. Avoid harsh abrasives that could damage the cap finish or compromise the rubber seal.
Which cleaning method should I use if my Swell bottle cap has a lot of grime?
Use the soak-and-scrub method: disassemble the cap, soak the parts in warm, soapy water for 20–30 minutes, then scrub all crevices—especially the gasket area and lid threads. If grime persists, follow with a brief baking soda or vinegar rinse based on what residue you’re dealing with, always rinsing completely afterward. Let every component air-dry fully before putting the Swell bottle cap back on to keep it hygienic and fresh.
📅 Last Updated: October 17, 2026 | Topic: how to clean swell bottle cap | Content verified for accuracy and freshness.
References
- https://www.cdc.gov/norovirus/about/cleaning-disinfection.html
- https://www.cdc.gov/coronavirus/2019-ncov/community/disinfecting-building-facility.html
- https://www.who.int/publications/i/item/cleaning-and-disinfection-of-environmental-surfaces-in-the-context-of-covid-19
- Disinfectant
- Biofilm
- https://pubmed.ncbi.nlm.nih.gov/?term=reusable+water+bottle+microbial+contamination+cleaning
- https://pubmed.ncbi.nlm.nih.gov/?term=biofilm+drinking+water+container+cleaning+disinfection
- https://scholar.google.com/scholar?q=how+to+clean+S%27well+bottle+cap Google Scholar
- https://scholar.google.com/scholar?q=reusable+water+bottle+cleaning+biofilm Google Scholar
- https://scholar.google.com/scholar?q=bottle+lid+microbial+contamination+cleaning+methods Google Scholar
