

If you need to clean up a contaminated house with vinegar, start here: this guide shows when vinegar is a safe, effective cleaner and exactly how to use it to tackle common household contamination. You’ll get clear, step-by-step instructions for preparing the area, applying vinegar correctly, and preventing cross-contamination. For situations vinegar can’t handle, you’ll also learn the red flags that mean it’s time to stop and call in professional help.



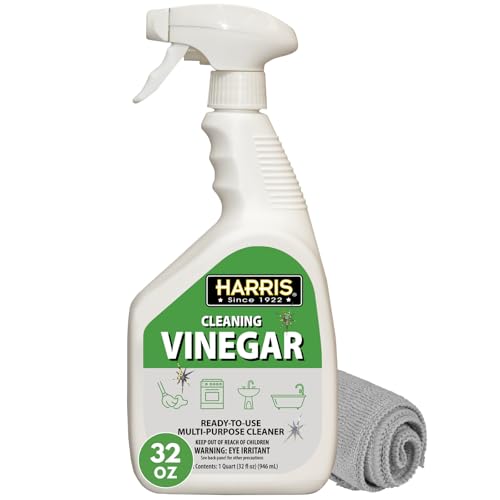
Use diluted white vinegar to wipe and deodorize many “everyday” contamination scenarios—after you’ve removed the source and any visible debris. It’s especially helpful for light mildew, sticky grime, and odor residues on hard, non-porous surfaces, but it is not a substitute for proper remediation of sewage, widespread mold, or unknown chemical contamination.
If the contamination is limited and you’re mainly dealing with lingering smells, minor microbial spotting, or general cleanup, vinegar can be a cost-effective, low-toxicity option. If you suspect biohazards, extensive mold, or chemical residues, treat this first as a safety and remediation decision—not just a cleaning task—because vinegar won’t reliably “solve” underlying contamination drivers like ongoing moisture or harmful compounds.
Vinegar is most practical for routine cleanup on surfaces like tile, glass, sealed countertops, and sealed floors. It also works well for deodorizing after you’ve already cleaned up the main mess. As of 2026, many homeowners still prefer vinegar because it’s readily available and, when used correctly, is unlikely to damage most sealed finishes—though it can be harsh on certain materials like unsealed stone.
Identify the contamination and handle safety first

The right starting point is figuring out what kind of contamination you’re dealing with, because vinegar is only appropriate for certain categories. If it’s sewage, heavy mold, or suspected chemical contamination, you need the correct remediation route—vinegar may reduce odor, but it won’t reliably address hazards.
“Mold growth is driven by moisture control,” so cleaning alone without stopping the water source usually leads to recurrence.
“EPA guidance emphasizes handling larger mold areas as a remediation decision,” rather than assuming a household cleaner is enough.
“Always ventilate and use personal protective equipment during cleanup,” especially when contamination type is uncertain.
– Figure out what “contaminated” means in your case (sewage/biohazard vs. odor/grime vs. moisture/mildew vs. chemical residues).
– If the contamination is widespread, involves sewage, or you’re dealing with strong chemical odors, stop and use the right remediation route (often professionals), not just vinegar.
– Ventilate the area and wear basic protection (gloves; consider eye protection) before you start wiping.
A practical way to classify the problem is to look at three indicators: source, coverage, and risk cues. “Source” answers whether the contamination came from an active leak, a spill, microbial growth, or sewage. “Coverage” helps you decide if you’re looking at a small area you can clean and dry promptly versus a widespread issue. “Risk cues” include strong chemical smells, visible unknown liquid residue, or patterns of contamination that suggest deeper material saturation.
From a process perspective, I recommend treating safety as a checklist you complete before you start wiping. If you cannot confidently identify what you’re cleaning, ventilation and PPE aren’t optional—they’re part of the job.
Anchoring facts (so you know when DIY stops)
According to the U.S. Environmental Protection Agency (EPA), indoor humidity should generally be kept between 30% and 50% to help prevent mold growth (year ).
According to the U.S. EPA, mold cleanup is typically approached differently when mold covers more than 10 square feet—larger areas are more appropriate for professional remediation or at least more formal handling (year ).
According to the CDC, mold remediation focuses on removing mold and addressing moisture sources to prevent regrowth (year ).
Gather supplies and prep the room
Yes—getting the right supplies and prepping the room determines whether vinegar cleanup ends cleanly or spreads contamination. The goal is simple: remove what’s removable, protect yourself, and keep “dirty tools” separate from “clean tools.”
“Use clean water and clean cloths to prevent re-depositing contamination onto surfaces,” which is a core hygiene principle during cleanup.
“A small spot test can prevent finish damage,” especially on painted surfaces, sealed wood, and glossy coatings.
– Use white distilled vinegar, clean water, microfiber cloths/mops, and a bucket/spray bottle; keep separate cloths for “dirty” vs. “clean.”
– Remove items you can (washable covers, small rugs where appropriate) and bag/discard anything that’s heavily soiled beyond cleaning.
– Test a small hidden spot first on finishes (wood, sealed surfaces, painted areas) to avoid discoloration or surface dulling.
Start with a controlled workspace. Move furniture away from the work zone and cover any items you can’t remove (plastic sheeting works for shielding from splashes and drips). Then remove loose debris first—especially dried material, hair, dust, and flaking residue—because wiping over debris can grind contaminants into grout lines or surface pores.
For cloth management, use at least two sets: one for the initial “lift” (wiping and grime removal) and another for the final pass (vinegar application and final wipe). This separation matters because vinegar is diluted, not magically sterilizing—so the cleaning effect still depends on physically removing contamination.
Quick handling notes
– For washable textiles: wash with detergent and dry thoroughly; do not assume vinegar wash alone replaces detergent cleaning.
– For anything porous that’s soaked or visibly moldy: vinegar can deodorize, but it usually doesn’t restore safe conditions once material is contaminated.
– For delicate finishes: vinegar is acidic, so always spot-test.
Clean hard, non-porous surfaces with diluted vinegar
Yes—diluted vinegar is a strong fit for many hard, non-porous surfaces after debris is removed. Use a controlled 1:1 dilution (v{inegar:water} as a starting point), keep the surface wet briefly, then wipe clean.
“Vinegar is commonly used as a household cleaner and deodorizer,” but it is not equivalent to a registered disinfectant for broad pathogen kill claims.
“Acids can damage some materials,” so correct dilution and brief dwell time reduce the risk of finish dulling or etching.
– Start with a plain clean: wipe up debris with soap and water first, then apply vinegar to the cleaned surface.
– Use diluted vinegar (commonly a 1:1 vinegar-to-water mix to start) and keep the surface visibly wet for a few minutes before wiping.
– Focus on high-touch areas and contaminated zones: baseboards, tile, sealed countertops, sealed floors, doorknobs, and walls with hard coatings.
A useful workflow is: debris removal → detergent clean (if needed) → vinegar dwell → wipe/rinse (as appropriate) → dry. The detergent step matters because grease and grime can “shield” residues from any acid-based cleaning effect. Once the surface is already clean, vinegar can do a better job on odors, mild mineral film, and light mildew residue.
How long to let it sit?
Aim for a brief dwell—enough time to loosen odor and residue, typically a few minutes—then wipe. Leaving vinegar to dry into residue can increase streaking on glass and some sealed finishes.
Where vinegar tends to work best (and where it doesn’t)
Below is a practical compatibility map for common household surfaces based on vinegar’s acidic chemistry and the fact that vinegar is primarily a cleaner/deodorizer (not a broad disinfectant).
Vinegar Compatibility for Everyday Cleanup (Hard vs. Problem Materials)
| # | Surface / Area | Typical Goal | Vinegar Usefulness | DIY Route |
|---|---|---|---|---|
| 1 | Ceramic or porcelain tile (sealed) | Odor & grime film | ★★★★★ | Recommended |
| 2 | Glass (windows, mirrors) | Light residue & odor lift | ★★★★☆ | Recommended |
| 3 | Stainless steel fixtures | Sticky grime & deodorizing | ★★★★☆ | Recommended |
| 4 | Sealed laminate / sealed vinyl flooring | General cleanup | ★★★☆☆ | Usually OK (rinse) |
| 5 | Washable painted walls (sealed coating) | Light odor spots & scuff film | ★★★☆☆ | Spot-test only |
| 6 | Unsealed natural stone (marble/limestone) | Odor on porous surface | ★☆☆☆☆ | Avoid |
| 7 | Carpet & upholstery (porous) | Persistent odors / mild mildew | ☆☆☆☆☆ | Assess moisture & remediate |
Tackle odors and light mildew/deposits
Yes—vinegar is often effective at reducing odors and light mildew residue on the right surfaces, especially after the underlying source has been removed. The key is cleaning first, then letting the diluted vinegar dwell briefly, then wiping and drying.
“Odor control works best after removing the underlying material,” because fragrance alone doesn’t remove contamination.
“Mold remediation depends on moisture removal,” so repeated odor return is a sign you must find the moisture source.
– For smells, vinegar works best after you’ve removed the source material—apply to the affected area, let it dwell briefly, then wipe/rinse as needed.
– For light mildew on non-porous surfaces, clean first, then apply diluted vinegar and repeat if needed (persistent growth usually means there’s ongoing moisture).
– Rinse if you notice stickiness or if the surface is prone to residue; ventilation helps odors fade faster.
For odors, think in two steps: source elimination and residual neutralization. If a pet accident, food spill, or smoke residue remains in porous layers (padding, grout microvoids, fabric seams), vinegar may reduce surface smell but won’t fully solve it. You’ll often see this when odor returns after the area dries.
For light mildew (such as small spots on tile, sealed bathroom surfaces, or glossy coatings), vinegar can function as a practical cleaner for residue. Still, if you’re seeing recurrence—especially along grout lines, behind fixtures, or around window frames—it usually indicates ongoing moisture intrusion. That’s the point where vinegar becomes a short-term aid rather than a true solution.
A practical rhythm that reduces re-contamination
1. Wipe away visible residue with detergent and water.
2. Apply diluted vinegar and keep the area visibly wet for a few minutes.
3. Scrub lightly (microfiber works for smooth coatings; soft brush can help on grout).
4. Rinse if the surface gets tacky, then dry completely.
Porous materials: know what vinegar can and can’t do
Yes—vinegar can help with some odor residue on certain porous items, but it can’t reliably remediate porous contamination like soaked drywall, insulation, or heavily mold-affected materials. For porous materials, moisture control and material removal decisions matter more than cleaner choice.
“Porous materials can hold contamination even after surface cleaning,” which is why remediation guidance stresses drying and, when necessary, removal.
“If the moisture source isn’t fixed, mildew and odors tend to return,” regardless of whether vinegar is used.
– Vinegar can help with surface odor on some materials, but it won’t “sanitize” deeply the way products registered for disinfection can.
– If porous items (carpet, drywall, insulation, upholstery) are soaked, heavily stained, or moldy, moisture control and proper remediation matter more than the cleaner you pick.
– If you can’t stop the moisture source, cleaning with vinegar will be temporary—fix leaks, humidity, and ventilation first.
Here’s the core limitation: vinegar is applied from the surface and may not penetrate deep enough—or at all—to address contamination trapped in fibers. In the case of mold, the biggest risk driver is the moisture environment that enabled growth, not just the smell.
If drywall got wet and smells remain, the risk isn’t just “odor.” It’s the possibility of hidden contamination within the wall cavity. Vinegar may make the smell less noticeable, but it doesn’t replace a remediation assessment. When porous materials are saturated, drying often requires professional equipment (dehumidifiers and air movers) and verification—not simply opening a window.
Moisture first, cleaner second
– Fix leaks and address condensation sources.
– Increase ventilation and dehumidification to reach stable indoor humidity targets (EPA generally recommends 30–50%).
– If mold is extensive or recurring, follow remediation guidance rather than cycling through household cleaners.
What can go wrong (and how to avoid it)
The most common failures aren’t that vinegar “does nothing”—they’re that vinegar is used in the wrong situation or in an unsafe chemical mix. Avoid these errors and vinegar cleanup becomes a controlled, low-risk process for everyday contamination.
“Never mix vinegar with bleach or other cleaners,” because chemical combinations can produce harmful gases or reduce cleaning performance.
“A cleaner smell is not the same as disinfection,” so when you need true disinfection, use products registered for that claim.
– Don’t mix vinegar with bleach or other cleaners: combining chemicals can create harmful fumes or reduce effectiveness.
– Don’t treat vinegar as a substitute for disinfection when the contamination type is unknown or high-risk—“cleaner smell” isn’t the same as pathogen kill.
– Avoid soaking electronics, unfinished wood, or delicate finishes; vinegar acidity can damage some materials over time.
– If you still see water damage or odor coming back quickly, assume there’s an underlying moisture or hidden contamination issue.
Pros and cons of vinegar vs. “registered disinfectant” products
- Pros (vinegar)
- Good for odor reduction and light mildew residue on many hard, non-porous surfaces; generally low cost; easy to dilute and apply.
- Cons (vinegar)
- Not a reliable disinfectant for unknown biohazards; limited effectiveness for porous materials; acidic chemistry can etch unsealed stone and dull some finishes.
- Best fit
- Everyday contamination that is mostly grime, odor, and light non-structural mildew—after the source is removed.
- When to switch tools
- When the issue is sewage, widespread mold, or chemical residues—remediation and/or registered disinfectants are the safer path.
Decision trigger: “Is the contamination type known?”
If the answer is no, you don’t have enough information to confidently choose vinegar as the final step. In those cases, focus on containment, PPE, and guidance from credible sources (EPA/CDC) before cleaning deeper.
Also watch for reappearance
– If odor comes back within days, moisture is likely still present.
– If a mildew spot returns in the same pattern, the “problem” may be behind the surface (caulk failure, missing grout sealing, hidden leaks).
Verdict / tip: use vinegar for cleaning and deodorizing—skip it for major hazards
Vinegar is a practical DIY option for many everyday contamination cleanups on hard, non-porous surfaces—especially when your goal is grime lifting, odor reduction, and light mildew/deposit management. However, vinegar is not universal remediation: it can’t substitute for professional mold remediation when growth is extensive or moisture is ongoing, and it is not the right choice for sewage or unknown chemical contamination.
“EPA and CDC guidance consistently point back to moisture control and correct remediation steps,” which limits how far any cleaner can go on its own.
“Vinegar can help with odor,” but it should not be treated as a stand-in for disinfection claims when hazards are uncertain.
Skip vinegar—and escalate to proper remediation—if you’re dealing with:
– sewage or obvious biohazards
– widespread or recurring mold
– unknown chemical residues or strong chemical odors
– porous materials that were soaked and can’t be dried quickly
If you’re unsure what you’re facing, treat it as a safety and identification problem first. That approach is usually faster, less expensive in the long run, and far less likely to spread contamination into additional rooms or materials.
Quick scan checklist (save this)
| Task | Do this | Don’t do this |
|---|---|---|
| Before cleaning | Remove debris; ventilate; wear gloves | Start spraying vinegar on visible biohazards |
| Vinegar mix | Start with diluted vinegar (example: 1:1) | Use full-strength on delicate finishes |
| Application | Keep surface wet briefly, then wipe | Leave areas soaking in crevices for hours |
| Porous items | Assess moisture; cleanable items only | Assume wiping carpet/drywall “fixes” contamination |
| Safety | Never mix with bleach/unknown cleaners | Combine chemicals to “boost” results |
Sources
– U.S. Environmental Protection Agency (EPA) — general guidance on mold and moisture control, and how remediation should address water sources.
– U.S. Centers for Disease Control and Prevention (CDC) — general guidance on mold exposure and prevention/remediation focus on moisture.
– U.S. Environmental Protection Agency (EPA) — disinfectants/cleaners must be registered to make disinfection claims; vinegar is typically discussed as a household cleaner/deodorizer rather than a broad disinfectant.
– OSHA (or manufacturer safety guidance) — chemical safety principles, including hazards of mixing cleaning products that release toxic gases.
In short: vinegar can be an effective, sensible tool for cleaning and deodorizing many hard, everyday contamination scenarios—especially once the source and visible debris are removed. For sewage, widespread mold, or unknown chemical contamination, use proper remediation steps (or professional help) rather than relying on vinegar to do safety-critical work.
Frequently Asked Questions
What is the safest way to clean up contaminated areas in a house using vinegar?
Start by ventilating the space and wearing gloves, especially if the contamination could be mold, food residue, or unknown spills. Use white distilled vinegar (typically 5%) and spot-test a small area first to ensure it won’t damage flooring, grout, or finishes. Remove loose debris, then apply vinegar to the affected area and allow it to dwell for several minutes before wiping clean. If you suspect sewage, heavy mold, or hazardous chemicals, vinegar may not be sufficient—consider professional help.
How do you use vinegar to clean mold or mildew without spreading spores?
Lightly mist the area with vinegar so it stays damp, then avoid aggressive scrubbing that can aerosolize spores. Let the vinegar sit for 10–30 minutes, then wipe away mold and rinse with water if the surface requires it. Dry the area thoroughly and control humidity to prevent mold regrowth. For large infestations (commonly larger than about 10 sq. ft.), vinegar cleaning alone may not be enough.
How should you clean up contaminated surfaces like countertops, floors, and bathroom tiles with vinegar?
First, remove any visible dirt or residue, then spray or wipe vinegar onto the surface and let it sit briefly so it can lift contamination. For non-porous surfaces like ceramic tile or sealed countertops, wipe with a clean cloth and optionally follow with plain water to remove vinegar odor. For grout or textured surfaces, use a soft brush with vinegar and avoid soaking materials that can warp. Always dry surfaces completely to reduce lingering smells and dampness.
Which household contamination types can vinegar help with, and which should you not mix it for?
Vinegar can help with water spots, mild grease, general grime, and some odors, and it’s commonly used as a vinegar-based cleaner for certain bathroom and kitchen contamination. Do not mix vinegar with bleach or other cleaners containing chlorine or ammonia, because it can produce harmful fumes. If the contamination involves sewage, strong chemical spills, or biohazards, use the appropriate disinfectant and follow safety guidance. When in doubt, treat it as unsafe until identified.
What is the best vinegar solution and method for removing contaminated odors from carpets and upholstery?
Blot up excess liquid first, then spray diluted white vinegar (about 1:1 with water for most fabrics) to dampen the area without soaking padding. Let it sit until the vinegar smell fades, then blot and allow the material to fully dry with good airflow. For stubborn odors, repeat the vinegar treatment once or twice rather than saturating the fabric. Avoid steam cleaning until the area is completely dry, since trapped moisture can worsen contamination and odor.
📅 Last Updated: October 17, 2026 | Topic: how to clean up contaminated house with vinegar | Content verified for accuracy and freshness.
References
- https://www.cdc.gov/mold/faqs.htm
- Mold Cleanup in Your Home | US EPA
- https://www.epa.gov/mold/mold-prevention-and-cleanup
- https://pubmed.ncbi.nlm.nih.gov/?term=acetic+acid+antifungal+mold
- https://pubmed.ncbi.nlm.nih.gov/?term=acetic+acid+disinfection+viruses+bacteria
- Vinegar
- Checking your browser – reCAPTCHA
- https://scholar.google.com/scholar?q=white+vinegar+mold+remediation+household Google Scholar
- https://scholar.google.com/scholar?q=acetic+acid+antimicrobial+effectiveness+surface+disinfection Google Scholar
- https://scholar.google.com/scholar?q=vinegar+acetic+acid+inactivation+of+common+household+pathogens Google Scholar
