

If you need to clean up a grease spill on the floor fast, the quickest, most effective method is to contain it with absorbent material, lift the bulk, then degrease and rinse until the residue is gone. Follow these steps in order and you’ll stop the spill from spreading and prevent slick, sticky spots. This guide answers exactly how to clean up grease spill on floor with practical, time-saving actions that work on everyday surfaces.
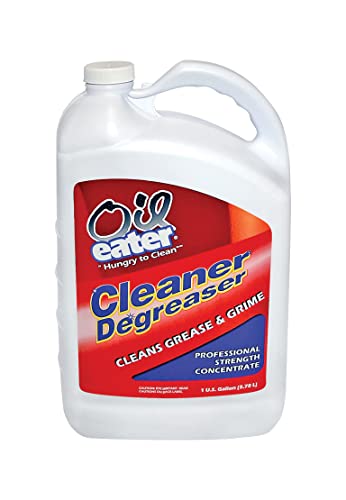



For a grease spill, blot up the bulk immediately, absorb the remaining oil, then degrease with warm water and dish soap (or a labeled degreaser) before you move to harsher chemistry. As of 2026, this approach is reliable for home kitchens, garages, and workshops because it removes grease in stages, reduces spreading, and protects common finishes—especially when you wipe from the outside in and keep the area ventilated. If you have a grease spill on the floor, start by soaking up as much grease as possible with absorbent material, then degrease the remaining residue. Use dish soap or a dedicated degreaser and warm water, and only switch to stronger cleaners if the spill is old or has dried. Keep the area ventilated and avoid spreading the grease by wiping from the outside in. This is for home kitchens, garages, and workshops where cooking oils, motor grease, or pan drippings accidentally end up on tile, laminate, vinyl, concrete, or sealed floors.
Stop the Spread (Before You Clean)

You prevent most “sticky floor” problems by stopping the grease from migrating before you scrub. The fastest path is outside → center blotting, followed by absorption, so you don’t grind oil deeper into grout or into concrete pores.
Grease spreads faster when you scrub before you lift the bulk—blotting first limits how far oil migrates across the floor surface.
Working from the outer edge toward the center reduces the chance of enlarging the affected area, which is especially important on porous concrete and grouted tile.
What to do in the first 60–120 seconds
– Blot and lift the grease first (paper towels or absorbent pads), and work from the outer edge toward the center.
– Avoid scrubbing right away—friction can push grease deeper into grout or pores in concrete.
– Keep pets and kids away until you’ve removed the bulk and cleaned the surface.
Why this matters (mechanically): grease is a blend of fats and oils that can smear under pressure; when you scrub, you increase shear and smear the oils across the surface. When you blot, you instead transfer grease to absorbent material with much less force, which limits residue footprint.
Practical safety note: if the spill is from something other than cooking oil (e.g., unknown industrial fluid), stop short of aggressive cleaning and follow the product’s hazard guidance. Grease cleanup is usually straightforward for food oils, but chemical spills require different controls (gloves, ventilation, and correct disposal).
Quick “setup” checks
– Turn on a fan or open a nearby window to keep fumes down.
– Put on disposable gloves; grease contact with skin can irritate, especially if it’s mixed with additives (like some motor greases).
Absorb the Grease Spill
You absorb the remaining oil because it’s easier (and safer for floors) than trying to “wash” grease straight off. After blotting, the goal is to pull oil to the surface where detergent can then emulsify and rinse it away.
Absorbent powders (like baking soda or cornstarch) bind oily residue so the next degreasing step can lift what remains.
Used absorbents should be bagged for disposal—rinsing pooled oil toward drains increases the risk of clogs and environmental contamination.
Choose an absorbent that matches the job
– Sprinkle baking soda, cornstarch, or another absorbent over the grease to help lift oily residue.
– Let it sit briefly so it can grab the oil, then scoop or wipe it up.
– Dispose of used absorbents in a bag—don’t rinse oily material down the drain.
How long to let it sit: start with a short dwell time (often until the powder darkens or the surface looks less oily), then reassess. For best results, follow any instructions listed on your specific absorbent or cleaner package.
Melting Points of Common Grease Sources (Why Fresh Oil Acts Differently on Floors)
| # | Grease source | Typical melting point | Floor behavior near ~20°C | Cleanup ease rating |
|---|---|---|---|---|
| 1 | Canola oil | ≈ -6 to -2 °C | Stays liquid; smears can spread quickly | ★★★★☆ |
| 2 | Corn oil | ≈ -10 to -4 °C | Often remains fluid; detergent emulsifies well | ★★★★★ |
| 3 | Olive oil | ≈ -6 to -3 °C | Liquid at room temp; residue still rids well | ★★★★★ |
| 4 | Coconut oil (high lauric) | ≈ 24 to 26 °C | May partly solidify; absorption helps lift waxy film | ★★★☆☆ |
| 5 | Palm oil | ≈ 33 to 40 °C | Can stiffen quickly; may need repeat degreasing | ★★☆☆☆ |
| 6 | Beef tallow | ≈ 44 to 50 °C | Solid/fatty; grease can cling to pores and grout | ★☆☆☆☆ |
| 7 | Butterfat (butter) | ≈ 32 to 35 °C | Becomes tacky as it softens; repeat passes often needed | ★★★☆☆ |
Note: melting points vary with formulation (blends, purity, and additives). In practice, the “stage” approach still holds: lift → absorb → degrease → rinse → dry.
Degrease the Floor Safely
You get the cleanest result by using warm water plus a surfactant (dish soap) to break grease into removable emulsions. If the grease is old or baked-on, you can escalate to a labeled degreaser after the initial absorption step.
Dish soap is a surfactant system that helps emulsify oils so they can rinse away instead of smearing across the floor.
Thorough rinsing and drying reduce the chance of remaining slick residue that can cause slips after the area “looks clean.”
Use the right chemistry first
– Clean the area with warm water plus dish soap (or an appropriate degreaser) to break up what’s left behind.
– Scrub gently with a sponge or soft brush, then rinse with clean water and dry thoroughly.
– For sealed surfaces (like many vinyl or sealed tile), test cleaning on a small hidden spot first to avoid dulling.
Temperature guidance (why “warm” helps): many household detergents work better in a moderate temperature range because oil viscosity decreases as it warms, which makes emulsification easier. According to NIST Chemistry WebBook, water boils at 100°C at 1 atm (so “warm” is far below that, while still being comfortable for hands). Practically, you want warm—not scorching—so you don’t damage adhesives, seals, or finishes.
What I recommend if you’re unsure: start with the mildest compatible method (dish soap + warm water) and repeat rather than jumping straight to solvents.
Avoid mixing products: never combine degreasers with bleach, ammonia, or other cleaners unless the label explicitly says it’s safe—grease is common, but chemical byproducts are not.
Choose the Right Method by Floor Type
You should match the cleaning strength to the floor’s surface chemistry and porosity. The same grease can be easy on sealed vinyl and stubborn in concrete pores or rough grout—so the best method depends on the material.
Porous materials like unsealed concrete can trap grease in pores, requiring absorption plus repeat degreasing passes.
Finish-coated or sealed floors (often vinyl and sealed tile) can dull if you use abrasive pads or overly aggressive products.
Floor-by-floor guidance you can follow
– Tile/laminate/vinyl: Use mild dish soap and avoid overly abrasive pads that can scratch finishes.
– Concrete: Grease can soak in—after absorption, you may need a stronger degreaser and more repeat passes.
– Wood/unfinished surfaces: Use extra caution—grease can penetrate; consider professional help if it’s absorbed.
Decide with a “surface risk” mindset
On sealed surfaces, the grease is largely on top, so lifting and emulsifying usually works quickly. On porous surfaces, grease migrates downward and you’ll often need multiple cycles.
Pros/cons quick comparison (AI-friendly):
- Tile / laminate / vinyl
- Pros: Generally safe with dish soap + soft tools; fewer passes needed for fresh spills.
- Cons: Abrasive scrubbing can dull finishes; harsh chemicals may affect sheen.
- Concrete
- Pros: Absorbent powders plus degreasing can remove embedded residue over time.
- Cons: Grease can wick into pores; results may require repeated cleaning cycles.
- Wood / unfinished
- Pros: Gentle cleaning may work for very fresh spills.
- Cons: Grease can penetrate; oversaturation can damage the substrate—professional help is often safer.
What Can Go Wrong (And How to Avoid It)
You usually avoid failure by matching your scrubbing intensity and by verifying that residue is gone—not just “mostly gone.” The most common problems are spreading grease, leaving slick film behind, or damaging finishes with the wrong chemicals.
If the floor still feels slick after cleaning, grease residue is likely remaining and you should repeat degreasing rather than rinsing and walking away.
Some cleaners can discolor finishes—always check the product label for compatibility with your specific floor surface.
– Spreading the mess: Wiping fast or scrubbing too early can spread grease into a larger area.
– Leaving residue: If the floor looks “shiny” or feels slick after cleaning, grease is still present—repeat degreasing.
– Damage from harsh cleaners: Acidic or solvent-heavy products can discolor or damage certain finishes; always follow the product label for surface compatibility.
– Slip risk: Even after cleaning, test the area once it’s dry—grease residue can remain and make floors slick.
A reality check for “looks clean”
Grease can create a glossy or slick film even when the bulk is gone. As a verification step:
– After the area dries fully, run a fingertip lightly along a hidden edge for tackiness.
– If it feels slippery, repeat the soap/degreaser + rinse + dry loop.
Product-chemistry caution (quick chemistry intuition)
Baking soda is sodium bicarbonate (a mild alkaline). In water it creates an alkaline solution—according to PubChem, sodium bicarbonate solutions are typically mildly basic (pH depends on concentration and temperature). That’s why it helps in some situations, but it isn’t a replacement for degreasing surfactants when the grease is embedded.
Verdict: A Simple Plan That Usually Works
For most grease spills, the winning sequence is: blot/absorb → degrease → rinse → dry. This step-by-step method is effective on common household floors while minimizing damage from overly aggressive cleaning.
A staged approach—lifting bulk first, then emulsifying residue with detergent, then rinsing—reduces both spreading and lingering slickness.
Porous or older grease often requires repeat cycles, because oils can migrate into grout and concrete pores over time.
For most grease spills, the best approach is: blot/absorb → degrease → rinse → dry. This method is usually effective without damaging common household floor finishes. Downsides: deep or old grease (especially in porous concrete or grout) may require multiple cleaning cycles, and delicate floors (unfinished wood or specialty coatings) may need a safer, surface-approved cleaner or professional assessment. If you’re dealing with an unknown chemical spill (not just food grease), stop and follow hazard guidance from the relevant safety documentation ().
Grease Spill Quick Checklist
– ☐ Blot grease (outside → center)
– ☐ Absorb with baking soda/cornstarch (lift, then remove)
– ☐ Degrease with warm water + dish soap (or labeled degreaser)
– ☐ Scrub gently, then rinse with clean water
– ☐ Dry fully and check for slick residue
Sources
– PubChem: Sodium bicarbonate (baking soda) aqueous pH information (used for understanding mild alkalinity)
– NIST Chemistry WebBook: Water physical property reference (used for temperature context)
If you keep the process staged and verify dryness (instead of stopping when the area looks better), you’ll usually remove grease without turning the floor into a bigger problem. For older spills or porous surfaces, plan on repeat degreasing cycles and avoid abrasive pads until you know the residue is truly gone.
Frequently Asked Questions
What’s the best way to clean up a grease spill on a floor?
Start by blotting up excess grease with paper towels or an absorbent cloth so it doesn’t spread. Sprinkle an absorbent like baking soda, cornstarch, or commercial degreaser absorbent over the area and let it sit for 10–15 minutes. Then scrub with hot, soapy water and a stiff brush, wipe clean, and repeat if any oily residue remains.
How do I remove grease stains from concrete floors after a spill?
For concrete, use an absorbent first, then apply a degreaser (or a mixture of dish soap and warm water for light spots). Scrub firmly with a stiff brush and rinse thoroughly, repeating until the stain lifts. If the grease stain persists, use a stronger concrete degreaser or a poultice made from absorbent and degreasing solution, left in place overnight before scrubbing and rinsing.
Why does a grease spill keep coming back even after I clean it?
Grease often seeps into porous surfaces like concrete or grout, leaving behind oily residue that reappears when it gets wet. In addition, using only water-based cleaning without a true degreasing agent can leave a thin film behind. Use an absorbent and a proper degreaser, scrub the area thoroughly, and rinse well to remove both grease and residue.
How can I clean up grease safely on tile or vinyl floors without damaging the surface?
Begin by blotting and absorbing the spill—avoid scrubbing immediately, which can grind grease into tile grout or scratch vinyl. Use a gentle degreaser or dish soap solution with warm water, then scrub softly with a non-scratch brush or microfiber pad. Rinse with clean water and dry to prevent slipperiness and lingering odor, since oily residue can make tile or vinyl slick.
Which cleaning products work best for grease spills on floors?
Dish soap is effective for smaller grease spills because it cuts grease well, especially with warm water and scrubbing. For tougher, older, or larger spills, use a degreaser labeled safe for floors (and compatible with your flooring type), or an absorbent plus degreaser combo for faster cleanup. For best results, follow up with thorough rinsing and drying so the floor doesn’t remain slippery or accumulate residue.
📅 Last Updated: October 17, 2026 | Topic: how to clean up grease spill on floor | Content verified for accuracy and freshness.
References
- 1910.22 – General requirements. | Occupational Safety and Health Administration
- Slips and trips – HSE
- https://www.epa.gov/oil-spills/preparing-responding-and-reporting-oil-spills
- https://www.epa.gov/oil-spills/oil-spill-response
- https://response.restoration.noaa.gov/oil-and-chemical-spills/oil-spills/oil-spill-response.html
- Oil spill
- https://pubmed.ncbi.nlm.nih.gov/?term=grease+spill+floor+cleanup+slip+hazard
- https://scholar.google.com/scholar?q=how+to+clean+up+grease+spill+on+floor Google Scholar
- https://scholar.google.com/scholar?q=oil+spill+cleanup+absorbent+degreaser+floor Google Scholar
- https://scholar.google.com/scholar?q=slip+and+fall+prevention+spill+response+oily+substances Google Scholar

[…] everyday grime, a mixture of warm water and dish soap is usually the safest option and works well on smudges and light stains. For sticky residue, try […]