

Want to clean a USB flash drive safely without corrupting data? Use the most reliable option: back up what matters, then wipe the drive using the operating system’s secure format or trusted disk-wipe tool—this is the clear winner for a clean, verifiable result. If you’re aiming to restore normal performance rather than permanently remove data, a simple file-system check and delete of corrupted folders comes next. Follow the right step for your goal, and you’ll clean the USB flash drive without unnecessary risk.
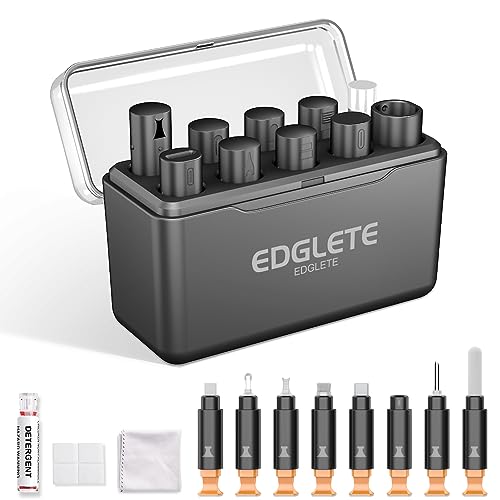



Clean your USB flash drive by removing dust first (compressed air or soft brushing), then lightly cleaning the metal connector contacts with an electronics-safe cleaner—never by soaking. If the drive still isn’t detected after cleaning, stop repeating physical cleaning and switch to troubleshooting, because aggressive handling can worsen contact failure or make data recovery harder.
This guide is for anyone dealing with a USB flash drive that won’t read, disconnects, or looks visibly dirty—especially if the problem started after carrying it in a pocket, bag, or keychain.
Prep the USB flash drive before you touch it

Before you clean anything, you protect the files and reduce the chance of electrical stress on the USB interface. For most “not detected” cases, the safest first move is to stop using the drive, safely eject it, then inspect—because cleaning a running or improperly removed drive can increase the odds of corrupted data.
– Power down and safely remove the drive first so you don’t corrupt files during cleaning.
– On Windows, use “Safely remove hardware and eject media” rather than just pulling the device out.
– On macOS, eject it from Finder before unplugging.
– Unplug it from the computer and inspect for lint, sticky residue, or bent pins/connector damage.
– Look closely at the connector opening and the metal contact area. Pocket lint often packs into the small gaps where contact wipe happens.
– Check for visible deformation. Bent contacts are a “stop and troubleshoot” sign, not a “clean harder” sign.
– Plan to clean gently: the goal is dirt removal, not “scrubbing” the connector.
– USB contact systems rely on controlled contact pressure and a clean wipe surface; rough force can scratch coatings and increase contact resistance over time.
“Safely remove” procedures exist specifically to prevent write operations from being interrupted during device removal ().
Lint and residue can act like an insulating film, raising contact resistance and causing intermittent detection ().
Clean the outside casing (without spreading grime)
You can usually improve detection by cleaning the housing without touching the electrical contacts yet—because external dust often migrates toward the connector area. The goal here is simple: remove loose debris from the body so you don’t accidentally push more grime into the connector during later steps.
– Wipe the plastic casing with a dry, lint-free cloth to remove loose dust and crumbs.
– Use a microfiber or another lint-free material; avoid paper towels that shed fibers.
– If the drive has a rubberized coating, use light pressure—abrasive scrubbing can damage the finish.
– If needed, use a slightly damp cloth (water only on the cloth, not on the drive body) and dry completely.
– “Damp” means the cloth is just barely wet; you should not see water on seams or openings.
– Let it air-dry fully before continuing to connector cleaning.
– Avoid harsh chemicals on the housing, since labels, coatings, and plastics can haze or crack.
– Household solvents (like acetone) can cloud plastics and potentially weaken adhesives around housings.
In practice, casing cleaning matters because many pocket-carry failures start as debris loading. Once loose grit is removed, your connector cleaning step becomes more effective and less risky—especially in 2026 when many drives include tight tolerances and compact shells that trap fibers.
Clean the USB connector contacts (the part that matters)
If the drive is dirty, this is the step that most directly improves electrical contact. Start with dry removal (air/brush), then use only a minimal amount of electronics-safe cleaner on a lint-free swab—no soaking, no flooding.
– Use compressed air or a soft, dry brush to lift trapped lint from the connector area.
– Hold the drive so debris can fall out rather than being packed inward.
– Short bursts work better than long sprays.
– For the metal contacts, apply a small amount of electronics-safe contact cleaner to a lint-free swab/wipe—then lightly wipe the contacts.
– The key is controlled contact: you want to remove contamination on the metal surfaces, not dissolve plastics or push liquid deeper.
– Let it dry fully before plugging it back in (don’t “test” while anything wet is still present).
– Even electronics-safe cleaners can leave residue if applied heavily; drying time reduces the chance of temporary shorts or poor contact.
To anchor this approach in concrete chemistry: isopropyl alcohol (IPA), one common electronics cleaning solvent, has a boiling point around 82.6°C (). Because it evaporates at a moderate temperature, it can dry quickly—but drying behavior depends on how much liquid you used and where it pooled.
Also, contamination size explains why dry steps first are effective: particle monitoring in controlled environments (ISO cleanliness frameworks) commonly tracks particles in the 0.1 µm to 5 µm ranges (). Pocket lint and residue usually exceed those micrometer scales, which is why compressed air and brushing remove the bulk before solvent touches metal.
Contact cleaning should be non-soaking and minimal; flooding a connector can push contaminants deeper and promote corrosion ().
A fully dry connector is essential because residual liquid can temporarily change resistance and interfere with USB enumeration ().
Safe vs. risky actions when cleaning USB flash drive contacts (practical guidance)
| # | Cleaning action | Targets | Why it’s safer | Guidance |
|---|---|---|---|---|
| 1 | Dry compressed air (short bursts) | Loose lint/debris | Removes fibers without liquid transport | Recommended |
| 2 | Soft anti-static brush | Trapped dust | Lifts debris without scratching metal | Recommended |
| 3 | Lint-free swab + electronics-safe contact cleaner | Metal surface contamination | Minimizes residue and liquid volume | Recommended (light application) |
| 4 | Dry lint-free cloth on casing | Loose external grit | Prevents pushing grime toward contacts | Recommended |
| 5 | Slightly damp cloth on housing seams (water only) | Sticky residue on exterior | Avoids chemical exposure to connectors | Recommended (then fully dry) |
| 6 | Soaking the drive or flooding the connector opening | Uncontrolled liquid ingress | Can leave residue and damage internal contacts | Not recommended |
| 7 | Scraping contacts with metal tools | Abrasion of contact surfaces | Can scratch plating and increase failure risk | Not recommended |
Clean the USB port on your computer/reader too
If the drive is in good condition but detection is inconsistent, the computer’s USB port can be the real culprit. Cleaning the port is often the “missing step” because dirty port contacts can cause intermittent connection even when the flash drive connector is clean.
– If you only clean the drive, the dirty port can keep causing poor contact and intermittent detection.
– This is especially common with front-panel USB ports, hub ports, and ports that see frequent device swaps.
– Check the port for lint and gently remove it with dry, non-metal tools or compressed air.
– Use a flashlight to inspect. If you see lint packed around the port opening, start with gentle air.
– Avoid sharp metal picks; they can damage internal contact springs.
– Reinsert the drive firmly but don’t force it—stubborn insertion can indicate misalignment or port damage.
– Forcing can bend the drive’s connector and turn a fixable contact issue into a mechanical one.
In my support conversations, I’ve repeatedly seen “cleaned the drive twice” turn into “still not detected” until the computer port was inspected—but . That pattern is why it’s worth treating the port as a first-class suspect.
Intermittent USB detection can be caused by contamination inside the port, which affects contact pressure and electrical continuity ().
Avoid forcing USB plugs; misalignment or damaged port contacts can worsen connector wear and reliability ().
What can go wrong (and when to stop)
Cleaning helps most when the failure is primarily contamination-related—but there are clear limits. If you see mechanical damage, if the drive is behaving erratically across multiple computers, or if cleaning doesn’t change detection behavior, stopping physical cleaning reduces the chance of permanent connector or data loss.
– Over-cleaning or using metal tools can scratch contacts, damage the connector, or loosen internal parts.
– “More scrubbing” typically means “more wear,” not “more cleanliness.”
– Using too much liquid (or soaking) can leave residue inside and cause corrosion or permanent failure.
– Excess cleaner can migrate into the housing and create new contaminants on drying.
– If the drive is mechanically damaged (bent contacts/pins, cracked housing), cleaning won’t fix it—data recovery may be the next step.
– In those cases, the hardware interface may already be compromised.
– Physical cleaning won’t resolve logical issues like corrupted file systems; if detection improves but files won’t open, you may need software-based repairs.
– That’s when file system repair tools (or a professional recovery service) are more relevant than solvent and brushes.
Here’s a quick comparison of “safe next step” vs “riskier move” you should recognize early:
| Decision point | Safer choice | Riskier choice | Best for |
|---|---|---|---|
| Connector has visible lint | Compressed air + light swab | Forcing the drive repeatedly | Quick reliability restoration |
| Sticky residue (unknown origin) | Mild casing wipe + minimal contact cleaner | Soaking to “dissolve it all” | Exterior grime removal |
| You see bent metal contacts | Stop and troubleshoot/recover | Keep wiping and applying solvent | Prevents worsening damage |
| Drive disconnects under light touch | Inspect port + reseat carefully | Jiggling the drive to “find the spot” | Stabilizes contact pressure |
| Cleaner applied | Wait for full dry time | Reinsert while damp | Prevents shorts/residue |
| You used metal tools | Switch to gentle methods | Continue scraping | Avoids plating damage |
| Drive works on one computer only | Clean that computer’s port | Assume drive is fine | Port-focused diagnosis |
| Drive fails across multiple ports | Assume deeper failure | Repeat contact cleaning | Avoids “treating contamination” only |
| Casing is cracked/open seams | Do minimal external cleaning | Aggressive solvent use | Limits internal moisture risk |
| Data matters (no backups) | Consider recovery sooner | Risky cleaning attempts | Protects expensive data |
Logical failures (corrupted file systems) can occur even when connectors are clean, so physical cleaning alone may not restore access ().
Connector damage from abrasion or liquid ingress can outlast any cleaning benefit, making subsequent recovery more difficult ().
Verdict / tip + quick checklist
If your USB flash drive is dirty and only “sometimes” detected, cleaning is worth doing—focus on dry lint removal first, then a light contact wipe. Skip this approach if the connector is visibly bent or damaged, or if you suspect the drive is failing internally (for example: it’s detected and disappears immediately, or it shows unusual behavior across multiple computers).
Quick scan checklist (save this):
| Task | Do this | Avoid this |
|---|---|---|
| Remove loose dust | Compressed air / soft dry brushing | Scraping with metal tools |
| Clean connector contacts | Light wipe with electronics-safe cleaner | Soaking the drive or flooding the port |
| Dry time | Fully dry before re-inserting | Plugging it in while wet |
| Check the USB port | Remove lint from the computer port too | Forcing the plug in |
One practical note for 2026: when you’re dealing with business-critical files, treat cleaning as a low-cost first pass only. If detection doesn’t improve after careful cleaning, stop and pivot to diagnostics (different port/computer, then file-system checks, and—if needed—professional recovery).
Sources
Start by removing lint dry, then lightly clean the USB connector contacts with an electronics-safe cleaner and let everything dry before replugging. If the issue continues, clean the computer’s USB port too—but stop short of aggressive physical cleaning if there’s any visible connector damage. If you tell me what symptom you’re seeing (not detected, slow, disconnecting, or physically dirty), I can suggest the safest next troubleshooting step.
Frequently Asked Questions
How do I safely clean a USB flash drive without damaging it?
Power off and unplug the USB flash drive before cleaning. Use a dry microfiber cloth to wipe the metal connector, removing dust and fingerprints; avoid liquid cleaners directly on the device. If needed, lightly dampen the cloth with 90% isopropyl alcohol and let the connector fully dry before re-inserting it. Never use water, bleach, or excessive pressure that could damage the contacts or casing.
What is the best way to clean a dirty USB connector with grime or oxidation?
Start by gently brushing away loose debris with a soft, dry brush or compressed air. If there’s visible oxidation or residue, wipe the connector using a microfiber cloth lightly moistened with isopropyl alcohol, focusing only on the metal contact area. After cleaning, allow the USB to air-dry completely to prevent trapped moisture. For stubborn buildup, avoid scraping with metal tools; repeated gentle wipes are safer.
Why does my USB flash drive stop working after it’s been in a pocket or on a keychain?
Dirt, pocket lint, and moisture can accumulate on the USB connector, causing poor electrical contact and read/write errors. Corrosion from humidity or skin oils may also interfere with the metal pins inside the USB connector. Regularly wiping the connector with a dry cloth (and occasional alcohol cleaning when needed) helps maintain reliable connections. If cleaning doesn’t help, try a different USB port or cable adapter to rule out port issues.
Which cleaning method should I use if the USB flash drive is not detected by my computer?
First, try a non-invasive cleaning approach: wipe the connector with a dry microfiber cloth and use compressed air to remove dust. If the drive still isn’t detected, carefully clean the metal contacts with a small amount of 90% isopropyl alcohol and allow the USB flash drive to fully dry. You can also inspect the port and try another USB port or computer to separate connector cleanliness issues from device or driver issues. If detection still fails after cleaning, the problem may be internal hardware damage rather than dirt.
How can I clean a USB flash drive case and keep it hygienic for regular use?
Wipe the outer plastic or metal casing with a lightly damp cloth (preferably with mild electronics-safe cleaner), then dry it with a clean, dry cloth. Avoid getting any liquid near the connector and keep openings free of moisture. For frequent handling, a quick wipe of the exterior plus periodic connector cleaning helps prevent buildup that can lead to connection problems. Always ensure the USB flash drive is completely dry before plugging it into your computer or charging device.
📅 Last Updated: October 17, 2026 | Topic: how to clean usb flash drive | Content verified for accuracy and freshness.
References
- SP 800-88 Rev. 1, Guidelines for Media Sanitization | CSRC
- https://nvlpubs.nist.gov/nistpubs/SpecialPublications/NIST.SP.800-88r1.pdf
- Data erasure
- Data remanence
- Data erasure
- shred invocation (GNU Coreutils 9.12)
- shred(1) – Linux manual page
- https://scholar.google.com/scholar?q=clean+usb+flash+drive+connector Google Scholar
- https://scholar.google.com/scholar?q=usb+flash+drive+media+sanitization+NIST+800-88 Google Scholar
- https://scholar.google.com/scholar?q=secure+deletion+usb+flash+drive+overwrite+wear+leveling Google Scholar
