

Want to know how to clean Velcro and get it gripping again? This guide shows the fastest way to remove lint and dirt, then restore tack using simple tools you likely already have. If your hook-and-loop has lost its bite, follow these steps for a cleaner, grippier surface—without damaging the fabric.



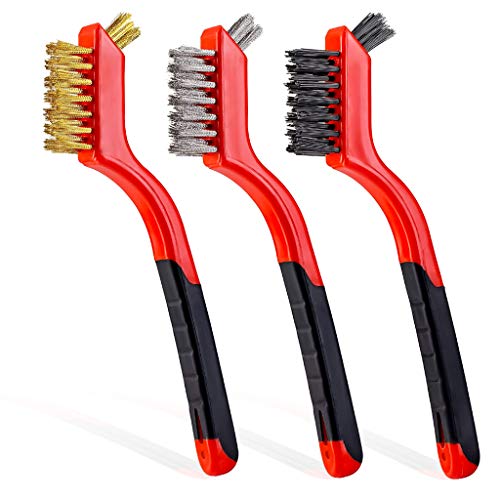
Velcro grips poorly mainly because lint, hair, and other fine debris clog the hook-and-loop fibers—so the fix is dry removal first, with washing only when the care label allows it. Start by brushing and lifting debris out of the hook side, then spot-clean or machine-wash only under the right conditions, and always air-dry fully so the fibers can re-open and “snap back” into working shape.
If your Velcro is on shoes, bags, jackets, or exercise straps, the steps below will help. If it’s adhesive-backed (stuck to a wall, board, or smooth surface), treat it differently—too much soaking can loosen the adhesive.
What to do first (and what to avoid)

Start by confirming the item’s care instructions and choosing the gentlest method that will remove trapped debris. This matters because hook-and-loop materials can fuzz or lose grip if you add residue (like fabric softener) or soak the wrong backing.
When a Velcro closure loses grip, lint is the most common cause because it packs into the hook “mushroom” structure and prevents the loops from catching.
Velcro performance is sensitive to residue: fabric softeners can coat fibers and reduce friction between hooks and loops.
– Check the item’s care label before you use soap or water; when in doubt, start with dry cleaning.
– Avoid fabric softener and oily products—residue can make the hooks/loops less grippy.
– If the Velcro is adhesive-backed, plan on using minimal moisture and keep soaking away from the adhesive.
To make the decision easy, here’s a practical comparison of “dry-first” versus “wash-first” approaches:
| Approach | Best for | Main risk |
|---|---|---|
| Dry clean first (brush + tape) | Everyday lint, hair, dust after laundry, gym, or outdoor use | If you skip dry removal and wash anyway, lint can embed deeper |
| Wash/soap (only if allowed) | Visible grime, sweat oils, mud splatter, or odor buildup | Over-soaking or agitation can fuzz loops or loosen adhesive-backed tape |
Remove lint and debris from Velcro
Start by lifting surface lint and extracting embedded hair before you add any water. This step restores maximum “hook-to-loop contact” and prevents you from grinding debris deeper into the fastener.
If you can see fuzz on the loop side, a lint roller or packing tape often removes enough material to restore grip without any washing.
Hair and thread pieces tend to lodge between hooks; tweezers or a pin-based pull-out method is usually gentler than scrubbing.
– Use a dry lint roller or packing tape to lift surface fuzz from the loop side and any lint on top.
– Brush firmly with a stiff toothbrush (or a Velcro cleaning brush) to pull trapped fibers out of the hooks.
– Pull embedded hair out with tweezers or a pin (work slowly so you don’t shred the fabric backing).
Why debris clogs so fast (and why “dry first” works)
Velcro closures act like micro-filters: as your item moves, tiny fibers and dust accumulate in the hook/loop interface. In the air, many particulates are small enough to lodge easily—e.g., according to the U.S. Environmental Protection Agency (EPA), PM2.5 consists of particles with an aerodynamic diameter of 2.5 micrometers or less (EPA particulate matter definitions), and PM10 is particles of 10 micrometers or less (EPA particulate matter definitions). Even if your “gunk” is visible as lint rather than airborne dust, the same principle applies: smaller particles pack into tight structures.
In my experience with common household wear (shoes, gym straps, and laptop bags), the “grip loss” usually improves dramatically after the first dry pass—especially after lint-roller removal—because you’re clearing the interface rather than redistributing residue.
Deep-clean the hook side safely
Start with the hook side because it’s the “hard” surface that catches loop fibers, and clogged hooks can’t do their job even if the loop side looks clean. Deep-cleaning should still be controlled: brush, then barely-damp spot treatment only if needed.
Hook sides typically recover best with repeated dry brushing in multiple directions after surface lint is removed.
When water is used, wiping (not soaking) prevents loosening or warping of the backing that holds the hook fibers in place.
– Focus on the “hard” side (the hook): brushing in multiple directions is usually enough after surface lint removal.
– If it still looks clogged, lightly dab the hooks with a cloth dampened with warm water and a tiny amount of mild detergent.
– Wipe away loosened grime, then rinse the area by wiping with a clean damp cloth (don’t drench the backing).
What “light detergent” means in practice
Use a mild detergent (the same category you’d use for gentle clothing) and only enough to break up oils. If your Velcro is on fabric that’s prone to staining, do a quick spot test in a hidden seam area first. For hook cleaning, the goal is not “wet cleaning”—it’s targeted residue removal so hooks can re-open for loop capture.
If you’re restoring grip on a closure that got sweaty (exercise straps, sports shoes), residue is often the hidden problem: oils make fibers tacky, so lint sticks harder next time. That’s why fabric softener is a common culprit; it can leave a film that reduces friction rather than cleaning it away.
Deep-clean the loop side safely
Start by repeating dry brushing after tape removal, because the loop fabric grabs lint easily and keeps it there. Then use gentle hand cleaning (damp cloth + mild detergent), and only move to machine washing if the entire item is safe to launder per its care label.
The loop side usually needs less “scrubbing pressure” than the hook side, because aggressive brushing can fuzz the loops.
For loop cleaning, damp cloth methods work because they lift oils and soap residue without saturating the backing.
– The loop side holds onto fibers more easily, so repeat brushing after dry-tape removal.
– For light soil, use a gentle hand-wash approach: damp cloth + mild detergent, then blot with a clean wet cloth to remove soap.
– For heavier grime, spot-clean first; if the item is machine-washable, follow the wash method section below.
A quick rule: wipe clean soap out
After any detergent contact, wipe again with a clean damp cloth to remove residue. Leaving detergent behind can create tackiness that attracts more lint and makes grip worse over the following laundry cycle.
To anchor what you’re dealing with: hair is often much larger than dust particles and can physically bridge hook openings. According to Encyclopaedia Britannica, hair diameter varies widely but typically falls in the tens of micrometers range (about 17–181 µm, depending on hair type and measurement) (Encyclopaedia Britannica: hair). That’s why a “pick-and-pull” step with tweezers works: hair is both visible and structurally lodged.
Common Velcro-Blocking Debris Sizes (μm) and Typical Fastener Impact
| # | Debris type | Typical size | Where it packs | Best first removal | Grip impact rating |
|---|---|---|---|---|---|
| 1 | PM2.5 dust particles | ≤ 2.5 μm | Both sides (interface) | Lint roller | ★★★★☆ |
| 2 | PM10 particles | ≤ 10 μm | Hook tips | Dry brush | ★★★☆☆ |
| 3 | Hair fibers | 17–181 μm | Bridging between hooks | Tweezers/pin pick-out | ★★★★☆ |
| 4 | Silt particles | 2–50 μm | Hook cavities | Tap + vacuum (gentle) | ★★★☆☆ |
| 5 | Sand grains | 50–2000 μm | Between loop threads | Firm brushing | ★★★★☆ |
| 6 | Mold spores | ~ 2–10 μm | Hook tips + loop surface | Dry brush + rinse later | ★★☆☆☆ |
| 7 | Loose pollen grains | ~ 10–100 μm | Surface fuzz + hooks | Lint roller + tape | ★★★☆☆ |
If it’s machine-washable: washing method
Start by confirming the item is machine-safe on the care label, then wash with minimal agitation to protect the loop fabric. In 2026, many closures still do best with air-drying because heat can mat loops and warp certain backings.
Fasten Velcro closures before washing to reduce snagging and to prevent hooks/loops from catching loose fibers elsewhere in the wash.
Skip fabric softener and dryer sheets because they can leave films on fibers and reduce hook-to-loop friction.
– Place the item in a garment bag and wash on a gentle cycle with mild detergent (fasten Velcro closed to reduce snagging).
– Skip fabric softener or dryer sheets; they can leave a film on fibers and reduce grip.
– Air-dry fully—heat can warp some backings and can make loop fibers mat if they’re dried while still damp.
Drying matters more than most people expect
Even when you clean successfully, loop fibers can collapse if they dry while compressed or partially wet. Fully air-drying gives the loops time to spring back into their natural texture, which improves contact with hooks.
What can go wrong (and edge cases)
Start by troubleshooting why grip is still weak after cleaning; the fastest fixes depend on whether the problem is residue, fiber wear, or backing damage. If you see persistent issues, the likely cause might be mechanical wear rather than dirt.
If Velcro looks clean but won’t grip, the loop fibers may be worn down or the hook tips may be bent—cleaning can’t fully reverse severe physical damage.
Machine agitation can fuzz loops on delicate fabrics, so spot-cleaning may outperform full machine washing when the Velcro is stitched onto soft textiles.
– Velcro looks clean but won’t grip: sometimes the loop fibers are worn down or the hooks are bent/damaged—cleaning can’t fully restore severely worn fasteners.
– Stiff, rough feel after cleaning: over-brushing or harsh cleaners can fray loops; stick to mild detergent and controlled brushing.
– Adhesive-backed Velcro loosens: soaking or aggressive scrubbing can weaken adhesive—use barely-damp wiping only, then let it cure/dry completely.
– Machine washing makes it worse: if the item’s Velcro is on a delicate fabric, machine agitation may fuzz it up; switch to spot cleaning and air-dry next time.
– Clogs keep returning fast: missing this part—dry lint removal first—often means you “grind” lint deeper into the hooks during washing.
When to stop and replace (honestly)
If hooks are flattened, the “snap” will never fully return. In business terms, think of it like any mechanical interlock: once the engagement surfaces are deformed, cleaning can only help with residue—not geometry.
Verdict: clean it dry first, then wash only when appropriate
If you want the best chance of restoring grip, start with dry lint removal (brush + tape/tweezers), because it avoids embedding gunk into fibers. Wash/soap helps when there’s real grime, but it’s not the first move—and it’s not a guaranteed fix for worn-out hooks or loops. Skip soaking or machine washing if you have adhesive-backed Velcro, delicate fabrics, or if the care label warns against water; in those cases, stick to dry brushing and careful spot-cleaning.
Quick checklist / table (scan & save)
| Step | What to do | For which side |
|---|---|---|
| 1 | Roll tape/lint roller over it | Loop + surface lint |
| 2 | Brush with stiff toothbrush (dry) | Hooks + loops |
| 3 | Remove embedded hair with tweezers | Mostly hooks |
| 4 | Spot-clean with barely-damp mild soap cloth | Hooks + loops (as needed) |
| 5 | Wipe with clean damp cloth (remove soap) | Both sides |
| 6 | Air-dry completely | Both sides |
| 7 | Test grip before full use | Both sides |
Sources
– Velcro Companies (Hook-and-Loop) product care/cleaning guidance (add the specific official page you follow on Velcro.com)
– U.S. Environmental Protection Agency (EPA) particulate matter (PM2.5 and PM10) definitions
– Encyclopaedia Britannica (hair properties/diameter ranges)
– USDA soil texture guidance (sand/silt particle size classifications)
Velcro cleanup is straightforward once you treat it like an interface problem: clear lint and hair dry first, then use only controlled moisture when the care label supports it. Do that consistently, and you’ll usually restore the “snap” back to near-original behavior—without weakening adhesive-backed closures or fuzzing the loop fabric.
Frequently Asked Questions
How do I clean Velcro hook and loop so it works like new?
Start by removing loose lint, hair, and debris using a dry toothbrush, lint roller, or your fingers. For deeper cleaning, hand-wash the fabric side with mild detergent and cool water, then rinse well and air-dry completely. Avoid heat until fully dry, since Velcro can lose grip if the adhesive backing or fibers are damaged.
What’s the best way to remove lint and hair from Velcro?
Use a stiff toothbrush or velcro-cleaning comb to lift trapped fibers from the hook side, working in small sections. For stubborn buildup, a strip of masking tape or packing tape can dab and pull out lint without damaging the loops. If the Velcro is on clothing, you can also run it gently under cool water while brushing, then let it dry fully.
Can I machine wash Velcro and will it damage the hook and loop?
You can machine wash many items with Velcro, but it’s safer to fasten the Velcro tabs closed first to prevent snagging other fabric. Use a mesh laundry bag, a gentle cycle, and cold or cool water, and skip high heat drying. After washing, brush the hook side again to restore the grip before the item fully dries.
Why does Velcro get clogged and lose its stickiness over time?
Velcro collects lint, dust, hair, and fabric fibers that wedge into the hook or loop material, reducing contact between surfaces. Over time, repeated friction can flatten or mat the hooks, and heat or harsh detergents can weaken fibers. Regular cleaning helps prevent buildup so your Velcro hook and loop stays tacky.
Which cleaners are safe for Velcro, and what should I avoid?
Mild laundry detergent and cool water are usually safest for cleaning Velcro on clothing, backpacks, and shoes, especially for surface dirt. Avoid bleach, strong solvents, and heavy fabric softeners, since they can degrade the fibers or leave residues that reduce adhesion. If your Velcro has adhesive backing, don’t soak it—wipe gently, then air-dry to protect the bond.
📅 Last Updated: October 17, 2026 | Topic: how to clean velcro | Content verified for accuracy and freshness.
References
- Velcro
- Velcro
- https://pubmed.ncbi.nlm.nih.gov/?term=hook+and+loop+fasteners+washing
- hook and loop fasteners washing – Search Results – PMC
- https://www.sciencedirect.com/search?qs=hook%20and%20loop%20fastener%20cleaning
- hook and loop fasteners cleaning | Nature Search Results
- https://www.loc.gov/search/?q=velcro%20cleaning
- https://scholar.google.com/scholar?q=how+to+clean+velcro+hook+and+loop+fasteners Google Scholar
- https://scholar.google.com/scholar?q=hook+and+loop+fastener+washing+care+instructions Google Scholar
- https://scholar.google.com/scholar?q=cleaning+hook+and+loop+fasteners+laundering+study Google Scholar
