

Want to clean window shutters without streaks or grime left behind? Follow these simple, step-by-step instructions to get a fresh, smooth finish on both painted and unpainted shutters. You’ll know exactly what to dust, what to wash with, and what to rinse and dry so the job looks professionally done.


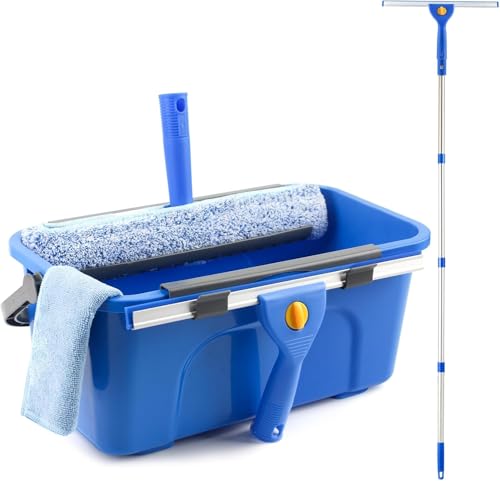

Clean window shutters by dusting them first, then washing with a mild soap-and-water solution that matches the shutter material, and drying thoroughly. Start with the slats (front and back if accessible) so grime doesn’t smear, then rinse lightly and let them air-dry completely to avoid streaks and water spots.
If your window shutters look dull, collect dust along the slats, or have spots that keep returning, this guide walks you through a finish-safe cleaning routine. It’s especially helpful in 2026 when more homes are using a mix of vinyl, painted wood, and metal shutters, and homeowners want results without warping, residue, or rust.
Identify your shutter material (and how far to take it)

Identify your shutter material first—because the amount of moisture a shutter can tolerate varies a lot. Once you know whether you’re working with vinyl, aluminum/metal, painted wood, or unsealed wood, you can choose the right cleaner and drying pace for your window shutters.
Vinyl, aluminum/metal, and painted wood shutters can typically handle mild soap-and-water cleaning, but unsealed wood needs far less moisture and faster drying.
If paint is peeling, rust is active, or mildew stains keep returning, “basic cleaning” may not be enough—you may need a finish-appropriate repair or specialty treatment for window shutters.
Confirm what you’re cleaning
– Check whether they’re vinyl, aluminum/metal, painted wood, or unsealed wood
– Look for special conditions: peeling paint, rust spots, mildew staining, or warping
– If you’re unsure, do a small “spot test” in a hidden area before cleaning the full shutter
In my experience, the quickest way to avoid damage to window shutters is to treat “material ID” like a safety step, not an aesthetic one. For example, if the shutter feels chalky when wiped (often a sign of degrading paint), you should avoid scrubbing hard and reduce how wet you make the surface. If a shutter is outdoors and you see dark streaking along the bottom rail, the issue may be mildew or trapped moisture rather than general dirt—so your window shutters may need a mildew-specific approach.
Know the risk markers
Before you add any water, check each shutter section for:
– Peeling or lifting paint (reduces the protection layer)
– Rust freckles on metal (scrubbing can spread iron oxide)
– Soft, fuzzy, or rough wood grain (unsealed or failing finish)
– Warping or gaps (often linked to prior over-wetting)
If you have older painted wood shutters, remember that safety guidance for lead-based paint may apply in some homes. According to U.S. EPA, about 3 in 4 homes built before 1980 contain lead-based paint (U.S. EPA). That matters because wet scrubbing and disturbed paint can increase hazard during DIY cleaning.
Gather supplies for streak-free cleaning
The simplest way to prevent streaks on window shutters is to use soft tools and a gentle cleaner matched to the material. Gather your microfiber, a soft brush, and mild soap-and-water—then avoid abrasives that can dull finishes or leave permanent residue.
Microfiber cloths and soft-bristle brushes are effective at lifting dust from slats and grooves without scratching painted surfaces of window shutters.
A mild dish soap in warm water is a common “default safe” option for many non-delaminating, factory-finished shutter materials when used lightly and rinsed.
Harsh chemicals and abrasive pads can leave dulling or residue on painted window shutters and can accelerate finish failure on wood.
Choose the right tools and cleaner
– Use soft tools: microfiber cloths, a soft-bristle brush, and/or a microfiber mop head for slats
– Choose a gentle cleaner: warm water plus mild dish soap is the default safe option for many finishes
– Skip abrasives and harsh chemicals (they can dull paint, damage wood, or leave permanent residue)
Quick material-safe chemistry check
Most streaks come from two things: dust being smeared by wet cleaning, and cleaner residue left behind after the wash. Mild cleaners reduce both risks because they’re designed to rinse cleanly with water. For window shutters, your goal is “lift and remove,” not “scrub and leave a film.”
Cleaner Neutrality Levels for Finish-Friendly Shutter Washing (Typical Household Solutions)
| # | Cleaner (typical use) | Typical pH (approx.) | Safety stars for most finishes | Compatibility score |
|---|---|---|---|---|
| 1 | Water | 7.0 | ★★★★★ | 100 |
| 2 | Mild dish soap solution | 8.0 | ★★★★☆ | 80 |
| 3 | Baking soda solution | 8.4 | ★★★☆☆ | 72 |
| 4 | 3% hydrogen peroxide | 4.5 | ★★☆☆☆ | 50 |
| 5 | White vinegar (5%) | 2.5 | ★☆☆☆☆ | 10 |
| 6 | Household ammonia (typical) | 11.5 | ★☆☆☆☆ | 0 |
| 7 | Chlorine bleach solution (typical) | 11.2 | ★☆☆☆☆ | 0 |
Note: pH varies by brand and dilution; always check the product label and test in a hidden spot on window shutters.
Dust and prep the slats (before any wet cleaning)
Dust first—this is the step that prevents cloudy streaks and gray smears on window shutters. After the dry pass, you can wash with minimal water and cleanly rinse away residue.
A dry wipe before washing prevents loose dust from turning into a smeary paste on the slats of window shutters.
Cleaning from top to bottom helps capture falling dust so it doesn’t land on already-clean sections of window shutters.
Pre-clean the grooves
– Close the shutters and start from the top down to catch falling dust
– Wipe along the slats and into the grooves with a dry microfiber cloth or soft brush
– If there’s light buildup only, sometimes a thorough dry pass is all you need before deciding to wash
How much pressure is safe?
Use light, controlled pressure. Slats and rails on window shutters are often finished with coatings (paint, vinyl surface layers, or anodized/painted metal). Heavy scrubbing—especially during the dust phase—can grind grime into the texture and make later streaks harder to remove.
In 2026, many homes also have textured coatings and semi-matte paints, where residue shows faster under side lighting. A gentle dry prep reduces the time you need to use wet cleaning, which helps painted wood shutters avoid swelling and helps metal shutters avoid spreading rust.
Wash properly by material
Wash the shutters using minimal, finish-appropriate moisture—this is what keeps window shutters looking crisp rather than water-spotted. The right approach differs for vinyl, metal, and wood because each material handles water and cleaning chemistry differently.
Vinyl shutters generally tolerate mild soap cleaning better than unsealed wood, which should be cleaned with damp (not wet) tools to prevent swelling.
On aluminum/metal shutters, avoid aggressive scrubbing if paint is thin, because mechanical action can expose new bare metal and encourage rust.
When cleaning painted wood shutters, quick damp wiping plus immediate drying reduces the chance of finish damage and water rings on window shutters.
Material-by-material washing steps
– Vinyl or painted shutters: Dampen a cloth/brush with the mild soap solution, scrub gently along the slats, then wipe with clean water on a second pass
– Aluminum/metal shutters: Use the same mild soap approach, but keep an eye out for rust—don’t scrub aggressively if paint or finish is thin
– Wood shutters: Use minimal moisture—lightly dampen (don’t soak), clean in sections, and dry immediately to reduce the risk of swelling or finish damage
Extra technique to stop streaks
For window shutters, the “two-pass logic” works well:
1. Pass 1 (soap): lift grime without soaking the grooves
2. Pass 2 (clean water): remove any surfactant film that causes dullness and streaking
If your shutters have removable hardware, taking them down can help you clean both sides and dry more completely. If they’re installed, clean top-down and keep water off hinge lines and the very bottom rail where runoff collects.
Watch-outs for exterior shutters
If exterior window shutters show recurring black/gray spots, you may be dealing with mildew embedded in the surface film. The right cleaner depends on your exact finish: . Without that step, repeated wet cleaning can spread staining and leave a patchy appearance.
Rinse, dry, and finish up the details
Rinse lightly and dry thoroughly—this final stage is what prevents water spots and makes window shutters look uniformly fresh. If you used soap, remove residue with a clean water wipe, then dry with a microfiber towel and allow complete air-drying.
Even when the soap amount is small, residue from surfactants can dry into a haze on window shutters unless you wipe/rinse and dry completely.
Air-drying fully before closing and locking helps prevent moisture from being trapped between slats and on hinge hardware of window shutters.
– If you used soap, rinse by wiping with clean, lightly damp cloths (or a very gentle water method if appropriate)
– Dry with a clean microfiber cloth, then let them air-dry fully before closing/locking them
– Recheck corners, rail edges, and the bottom edges where water and grime collect
Where grime hides
Pay extra attention to:
– Rail edges (where runoff concentrates)
– Bottom slat channels (dust + moisture = buildup)
– Hinge-side corners (missed grooves re-dirty quickly)
If you’re cleaning in 2026 during high humidity, allow longer air-dry time so window shutters aren’t “closed damp.” That reduces the chance of musty odors and finish softening.
What can go wrong (and how to avoid it)
Most cleaning failures on window shutters come from skipping dry prep, over-wetting, or using harsh cleaners that leave residue. If you avoid these common pitfalls, you’ll keep the finish intact and the slats looking clean.
Skipping the dry dusting step is the fastest path to smears, because dust turns into a gray paste when it meets soap water on window shutters.
Over-wetting is particularly risky for wood shutters, because absorbed water can cause swelling and finish breakdown that a quick “spot wipe” won’t undo.
Abrasives and strong degreasers can dull paint and create a permanent film that continues to attract dust on window shutters.
Common mistakes to prevent
– Smearing dust into streaks: Always dust first, then clean; never jump straight to wet cleaning
– Water damage on wood: Over-wetting is a common problem—use damp cloths, work quickly, and dry right after
– Finish dulling or residue: Avoid abrasive sponges, strong degreasers, and “mystery cleaners” that can leave a film
– Mildew surprises on exterior shutters: If you see recurring black/gray spots, you may need a mildew-specific approach—
If you suspect lead paint (older shutters)
If you’re working with older painted window shutters, treat the situation cautiously. According to OSHA, the lead action level is 30 µg/m³ averaged over an 8-hour period (OSHA Lead Standard (29 CFR 1910.1025)) and the PEL is 50 µg/m³ as an 8-hour TWA (OSHA Lead Standard (29 CFR 1910.1025)). You should avoid methods that create dust (like sanding or aggressive scraping). For compliance and safety information, see: .
Verdict: the safest approach (and who should skip DIY)
This method is usually the safest way to clean window shutters without ruining paint, warps on wood, or leaving streaks. That said, if your shutters are heavily damaged, if paint may be deteriorating, or if you suspect hazardous materials, you should pause and follow manufacturer guidance or professional help.
For most intact vinyl, aluminum/metal, and painted wood shutters, “dry dust → mild soap wash → light rinse (if needed) → full dry” reliably minimizes residue and streaks.
Heavily damaged coatings (peeling paint, failing finish, active rust) can worsen with DIY wet cleaning, especially when water gets into cracks around window shutter rails.
DIY vs. professional help (fast comparison)
– If your shutters are heavily damaged (peeling/soft wood, widespread rust, or crumbling paint), or if you suspect hazardous material like old lead-based paint, it’s better to pause and follow manufacturer guidance or get professional help—.
– Also pause if you’ve tried a cleaner and see lingering haze—finish film sometimes needs a different process than “more washing.”
Quick checklist (save this)
| Step | What to do | Tools/Cleaner |
|---|---|---|
| 1 | Identify material + spot-test | Hidden area check |
| 2 | Dust thoroughly (top to bottom) | Microfiber + soft brush |
| 3 | Wash gently by material | Mild dish soap + warm water |
| 4 | Rinse (if soap used) | Clean, lightly damp cloth |
| 5 | Dry completely | Microfiber towel + air-dry |
FAQ
– Can I use bleach to clean window shutters?
It depends on the finish and material. Bleach can discolor or weaken some coatings, so use a finish-appropriate cleaner and follow manufacturer safety guidance—.
– How do I clean wooden shutters without soaking them?
Use a lightly damp microfiber cloth or brush, clean in small sections, and dry immediately. The goal is “damp,” not “wet.”
– Should I clean shutters while they’re installed?
You can, but it’s easier to get into both sides (and dry faster) if you remove them. If you keep them mounted, work from top to bottom and avoid oversaturating edges.
– What’s the best way to tackle thick grime in slats?
Use a soft brush and gentle pressure, then wipe with a clean damp cloth to lift residue from the grooves.
– How often should I clean window shutters?
A quick dusting every few months (or when you notice buildup) is usually enough; do a full wash when grime shows or after pollen/dust seasons—.
Sources:
– U.S. OSHA Lead Standard (29 CFR 1910.1025)
– U.S. EPA
The safest path to clean, streak-free window shutters is still straightforward: dust thoroughly first, wash with a mild soap solution matched to the shutter material, and dry completely—especially along the bottom rail and corners. When you handle moisture carefully (damp, not soaked, for wood) and avoid abrasive/harsh chemicals, your shutters stay attractive without accelerating finish wear.
Frequently Asked Questions
What’s the best way to clean window shutters without damaging the finish?
Start by dusting the shutters thoroughly with a microfiber cloth or a soft brush to remove loose grit. Use a mild detergent mixed with water (or a cleaner recommended for your shutter material) and test it in a small hidden area first. Avoid harsh chemicals and soaking wood shutters, since excess moisture can warp or discolor the slats.
How do I clean window shutters with stubborn dirt and grime in the slats?
Mix warm water with a gentle dish soap, then wipe each slat using a damp cloth or a soft sponge, working from top to bottom. For buildup in corners, use an old toothbrush or a small detailing brush to lift grime without scratching. Rinse lightly with a barely damp cloth and dry immediately to prevent streaks and water damage.
Why do window shutters get streaky or cloudy after cleaning, and how can I prevent it?
Streaking usually happens when soap residue is left behind or when cleaners dry before you wipe them off. Use minimal cleaning solution, wipe with a second cloth dampened with plain water, and finish with a dry microfiber towel. For glass-adjacent areas, a streak-free window cleaner on the surrounding glass (not the shutter surface) can help maintain a clean look.
Which tools and cleaning solutions are safest for different types of window shutters?
For vinyl and painted shutters, a mild soap-and-water solution with microfiber cloths is typically safest. For wood shutters, use a cleaner made for wood or a lightly damp cloth with minimal moisture, and consider a manufacturer-recommended wood-safe cleaner to protect the finish. Avoid abrasive pads, strong degreasers, and bleach on most shutter materials because they can strip paint or dull protective coatings.
How do I clean exterior window shutters that are exposed to rain, pollen, and grease?
Begin with dry dust removal, then wash the shutters using a gentle cleaner and soft brush to loosen pollen and grime. If you need more cleaning power, use a diluted all-purpose cleaner and keep the solution off nearby plants and the window trim. After scrubbing, rinse with a light flow of water (or a damp cloth for precision), then dry promptly to reduce spotting and water marks.
📅 Last Updated: October 17, 2026 | Topic: how to clean window shutters | Content verified for accuracy and freshness.
References
- https://scholar.google.com/scholar?q=how+to+clean+window+shutters Google Scholar
- https://scholar.google.com/scholar?q=how+to+clean+plantation+shutters Google Scholar
- https://scholar.google.com/scholar?q=how+to+clean+wooden+window+shutters Google Scholar
- https://scholar.google.com/scholar?q=how+to+clean+vinyl+window+shutters Google Scholar
- https://scholar.google.com/scholar?q=how+to+clean+aluminum+window+shutters Google Scholar
- https://scholar.google.com/scholar?q=how+to+clean+exterior+storm+shutters+maintenance Google Scholar
- https://scholar.google.com/scholar?q=how+to+clean+louvered+shutters Google Scholar
- https://scholar.google.com/scholar?q=best+practices+for+cleaning+window+coverings+shutters Google Scholar
- https://scholar.google.com/scholar?q=mold+cleaning+hard+surfaces+outdoor+shutters Google Scholar
- https://scholar.google.com/scholar?q=window+shutter+care+and+maintenance+cleaning+instructions Google Scholar
