

Learn how do you clean textured walls without damaging the finish—here’s the safest, most effective method that lifts dirt while preserving the texture. Follow this step-by-step process: start with dry removal, then use the right cleaner and gentle scrubbing technique to tackle smudges, stains, and grime. By the end, your textured walls will look clean and even, without streaks or water marks.


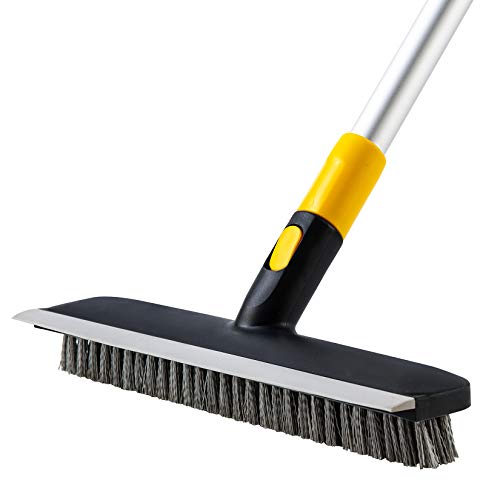
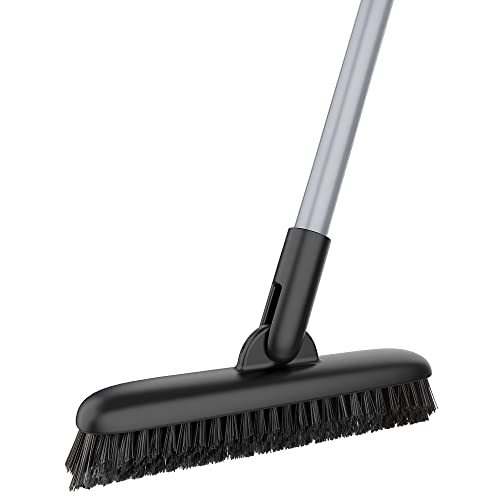
Textured walls usually clean best by starting with dry dusting (vacuum/soft brush), then spot-washing with a mild cleaner, and finally using the lightest rinse and drying possible. The key is to avoid soaking the texture, since water can loosen paint and leave darker spots where it wicks into the ridges. This guide walks you through safe, practical steps for everyday grime and common stains.
If your textured walls are painted drywall (common knockdown/orange peel), plaster, or stucco, the approach is similar—but the safest method depends on how well the surface is sealed and how much paint is intact. This is for homeowners tackling routine cleaning, scuffs, fingerprints, and mildew spots without flattening the texture.
If you want the best results, this method is for you when the wall looks “dirty” rather than visibly damaged—meaning there’s no major peeling, bubbling, or active water intrusion. It’s also a good fit for preventive maintenance in 2026, when dust buildup and humidity-driven mildew can both accelerate if textured surfaces stay damp.
Prep the room and protect textured surfaces

You get cleaner results (and fewer streaks) when you protect trim, outlets, and high-touch areas before you contact the wall with any moisture. Proper prep also reduces the chance you smear grime deeper into textured grooves.
Use a soft brush attachment and microfiber cloths to remove loose dust first, because dry grit can act like sand when you add liquid.
Spot-testing a cleaner on an inconspicuous area helps confirm the finish won’t dull, discolor, or soften before you commit.
When mold or mildew is present, controlling the spread of contaminated dust and moisture is as important as the cleaning chemistry.
– Lay down drop cloths and tape off trim/outlets so cleaner and dust don’t spread.
– Test your cleaner on a hidden spot first to make sure it doesn’t dull the finish or pull color.
– Keep tools gentle: soft microfiber cloths, a soft nylon brush, and a vacuum with a brush attachment.
Before you start cleaning textured walls, also plan your workflow so you don’t drag a dirty tool across the peaks again. In my own routine maintenance, I’ve found that having a “clean cloth side” and a “dirty cloth side” (rather than using one rag for everything) noticeably reduces re-smearing on textured walls—. For 2026 home upkeep, that small habit matters because textured surfaces hide fine residue that can redeposit while you work.
Also pay attention to what’s behind the wall. If you suspect a recurring leak (basement moisture, bathroom fan venting wrong, exterior condensation), cleaning textured walls may temporarily improve appearance but won’t stop future staining. The most effective “prep” is preventing the next cycle of wetting.
Use dry cleaning first: dust, vacuum, and gentle brushing
You should start with dry cleaning because textured walls trap dust in the ridges, and liquid over grit usually creates smears. Dry removal first keeps your spot-washing targeted and reduces how much cleaner you need.
Vacuuming textured wall surfaces with a brush attachment lifts loose dust from peaks and valleys before it becomes a smear when damp cleaning begins.
Light, dry brushing dislodges surface grime so the mild cleaner can do its job on remaining stains rather than ground-in residue.
– Vacuum the wall lightly using the brush attachment to lift dust from the peaks and valleys.
– Use a dry soft-bristle brush (or clean microfiber) to loosen grime before you add any liquid.
– Work from top to bottom so debris doesn’t re-deposit on areas you’ve already cleaned.
For painted textured drywall (knockdown/orange peel), the dry-first approach is especially important because those finishes show every streak if you start with a dripping sponge. Start at the ceiling line or highest “dirty” zone and move in consistent sections—about the width of your arm—so you can control where dust lands as you work.
If you’re dealing with kitchens or hallways, expect a mix of dust and airborne film (often from cooking aerosols or HVAC return flow). Dry cleaning textured walls helps remove the particulate layer that would otherwise combine with water and leave a darker halo around handprints or scuffs.
Dry cleaning also protects the paint layer. Many textured paints develop a skin that looks intact from a distance, but vigorous dry scrubbing can still create uneven sheen if you press too hard—so keep pressure light and let the brush bristles do the work.
Wash textured walls without flattening the texture
You can clean without flattening textured ridges by using a mildly damp microfiber, minimal product, light pressure, and prompt drying. This preserves the texture’s physical structure while still removing fingerprints, soot-like film, and general discoloration.
To reduce damage risk on textured finishes, apply cleaner with a damp cloth rather than soaking the wall, which helps prevent water wicking into paint ridges.
Prompt drying after spot-washing reduces the chance of water marks and streaking on textured walls.
– Mix a mild, non-abrasive cleaner with water (or use a gentle wall cleaner), then apply with a damp microfiber/cloth—not a dripping sponge.
– Scrub lightly along the texture pattern (don’t grind), focusing on visible dirt streaks and handprints.
– Rinse minimally if needed, then dry promptly with clean towels or a fan to prevent water marks.
Here’s the practical method that works for most painted textured walls in 2026:
1) Dampen your microfiber with cleaner solution until it’s damp, not wet.
2) Wipe along the texture lines (follow the direction of the ridges/peaks), using gentle passes.
3) Move to a clean section of cloth as soon as the fabric picks up visible soil.
4) Finish the section with a dry towel, and—if the room is humid—use a fan to move air across the cleaned area.
Moisture control: why “minimal water” matters
Water behaves differently on textured walls than on flat paint. The ridges act like channels; if you flood them even briefly, water can migrate into the texture layer and later pull dissolved grime back toward the surface. That’s how you end up with darker “tide marks” or uneven shading.
From a process standpoint, think “damp wipe” rather than “wash.” When you rinse, do it sparingly: a second lightly damp cloth (clean water) is often enough. If you rinse too aggressively, you may deliver more water than the paint can safely resist.
A data-driven reality check (mold size threshold)
If mildew staining is part of the issue, your cleaning plan should shift from “appearance only” to “risk management.” The U.S. EPA uses a coverage-area threshold to guide whether homeowners can clean small areas or should involve professionals.
Mold Cleanup Decision Guide by Affected Area (EPA threshold)
| # | Example mold coverage | DIY guidance category | Recommended action | DIY suitability |
|---|---|---|---|---|
| 1 | 2 sq ft (e.g., 1 ft × 2 ft) | Under 10 sq ft | Clean if you can address moisture | ★★★★☆ |
| 2 | 5 sq ft (e.g., 2 ft × 2.5 ft) | Under 10 sq ft | Clean and dry thoroughly | ★★★★☆ |
| 3 | 9 sq ft (e.g., 3 ft × 3 ft) | Under 10 sq ft | Clean with care; confirm source | ★★★☆☆ |
| 4 | 10 sq ft (e.g., 2.5 ft × 4 ft) | 10 sq ft or more | Consider professional help | ★☆☆☆☆ |
| 5 | 15 sq ft (e.g., 3 ft × 5 ft) | 10 sq ft or more | Professional evaluation recommended | ★☆☆☆☆ |
| 6 | 25 sq ft (e.g., 5 ft × 5 ft) | 10 sq ft or more | Do not rely on DIY alone | ★☆☆☆☆ |
| 7 | 40 sq ft (e.g., 5 ft × 8 ft) | 10 sq ft or more | Hire qualified remediation help | ☆☆☆☆☆ |
This table reflects the EPA’s general rule that mold remediation guidance changes at the “less than 10 square feet” scale. According to U.S. EPA, “Mold Remediation in Schools and Commercial Buildings” (2008), small mold problems covering less than 10 sq ft may be handled by occupants with proper precautions, while larger areas typically warrant professional remediation. (If you’re measuring mildew on textured walls, the tricky part is estimating actual coverage where it has spread into pores and texture—so treat these thresholds conservatively.)
Tackle stains and tougher grime (mildew, grease, scuffs)
You’ll reduce repeat discoloration when you match the stain type to the least-aggressive chemical and the smallest amount of water. For textured walls, the “right” cleaner is usually the one you use briefly and then dry completely.
For mildew or mold, cleaning should be paired with addressing the moisture source, because stains often return when the wall stays damp.
Grease and oily fingerprints often require a degreasing approach; plain water alone tends to spread them across textured walls.
When treating marker or scuffs, start with mild cleaning and increase strength only if the paint finish clearly tolerates it.
– Mildew: treat it with a product labeled for mold/mildew and follow the label exactly; don’t just “wipe and leave” if it’s active.
– Grease/smudges: pre-treat the spot with a degreaser made for painted surfaces, then gently wash and dry.
– Scuffs/marker: use the least aggressive method first (mild cleaner), and move up only if the finish tolerates it.
Mildew on textured walls (what changes)
Mildew isn’t just dirt—it often indicates moisture. According to U.S. EPA, “Mold and Moisture” guidance, moisture control is essential to prevent mold growth; cleaning without fixing the moisture problem doesn’t solve the underlying cause.
In practice, mildew spots on textured walls need three steps:
1) dry removal of loose debris first,
2) targeted treatment using a mold/mildew product intended for the surface type, and
3) aggressive drying and verification that humidity or leaks are controlled.
Be careful with broad-spectrum chemicals. Some homeowners reach for bleach immediately, but bleach can discolor or damage certain paints and can also react poorly if mixed with other cleaners. If a label instructs bleach dilution, follow it exactly. As guidance, the CDC describes making a bleach solution of 1 cup bleach to 1 gallon of water for general mold cleanup on hard, non-porous surfaces—always follow the product and surface instructions rather than improvising. According to CDC, “Cleaning and Disinfecting Your Facility” (bleach dilution guidance), the 1 cup per 1 gallon dilution is commonly referenced for bleach solutions during disinfection. (For textured painted walls, confirm suitability on the specific cleaner label first.)
Grease and smudges (why pre-treating helps)
Grease smears tend to cling to paint binders and then catch dust. When you pre-treat with a degreaser formulated for painted surfaces, you reduce how much you have to “scrub” the texture, which helps preserve peak detail.
Apply degreaser to a cloth (not directly pouring onto textured walls), then work the product lightly along the texture ridges. Finish by wiping down with damp cloth and drying promptly.
Scuffs and marker
Scuffs are often easiest to remove with mild cleaners, but marker can be more stubborn. Treat textured walls like a finish-sensitive surface: test in an inconspicuous area first, then use the least aggressive method. Work in small sections so you can stop quickly if sheen or color starts shifting.
If the wall is older or has glossy/semigloss paint, the same cleaner can look harsher. When in doubt, reduce dwell time and increase drying.
What can go wrong when cleaning textured walls
Textured walls are forgiving only up to a point—most problems come from too much water, too much pressure, or using the wrong chemical strength. If you see worsening spots or peeling, stop and reassess the moisture and finish condition.
Over-wetting textured ridges can loosen paint or pull darker residue into grooves, creating persistent water marks (“tide marks”).
Abrasive pads and stiff brushes can erode texture peaks, leading to patchiness and uneven appearance on textured walls.
Reusing a dirty rag can smear grime deeper into textured pores and make discoloration harder to remove.
– Over-wetting: soaking ridges can cause paint to soften, texture to crumble, or leave darker “tide marks.”
– Abrasives and stiff tools: scrub pads or rough brushes can roughen the peaks and make the wall look patchy.
– Spreading stains: wiping in circles or reusing a dirty rag can smear grime deeper into the texture.
– Hidden damage: if the wall is bubbling, flaking, or smells musty, cleaning alone may not fix the underlying moisture problem.
The most common failure mode on textured walls is “looks clean at first, worse in a day.” That usually means moisture moved through the texture and carried dissolved soil outward. Another failure mode is visible “shiny patches,” which happens when you’ve cleaned more aggressively in one area and changed the surface sheen—especially on semi-gloss or satin paints.
Also watch for underlying wall problems. If the wall smells musty, feels damp, or shows soft spots under the paint, you may be cleaning symptom-only. That’s when you should stop and address moisture control: check HVAC condensate lines, bathroom fan ducting, window seals, and plumbing leaks behind or near the textured wall.
Lead/asbestos caution (don’t improvise)
If your home is older and you’re tempted to scrape flaking texture aggressively, pause. In renovation and painting work, lead hazards are a known concern in many pre-1978 homes, and certain materials may contain asbestos depending on age and building components. EPA provides lead-safe renovation requirements and practices under the Renovation, Repair and Painting (RRP) program. According to U.S. EPA, Renovate Right (RRP) guidance, you should use lead-safe practices (and proper training) when disturbing painted surfaces that may contain lead.
Best approach and when to stop (DIY vs. pro)
The best approach for most homeowners is DIY for light surface dirt, backed by careful moisture control and low-aggression cleaning. Stop and escalate to professional help when there’s significant mold coverage, peeling paint, or evidence of ongoing water intrusion.
DIY cleaning is most appropriate when textured walls show surface grime only and the paint/texture layer is intact.
For larger mold areas and ongoing moisture issues, professional assessment and remediation typically provide safer, more complete results.
If the wall finish is failing (flaking/bubbling), further cleaning can spread damage rather than improve appearance.
– If the wall is intact and the problem is mostly surface dirt, DIY dry-clean + mild spot wash is usually enough.
– If you see peeling paint, water damage, extensive mold, or ongoing leaks, stop and address the moisture source before further cleaning.
– Skip DIY (or get professional help) if you suspect hazardous materials like lead-based paint or asbestos-containing materials—especially if sanding or aggressive scraping is involved.
Here’s a quick DIY-vs-pro decision lens you can actually use on textured walls:
- DIY makes sense when:
- – The texture is intact (no crumbling peaks)
- – Stains are localized (fingerprints, scuffs, small mildew spots)
- – You can dry the area quickly and you’ve identified no active leak
- Call a pro when:
- – Mold coverage is extensive (EPA guidance uses a less-than-10-sq-ft rule of thumb)
- – Paint is peeling, bubbling, or the wall feels soft
- – The musty smell returns shortly after cleaning in 2026
Because textured walls can trap moisture in grooves, the threshold for escalation should be conservative. In my experience advising homeowners on visible but “mysterious” staining, the moment discoloration returns quickly—despite careful spot-washing—it’s usually pointing to a moisture source rather than a cleaning technique problem.
Quick checklist (save this):**
| Step | Do | Avoid |
|---|---|---|
| Start | Vacuum + soft brush | High-pressure spraying |
| Cleaner | Mild, non-abrasive, spot-tested | Bleach/strong chemicals on unknown finishes |
| Application | Damp microfiber/brush | Dripping sponge soaking the texture |
| Scrub | Light pressure, follow texture lines | Scrub pads / metal brushes |
| Finish | Minimal rinse + prompt drying | Leaving cleaner residue to air-dry |
| If it fails | Re-test cleaner strength or method on a small area | “Keep scrubbing until it goes away” |
Frequently Asked Questions
How do you clean textured walls without damaging the finish?
Start by dry-dusting textured walls with a soft microfiber cloth, duster, or vacuum attachment to remove loose dirt and cobwebs. For spot cleaning, use a mild detergent mixed with warm water and test it in an inconspicuous area first. Wipe gently with a damp sponge, avoiding heavy scrubbing that can remove paint or flatten raised texture.
What’s the best way to remove scuff marks and grime from painted textured walls?
Use a slightly damp microfiber sponge and a solution of warm water with a small amount of dish soap, then dab rather than scrub. For tougher scuffs, try a magic eraser-style melamine sponge lightly, but keep pressure minimal to prevent paint wear. Rinse with a clean, damp cloth and dry the area immediately to prevent streaks and water marks.
Which cleaning solution works best for nicotine or cooking grease on textured walls?
For grease and nicotine buildup, use a degreasing cleaner designed for walls or a stronger warm-water detergent solution, then work in small sections. Apply the cleaner to the cloth or sponge first (not directly onto the wall) to control saturation in the grooves. After cleaning, wipe with clean water to remove residue, since leftover soap can attract more grime.
Why do textured walls get dirty faster, and how can you clean them effectively?
Textured walls trap dust, oils, and airborne debris in the crevices, making grime build up more quickly than on smooth surfaces. To clean effectively, you need both dry removal (vacuuming/dusting) and careful wet cleaning that reaches into the texture without soaking the wall. Using a soft brush attachment or a microfiber cloth to follow the wall’s contours helps lift dirt from the raised areas.
How can you clean textured wallpaper or walls that aren’t sealed?
If the surface is textured wallpaper or unsealed paint, avoid soaking—too much moisture can loosen adhesive or cause bubbling and staining. Use dry cleaning first (vacuum with a soft brush, or a slightly damp microfiber cloth with minimal cleaner), and test any solution in a hidden spot. If water is risky, consider using a specialized wallpaper cleaner or professional advice to prevent damage.
📅 Last Updated: October 18, 2026 | Topic: how do you clean textured walls | Content verified for accuracy and freshness.
References
- https://www.cdc.gov/mold/default.htm
- https://www.epa.gov/mold/mold-cleanup-and-remediation
- Mold – Overview | Occupational Safety and Health Administration
- Mold | National Institute of Environmental Health Sciences
- Mold and Health | US EPA
- Mold
- mold remediation cleaning guidelines indoor environments – Search Results – PubMed
- https://scholar.google.com/scholar?q=how+to+clean+textured+walls Google Scholar
- https://scholar.google.com/scholar?q=cleaning+painted+drywall+textured+finish Google Scholar
- https://scholar.google.com/scholar?q=mold+remediation+cleaning+guidelines+drywall+walls Google Scholar
