

Wondering how to clean a gaming headset without ruining the pads, mic, or sound quality? This Gaming Headset Cleaning FAQ delivers clear, no-nonsense answers to the most common questions—what you can safely use, how often to clean, and how to handle sweat and grime. You’ll get the quickest route to a headset that stays comfortable, hygienic, and game-ready.



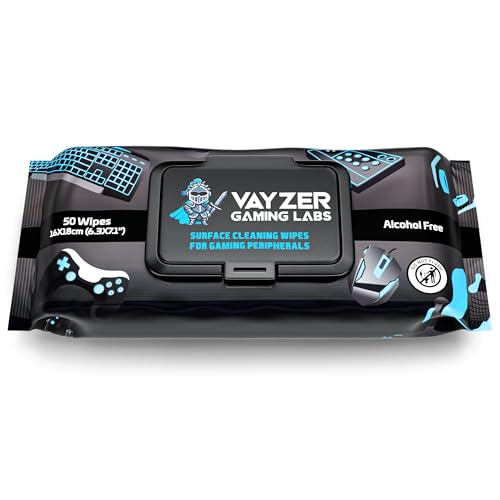
Yes—clean your gaming headset by wiping the exterior and mic with a slightly damp microfiber cloth, then spot-cleaning the pads and letting everything air-dry fully before use. For deeper cleaning, remove pads only if your model supports it, clean by material type, and keep liquids away from speaker openings and electronics to prevent audio issues. If you’re dealing with sweaty ear pads, smudged headband grime, or a microphone that’s getting harder to hear clearly, this FAQ-style guide lays out safe, repeatable steps—and the mistakes that most often cause discoloration, lingering odor, or damaged components.
This guidance is for anyone who uses a gaming headset regularly (solo or with others) and wants a consistent cleaning routine that won’t accidentally void manufacturer care advice. As of 2026, the “best practice” approach is still the same: gentle cleaning, correct material handling, and complete air-drying before the next session.
How often should you clean a gaming headset?

Clean a gaming headset on a schedule: quick wipe-downs are frequent, and deep pad cleaning happens when you notice odor, itchiness, or visible buildup. The exact interval varies by sweat level and whether pads are shared, but you should treat your headset like a high-touch device: it accumulates skin oils and microbial residue over time even when it looks clean.
According to the CDC, cleaning and disinfecting high-touch surfaces reduces germs on frequently handled items, and the method should match the surface material. CDC (Cleaning and Disinfecting Your Facility)
According to the CDC, handwashing with soap and water should take at least 20 seconds, which matters when you handle headset pads after sweaty sessions. CDC (Handwashing)
Quick routine (what “regular” looks like)
A practical pattern for a gaming headset cleaning schedule is:
– After most sessions: wipe contact points with a dry or barely damp microfiber cloth—especially around the ear pad seals and headband contact.
– Every 1–2 weeks (typical): do a more thorough pad surface wipe to prevent oils from settling into foam pores or fabric weave.
– When you can detect change: switch to deep cleaning immediately if you notice odor, itchiness, visible grime, or your mic windscreen looks dull or oily.
Why sweat accelerates buildup
A gaming headset has multiple “micro-environments”: warm contact areas near the ears and head, plus a mic windscreen that traps respiratory oils. Sweat doesn’t just add water—it increases residue transfer. If you play in warm rooms, work out while wearing the headset, or share it, you’ll usually need to clean more often than someone who uses it casually.
A note on “shared use”
When multiple people use the same gaming headset, the safest approach is:
– Wipe contact surfaces every session, and
– Avoid heavy disinfectant soaking, since many pads are porous (foam/fabric) or coated (leatherette) and can degrade.
How to clean earpads (foam vs leatherette vs fabric)
Clean the gaming headset earpads using the least aggressive method first: wipe, then apply cleaner to the cloth (not the seams), and let everything air-dry completely. Foam, fabric, and leatherette/coated pads respond differently—using the wrong approach can cause discoloration, stiffness, or trapped odor.
According to Apple’s care guidance for its devices, 70% isopropyl alcohol wipes can be used for certain external hard surfaces when appropriate; however, porous or coated pads should follow the headset’s own material instructions. Apple Support (Cleaning guidance; alcohol wipe note)
According to CDC cleaning principles, disinfecting works only when the product is applied appropriately and allowed to stay in contact as directed; “spraying then wiping immediately” often reduces effectiveness. CDC (Cleaning and Disinfecting Your Facility)
Foam pads (soft comfort, easy-to-hold odor)
Foam pads are common on gaming headsets because they conform to your ears. The downside is that they can hold sweat and smell. For foam earpads:
1. Dry wipe first to remove loose dust.
2. Lightly dampen a microfiber cloth, then spot-clean the outer surface.
3. If you use soap, use minimal mild soap on the cloth—avoid pushing liquid into seams.
If your gaming headset manual says pads are removable, you can often clean more safely by working on the pad outside the headset. If pads are not removable, treat the unit like electronics-adjacent: wipe surface areas only.
Leatherette / coated pads (look good, resent harsh chemicals)
Leatherette (PU leather) and other coated finishes often handle wiping better than soaking. For leatherette earpads:
– Use gentle cleaner recommended for that coating (or the manufacturer’s kit).
– Avoid strong solvents and repeated alcohol exposure unless the manual explicitly allows it—coatings can dry out and crack over time.
Fabric pads (breathable, stain-prone)
Fabric pads can trap oils in the weave. A safe method for fabric:
– Use a cloth with a small amount of mild cleaner.
– Work in small sections with gentle pressure.
– Do not saturate foam backing.
What I’ve found matters most (practical tip)
That aligns with how most pad materials behave: the goal is lifting residue without letting liquid migrate inward.
How to clean the boom mic safely
Clean your gaming headset boom mic by wiping the body and windscreen gently with a microfiber cloth (lightly damp if needed), then fully air-drying. The key safety rule is preventing liquid from entering openings near the mic capsule/electronics.
Moisture intrusion into mic openings can alter audio behavior even if the headset “still works,” because internal components are sensitive to corrosion and residue. General electronics-care practice; consult manufacturer care docs
If a mic windscreen is removable only by manual instruction, cleaning should be limited to the windscreen and allowed to dry fully before reassembly. Manufacturer care and maintenance practices (general)
Clean the mic body and windscreen
Follow this order for a gaming headset microphone:
– Dry wipe first (gets rid of dust and loose skin oils).
– Lightly damp wipe next if there’s visible grime—apply moisture to the cloth, not the mic.
– Use gentle, circular motions around the windscreen mesh.
Avoid “soak and rinse” behavior
Even if a mic looks durable, avoid any approach that floods the mic opening. Speaker-like “rinse it under water” cleaning can damage the mic module or degrade internal damping materials. For a gaming headset mic, it’s safer to:
– Clean externally, and
– Keep liquids away from openings and seams.
If the windscreen is removable
Some gaming headsets have windscreens designed to lift off. If your manual confirms that:
– Remove it,
– Clean it gently,
– Air-dry completely, and
– Reinstall carefully.
If your manual does not confirm removal, don’t force it—clips and micro-connectors can break.
Deep-clean the headband, frame, and exterior
Deep-clean your gaming headset exterior by removing dust dry first, then wiping sweat marks with a lightly damp cloth and drying thoroughly. For textured areas (mesh, grooves, stitching), a soft brush helps lift grime without grinding it deeper.
Dry cleaning (wiping/soft brushing) removes particulates before any moisture is introduced, reducing the risk of smearing grime into fabric or seams. General surface-cleaning best practice; consult manufacturer guidance
If a component’s material safety for damp cleaning isn’t confirmed in the manual, treat it as “no liquids” and clean with dry methods only. Manufacturer care and maintenance principles (general)
Step-by-step exterior approach
For the headband and frame:
1. Dry wipe all exterior surfaces to remove dust.
2. Lightly damp wipe for sweat stains and smudges.
3. Brush textured zones gently (mesh or grainy plastics): use a soft brush, then wipe.
Mesh and textured areas
Textured surfaces on a gaming headset headband can trap residue in the tiny valleys. Scrubbing too hard can push dirt deeper. Instead:
– Use light pressure,
– Work in sections, and
– Return to microfiber wiping after brushing.
When “no liquids” is the right call
If you see:
– Loose fabric edges,
– Cracking coatings,
– Exposed foam seams,
– Or you’re unsure about internal tolerances,
pause and stick to dry wipe/brush until you confirm what the manual allows.
What can go wrong (common mistakes + edge cases)
The biggest problems in gaming headset cleaning are preventable: moisture where it shouldn’t go, harsh chemicals on coatings/foam, and incomplete drying that brings odor back. If you want fewer headaches, the safest mindset is “surface cleaning + full air-dry,” especially around speaker openings and mic electronics.
IEC 60529 defines water-resistance classes (IP ratings), and lower ratings generally mean you should avoid liquid exposure beyond controlled wiping. IEC 60529 (Ingress Protection)
According to CDC guidance, disinfecting isn’t a substitute for proper cleaning—visible soil should be removed first, and disinfectants must match the surface. CDC (Cleaning and Disinfecting Your Facility)
Common mistakes that damage gaming headsets
– Soaking near speaker openings/electronics: even if the headset seems fine, moisture can cause later audio quality changes.
– Using the wrong disinfectant: harsh alcohol concentrations, solvents, and strong cleaners can discolor plastics or degrade foam structure.
– Skipping drying time: reassembly before full dry can cause odor or trapped moisture.
– Forcing parts that aren’t designed to detach: pads/covers can tear fabric, break clips, or strain internal connections.
Quick pros/cons comparison: “Deeper clean” vs “No-risk routine”
| Approach | Pros | Cons / Risks |
|---|---|---|
| No-risk routine (wipe + spot-clean + air-dry) | Lower chance of moisture intrusion; less coating/foam damage risk | May not fully “sanitize” deep-porous materials |
| Deep-clean with removable pads | Better reach for residue/odor; pads dry more consistently | Only safe if your manual allows pad removal; higher disassembly risk |
How to think about “wet vs safe” (IP ratings as a risk lens)
Not every gaming headset is rated for water exposure, but IP ratings (Ingress Protection code) can still help you conceptualize risk: higher IP water resistance generally correlates with better tolerance for moisture exposure. When you don’t have an IP rating, default to the conservative approach—damp cloth on external surfaces only.
IP Water-Resistance Levels and Damp-Cleaning Risk Lens (IEC 60529)
| # | IP rating (water) | What it’s designed to resist | Damp-wipe takeaway for headset cleaning | Exterior wipe safety (★) |
|---|---|---|---|---|
| 1 | IPX0 | No protection against water | Avoid damp cleaning near any openings; stick to dry wiping | ★ |
| 2 | IPX2 | Dripping water when tilted up to 15° | Use damp microfiber only on exterior plastics; keep liquids off seams | ★★ |
| 3 | IPX3 | Spraying water up to 60° from vertical | Damp wiping is generally less risky, but still avoid openings | ★★★ |
| 4 | IPX4 | Splashing water from any direction | Better tolerance for damp cleaning on the outside surface | ★★★★ |
| 5 | IPX5 | Water jets (low pressure) | Least restrictive among common “wipe-only” scenarios | ★★★★★ |
| 6 | IPX6 | Powerful water jets | Generally tolerates heavier external exposure than lower IP levels | ★★★★★ |
| 7 | IPX7 | Immersion up to 1 m for up to 30 min (per test conditions) | Highest tolerance, but many headsets still lack IP ratings—follow the manual | ★★★★★ |
Verdict / tip: what’s the safest routine to follow
If you want a simple, low-risk approach: wipe contact points, clean pads based on material, clean the mic gently, and air-dry fully. The upside is better comfort and clearer audio; the downside is that porous materials (like foam) may not be fully “sanitized” with only surface cleaning.
A conservative cleaning routine for a gaming headset prioritizes gentle wiping, material-appropriate pad cleaning, mic cleaning without liquid intrusion, and full air-drying. Manufacturer care and general surface-care principles
CDC emphasizes that disinfecting is most effective when you first remove visible soil and then apply the right product in the right way. CDC (Cleaning and Disinfecting Your Facility)
What to do every time (repeatable routine)
– Exterior + contact points: microfiber cloth, slightly damp if needed.
– Pads: clean based on pad material (foam/fabric = minimal soap on cloth; leatherette/coated = manufacturer-approved cleaner).
– Boom mic: microfiber wipe of body and windscreen; avoid wetting openings.
– Drying: air-dry fully before you wear the gaming headset again.
When “skip it and check the manual” is the correct call
Skip (or pause and follow your headset’s manual) if:
– Your headset is under warranty and the cleaning method could conflict with manufacturer instructions.
– Pads are not designed to be removed, or you see cracking/peeling—aggressive cleaning can make damage worse.
– You’re dealing with electrical moisture exposure (spills, rain, or condensation). Prioritize safe drying and service guidance instead of continuing cleaning.
Quick honesty about limits
If your gaming headset pads are porous and absorb sweat deep into foam, surface cleaning can reduce odor and grime—but it may not fully eliminate every deep-seated contaminant. In those cases, replacing pads (when supported) is often the most reliable long-term fix—though you should verify compatibility first.
Scan-and-save checklist (quick reference)
| Area | What to do | What to avoid |
|---|---|---|
| Earpads | Clean by material; apply cleaner to cloth, not into seams | Soaking, rinsing, dripping liquid |
| Headband/frame | Dry wipe → lightly damp wipe | Strong solvents or scrubbing harshly |
| Boom mic | Wipe gently; clean windscreen only if designed removable | Getting liquid into mic opening |
| After cleaning | Air-dry fully before use | Heat guns/hair dryers unless manual allows |
Frequently Asked Questions
How do I clean a gaming headset without damaging the speakers?
Start by unplugging or powering off the headset and removing any detachable parts like ear cushions. Use a slightly damp microfiber cloth for the headband and exterior, and avoid soaking the ear pads or letting moisture seep into the speaker openings. For the microphone, wipe it gently with a cloth lightly dampened with 70% isopropyl alcohol, then let everything fully dry before using. Never spray cleaners directly onto drivers, buttons, or ports.
What’s the safest way to clean sticky ear pads on a gaming headset?
For fabric or mesh ear pads, lightly wipe with a cloth and mild soap solution, then rinse with a barely damp cloth and air-dry completely. For leatherette or synthetic leather pads, use a 1:1 mix of water and mild soap (or a dedicated pad cleaner), wiping in gentle passes and avoiding excess liquid. If the pads are heavily sticky, remove them and clean according to the manufacturer’s instructions, since harsh chemicals can break down materials and cause peeling. Once dry, reattach and test the fit for comfort.
Why does my gaming headset smell even after cleaning, and how can I fix it?
Odor often comes from sweat, skin oils, and bacteria trapped in foam, fabric, and microphone grilles. Deep cleaning the ear pads and headband, plus regularly wiping high-touch areas, reduces buildup over time. If the smell persists, consider using a headset-safe deodorizing method like placing the cleaned pads in a well-ventilated area and replacing foam inserts if your model allows. Always dry thoroughly—stored moisture can worsen odor.
Which cleaning products are best for gaming headset disinfection and grime removal?
Look for alcohol-based wipes (70% isopropyl) for surfaces that don’t contact speaker openings, and use mild soap for ear pad materials like fabric or synthetic leather. Avoid bleach, ammonia, and abrasive cleaners because they can damage finishes and degrade padding. For mesh fabric, a gentle upholstery cleaner can work, but spot-test first in an inconspicuous area. If you use disinfectant, apply it to the cloth rather than spraying directly onto controls or microphone components.
How often should I clean my gaming headset for hygiene and better audio quality?
A quick wipe of the headband and ear pads weekly helps remove oils and sweat, while a deeper clean every 1–3 months prevents grime buildup. If you game frequently, sweat heavily, or use a headphone cover, you may need more frequent cleaning to keep comfort high and reduce odor. Keep ear pads free of dust since buildup can affect seal and perceived sound quality. Replacing worn ear pads can also restore comfort and audio performance when cleaning no longer helps.
📅 Last Updated: October 19, 2026 | Topic: Gaming Headset Cleaning FAQ: Answers to the Most Common Questions | Content verified for accuracy and freshness.
References
- https://www.cdc.gov/coronavirus/2019-ncov/community/disinfecting-building-facility.html
- https://www.who.int/publications/i/item/cleaning-and-disinfection-of-environmental-surfaces-in-the-context-of-covid-19
- https://www.epa.gov/pesticide-registration/list-n-disinfectants-use-against-sars-cov-2
- Guideline for Disinfection and Sterilization in Healthcare Facilities 2008 – Search Results – PubMed
- Disinfectant
- https://www.britannica.com/science/disinfectant
- Checking your browser – reCAPTCHA
- https://scholar.google.com/scholar?q=gaming+headset+cleaning+disinfection Google Scholar
- https://scholar.google.com/scholar?q=headphones+microbial+contamination+study Google Scholar
- https://scholar.google.com/scholar?q=disinfection+of+audio+equipment+alcohol+wipe Google Scholar
