

Wondering how to clean antique wooden furniture with household products without damaging the finish? Use a simple vinegar-and-water mix for grime and a mild soap solution for sticky spots—those are the safest, most effective choices for most antiques. Skip harsh cleaners and soak-and-scrub methods; the right gentle approach brings back the shine while protecting aged wood and varnish.


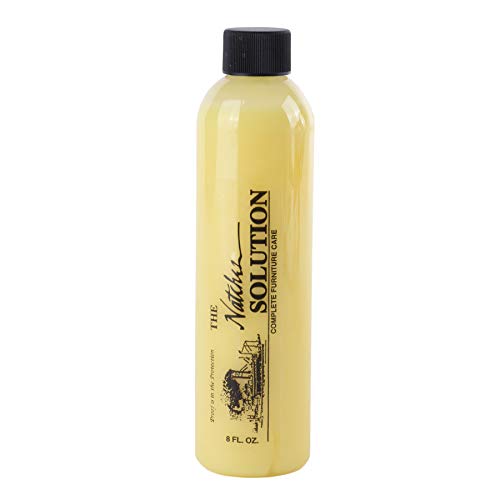

Use gentle, low-moisture cleaning: dust first, then wipe with a lightly damp cloth using diluted mild dish soap—save vinegar and baking soda paste for specific, tested spots. Because antique finishes can be varnish, shellac, lacquer, or older coatings, you’ll protect the piece best by spot-testing every product in an inconspicuous area before it touches the visible surface.
If you’ve got antique chairs, dressers, or cabinets that look dull, sticky, or grimy, this guide shows which common household items are safest by situation (dust, grime, water marks, and residue). You’ll also get a quick checklist of what to avoid so you don’t strip or haze the finish.
Gather what you need (and prep the surface)

Start by setting up a “low-moisture” cleaning workflow so you control exposure time and reduce the risk of swelling or finish lifting on antique wooden furniture. The goal of prep is simple: remove loose particles dry, then introduce only minimal liquid—immediately followed by thorough drying.
For antique wooden furniture care, the safest first step is dry removal of loose dust to reduce abrasion when you wipe the finish.
Conservation-oriented cleaning prioritizes minimal intervention and controlled moisture exposure, because wood and many finish systems are moisture-sensitive.
– Use soft microfiber cloths and a soft-bristle brush (for dust in carvings and corners).
– Avoid soaking: have a dry cloth ready so you can remove moisture immediately.
– Pick your “spot test” area (inside a drawer edge or the back corner) before touching the visible finish.
Prep checks that prevent avoidable damage
Before you use any household product, visually inspect the antique wooden furniture for clues about the finish and condition. Look for flaking or lifting edges around carving, corners, and hardware—signs that the coating may fail under even mild wetting. If the surface feels unusually tacky, assume an oil/unknown residue issue and plan to use diluted soap lightly and repeat gently rather than switching to stronger degreasers.
Also, confirm where moisture might go. Veneered antiques can be especially vulnerable at thin edges and veneer seams; even small amounts can migrate and lift edges if you keep a cloth wet too long. In practice, the safest approach is “damp cloth, fast pass, immediate dry buff” on antique wooden furniture.
Start with the safest method: dust + mild soap wipe
Start with the gentlest cleaning pass for most antique wooden furniture: dry dusting followed by a lightly damp wipe using diluted mild dish soap. This method removes everyday grime and sticky film without aggressively attacking varnish, shellac, or lacquer.
Diluted, mild surfactant solutions are commonly recommended for general grime because they lift greasy soil without introducing high acidity or strong solvents.
Leaving water to air-dry on antique wood increases risk of tide marks and finish haze, so controlled wiping followed by immediate drying reduces visible spotting.
– Remove loose dirt first: dry dusting prevents scratching when you wipe.
– For general grime, mix a few drops of mild dish soap into warm water, dampen the cloth lightly, and wipe with the grain.
– Immediately buff dry with a clean cloth—don’t let liquid sit on antique surfaces.
Why grain direction matters on antique wooden furniture
Wood grain direction isn’t just aesthetic—on antique wooden furniture it affects how grime releases and where abrasion concentrates. Wiping with the grain limits the chance of driving fine dust into pores and seams. It also helps you judge progress: you should see grime transfer to the cloth without leaving a wet “map” on the surface.
How light should “lightly damp” be?
If you wring the cloth until it’s just damp and it doesn’t drip, you’re in the right zone for antique wooden furniture. If liquid runs, you’ve already exceeded the low-moisture threshold and should stop and reassess. Over-wetting is one of the most common ways people accidentally create water rings or dull patches on older topcoats.
Handle sticky residue and smudges (without stripping finish)
Start with diluted mild dish soap and minimal moisture—sticky residue usually responds to gentle surfactant lifting rather than harsh degreasing. On antique wooden furniture, repeating careful wipes is safer than switching to stronger chemicals that can soften or dull the finish.
Using minimal moisture and repeated gentle passes reduces the likelihood of finish disturbance compared with aggressive single-step scrubbing on antique wood.
Many traditional wood coatings can be softened or reactivated by certain household solvents or stronger formulations, so you should avoid switching from mild detergent to “heavy degreaser” without testing.
– If something feels greasy or tacky, repeat the diluted soap wipe using minimal moisture rather than stronger cleaners.
– For residue that won’t lift, try a slightly damp cloth again, then dry/buff right away (multiple gentle passes beat one harsh scrub).
– Skip scrub pads and abrasives; even “natural” cleaners can cut through soft or worn antique finishes.
Common “sticky” causes (and why the approach changes)
Sticky areas aren’t always dirt. They can be:
– Old wax buildup (often smears and feels tacky in the light)
– Kitchen residue/grease (shows as glossy smudges around handles or rails)
– Over-applied polish (can form a film that attracts dust)
Diluted mild dish soap is effective for many of these because it uses surfactants to break down oily soil. If the tackiness persists after several gentle passes, the risk goes up that you’re dealing with finish-incompatibility or a degraded coating. At that point, the best move is to pause and reassess instead of escalating to stronger household products.
Spot-clean common problems: water marks, dull haze, and spots
Start by treating water marks with water-first, then use vinegar only on the cloth after testing; dull haze should stop being “worked” as soon as you see improvement. Antique wooden furniture often shows finish changes faster than dirt removal, so the safest strategy is small, controlled steps.
White vinegar is acidic (commonly ~4–8% acetic acid in vinegar products), which means it can help with certain deposits but also increases risk for sensitive finishes.
Alkaline abrasives like baking soda can act as mild abrasives depending on how they’re applied, so conservators typically treat them as spot-only, test-first tools.
– Water marks: use a lightly damp cloth (water only) first; if needed, use a very small amount of white vinegar on the cloth, not directly on the furniture, then buff dry.
– Dull haze or scuffing: stop as soon as you see improvement—overworking can make shine uneven on older finishes.
– Baking soda for spots: only use a tiny amount mixed into a paste (not slurry), apply briefly, and buff gently—test first because it can be too aggressive for fragile topcoats.
Water marks: step-down method for antique wooden furniture
Start with water-only because some “water marks” are actually dust-and-sheen problems that respond to controlled re-wetting and immediate drying. If water-only doesn’t help, vinegar on the cloth may dissolve mineral-related deposits. Avoid pouring vinegar directly—liquid pooling is where antique wooden furniture is most likely to show rings.
Data point to keep in mind: vinegar products are commonly standardized to contain about 4–8% acetic acid (product-to-product variation exists), which explains why vinegar can be effective but also why it can be risky on fragile coatings.
Dull haze: why “more cleaning” can worsen shine
Dull haze sometimes means the topcoat is worn, not that grime remains. If you keep buffing, you may redistribute micro-scratches and change how light reflects. For antique wooden furniture, the practical rule is: if the surface looks better, stop. If it isn’t improving, stop and change tactics (or consult a professional).
What can go wrong (and how to avoid it)
Start with a realistic risk view: household products can remove grime, but they can also dull, cloud, or soften antique finishes—especially shellac and older lacquer systems. Avoid the most common failure modes: over-wetting, using strong chemistry, and treating “haze” as dirt when it’s finish wear.
Acidic cleaners (like vinegar) and alkaline abrasives (like baking soda paste) can alter finish appearance, so conservators commonly recommend spot-testing and minimal dwell time.
Moisture can penetrate at veneer edges and seam lines, increasing the risk of swelling, loosening joints, or creating tide marks on antique wooden furniture.
– Finish damage: vinegar, baking soda, and strong cleaners can dull, cloud, or strip shellac/lacquer—always spot test.
– Over-wetting: antiques can swell, warp, or loosen joints when moisture penetrates seams and veneer edges.
– Abrasive “household” fixes: even baking soda can act like mild abrasive; avoid anything that sands, scrubs, or turns into paste that stays wet.
– Unknown restoration: if the piece was previously refinished, the safe method depends on the existing finish—use the gentlest approach first.
Quick risk comparison: household option vs. finish risk
Below is a high-level “risk profile” view to help you choose the least risky step for antique wooden furniture.
| Household product (use case) | Primary risk on antiques | Safer use pattern |
|---|---|---|
| Distilled water (water marks first) | Tide marks from uneven drying | Light damp cloth + immediate dry/buff |
| Diluted mild dish soap (general grime) | Residue if not fully dried | Minimal moisture + thorough buffing |
| White vinegar on cloth (specific marks) | Finish dulling if too acidic/too wet | Spot-tested + tiny amount on cloth only |
| Baking soda paste (stubborn spots) | Mild abrasiveness + alkaline residue | Tiny paste, brief contact, gentle buff, stop quickly |
Verdict: what household products are worth using (and who should skip)
For most antique wooden furniture in average condition, start with dry dusting, then diluted mild dish soap on a lightly damp cloth, and finish with thorough drying and buffing. Vinegar (used sparingly on the cloth) can help with certain water-related marks, while baking soda paste is the “last resort” because it’s easier to overdo.
Minimal-intervention cleaning typically favors mild detergents and controlled moisture over strong chemistry when dealing with aged wood finishes.
If an antique finish is flaking or unstable, professional stabilization is safer than DIY household cleaning because the coating may continue to fail under wiping.
Skip household cleaning—or stop and get professional help—if the piece has flaking finish, loose veneer, active mold, or you suspect it’s highly fragile/unfinished wood.
– Downsides to expect: household cleaners may improve grime but won’t “restore” missing varnish; some haze may be finish wear rather than dirt.
Who should pause and get help
If you’re dealing with antique wooden furniture that has any of the following, professional assessment is the lower-risk path:
– Active peeling (finish lifting or flaking)
– Loose veneer (edges that flex or lift)
– Mold (must be stabilized/treated correctly to avoid spread)
– Unknown finish with severe water damage (tide lines + structural concerns)
Finish-Safety Snapshot for Household Cleaners on Antique Wooden Furniture (Practical Risk Ranking)
| # | Household cleaner/step | Typical chemistry (at use) | Antique finish safety | Risk compared with diluted soap wipe |
|---|---|---|---|---|
| 1 | Dry microfiber dusting + soft brush | No water; particle removal only | ★★★★★★★★★★ | – |
| 2 | Diluted mild dish soap wipe | Surfactants in slightly alkaline solution (product-dependent) | ★★★★★★★★☆ | 0 |
| 3 | Water-only wipe (spot tests) | Neutral pH (~7 at 25°C) | ★★★★★★★☆☆ | +1 |
| 4 | White vinegar on cloth (water-ring marks) | Acetic acid ~4–8% (typical vinegar range) | ★★★★☆☆☆☆☆ | +3 |
| 5 | Baking soda paste (tiny, brief spot) | Sodium bicarbonate alkaline (1% solution pH ≈ 8.3) | ★★★☆☆☆☆☆☆ | +4 |
| 6 | Rubbing alcohol (isopropyl) spot testing | Solvent action; can affect shellac/soft coatings | ★★☆☆☆☆☆☆☆ | +6 |
| 7 | Mineral spirits/paint thinner (finish risk) | Strong solvent class; finish-dependent swelling/softening risk | ★☆☆☆☆☆☆☆☆ | +7 |
> Notes on the table: finish safety depends heavily on whether the coating is shellac, varnish, lacquer, wax, or an unknown older system. Always spot-test on antique wooden furniture first.
Quick checklist (scan before you wipe)
| Situation | Safer household option | Avoid |
|---|---|---|
| Dust + loose dirt | Dry microfiber + soft brush | Rubbing with a wet cloth |
| Everyday grime | Diluted mild dish soap on lightly damp cloth | Soaking / leaving liquid to dry |
| Sticky residue | Gentle repeat soap wipes + immediate drying | Scrub pads, harsh degreasers |
| Water marks | Water-only cloth first; then *small* vinegar on cloth (spot tested) | Pouring vinegar directly |
| Stubborn spots | Tiny baking soda paste (brief, gentle, spot tested) | Baking soda slurries, aggressive scrubbing |
Sources
Cleaning antique wooden furniture with household products is absolutely doable when you respect one principle: keep moisture low, use mild chemistry first, and stop the moment you see improvement. If you follow the dust → diluted mild soap wipe → immediate dry/buff workflow (and reserve vinegar/baking soda for tested spots), you’ll solve most dullness and residue issues without unnecessarily stressing the underlying varnish, shellac, or lacquer.
Frequently Asked Questions
What’s the safest way to clean antique wooden furniture using household products?
Start by gently dusting the piece with a soft, dry microfiber cloth to remove loose dirt and grit that can scratch the finish. For spot cleaning, use a slightly damp cloth with distilled water, then dry immediately with a clean towel. Avoid soaking the wood or using harsh cleaners, since antique finishes can be delicate and water-sensitive.
How can I remove sticky residue or grime from antique wood without damaging the finish?
Mix a few drops of mild dish soap into distilled water to create a very gentle solution, then lightly wipe the sticky area with a soft cloth. Follow up by wiping again with a cloth dampened only with distilled water to remove any soap film, and dry right away. If residue remains, consider using a small amount of isopropyl alcohol on a cotton swab in an inconspicuous spot first, since some finishes tolerate it better than others.
Why should I avoid vinegar, bleach, or alcohol-based sprays on antique wooden furniture?
Many household cleaners are too acidic or strong and can dull antique varnish, strip wax build-up, or trigger discoloration in older finishes. Vinegar and bleach can also react unpredictably with stained wood and shellac, while heavy alcohol spraying may dry out or soften delicate coatings. When in doubt, use mild, low-moisture methods and test in a hidden area before cleaning the entire piece.
What’s the best way to clean and deodorize antique wood that smells musty or like smoke?
First, remove dust thoroughly with a dry cloth, then use a lightly damp microfiber cloth with distilled water to lift surface grime that traps odors. For odors from smoke or storage, you can place an open container of baking soda nearby (not directly on the furniture) for a few days to absorb smells. Always allow the piece to dry fully and keep it in a stable, well-ventilated area to prevent moisture-related damage.
Which household products can I use to polish antique wooden furniture safely—and how do I apply them?
A popular option is a simple beeswax or paste wax made for wood, applied in a thin layer and buffed gently with a soft cloth after it hazes. If the furniture looks dry, use a small amount of mineral oil as a light conditioner only on bare or clearly finish-free areas, then wipe off excess to prevent sticky build-up. Never over-polish; frequent polishing can blur details, attract dust, and create a thick wax layer that’s harder to clean later.
📅 Last Updated: October 20, 2026 | Topic: How to Clean Antique Wooden Furniture With Household Products | Content verified for accuracy and freshness.
References
- Wood finishing
- Wood finishing
- White spirit
- Shellac
- Varnish
- Lacquer
- Vinegar
- https://scholar.google.com/scholar?q=how+to+clean+antique+wooden+furniture+household+products Google Scholar
- https://scholar.google.com/scholar?q=wood+furniture+surface+cleaning+mineral+spirits+vinegar+soap Google Scholar
- https://scholar.google.com/scholar?q=conservation+cleaning+wooden+furniture+shellac+varnish+lacquer+care Google Scholar
