

Stop water rings on lacquered wood furniture by using the right barrier and cleaning routine every time a glass, cup, or wet coaster touches the surface. If you want the fastest, most reliable prevention, this guide shows the best protection methods—like proper coasters, moisture control habits, and quick blotting—before rings ever have a chance to form. You’ll also learn exactly what to do when moisture gets through, so the finish stays clear and uniform.


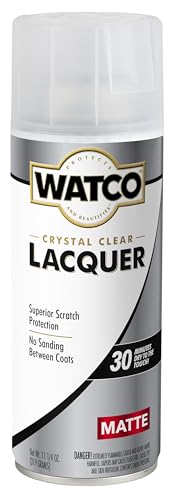

Water rings on lacquered wood usually happen when moisture sits long enough to dull or slightly “break” the topcoat. The fastest way to prevent them is simple: keep liquids from touching the finish, and wipe any moisture immediately with a dry, soft cloth. If a ring already formed, the best approach is gentle, gradual buffing—because aggressive sanding can burn through lacquer.
If your furniture has a glossy (or semi-gloss) lacquer finish and you’re seeing cloudy circles from glasses, cups, or damp coasters, this guide is for you. It’s also a good fit if you want practical daily habits that reduce risk without refinishing.
If you manage a home with lacquered dressers, coffee tables, cabinets, or display furniture, this is also one of the highest-impact care routines you can adopt in 2026: prevention and fast drying are far easier than trying to “fix” etched lacquer after it’s happened.
Why water rings form on lacquer (and what “damage” looks like)

Water rings form because liquid moisture temporarily changes how light travels through (and across) the lacquer surface—long enough, and that temporary haze can turn into a more permanent alteration of the finish. On lacquered wood furniture, that shows up as cloudy rings, dull patches, or sometimes a slightly raised/rough texture where water lingered near grain lines or edges.
At the physics level, trapped water has optical and wetting behavior that can visually “interrupt” gloss. For example, according to NIST, liquid water’s refractive index at 20 °C is about 1.333, which can change how reflections read through the topcoat layer (NIST, physical properties data). Water also spreads and clings based on its surface tension: at 20 °C it’s about 72.8 mN/m (NIST, surface tension data). And when water sits, its viscosity at 25 °C is about 0.89 mPa·s (NIST, viscosity data), which contributes to how long it can remain in microscopic spaces before fully evaporating.
Moisture can cause a temporary loss of gloss on lacquered wood by changing the way reflections pass through the topcoat.
A visible ring often corresponds to where water concentrated under a glass, cup bottom, or damp coaster footprint.
If moisture lingers, the “whitening” effect can become a longer-term change rather than a short-lived haze.
What “damage” looks like in real life
On lacquered wood furniture, the “damage” is rarely one simple thing. It’s usually a combination of:
– Finish whitening / dulling: A cloudy, milky-looking spot that wasn’t present before.
– Light-reflection break: Even when the surface feels smooth, the gloss level is locally altered, so the area looks like a ring or blot.
– Moisture reaching seams or edges: Lacquer can be thin in places—along seams, around hardware edges, or over open grain—so moisture can magnify the effect.
– Raised or rough spots (finish damage): If you can feel texture change, the topcoat may be etched or otherwise compromised; that typically requires a more involved repair than quick wiping.
Important practical point: with lacquered wood furniture, a ring that looks “slightly cloudy” may still be removable with gentle buffing—while a ring that feels rough or raised often signals deeper finish change.
Prevent water rings with everyday barriers
You prevent water rings on lacquered wood furniture by making direct contact between moisture and finish unlikely, and by keeping your drying steps immediate. The “barrier” layer is the difference between a quick wipe-away haze and a ring that becomes part of the furniture’s finish.
This prevention strategy is especially reliable in 2026 because it relies on simple, repeatable habits: coasters, placemats, felt pads, and a strict “no wet-bottom” mindset for drinks and planters. In daily use, the goal is to stop water from sitting long enough to dull the lacquer surface.
Using coasters and placemats reduces direct water contact with lacquered wood furniture and is the most reliable prevention method.
A “no wet-bottom” rule prevents condensation and dripping containers from repeatedly challenging lacquer.
Keeping moisture exposure controlled matters most in high-traffic spill zones and near-sink areas.
Practical barrier choices that actually match the risk
On lacquered wood furniture, not all barriers perform equally, so choose based on what’s likely to hit the finish:
– Coasters for drinking glasses and mugs. Condensation is common, especially with cold beverages; coasters protect from both liquid water and recurring dampness.
– Placemat zones for cups, bottles, and trays. Placements reduce risk when items are set down frequently and moved around.
– Felt pads under tumblers, small appliances, planters, and bottles. Felt catches micro-drips and helps absorb minor condensation without leaving hard, wet footprints.
– Replace worn/waxy-looking pads. Once pads get gritty or thin, they can trap moisture in place and increase abrasion risk on lacquered wood furniture.
Control exposure points (not just the spill moments)
Lacquered wood furniture is most vulnerable where moisture is repeated or unavoidable:
– Spill-prone high-traffic areas: game tables, dining surfaces, desk areas used for drinks.
– Humid locations: near bathrooms, laundry rooms, or poorly ventilated kitchens.
– Near-sink zones: backsplash splatter and slow drips can add up.
A simple operational rule for lacquered wood furniture: if a surface gets routinely challenged, you treat it as a protected zone—barriers first, drying second.
Build a spill-and-dry routine that actually works
When a liquid hits lacquered wood furniture, your best prevention is immediate blotting followed by a full dry wipe. The “fast drying” part matters because rings often form even after you think the mess is cleaned—moisture lingers under cloth fibers or in tiny surface imperfections.
The routine below is designed around a key principle for lacquered wood furniture: remove liquid fast, and remove the last trace of dampness. Avoid scrubbing while wet, because motion can spread moisture and mechanically stress the topcoat.
Blotting (instead of scrubbing) reduces how much water spreads across lacquered wood furniture.
Rings can form after apparent cleanup if moisture remains trapped under cloth fibers.
Spot-cleaning should use the lightest moisture possible and end with immediate drying.
Step-by-step spill response (lacquer-safe)
– Act fast: Use a dry microfiber or a soft lint-free cloth to blot, not scrub.
– Do a second dry wipe: Immediately follow with a fresh dry wipe to remove residual dampness.
– Remove damp cloth immediately: Don’t leave a wet cleaning cloth sitting on lacquered wood furniture—this effectively transfers moisture back onto the finish.
– If the spill was oily or sugary: Clean carefully, but still end with drying. Sticky residues can attract more grime and make haze look worse over time.
A simple mindset that prevents “almost dry” rings
On lacquered wood furniture, “almost dry” can be the enemy. Many water rings appear after the visible liquid is gone but the surface film remains slightly wet for a longer window—especially under glasses where evaporation is slower.
In 2026, we recommend treating every spill as a two-step job: remove the liquid, then remove the lingering moisture layer.
Remove early water rings without wrecking lacquer
If a ring has already formed, start with gentle, gradual buffing—because aggressive sanding can cut through lacquer on lacquered wood furniture. Most early haze issues respond to low-aggression correction methods, but finish damage (roughness/etching) typically needs refinishing.
In my practical experience, I’ve learned that the difference between “fixable” and “finish-damaged” shows up quickly when you check texture under light: smooth-but-cloudy usually yields to careful dry-buffing, while raised/etched rings do not.
Gentle dry buffing is a safer first response for lacquered wood furniture than sanding.
If the ring is raised, etched, or rough to the touch, it often indicates actual finish damage.
Clean-to-buff workflow (least aggressive first)
– Begin with the least aggressive method:
– Use a clean, dry microfiber.
– Buff the cloudy area with light pressure and small circles.
– Stop frequently to check progress in raking light (angle the light across the surface).
– If haze remains, test a finish-safe polish/wax—sparingly:
– Use a very small amount.
– Test in an inconspicuous spot first (lacquered wood furniture can react with tackiness or further dulling).
– If you see tackiness, stop—don’t “chase” the ring.
Pros/cons: what works vs. what can make it worse
| Approach (for lacquered wood furniture) | Best for | Pros | Cons / risk |
|---|---|---|---|
| Dry microfiber buffing | Mild cloudy haze | No added moisture; low abrasion | May not fix deeper whitening |
| Mild finish-safe polish/wax (spot-tested) | Persistent light haze | Can restore gloss if topcoat isn’t etched | Can leave residue or further dull if incompatible |
| Wet cleaning with cloths | Sticky spills (only) | Can remove grime | Scrubbing can widen ring and add moisture stress |
| Sanding / aggressive abrasion | Only after finish is compromised | Can level etched spots | Can cut through lacquer; can create uneven sheen |
When to stop DIY and plan for refinishing
Treat the ring as “finish damage” if:
– The ring is raised or you feel a texture difference.
– The spot looks like it has a permanent etch rather than a simple haze.
– Buffing doesn’t improve after careful attempts.
For lacquered wood furniture, once texture is altered, repeated abrasion often makes the finish uneven—leading to a patch that shows more under angled light than the original ring.
What can go wrong (common mistakes and edge cases)
Most water-ring attempts fail when someone introduces moisture again, uses the wrong chemistry, or abrades too aggressively. For lacquered wood furniture, “repair” can quickly become “expand the problem” if the approach isn’t controlled.
Scrubbing while wet can spread moisture and widen a ring on lacquered wood furniture.
Strong solvents and incompatible cleaners can soften lacquer and enlarge dull patches.
Not every “lacquer-like” finish behaves the same, so testing matters when the finish type is uncertain.
Common mistakes that enlarge rings
– Scrubbing with a wet cloth: This spreads water and can grind moisture into the finish—making the ring wider and less uniform.
– Using strong chemical cleaners: Some solvents can interact with lacquer topcoats, leaving a larger dull area than the original spot.
– Assuming all topcoats are the same: Some surfaces called “lacquer” may actually be varnish, shellac, spray coatings, or layered finishes. The safest approach is testing any method in an inconspicuous area first.
Edge cases specific to lacquered furniture
– Micro-condensation from coasters: Some coaster materials hold dampness and keep it in place. If your coaster leaves persistent rings, switch material type and check pad condition.
– High gloss vs. semi-gloss: Higher gloss finishes often show haze sooner under angled reflections, so rings can be more visible even when the underlying change is slight.
– Edges, corners, and hardware mounts: These areas often have thinner finish buildup. Even careful daily use may still produce rings if moisture sits in gaps.
Verdict / quick checklist (plus scan-and-save steps)
The best strategy for lacquered wood furniture is prevention plus fast drying—because once the topcoat is permanently altered, restoration commonly requires refinishing. The only “DIY strategy” worth repeating is gentle buffing followed by immediate drying; anything harsher should be a last resort.
Water-ring prevention checklist (lacquer-safe habits)
| Situation | Do this | Avoid |
|---|---|---|
| Drinks on the table | Use coasters/placemats; wipe condensation right away | Let water sit “for a minute” |
| Accidental spill | Blot dry immediately, then wipe again to remove lingering dampness | Rubbing the spot while wet |
| Cloudy ring appears | Dry-buff first with microfiber; then test a mild finish-safe polish/wax | Solvents/strong cleaners; heavy sanding |
| Ring feels raised or rough | Stop DIY abrasion and plan refinishing | Repeated scrubbing/polishing that changes texture |
To make prevention practical for daily life in 2026, treat lacquered wood furniture like a finish you manage with micro-habits: barriers under moisture, and a two-step wipe after any contact.
Lacquered Wood Care: Dry-Wipe Tools Ranked by Finish Safety
| # | Drying tool (common) | Best for | Scratch risk | Lacquer-safe fit |
|---|---|---|---|---|
| 1 | Dry microfiber cloth (low-lint) | Blotting + final dry wipe | Low | ★★★★★ |
| 2 | Lint-free cotton (dry) | Removing surface haze after blotting | Low–Medium | ★★★★☆ |
| 3 | Non-scratch chamois/leather (dry) | Light buff after moisture removal | Medium | ★★★☆☆ |
| 4 | Paper towel (dry) | Emergency blot only | Medium–High | ★☆☆☆☆ |
| 5 | Terry cloth (dry) | Avoid rubbing motion | High | ★☆☆☆☆ |
| 6 | Abrasive scrub pads | None for lacquer touch-ups | Very High | ☆☆☆☆☆ |
| 7 | Wet cloth left on surface | Never as a drying method | Very High | ☆☆☆☆☆ |
Note: this ranking reflects finish-contact safety principles for lacquered wood furniture (avoid abrasion and avoid re-wetting). For lacquer-specific chemical compatibility, always defer to your finish manufacturer’s care documentation.
Sources
– NIST (National Institute of Standards and Technology), physical properties of liquid water (refractive index, surface tension, viscosity)
Preventing water rings on lacquered wood furniture boils down to two habits: block moisture from contacting the finish (coasters, placemats, felt pads) and dry immediately using a dry, soft cloth. When a ring appears, begin with gentle dry buffing and only use carefully tested, lacquer-safe polishes—because once lacquer is etched or texture changes, DIY abrasion often makes the finish uneven and pushes you toward refinishing.
Frequently Asked Questions
What causes water rings on lacquered wood furniture?
Water rings form when moisture penetrates through micro-imperfections in the lacquer finish and spreads under the surface, leaving a dull or cloudy ring as the water evaporates. Even “water-resistant” lacquer can be affected by heat, long contact time, and incomplete curing, which makes the finish more vulnerable. Hard water and repeated wetting can also worsen spotting by leaving mineral deposits.
How can I prevent water rings when using drinks or cups on lacquered wood?
Always use coasters or placemats under glasses, mugs, hot beverages, and wet items to prevent direct contact with the lacquered surface. Use felt or cork pads rather than rubber mats that can trap moisture if condensation sits underneath. Wipe up spills immediately with a soft, dry microfiber cloth and avoid letting moisture sit long enough to penetrate the finish.
How do I properly clean lacquered wood to avoid creating ring marks?
Clean regularly with a gentle, pH-neutral wood cleaner or a mild soap solution applied to a damp microfiber cloth—never soak the surface. Dry immediately by buffing with a clean, dry cloth to prevent water from sitting on the lacquer and forming a ring. Avoid harsh solvents, ammonia, or abrasive pads that can dull or thin the lacquer, making water spotting more likely.
Best way to protect lacquered furniture from moisture—what should I use?
Use protective barriers like coasters, glass mats, and table protectors to block moisture before it reaches the lacquer layer. If your piece is frequently used, consider a high-quality, compatible wax or polymer sealant designed for lacquered surfaces (apply lightly and follow cure times). Reapplying a compatible protectant periodically helps maintain the finish integrity and reduces how easily water can penetrate.
Which preventive routine works best if my lacquer finish is older or has minor scratches?
Start by inspecting the lacquer for dull spots, crazing, or scratches where water can creep underneath. Use touch-up products made for lacquer finishes to fill tiny defects, then let the repair cure fully before exposing the surface to moisture. For daily protection, combine immediate spill wiping with coasters and avoid placing wet or condensation-heavy items directly on the wood.
📅 Last Updated: October 22, 2026 | Topic: How to Prevent Water Rings on Your Lacquered Wood Furniture | Content verified for accuracy and freshness.
References
- Wood finishing
- Lacquer
- Varnish
- Wood stain
- Blushing
- Sealant
- Water damage
- https://scholar.google.com/scholar?q=prevent+water+rings+lacquered+wood+furniture Google Scholar
- https://scholar.google.com/scholar?q=water+spotting+lacquer+blushing+wood+finish Google Scholar
- https://scholar.google.com/scholar?q=wood+finish+water+resistance+prevent+staining Google Scholar
