

Stop knife marks on your butcher block countertop by switching to the right cutting setup and maintenance routine. Use a dedicated cutting board or a quality board protector for cutting, then oil and buff the surface on a tight schedule to keep dents from setting in. Follow these steps and you’ll prevent most visible cuts before they become permanent.



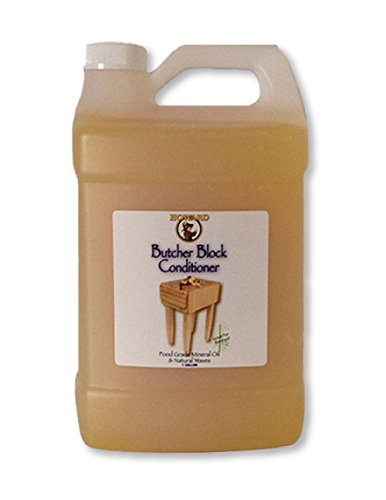
Prevent knife marks by keeping your butcher block well-conditioned (so the wood resists deep scoring) and by limiting direct blade contact when you can. Pair that with good knife care and proper cleaning so you don’t dry out the surface or encourage fuzzing; in this guide, you’ll learn the routine that keeps it smoother longer, plus what to do when marks already show up.
This is especially helpful if you cut directly on your butcher block often, notice dryness/roughness after washing, or you want to keep the surface looking clean without sanding every few months.
If you’re trying to maintain a butcher block countertop through daily prep, the most effective strategy is to manage two variables: wood moisture/conditioning and cutting mechanics (what the blade contacts and how sharp it is). This approach also scales well—whether you do quick meal prep or handle heavy chopping regularly, you can adjust the routine without turning countertop care into a project.
Condition the wood regularly to resist scoring

Conditioning is what makes the wood “work with” your knives instead of letting every pass become a visible groove. When butcher block oil is applied correctly, the surface stays more stable and resists the kind of deep scoring that turns light lines into permanent-looking marks.
Wood dimensional changes are strongly tied to moisture content and occur below the fiber saturation point (about 30% moisture content), which is why drying/over-wetting can quickly change how the surface looks. USDA Forest Service / Wood Handbook (wood science fundamentals on moisture behavior)
Butcher block oils are designed to penetrate wood and help slow moisture loss, which can reduce the “dry, grabby” feel that makes knives and food prep look more scuffed.
Re-oil your butcher block on a schedule so it stays “fed,” not dry—dry wood dents and “holds” marks more easily.
I treat oiling like maintenance, not remediation: if the wood is already dry, you’ll feel it during prep as more drag and a more “open” grain that shows scoring sooner. In my home kitchen, the countertop always looks roughest after I let cleaning leave the top too dry for too long; keeping a consistent cadence prevents that swing.
Apply the recommended butcher-block oil (commonly food-safe mineral oil or a butcher-block blend) and let it soak in before wiping off excess.
Use the exact product guidance from the countertop or oil manufacturer, because blends (oil + wax, oil + polymer, or oil + additives) behave differently on the surface. In general, the best practice is to apply enough for the wood to accept it, then wipe off what remains on top.
Avoid over-saturating and leaving puddles; excess oil can create a tacky surface that collects residue and can make the top feel rough.
Over-oiling is a common “looks worse before it gets better” problem. If the surface feels sticky after a wipe-down, residue from cooking (especially fats) can cling more readily, which makes blade marks and cleaning haze stand out.
Use the right cutting setup (even if you love cutting directly)
A sacrificial layer is the simplest way to stop direct blade contact from turning into visible wear. Even if you prefer cutting on the countertop, you can still protect the high-wear zones by routing the toughest work to a dedicated board or mat.
If you reduce direct blade-to-wood contact, you reduce the rate at which shallow surface wear becomes deeper grooves.
Consistent placement of cutting pressure creates “wear zones,” which is why rotating where you cut helps distribute minor damage over more area.
If you’re trying to minimize marks long-term, place a thin sacrificial cutting board, mat, or even a dedicated board for harder tasks (carving, bread, dense foods).
A thin board can preserve the countertop while still feeling close to “cutting directly.” If you do a lot of bread, dense vegetables, or carving, that’s usually where marks accelerate—because those tasks combine abrasion and pressure.
Rotate where you cut most—consistent pressure in the same zones accelerates visible wear.
This is less about perfection and more about geometry. Your knife tip and heel often hit similar spots repeatedly (especially for prep layouts near the sink or stove), so rotating even 6–12 inches can meaningfully slow the appearance of “tracks.”
Consider surface strategy: use the butcher block for lighter prep and reserve the cutting board for heavy chopping so the countertop stays smoother.
Think of your butcher block as the general work surface and your board(s) as the impact surface. Lightweight slicing—where the blade glides more than it chops—tends to show fewer deep lines, especially when the wood is properly conditioned.
Keep knives sharp and clean to reduce “drag” marks
Sharp knives reduce the amount of force you need, and less force generally means less fiber disruption and less visible tearing. Clean blades also prevent residues from becoming a smear layer that makes surface texture seem worse than it is.
Dull edges require higher cutting forces, which can increase fiber deformation and surface damage compared with a properly maintained edge.
Sticky residues (juices, oils, sugar) can leave films on wood that make the countertop feel less smooth and can visually intensify knife-line roughness after cleaning.
Dull knives press and tear fibers, which can create deeper grooves than a sharp edge would.
When an edge is too dull, it doesn’t “cut then release”—it pushes, drags, and releases. That extra mechanical action tends to create the deeper, more persistent marks that look like grooves rather than faint surface lines.
Wipe blades during prep to remove sticky juices that can leave films; those films can make the surface feel less smooth.
This is especially noticeable during tasks like slicing citrus, tomatoes, or marinating proteins. A quick wipe on a clean towel between tasks prevents transferred residue from building up in the same wear zones you’re trying to protect.
Use a proper sharpening routine (stone, guided system, or professional service) so your edge stays consistent—an uneven edge often “catches” wood.
An uneven edge can feel sharp in the “right” direction but catch during the next pass. Consistency matters: a slightly refreshed, even bevel often prevents that intermittent grabbing that turns into visible scoring.
Clean and dry the countertop the way wood wants
Cleaning and drying are the final control points that decide whether your conditioning holds up after everyday cooking. If you use too much water, let the block soak, or use harsh abrasives, you can raise grain and make knife marks look sharper and more frequent.
Excess moisture can raise the grain and change a wood surface’s texture appearance, so minimizing water contact and drying promptly helps keep the countertop smoother. USDA Forest Service / Wood Handbook (moisture effects on wood surfaces)
Wood surfaces can be chemically and mechanically sensitive; harsh cleaners and abrasive pads can strip protective oil layers and increase how strongly scoring shows.
Clean with minimal water and dry promptly; soaking and long damp contact raise grain and can worsen the appearance of knife scoring.
Use a damp cloth rather than letting water pool. I’ve found that the difference between “wiped clean immediately” and “left to sit while I finish cooking” shows up the next day as a faint roughness that makes every knife line look deeper.
Don’t use harsh chemicals or leave abrasive scrubbers on the surface; they can strip the finish/oil layer and make marks more obvious.
Even when the goal is sanitation, the tools matter. If cleaning strips the oil more aggressively than you can recondition, your countertop cycles into dryness again.
Follow the grain when doing any gentle spot cleaning or light scrubbing, so you’re not lifting fibers across the work area.
Following the grain helps you reduce fuzzing. Think of it like sanding without abrasion: your cleaning motion should be consistent with how the wood fibers sit, not against them.
Butcher-Block Wood Species and Expected Dent Resistance (Janka hardness)
| # | Wood species (common butcher-block) | Janka hardness (lbf) | Knife-mark resistance (relative) | Practical takeaway |
|---|---|---|---|---|
| 1 | Hard maple | 1450 | ★★★★★ | Good for daily prep |
| 2 | White oak | 1360 | ★★★★☆ | Slower visible dents |
| 3 | Beech | 1300 | ★★★★☆ | Handles normal chopping well |
| 4 | Red oak | 1290 | ★★★★☆ | May show lines sooner than maple |
| 5 | Birch | 1260 | ★★★☆☆ | Conditioning matters a lot |
| 6 | Walnut | 1010 | ★★☆☆☆ | Use boards for heavy chopping |
| 7 | Cherry | 995 | ★☆☆☆☆ | Expect faster visible surface wear |
Janka hardness is an indicator of dent resistance; it helps explain why some woods show scoring sooner than others, but conditioning and cutting habits still dominate the long-term appearance.
What can go wrong (common mistakes and limits)
Even with a solid routine, butcher blocks still show normal wear—wood moves and knives interact with fibers. The key is avoiding habits that accelerate visible marks or create a “maintenance loop” where the countertop never quite feels smooth.
Over-oiling can leave a surface tack that traps cooking residue, which can make grooves and lines look more obvious after cleaning.
Some knife lines are not “surface dirt”—deep grooves can require sanding to level the wood before conditioning can restore a smoother feel.
Over-oiling or skipping wipe-off: A buildup of oil can turn tacky and attract debris, which makes surface wear look worse.
If your countertop feels tacky, treat it as an immediate feedback signal. The fix is usually more thorough wipe-down (and in some cases, a light restoration step per manufacturer directions), then return to a lighter, more predictable oiling cadence.
Using cutting boards inconsistently: If you sometimes cut directly and sometimes use protection, you may notice “ghost zones” where the countertop wears differently.
Inconsistent protection doesn’t mean you’re doing anything wrong—it just means the wood has different wear rates in different zones. If appearance matters, be consistent about where you do heavy chopping.
Assuming marks are removable forever: Deep grooves can require sanding to truly reset the surface; surface conditioning helps prevent new damage more than it “erases” old ones.
Conditioning improves how the wood behaves going forward. For already-deep grooves, oil won’t “fill” and level the surface in the way people often hope.
Sanding too aggressively: Over time, heavy sanding reduces thickness and can change the countertop’s stability—treat sanding as periodic maintenance, not a quick fix.
Sanding can restore a smoother plane, but it’s not free. Follow manufacturer restoration intervals (or a countertop pro’s plan) and avoid frequent, high-grit “recovery sanding” just to chase appearance.
- Best protection combo
- Condition on a schedule + use a sacrificial cutting board/mat for heavy prep + wipe blades.
- Main trade-off
- More routine steps and some “secondary” tools (boards/mats), instead of relying on countertop cutting alone.
Verdict / tip (what I’d do day-to-day)
If you want the best balance of appearance and effort in 2026, do three things: oil on a regular cadence, dry promptly after cleaning, and use a sacrificial board for the toughest prep (hard chopping and carving). This combination prevents new deep scoring while keeping the surface smooth enough that knife lines stay subtle rather than trench-like.
Downsides: the countertop won’t be “indestructible,” and frequent direct chopping will still create normal wear over time—especially in high-impact zones. Skip this approach if your butcher block is already unstable (warping, loose joints, or significant movement), or if you can’t commit to consistent drying and periodic re-oiling; in that case, plan a restoration conversation with the manufacturer or a wood countertop professional.
Quick checklist to save your butcher block from knife marks
| Situation | Do this | Why it helps |
|---|---|---|
| After daily cooking | Wipe clean with minimal water + dry right away | Prevents grain lift and roughness |
| Weekly / every few weeks | Light re-oil per manufacturer guidance | Keeps wood conditioned to resist deep scoring |
| Hard prep days | Use a sacrificial board/mat | Reduces direct blade-to-wood contact |
| Marks appear | Stop the cause first; then spot-fix via re-conditioning | Prevents the same wear pattern from growing |
| Surface feels fuzzy | Gently clean, then re-oil (and sand only if needed) | Restores a smoother feel without constant abrasion |
Sources
If you apply one idea from this guide, make it this: keep the wood conditioned and keep the blade from repeatedly “impacting” the same patch of countertop. That two-part routine is what turns knife marks from an accelerating problem into ordinary, manageable wear—even with daily cooking.
Frequently Asked Questions
What’s the best way to prevent knife marks on a butcher block countertop?
Use a dedicated cutting board for almost all food prep, since direct cutting on butcher block is the main cause of knife marks. For extra protection, place a high-quality rubber or composite board on top of the wood and reserve the countertop for prep that doesn’t require a sharp edge. Regularly oil and maintain the butcher block to keep it resilient, because dry wood can show scratches and dents more easily.
How can I stop knife marks when I have to cut directly on the countertop?
If you must cut on the butcher block, use a sacrificial surface like a thicker silicone mat or a thin cutting board layer rather than cutting directly into the wood. Keep blades sharp—dull knives require more pressure and can dig deeper grooves. Also, avoid dragging the blade across the surface; instead, use a clean, straight-down cutting motion and lift the knife between cuts.
Which butcher block maintenance routine helps reduce visible scratches and knife impressions?
Apply butcher block oil according to the manufacturer’s guidance, typically once the surface looks dry or every few months with normal use. Keeping the wood properly hydrated helps it resist knife marks and limits uneven wear that makes scratches more noticeable. After cleaning, dry the countertop fully before oiling to prevent moisture-related swelling and rough spots that can catch knife edges.
Why do knife marks show up more on some butcher block countertops than others?
Knife marks look more pronounced when the wood is dry, rough, or unevenly sealed, because the blade can catch and compress softer grain. Softer woods, certain finishes, and improper cleaning can also make the grain more susceptible to gouges. Additionally, heavy daily prep without boards tends to roughen the surface, so even minor cuts can become visible over time.
Best practices: How should I clean and protect my butcher block to minimize future knife marks?
Clean with mild soap and warm water, then dry thoroughly to prevent swelling that can exaggerate scratches and create a rougher cutting surface. Avoid harsh chemicals and soaking, which can damage the wood and make marks more visible. After cleaning and drying, consider using food-safe mineral oil or butcher block conditioner to maintain a smooth, protected top layer that helps resist knife dents.
📅 Last Updated: October 24, 2026 | Topic: How to Prevent Knife Marks on Your Butcher Block Countertop | Content verified for accuracy and freshness.
References
- Cutting board
- Butcher block
- Mineral oil
- Janka hardness test
- https://pubmed.ncbi.nlm.nih.gov/?term=wooden+cutting+board+scratches
- https://pubmed.ncbi.nlm.nih.gov/?term=wooden+cutting+board+grooves+bacteria
- https://www.fda.gov/food/fda-food-code
- https://scholar.google.com/scholar?q=prevent+knife+marks+on+wood+cutting+boards Google Scholar
- https://scholar.google.com/scholar?q=butcher+block+care+mineral+oil+prevent+scratching Google Scholar
- https://scholar.google.com/scholar?q=wood+cutting+board+surface+wear+knife+damage Google Scholar

[…] to the USDA Forest Products Laboratory “Wood Handbook”, fiber saturation occurs around ~30% moisture content, which is when dimensional swelling can become significant. While you won’t drive the entire […]