

Want to remove stains from a wooden shoe rack without damaging the finish? Follow these easy, proven steps for lifting grime and water rings while preserving the wood’s surface. You’ll know exactly what to use for common stain types and how to clean, rinse, and dry so the rack looks good again.


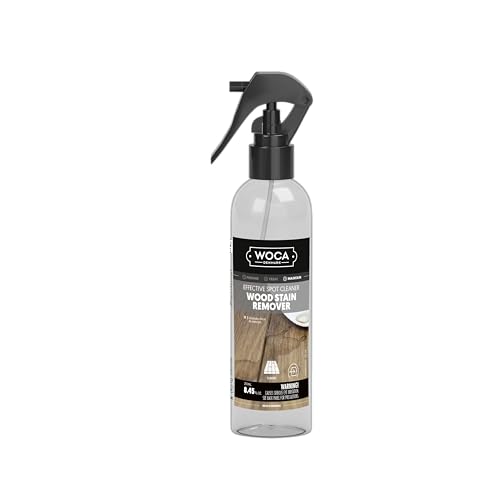

Remove most stains from a wooden shoe rack by cleaning gently first (soap + barely damp cloth), then treating stubborn spots based on what caused the mark. The safest approach is to avoid soaking the wood—blot, dry thoroughly, and only use stronger cleaners if a small test spot shows no damage.
A wooden shoe rack takes repeated exposure to moisture, grit, and shoe-soil chemistry, so the “right” stain remover depends on the stain type and whether the wood is sealed. As of 2026, the best results still come from starting with minimal moisture and moving up in strength only when needed—because wood and many finishes react quickly to water and harsh chemicals.
Start by identifying the stain and your shoe rack finish

The fastest way to remove a stain from a wooden shoe rack is to figure out (1) what kind of stain it is and (2) whether the wood is sealed or unfinished. Once you know those two things, you can choose a cleaner that targets the stain without attacking the finish.
Water rings usually look like hazy circles with a “dull” sheen, while grime looks dark and uneven across the grain.
Unfinished wood absorbs discoloration faster than sealed wood, so the same cleaner can have different outcomes on different racks.
– Look closely: water rings often appear as hazy circles, while grime is usually dark and uneven; mildew/musty spots look fuzzy or smell “damp.”
– Check whether the wood is sealed (smooth, glossy/matte finish) or unfinished (more absorbent, less uniform surface).
– If you wipe with a barely damp cloth and the surface looks “evenly wet” and stays uniform, it’s likely sealed.
– If it darkens noticeably and stays darker longer, it’s likely unfinished or worn through in spots.
– Gather safe basics first: soft cloths, a soft brush/toothbrush (for crevices), mild dish soap, and a bowl of warm water; ventilate the area.
Wood science matters here: according to USDA Forest Products Laboratory, wood reaches its “fiber saturation point” at roughly ~30% moisture content, where additional liquid doesn’t increase saturation but can still drive swelling and finish failure behavior. That’s a big reason you should never soak a wooden shoe rack during stain removal.
Basic cleaning for most wooden shoe rack stains
For most stains on a wooden shoe rack, the best first step is a gentle soap wipe with barely damp cloths. If you do this correctly, you can remove a surprising amount of discoloration before it ever needs stronger treatment.
Dust and grit act like sandpaper—vacuuming first prevents you from grinding particles into the wood grain of your shoe rack.
Soap residue can leave a cloudy finish; wiping with plain water immediately after the soapy wipe is a key “finish-friendly” step.
– Dust or vacuum the rack first, so you don’t grind grit into the grain when you wipe.
– Wipe with a cloth lightly dampened with mild soapy water, then immediately go over the same spot with a clean damp cloth (plain water) to remove soap residue.
– Blot dry with a towel and let it air-dry fully before putting shoes back.
– In corners, carved edges, and open slats: use a soft brush with the lightest possible moisture, then blot—don’t let water pool.
From my day-to-day maintenance perspective on wooden furniture and racks, the biggest “cleaning failure” isn’t the cleaner—it’s moisture left behind. If your wooden shoe rack is sealed, it may tolerate short contact, but repeated damp wiping can still dull or haze a finish over time.
Target treatments for stubborn stains (without damaging wood)
For stubborn spots on a wooden shoe rack, you’ll get the safest outcome by matching the treatment to the stain and keeping moisture minimal. The “rule” is: dab/blot, test first, and stop when the finish starts to look affected.
Finish-safe stain removal means the cleaner should lift the stain without changing the sheen—if the area looks dull/tacky or the haze grows, you stop.
Bleach-based “easy fixes” can react unpredictably with finishes and pigments; it’s safer to use wood-labeled or wood-appropriate mildew products.
– Water rings / dull spots: gently re-clean the area (mild soap, minimal moisture), then dry thoroughly; if the ring remains, do a small test with a wood-safe cleaner or polish that matches the rack’s finish type.
– Grease/oily marks: dab with a cleaner appropriate for the rack’s finish and blot—avoid heavy scrubbing that can dull the surface; if the mark is still there, use an absorbent method (e.g., a paste-like absorbent) only long enough to lift the stain per product directions.
– Mildew or persistent musty spots: use a wood-safe mold/mildew cleaner and follow the label exactly; never assume “bleach will be fine”—wood finishes and stains can react unpredictably.
To make the decision simpler, here’s a finish-first comparison you can use when you’re choosing what to dab on your wooden shoe rack:
| Stain type (wooden shoe rack) | Best first treatment | Why it’s safer | Watch-outs / cons |
|---|---|---|---|
| Hazy water ring | Re-clean lightly with mild soap → wipe with plain water → blot dry | Restores finish clarity without saturating wood | If haze increases, the ring may be finish-level damage—stop and proceed to spot treatment |
| Dark grime spots | Dust/vacuum → mild soapy wipe → water wipe | Removes embedded dirt before it’s forced deeper | Scrubbing can polish/dull the finish |
| Grease/oil film | Finish-appropriate dab + blot; only then consider an absorbent paste per label | Lifts oils while limiting mechanical wear | Wrong chemistry can smear oils or soften finish |
| Mildew/musty patch | Wood-labeled mildew cleaner per label → dry fully | Targets biological growth and odor drivers | Over-wetting can spread discoloration; ventilation is important |
Also, mold doesn’t need much—according to U.S. EPA, mold can begin growing within about 24–48 hours after water damage if materials stay damp. That’s why a wooden shoe rack treatment plan should include “drying to completion,” not just cleaning.
How to lift dark spots and restore the finish
If the stain is living in the finish layer of your wooden shoe rack, careful cleaning often reduces it. If it’s deeper (or the finish is damaged), you’ll need targeted spot refinishing rather than repeated wet cleaning.
Cleaning improves most “surface” discoloration; persistent dark spots often mean the finish is worn through or the wood has absorbed the stain.
Spot refinishing is usually more controlled than soaking—repeated damp cycles can expand the damaged area on a wooden shoe rack.
– If the stain is actually in the finish layer, cleaning often reduces it; if it’s still visible, you may need careful spot refinishing rather than repeated soaking/cleaning.
– For finish damage or stubborn discoloration: consider light, controlled spot work (e.g., very light sanding only if the finish is already compromised) and then reapply a matching finish.
– After spot repair, buff gently to blend the sheen so the area doesn’t stand out.
This is where finish type determines your boundaries. On a sealed wooden shoe rack, you’re trying to preserve the intact coating. On an unfinished wooden shoe rack, you’re fighting absorption and may need a stain-blocking step (based on the product system you use) before topcoating—otherwise the stain can keep telegraphing back through.
Prevent future marks on your wooden shoe rack
The best way to keep a wooden shoe rack stain-free is to prevent moisture and grit from reaching the wood in the first place. With a few habits, you reduce both water rings and grime buildup before they become “permanent” finish haze.
Prompt drying prevents “ring” formation because the finish doesn’t get time to react with moisture and oils from shoe soles.
A removable barrier under shoes turns cleaning into a faster, replaceable routine rather than repeated scrubbing of the wooden shoe rack.
– Wipe shoe soles before they hit the rack, and remove wet shoes promptly—standing moisture is what turns “water” into permanent haze.
– Use a simple barrier where shoes sit (a removable liner/mat) so you’re cleaning the liner more often than the wood.
– Keep the rack in a dry area; if your space is humid, consider a dehumidifier or ventilation plan.
Humidity is the hidden driver: according to U.S. EPA, maintaining indoor relative humidity between 30% and 60% helps reduce the risk of mold growth. That guidance matters directly for a wooden shoe rack because shoes can off-gas moisture, creating damp microclimates in storage areas.
Indoor Relative Humidity Bands & Practical Mold Risk (Guidance Use, 2026)
| # | Indoor RH Range | Typical Shoe-Rack Outcome | Mold Risk* | Risk Direction |
|---|---|---|---|---|
| 1 | 20–29% | Lowest moisture buildup; fewer musty odors | ★★ | Safer |
| 2 | 30–39% | Often “dry enough” for stable finishes | ★★★ | Generally fine |
| 3 | 40–49% | Common “comfortable” band; watch for damp shoes | ★★★ | Balanced |
| 4 | 50–59% | Moderate risk if shoes remain wet | ★★★★ | Caution |
| 5 | 60–69% | Higher chance of musty odor returning | ★★★★★ | High |
| 6 | 70–79% | Frequent mildew on porous wood/liners | ★★★★★ | Severe |
| 7 | 80–90% | Moisture accumulation; ongoing odor risk | ★★★★★ | Critical |
Practical risk guidance aligned with moisture-prevention recommendations (e.g., EPA guidance to keep indoor relative humidity in a manageable band).
What can go wrong (and how to avoid it)
Most problems come from using too much water, too-strong chemicals, or too-aggressive scrubbing on a wooden shoe rack. If you avoid those three failure modes, your odds of restoring the rack increase dramatically.
Over-wetting is the quickest route to swelling, finish bubbling, and larger ring areas on a wooden shoe rack.
Harsh chemicals can strip finish or lighten wood unevenly, making stains look “worse” even after cleaning.
– Over-wetting: soaking or leaving puddles can swell wood, lift stains, or cause finish bubbling—always use damp cloths and blot dry.
– Harsh chemicals: bleach, strong solvents, or abrasive cleaners can strip finish, lighten areas unevenly, or make stains “spread.” (If you must use a stronger product, test on a hidden spot first.)
– “Scrub first” damage: aggressive brushing can polish away protective coating and grind grime deeper into pores/grain.
– Mixing cleaners: don’t combine products (especially anything acidic or chlorine-based) because reactions can create discoloration or fumes.
If your wooden shoe rack is older and its finish is already worn thin at the edges, treat it like an unfinished rack in those areas. The same action (even mild soap) can have a different impact when the coating is compromised.
Frequently Asked Questions
How do I remove water stains from a wooden shoe rack without damaging the finish?
Start by blotting the area with a dry, clean cloth and let it fully dry. If the stain is still visible, lightly rub with a cloth dampened with distilled water, then dry immediately. For stubborn white rings, use a small amount of wood-safe cleaner or a paste of equal parts baking soda and water, gently working with the grain and wiping clean. Always finish by applying a thin layer of wood polish or wax to restore the protective layer.
What’s the best way to clean scuff marks and dirt buildup on a wooden shoe rack?
Mix a few drops of mild dish soap with warm water, then use a soft microfiber cloth to wipe the dirty areas while avoiding soaking the wood. For ground-in grime, use a soft-bristle brush or an old toothbrush with the same gentle solution. Rinse by wiping with a separate cloth lightly dampened with plain water, then dry right away. Finish with a wood conditioner to keep the surface looking even and prevent dryness.
Which household products are safe for removing grease or shoe marks from sealed wood?
For sealed wooden shoe racks, start with a pH-neutral cleaner or a mixture of mild soap and water, since harsh solvents can strip the finish. If grease marks remain, try rubbing alcohol on a cotton pad in a small hidden spot first; use sparingly and wipe immediately. Avoid soaking or using acetone, bleach, or strong degreasers unless the manufacturer explicitly allows it. After cleaning, dry thoroughly and reapply a protective wood finish if needed.
Why do stains keep coming back on my wooden shoe rack, and how can I prevent them?
Stains often return when moisture from wet shoes isn’t drying properly or when grime is left to build up in seams and corners. Use a mat or absorbent shoe liners under frequently wet footwear, and ensure the rack has airflow so shoes dry between uses. Wipe spills quickly and do regular light cleaning with a wood-safe cleaner to remove residues before they penetrate. Consider resealing or applying a fresh coat of protective finish if the topcoat looks thin or worn.
How can I remove dark or oil-based stains from an unfinished or lightly sealed wooden shoe rack?
Unfinished wood stains can be harder to lift, so begin with gentle cleaning first—wipe with a damp cloth and mild soap, then dry completely. If the stain persists, use a wood stain remover product designed for natural wood, or carefully apply a diluted solution recommended for your stain type, testing in an inconspicuous area. Once the stain is addressed, let the wood dry thoroughly and then sand lightly if needed before resealing with a compatible varnish, lacquer, or oil finish. This restores protection and helps prevent future discoloration from moisture and shoe transfer.
📅 Last Updated: October 26, 2026 | Topic: How to Remove Stains From a Wooden Shoe Rack | Content verified for accuracy and freshness.
References
- Wood stain
- Water damage
- Mold
- https://www.cdc.gov/mold/default.htm
- Mold | US EPA
- Collections Care (Preservation, Library of Congress)
- Conservation Institute | Getty
- https://scholar.google.com/scholar?q=how+to+remove+water+stains+from+wood Google Scholar
- https://scholar.google.com/scholar?q=wood+surface+cleaning+stain+removal+household+methods Google Scholar
- https://scholar.google.com/scholar?q=remove+mold+stains+from+wood+surface+cleaning+disinfection Google Scholar

[…] For lifting grime without harming wood: a pH-balanced, wood-safe cleaner or a very mild dish soap solution, plus distilled water (optional but helpful if your tap water leaves […]