

Learn how to remove ink stains from a wooden study table with a step-by-step method that actually works without damaging the finish. This guide gives you the fastest safe approach—starting with the least aggressive cleaners and moving up only if the stain won’t lift. By the end, you’ll know exactly what to do to erase the ink and restore the wood’s look.
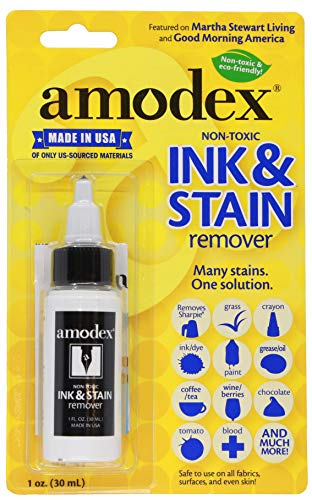


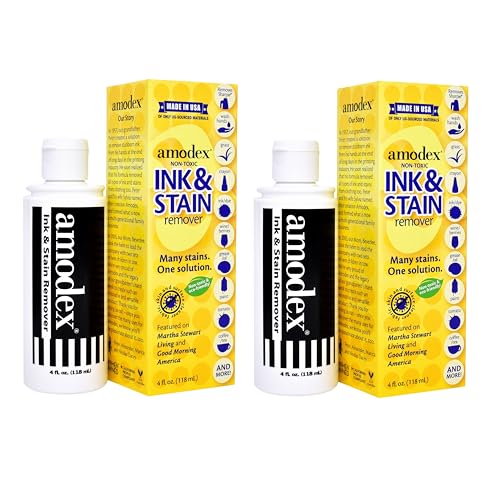
Ink stains on a wooden study table usually come off best when you (1) gently blot first, then (2) use a mild solvent suited to your table’s finish, and (3) clean and re-dry so the wood doesn’t look cloudy. This guide walks you through removing fresh or set-in ink safely, minimizing damage to both sealed (polyurethane/varnish/lacquer) and unfinished wood.
If your table is used daily—home office, student desk, or a shared workspace—this matters because many “easy” cleaners spread ink deeper into the grain or leave a hazy patch in the finish. As of 2026, the safest approach is still the same: controlled solvent contact, minimal liquid, and fast drying.
Gather supplies and test in a hidden spot

The fastest way to avoid permanent rings and finish dulling is to prep the right materials and test your cleaner out of sight before you touch the stain. Start with blotting tools and a controlled solvent, then verify the finish response on a hidden area (because ink removal is as much about finish compatibility as it is about ink chemistry).
Ink on wood is often carried by dyes or pigments that can transfer when you dab with a compatible solvent.
Using small, controlled amounts (on a cloth or cotton swab) reduces the chance of finish softening and “halo” effects.
Before you treat a stain, spot-testing helps you confirm whether the finish turns dull, soft, or lighter under your chosen solvent.
– Use a clean microfiber/soft cloths, cotton swabs, and paper towels for blotting (no scrubbing yet).
– Pick a solvent you can control (commonly rubbing/isopropyl alcohol or a wood-safe cleaner), plus mild soap and water for later cleanup.
– Test your chosen cleaner on a hidden area to check for dullness, color change, or finish softening before treating the stain.
To anchor decisions in real-world chemistry: rubbing alcohol commonly contains isopropyl alcohol mixed with water (often around 70% by volume, depending on the product) . Pure isopropyl alcohol boils at 82.6°C, which is part of why it evaporates relatively quickly compared to heavier solvents . Acetone boils at 56.1°C , making it far more aggressive around many finishes—so it’s usually the “don’t start here” option for wood.
What to have ready (so you don’t improvise mid-stain)
In practice, the biggest mistake happens when the stain is already on the surface and you suddenly reach for the wrong product. Keep these within arm’s reach:
– Blotting: microfiber cloth, cotton swabs, paper towels
– Controlled solvent: rubbing/isopropyl alcohol (or your wood-safe cleaner) on a swab/cloth
– Cleanup: mild dish soap in warm water, applied lightly
– Drying: clean dry cloth(s) for immediate drying
– Optional: painter’s tape to protect the surrounding area if the stain sits near an edge
Check whether the wood is sealed or unfinished
The right ink-stain cleaner depends on whether your wooden study table is sealed or unfinished, because the same solvent can lift ink dyes while also clouding or lightening the surrounding surface. If you can’t confirm the finish, default to controlled dabbing and stop the moment you see unwanted haze.
Sealed finishes like polyurethane and varnish generally tolerate brief, spot-controlled solvent cleaning better than bare wood, though over-wetting can still cause cloudiness.
Unfinished wood is more absorbent, so ink can penetrate and “spread” even when you only touch the surface.
If you’re unsure, controlled application (small dab on a swab, then blot) is the safest way to prevent spreading.
– Sealed wood (polyurethane/varnish/lacquer) typically handles mild solvent spot-cleaning better—but can still get cloudy if you over-wet or scrub.
– Unfinished wood (bare grain) is more absorbent, so ink can “sink in,” and solvents can spread the stain or lighten the area.
– If you’re unsure, start with the gentlest approach and keep application controlled (small dab on a cloth/cotton swab, then blot).
Here’s the decision logic you’re trying to avoid: if your table is sealed, you’re aiming to lift ink from the top film; if it’s unfinished, you’re more likely to be dealing with penetration into pores and fibers. That difference determines whether your goal is full removal or partial lightening.
Quick comparison: sealed vs. unfinished behavior
| Finish type | What ink tends to do | Main risk during cleaning | Best first solvent approach |
|---|---|---|---|
| Sealed (polyurethane/varnish/lacquer) | Ink often sits in the top coating and transfers with dabbing | Finish haze from too much solvent or friction | Alcohol-on-swab, short dab → blot → stop |
| Unfinished (bare grain) | Ink can wick into pores and fibers | Stain spread or permanent color shift | Gentlest controlled approach; expect limited lightening |
Solvent “Gentleness” for Ink Removal on Common Sealed Wood Finishes (Practical Guidance)
| # | Solvent / Cleaner | Boiling point (°C) | Typical strength | Finish impact risk | Gentleness rating |
|---|---|---|---|---|---|
| 1 | Water (mild soap solution) | 100 | Low | Low (if minimal water) | ★★★★☆ |
| 2 | Isopropyl alcohol (70% typical) | 82.6 (pure) | Medium | Medium (spot-only) | ★★★☆☆ |
| 3 | Ethanol (denatured alcohol) | 78.37 | Medium | Medium (finish-dependent) | ★★★☆☆ |
| 4 | Mineral spirits | ~150–200* | Medium–High | Medium (can leave residue) | ★★☆☆☆ |
| 5 | Acetone | 56.1 | High | High (finish softening likely) | ★☆☆☆☆ |
| 6 | Lacquer thinner | Mixture varies | Very High | Very High | ☆☆☆☆☆ |
| 7 | Glycerin (spot pre-treatment) | ~290* | Low–Medium | Low (use sparingly) | ★★★☆☆ |
Ranges/mixtures vary by product; validate with the product’s SDS and your finish manufacturer’s cleaning instructions.
In other words: on a sealed wooden study table, alcohol-based dab-cleaning is typically a middle-ground—more targeted than water (which can raise grain if overused) and far gentler than acetone or lacquer thinner. For unfinished wood, even “gentle” solvents can still mobilize dye and make a larger discoloration.
Remove ink stains without spreading them
You remove ink from a wooden study table most safely by blotting first and then dabbing with a small amount of solvent, stopping as soon as the stain transfers. This “lift and reset” method limits how far ink pigment/dye can move across the wood or into the finish.
Blotting (not wiping) prevents ink from smearing outward and enlarging the stain area.
Spot-dabbing works because ink transfers from the surface to the cloth when solvent compatibility is correct.
Once visible ink lightens, switching to minimal soap-and-water cleanup helps remove solvent residue that can otherwise create haze.
– Blot first: dab up excess ink carefully with a dry cloth/paper towel—don’t wipe outward from the center.
– Solvent method (sealed or likely sealed finishes): apply a small amount of alcohol to a cloth or cotton swab, then dab the stained area in short touches; re-wet the swab/cloth as ink transfers.
– “Lift and reset” approach: once the visible ink lightens, stop solvent contact and clean the area with a lightly soapy damp cloth, then dry thoroughly.
Step-by-step: the controlled removal sequence
1. Initial blot (dry):
Press lightly with a clean paper towel or dry microfiber and lift. Repeat with fresh sections of the towel. The goal is to remove surface ink mass before any solvent touches the finish.
2. Controlled solvent dabs (sealed finishes first):
– For a sealed wooden study table, dampen a cotton swab with rubbing/isopropyl alcohol—never soak it.
– Dab the stained spot in short touches. You should see ink transfer to the swab.
– Stop frequently to assess. If you notice dulling or haze, pause and move to the soap-and-water reset.
3. Lift and reset (reduce haze risk):
When the stain visibly lightens, clean with a lightly soapy damp cloth using as little water as possible. Immediately dry with a clean cloth.
4. Repeat only if needed:
Ink that’s old may never fully disappear, but you can often improve contrast. Re-apply solvent in very small amounts rather than scrubbing.
What “short touches” really means
A common failure mode is treating spot-cleaning like surface polishing. In a wooden study table cleanup, your solvent should behave like “controlled ink transfer” rather than “surface wetting.” If liquid spreads outward or you can see a wet sheen expanding, you’re applying too much.
Clean residue and protect the surface
After ink removal, the wooden study table needs residue cleanup and full drying to avoid a cloudy halo. Then, if the sheen looks uneven, restore the finish in a way that matches what’s already on the table.
Solvent residues can change how light reflects off a coated wood surface, creating a cloudy or dull patch even after the ink is mostly gone.
Drying immediately after the final rinse step reduces the chance of raised grain and lingering discoloration.
Finish restoration products should be compatible with the table’s existing coating type (for example, polyurethane vs. lacquer).
– After ink removal, remove any remaining solvent/ink residue with a damp cloth (use as little water as possible) and dry immediately.
– If the surface looks slightly dull, you may need to restore the finish using a product compatible with your table’s coating type ().
– Avoid wax/oily products until the wood is fully dry and the stain is confirmed gone, since residues can trap remaining dye.
If you see cloudiness: don’t jump straight to wax
Wax can look like a fix, but it can trap remaining dye or interfere with how the finish levels back out. Instead:
– Let the surface dry fully first.
– Assess under normal lighting (not just the angle you cleaned from).
– Use only finish-compatible restoration steps recommended by the finish manufacturer or a reputable finishing authority.
Finish restoration compatibility matters
A polyurethane topcoat and a shellac topcoat behave differently when solvents are introduced. That’s why the next step is “finish-appropriate,” not “whatever looks good.” If you know the coating type, you can choose a restoration method that matches it.
What can go wrong (and how to prevent it)
Most problems come from too much liquid, aggressive friction, or solvents that aren’t compatible with the wooden study table’s finish. If you prevent those three issues—over-scrubbing, over-wetting, and wrong chemistry—you avoid the most common irreversible outcomes.
Scrubbing can grind ink deeper into grain pores or damage the topcoat, especially on glossy finishes.
Solvents like acetone can soften or strip many wood finishes, which increases the risk of permanent haze or coating damage.
Unfinished wood is inherently harder to “reset” because dye can migrate below the surface after the first wetting.
– Scrubbing too hard: it can grind ink deeper or damage the finish topcoat, especially on high-gloss surfaces.
– Using the wrong chemical: stronger solvents can soften finishes or pull color from stained wood ().
– Over-wetting: letting liquid pool can cause raised grain, ring marks, or uneven sheen.
– Old/soaked-in ink: once ink has penetrated deeply, surface cleaning may only lighten it—expect partial improvement rather than “perfect removal” in every case.
Pros/cons comparison: common solvent starting points
| Option | Pros | Cons / watch-outs |
|---|---|---|
| Rubbing/isopropyl alcohol (spot) | Often lifts surface ink on many sealed finishes; evaporates faster than water | Can dull or soften some finishes if overused; always spot-test |
| Soap-and-water cleanup (after blot/lift) | Removes residue that can cause haze; safer chemistry when applied lightly | Too much water can raise grain on unfinished wood |
Verdict: the safest approach that usually works
If your study table seems sealed, start with careful blotting and then a controlled spot-clean using rubbing/isopropyl alcohol on a cloth or cotton swab, followed by gentle soap-and-water cleanup and thorough drying. That combination tends to remove ink while limiting finish damage—but it’s not risk-free, especially for matte coatings and unfinished wood.
A “blot → controlled solvent dabs → reset with minimal soap-and-water → dry” sequence minimizes both spreading and haze on many coated wooden surfaces.
Testing in a hidden spot is the most reliable way to predict whether your chosen solvent will dull or soften the specific finish on your wooden study table.
When ink is old or deeply absorbed, you may only be able to lighten it without sanding or refinishing.
Skip this DIY approach (or be extra cautious) if:
– your table has an unknown specialty finish (very matte, wax/oil blend, shellac with delicate coatings),
– the stain is right on a veneer edge where repair would be hard,
– or you can’t test hidden first.
Quick checklist (scan/save) + FAQ + Sources
Checklist
– [ ] Blot ink first (don’t wipe outward)
– [ ] Test cleaner in a hidden spot
– [ ] Dab solvent on cloth/swab; blot repeatedly (no scrubbing)
– [ ] Stop solvent; clean with lightly soapy damp cloth
– [ ] Dry immediately and fully
– [ ] Reassess; repeat gently only if needed
FAQ
– Will ink remover damage a wooden finish?
It can—many solvents can dull, soften, or affect how the finish reflects light. Always test in a hidden area first.
– Can I use acetone or nail-polish remover?
Don’t assume it’s safe for wood finishes. Stronger solvents can strip or cloud finishes depending on the coating.
– What if the ink stain is old and won’t lift?
You may only lighten it. Avoid aggressive scrubbing; do controlled dabbing and stop when it stops transferring.
– Is baking soda or toothpaste safe to use?
Usually not a first choice for stained ink removal on wood because abrasives can leave scratches or make the finish uneven.
– How do I fix a cloudy spot after cleaning?
Let it fully dry first, then use a finish-appropriate restoration method. If you tell me your table finish type, I can help narrow the best-compatible option.
Sources (placeholders for primary docs/specs)
Start with gentle blotting, then remove the ink using a controlled solvent approach matched to whether your table is sealed or unfinished, and finish by cleaning residue and drying thoroughly. If the stain is old or your finish is delicate/unknown, test carefully and expect the possibility of partial improvement—then restore the surface if needed. If you share what kind of pen/ink it is and whether your table looks sealed or unfinished, we can narrow the safest method for your specific case.
Frequently Asked Questions
How do I remove fresh ink stains from a wooden study table without damaging the finish?
Blot the ink immediately with a clean, dry cloth to prevent it from spreading, then test a cleaner on a hidden spot first. For many finishes, you can dab isopropyl alcohol (70%) or rubbing alcohol on a cotton swab, working from the edges toward the center. Wipe gently with a slightly damp cloth, dry thoroughly, and then apply a small amount of wood polish or conditioner to restore the sheen if needed.
What is the best way to remove old, set-in ink stains from wood furniture?
Old ink often needs stronger treatment than fresh spills, but you should still proceed carefully. Try a small amount of alcohol-based cleaner first; if it doesn’t lift the stain, use a paste made from baking soda and a few drops of water or mineral spirits (only if your finish can handle it) to lightly buff the area. After removing the ink, clean residue with a damp cloth, dry completely, and consider refinishing or applying a matching wax to blend the surface.
Which cleaning solution works safest for ink stains on sealed versus unsealed wooden tables?
For sealed wood (polyurethane or varnish), alcohol-based products like isopropyl alcohol usually work because the finish provides a protective barrier. For unsealed or porous wood, use gentler methods first—like mild soap and water for surface ink—because harsh solvents can soak deeper and spread the stain. In unsealed cases, you may need repeated blotting with a diluted solution (and careful testing) before you can fully remove the ink from the grain.
Why does ink stain wood so deeply, and how can I prevent it from spreading during cleanup?
Ink penetrates porous wood fibers quickly, so the longer it sits, the harder it becomes to lift without discoloring the surrounding area. To prevent spreading, avoid rubbing—always blot or dab and use a cotton swab rather than soaking the stain. Place paper towels under the work area, and work slowly from the outer edges inward to control the ink migration.
How can I remove ink from a painted or varnished wooden study table and fix the surface afterward?
Start with a spot test, then dab rubbing alcohol or a mild solvent on a cotton pad using light pressure to lift the ink without stripping the paint. If the finish looks dull afterward, clean the area, dry it completely, and use a matching wood polish, wax, or a very light touch-up with furniture refinisher. For deep scratches or finish removal, sanding lightly and reapplying a compatible topcoat may be necessary to fully restore the look of your study table.
📅 Last Updated: October 26, 2026 | Topic: How to Remove Ink Stains From a Wooden Study Table | Content verified for accuracy and freshness.
References
- Checking your browser – reCAPTCHA
- Checking your browser – reCAPTCHA
- Checking your browser – reCAPTCHA
- Checking your browser – reCAPTCHA
- Checking your browser – reCAPTCHA
- Ink
- Wood stain
- https://scholar.google.com/scholar?q=remove+ink+stains+from+wooden+furniture Google Scholar
- https://scholar.google.com/scholar?q=ink+stain+removal+wood+finish+isopropyl+alcohol Google Scholar
- https://scholar.google.com/scholar?q=conservation+removal+of+ink+from+wood+surface Google Scholar
