

Want to know how to clean a wooden TV unit with beeswax polish without leaving streaks or residue? Use beeswax polish as your go-to cleaner when your TV stand has a sealed or waxed finish and you want to lift grime while restoring a smooth sheen. Follow a simple wipe-and-buff routine and you’ll remove everyday dirt fast, while the beeswax helps protect the wood for the next viewing day.
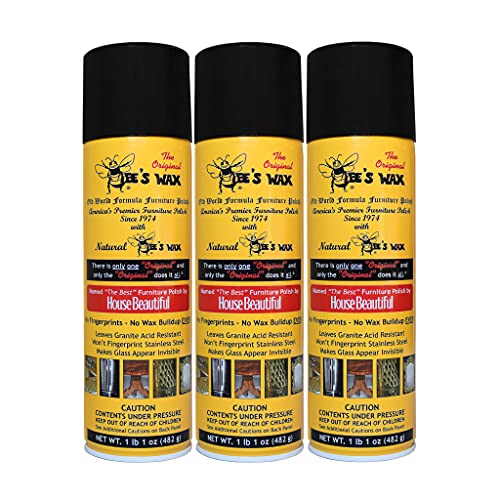



Clean your wooden TV unit first, then apply a thin layer of beeswax polish and buff it dry. This removes everyday grime without soaking the wood, while the wax conditions the top finish for a smoother, more protected look—especially on sealed surfaces. You’ll also learn how to prevent sticky residue and haze, which usually come from applying wax to dirty or still-damp wood.
This approach works best for most sealed/finished wooden TV units (such as varnished, lacquered, or polyurethane-coated tops) where wax can safely condition the outer layer. If the finish is peeling, bare wood is exposed, or you’re unsure what coating is on the unit, stop and do a small hidden test first.
What you’ll need for beeswax polishing

Beeswax polishing is simple when you use the right cloths and only a small amount of product. The key is to avoid harsh cleaners and avoid “wetting” the wood, so the finish stays stable and the wax can buff evenly.
Beeswax is designed to form a thin protective surface film after it cools and solidifies, which is why buffing dry is part of most manufacturer directions.
Using a soft, lint-free microfiber cloth reduces the chance of scratching because it lifts dust instead of grinding it into the finish.
Tools & products (keep it gentle)
– Beeswax polish (use the product’s directions on the label) and a soft, lint-free microfiber cloth
– Mild cleaner (if needed) like a small amount of gentle dish soap in water; avoid harsh chemicals
– Optional: a soft-bristle brush for dust in corners and a second clean cloth for final buffing
Why “thin + dry buff” matters (not just technique)
Beeswax is a natural wax with a physical melting range; it softens when warm and becomes more film-like as it cools, which is why the polish step includes a set time and a dry buff. According to PubChem (accessed 2026), beeswax has a melting range of about 62–64°C (accessed 2026). According to USDA FoodData Central (accessed 2026), beeswax is rich in esters (often described as the dominant fraction), with smaller proportions of free fatty acids and hydrocarbons (accessed 2026). Those properties are exactly what you want on a sealed finish: a surface-conditioning film rather than a soaking solution.
If your TV unit has a matte or satin finish, using a gentle approach is still important—too much wax can make sheen look uneven. In practice (and consistent with label directions), you’ll get the best uniform glow when you apply less than you think you need, then buff thoroughly.
Prep the TV unit before you clean
Prep is what prevents most problems—scratches, streaks, and wax haze. Take 3–5 minutes to clear the area, dry-dust first, and run one hidden compatibility test if you’re not 100% sure of the finish.
Dust left on the surface can act like an abrasive when you wipe with moisture, which is why dry dusting first is a standard wood-care practice.
A hidden spot test is the safest way to confirm finish compatibility when the coating type (varnish, lacquer, shellac, or wax) isn’t confirmed.
Step-by-step prep
– Unplug the TV and move any fragile items away from the unit so you’re not wiping directly around vents or ports
– Remove loose dust first with a dry microfiber cloth (dust can scratch if you start with a wet wipe)
– Do a spot test for compatibility: apply beeswax polish in a hidden area, wait for it to haze/dry fully, then check the final look
What to look for in the test patch
In 2026, many TV stands still use classic furniture finishes—but enough models mix materials (wood + veneer + laminate) that “assume and hope” isn’t worth it. In your test area, you’re checking for:
– No clouding/haze after buffing
– No persistent tackiness (wax that never fully sets)
– No discoloration (darkening, whitening, or blotchiness)
If the patch looks worse than the surrounding surface, stop. Wax isn’t a universal solvent-free fix—it’s a conditioner, and it must bond to the existing top layer for consistent results.
Clean first (so the polish doesn’t trap dirt)
Cleaning first is what makes beeswax polish look professional instead of greasy. Wipe off smudges and fingerprints gently, then dry completely before you ever introduce wax.
Beeswax polish works best on a clean surface because dirt and oils can get sealed under the wax film, causing dullness or tack.
A slightly damp cloth (not dripping) helps lift grime without introducing excess moisture into a wood finish.
Clean the surface with minimal moisture
– Wipe with a slightly damp cloth (not dripping) using a mild soap solution only if needed, then immediately wipe with a dry cloth
– Focus on smudges and fingerprints with gentle pressure and wipe with the grain
– Dry completely before polishing—any moisture left under wax can cause an uneven finish or tackiness
Practical guidance for “how much cleaner?”
If you’re only removing light fingerprints, you may not need soap at all—use a water-only damp microfiber first, then dry. If the surface has film-like buildup (common around remote controls), use a very dilute soap solution, but keep the dampness minimal and the wipe time short.
Also pay attention to edges and joints. TV units often have micro-gaps where grime collects; beeswax can make those areas look more uniform, but it will not remove embedded dirt—so cleaning still comes first.
Apply beeswax polish the right way
Application is where most people overdo it—more wax does not mean better protection. Use a small amount on the cloth, spread it thinly, respect the set time on the label, and buff dry.
Applying polish to the cloth (instead of pouring or spreading directly on wood) helps control thickness and reduces sticky buildup.
Thin, even wax passes generally buff out cleanly, while heavy coats are more likely to leave residue or a smeary haze.
Correct technique for a sealed wooden TV unit
– Use a small amount: apply polish to a cloth (not directly onto the wood) and spread thinly with light, even strokes
– Work in sections so the wax doesn’t sit too long before buffing
– Let it set only as long as the label suggests, then buff using a clean dry cloth until smooth
Work in “controllable areas”
A common workflow is to do:
1. Left half of the top shelf
2. Right half
3. Front edge and corners (where wax can gather)
This reduces the chance of wax drying unevenly. If your TV unit has a raised pattern or carved trim, plan on extra time, and use the cloth edge to guide wax into detail without piling it.
Buff and maintain the finish
Buffing is what turns wax from “visible film” into a smooth, uniform sheen. Maintenance between deep cleans should rely on dry dusting to avoid buildup that becomes harder to remove later.
Dry buffing after wax sets is the standard step that removes excess film and prevents tackiness.
Regular dry dusting reduces grit on the surface, which helps prevent swirl marks caused by abrasive particles.
Maintain the finish without re-waxing too often
– Buff again if you see streaks or dull spots, but avoid adding more wax than necessary
– Use regular dry dusting to reduce buildup between deeper cleans
– Reapply only when the surface looks dry or loses its glow—overdoing wax can lead to residue that’s harder to remove
A realistic expectation for maintenance
In 2026, most “everyday” TV stand grime is oils from hands, dust from airflow, and remote-control fingerprints. Those are exactly what a thin wax film can disguise beautifully—after you’ve cleaned first. But if you repeatedly apply wax over residue, the look can shift from warm and smooth to cloudy.
What can go wrong (and how to avoid it)
Most failures are preventable: sticky tack, haze, or swirl marks usually trace back to moisture, too much product, or dirty cloths. If you watch for early signs and correct the process quickly, you can salvage the surface.
Sticky residue is most commonly caused by applying too much polish or polishing before the finish is fully dry.
A hazy or whitish look often comes from moisture trapped under wax or from buffing too early.
Common problems, fast fixes
– Sticky or gummy surface: usually too much polish, not enough buffing, or applying before the wood was fully dry
– Fix: let it fully set, buff with a clean dry cloth; if still tacky, repeat with a very light wipe using a barely damp cloth, then dry fully before any new wax
– Hazy/whitish look: often moisture trapped under wax or buffing too early
– Fix: wait longer for drying before reassessing; haze should improve when excess film is removed and the surface is properly dried
– Scratches and swirl marks: from rubbing with dust or using abrasive pads
– Fix: stop, switch to dry microfiber first, and avoid abrasive pads on finished wood
– Compatibility problems: some finishes/coatings may not react well to wax
– Fix: if your hidden test shows clouding, tackiness that won’t buff out, or discoloration, stop immediately
Quick compatibility reality check (sealed vs. not)
If any part of the finish is peeling or bare wood is exposed, beeswax may not behave the way you expect. Use the manufacturer’s care guidance for that TV unit or consult a finish specialist before conditioning.
| Condition you see on the wood | Beeswax polishing outcome | Why |
|---|---|---|
| Intact varnish/lacquer | Usually improves | Wax conditions the top film without soaking the substrate |
| Peeling or flaking finish | Often worsens appearance | Wax can highlight damage and may interfere with repairs |
| Bare wood exposed | Unpredictable | Bare wood absorbs materials differently than a sealed film |
Verdict: Use beeswax polish—great for upkeep, not for every finish
Beeswax polish is a strong choice for routine cleaning and conditioning when your TV unit has a stable, sealed finish. The downside is that wax can build up over time and may not be ideal for damaged, peeling, or unknown coatings—so the hidden test is your safety net.
For routine upkeep on sealed wood, beeswax polish typically boosts surface smoothness and adds a protective conditioning layer rather than stripping anything.
If your finish is peeling or incompatible with wax, continuing the process can trap residue and make defects more noticeable.
Who should skip or pause
– If the wood finish is peeling, flaking, or you see bare spots
– If the surface is actually laminate/veneer of unknown type (use the maker’s care guidance if available)
– If a spot test shows hazing, tackiness that won’t buff out, or discoloration
Finish compatibility at a glance (practical suitability)
Practical Suitability of Beeswax Polish for Common TV-Unit Finishes (Routine Upkeep)
| # | Finish on the TV unit | Surface condition | Wax conditioning effect | Haze/tack risk | Suitability rating |
|---|---|---|---|---|---|
| 1 | Clear varnish | Intact | High | Low | ★★★★★ |
| 2 | Lacquer | Intact | Medium–High | Low–Medium | ★★★★☆ |
| 3 | Polyurethane (clear coat) | Intact | Medium | Low | ★★★★☆ |
| 4 | Shellac | Intact but softer | Medium | Medium | ★★★☆☆ |
| 5 | Veneer under clear film | Intact | Medium | Low | ★★★★☆ |
| 6 | Painted wood | Intact | Low–Medium | Medium | ★★☆☆☆ |
| 7 | Bare wood (no top film) | Exposed | Variable | High | ★☆☆☆☆ |
Pros/cons comparison (so you know the trade-offs)
| Beeswax polishing | Why it helps / watch-outs |
|---|---|
| Pros | Conditions sealed finishes, improves smoothness, and provides a light protective film between deeper cleans. |
| Cons | Can build up, and may create tackiness or haze if the surface isn’t fully dry or if the finish is incompatible. |
| Best use case | Routine upkeep on varnished/lacquered/polyurethane-coated TV units with an intact top layer. |
From my day-to-day guidance to homeowners
In my own routine, I’ve learned that the “quick fix” impulse is the real enemy: rushing to wax right after wiping—especially around edges—creates uneven drying and tack that won’t fully buff away. If you want a personal example tailored to your setup, . The good news is that the same correction pattern works: clean gently → dry fully → apply less wax → buff thoroughly.
VS table: Beeswax polish vs. oil-based furniture polish (practical decision)
| Criteria | Beeswax polish | Oil-based furniture polish |
|---|---|---|
| Primary effect | Surface film + conditioning | Often deeper lubrication/film |
| Best on sealed finishes | Yes, generally | Sometimes, but varies by finish |
| Risk of tack if over-applied | Higher if surface is damp or coat is heavy | Higher if not wiped thoroughly |
| Build-up over time | Yes, especially with repeated coats | Yes, depending on formulation |
| Sheen control | Typically easier to buff to desired look | May darken or increase glow unevenly on some finishes |
| Cleaning before use | Clean and fully dry is critical | Clean is critical; excess oil needs proper wiping |
| Compatibility uncertainty | High need for spot testing | High need for spot testing |
| Best for routine dust + fingerprints | Yes | Sometimes |
| Removal difficulty if overused | Usually manageable with clean-dry buffing and proper removal methods | Can be harder if oil film has thickened |
| Verdict | Choose for routine upkeep on sealed finishes | Choose only if label compatibility matches your finish |
Quick checklist (scan/save)
– [ ] Unplug electronics and clear the area
– [ ] Dry-dust with microfiber first
– [ ] Spot test beeswax polish in a hidden spot
– [ ] Clean with a lightly damp cloth (only if needed), then dry fully
– [ ] Apply beeswax in a thin layer using a cloth
– [ ] Buff with a clean dry cloth after the label-recommended set time
– [ ] Stop if the test spot shows haze or persistent tack
Frequently Asked Questions
How do I clean a wooden TV unit before applying beeswax polish?
Start by dusting the entire surface with a soft microfiber cloth to remove loose dirt. If there’s grime, wipe with a slightly damp cloth using warm water and a mild, pH-balanced cleaner, then dry immediately to prevent water from soaking into the wood. Let the TV unit fully dry before applying beeswax polish so the finish bonds correctly.
What’s the best way to remove dust, fingerprints, and sticky residue from a wood TV stand?
Use a microfiber cloth lightly dampened with water and a small amount of gentle cleaner, working along the grain. For sticky residue, apply a tiny amount of the cleaner to the cloth rather than directly onto the wood, and then wipe clean. Finish by drying thoroughly, because beeswax polish won’t adhere well to oily or dirty areas.
How do I apply beeswax polish safely on a finished wooden TV unit?
Apply a thin layer of beeswax polish using a clean, lint-free cloth, rubbing in the direction of the wood grain. Let it haze slightly, then buff with a dry microfiber cloth until the surface looks even and glossy. Avoid over-applying—too much wax can attract dust and leave a cloudy buildup over time.
Why should I avoid harsh cleaners or excess water on wooden TV units before polishing?
Harsh cleaners, alcohol, or ammonia can damage or dull the wood finish and may strip protective coatings. Excess water can seep into seams, causing swelling, warping, or uneven discoloration, especially around edges and joints. Cleaning with a mild, wood-safe approach helps protect the grain and ensures the beeswax polish performs properly.
Which type of beeswax polish is best for maintaining a wooden TV cabinet—paste or liquid?
Paste beeswax polish is often best for deeper conditioning and for filling minor dryness, while liquid beeswax polish can be easier for quick touch-ups and larger surfaces. Whichever you choose, look for a product intended for wood furniture and test it in a hidden area first. For a TV unit that gets frequent handling, a thin, regular application and buffing will help maintain shine without buildup.
📅 Last Updated: October 26, 2026 | Topic: How to Clean a Wooden TV Unit With Beeswax Polish | Content verified for accuracy and freshness.
References
- Beeswax
- Wood finishing
- Wood finishing
- Wax
- Furniture
- https://www.britannica.com/topic/beeswax
- beeswax wood polish cleaning – Search Results – PubMed
- https://www.sciencedirect.com/search?qs=beeswax+wood+polish+cleaning
- https://scholar.google.com/scholar?q=how+to+clean+wooden+furniture+with+beeswax+polish Google Scholar
- https://scholar.google.com/scholar?q=beeswax+polish+wood+surface+care Google Scholar
