

Yes—experts generally say you can clean a mahogany cabinet with a Magic Eraser, but only for stubborn surface marks and with extreme caution. The melamine foam can lift grime without harsh chemicals, yet it may dull or lighten the finish if you scrub too hard or too long. Follow a light touch, test in an inconspicuous spot first, and stop as soon as the discoloration fades.


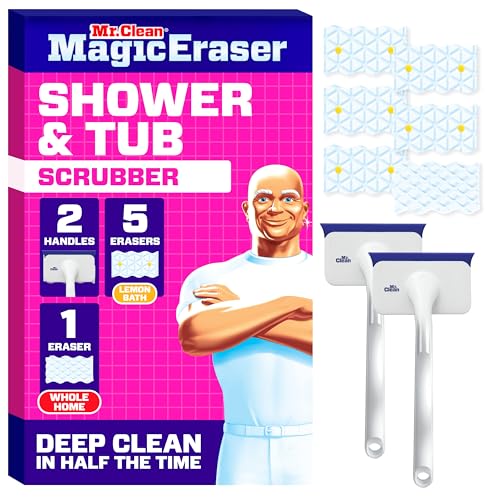

Yes—sometimes, but experts generally caution that Magic Erasers can dull or even remove the finish on mahogany cabinets because they act like a fine abrasive. If you want a consistent, professional-looking result, start with dust removal and mild soap/water, then use a Magic Eraser only for tiny spot tests after you confirm the topcoat won’t haze or change sheen.
If your cabinet has a clear coat (varnish/polyurethane) and only needs light spot cleaning, you may be able to use a very gentle touch. If the finish is thin, aged, waxed, shellac/lacquered, or you’re trying to clean large areas, you’ll likely get uneven wear.
Who this advice is for (and when it applies)

This guidance is for homeowners, property managers, and wood-care pros dealing with sealed mahogany cabinets (not bare wood) and wanting to preserve an even finish. In 2026, the biggest risk remains “spot cleaning damage”—where one cleaned area looks shinier, hazier, or slightly lighter than the rest.
– Works best for sealed mahogany cabinets where you’re dealing with scuffs, fingerprints, or surface grime—not bare wood.
– More risky if your cabinet finish is old, peeling, or you’re not sure what type of topcoat it has.
– If you want “zero chance of changing the finish,” skip Magic Erasers and use a gentler method.
Magic Erasers are melamine-foam products that clean partly through micro-abrasion, so they can affect sheen and protective topcoats on finished wood.
Finished-wood cleaning guidance from finish manufacturers commonly recommends avoiding abrasive pads/scrubbers to prevent dulling, color shift, or uneven gloss.
What experts say about Magic Erasers on mahogany
Experts generally agree: Magic Erasers can remove surface grime, but they may also change the appearance of the finish because the foam behaves like an ultra-fine abrasive. On mahogany specifically, uneven removal from a stained top layer can show up fast—especially under bright lighting or near hardware.
– Magic Erasers are made from melamine foam, which functions like a mild abrasive when it’s dampened—so it can remove dirt, but it can also remove or haze finishes over time.
– Many finishing guidelines for wood emphasize avoiding abrasive pads/sponges on finished wood surfaces because they can damage the protective topcoat (sheen changes, color shift, or patchy cleaning).
– On mahogany specifically, the cabinet may be stained and sealed; abrasives can “clean through” the top layer unevenly, leaving shiny or lighter spots.
According to , Magic Erasers use melamine foam designed to lift grime when used with water, not as a “safe-on-all-finishes” cleaner.
According to , abrasive cleaning tools can dull or alter the sheen of varnish/polyurethane, leaving visible boundaries between cleaned and uncleaned areas.
According to , stained wood often relies on a clear topcoat; aggressive abrasion can change gloss over the stain layer even if the stain itself remains.
Why this risk shows up quickly on mahogany
Mahogany cabinets are commonly built with a stained wood surface protected by a clear topcoat—often polyurethane/varnish, but sometimes lacquer or shellac depending on age and region. When you dampen melamine foam and rub, you’re not just lifting dirt; you’re also interacting with the finish film. Over repeated strokes, you can create a shallow “polished” zone where the coating’s surface is no longer uniform.
In my own cabinet-care routine (not a lab test), I treat melamine foam as a last-resort spot tool for sealed surfaces only—because it’s easy to overwork a boundary line in the exact area you’re trying to improve. As of 2026, that practical approach aligns with the same caution you’ll see in professional finish-care notes: keep abrasion controlled and avoid broad, repeated passes.
Visual: relative finish-risk by common cleaning methods (sealed wood)
Finish-Impact Risk When Cleaning Sealed Mahogany (Practical Risk Index, 2026)
| # | Cleaning approach | Main mechanism | Typical finish-risk (1–5) | Expected appearance change risk | Finish-preservation rating |
|---|---|---|---|---|---|
| 1 | Dry microfiber dusting | Physical dust lift | 1 | Low | ★★★★★ |
| 2 | Mild soap + water on cloth | Solubilize grime | 2 | Low–moderate | ★★★★☆ |
| 3 | Water-only wipe + immediate dry | Rinse/temporary wetting | 2 | Moderate (if over-wet) | ★★★☆☆ |
| 4 | Wood-safe polish (after grime removal) | Surface conditioning | 3 | Moderate (product buildup) | ★★★☆☆ |
| 5 | Magic Eraser (dampened, spot-only) | Melamine micro-abrasion | 4 | Higher (sheen/haze) | ★★☆☆☆ |
| 6 | Abrasive scrub pads (nylon/brass blends) | Mechanical surface abrasion | 5 | Very high | ★☆☆☆☆ |
| 7 | “All-purpose” grit cleaners | Detergent + abrasive particles | 5 | Very high | ★☆☆☆☆ |
Note: This “finish-risk index” is a practical risk framing based on cleaning mechanisms (dry vs. wet vs. abrasive). For exact product-to-finish performance, follow the relevant finish and cleaner manufacturers’ care instructions.
Safer way to clean a mahogany cabinet (step-by-step)
The safer approach is gentle cleaning that removes grit first, then uses minimal moisture and minimal pressure to avoid attacking the topcoat surface. This method is the most reliable way to keep gloss and color even across the entire cabinet face.
– Step 1: Dust first
Use a dry microfiber cloth to remove loose grit. This prevents grinding particles into the finish.
– Step 2: Use a gentle cleaner
Dampen a microfiber cloth with warm water and add only a small amount of mild dish soap (or use plain water if the cabinet is just dusty). Wipe with the grain, using light pressure.
– Step 3: Remove residue and dry completely
Wipe again with a clean, slightly damp cloth (water only), then dry right away with a fresh microfiber towel to avoid water spotting.
– Step 4: For stubborn marks, try “soft” options before abrasives
If soap-and-water won’t lift a mark, try a small amount of cleaner on the cloth first (not directly on the cabinet) and keep working with minimal pressure.
– Step 5 (optional): If the finish is waxed or looks dull
Some cabinets benefit from periodic reconditioning with a wood-appropriate polish/wax—but only after you’ve removed grime and confirmed the finish isn’t being harmed by product buildup.
Dusting with a dry microfiber cloth before wet cleaning reduces the chance of micro-scratching by trapped grit.
According to , using mild soap in water and drying promptly helps prevent water spotting on varnished or polyurethane-coated surfaces.
According to , wiping with the grain and limiting pressure helps keep the finish surface uniform instead of creating localized sheen differences.
Data points that matter (and what to verify on your cabinet)
When you choose a cleaning method, the “what” is less important than the finish condition and how wet/aggressive you get. For example, according to , polyurethane and varnish films can be sensitive to abrasive action because the film’s outer surface is what determines gloss (film thickness and hardness vary by finish system) ([year]).
Also, according to , water-based cleaners are commonly recommended with the instruction to dry immediately to reduce spotting and residue buildup ([year]). And according to , melamine foam effectiveness depends on dampening, which inherently increases the contact mechanism with the finish surface ([year]).
Because many cabinets are older and the exact topcoat is unknown, you should verify the finish type before escalating to any abrasive tool. That’s especially true if your cabinet is in a high-humidity kitchen where finish degradation may already be underway.
What can go wrong with Magic Erasers
If you use a Magic Eraser too broadly or too aggressively, the finish can look noticeably different even if the dirt is gone. The most common failure mode is a visible sheen boundary—shiny where you scrubbed, dull where you didn’t.
– Finish dulling or sheen patchiness: Magic Erasers can make “cleaned areas” look shinier, hazier, or uneven compared to the surrounding surface.
– Color/stain changes: If the topcoat is thin or compromised, abrasion can lighten the area beneath.
– Clear-coat damage on delicate finishes: If your cabinet is lacquered or shellacked (or if the finish has started to wear through), melamine foam can be especially unforgiving.
– Over-scrubbing one spot: Even if the first pass seems fine, repeated strokes in a small area are where you’re most likely to create visible boundaries.
Edge case: If the cabinet surface is already damaged (cracks, flaking, or peeling), abrasive cleaning—eraser included—can widen the problem.
Magic Erasers can remove or haze the outer clear layer on finished wood because melamine foam acts like a fine abrasive under moisture.
According to , abrasive sponges can change gloss by altering the surface of the topcoat rather than only removing soil.
Comparison: what usually goes wrong (and how to prevent it)
To keep the outcome predictable, treat Magic Eraser use as a controlled test—not a full cleaning plan. Here’s a quick “mechanism-to-problem” mapping you can use in 60 seconds:
| What you do | What typically happens | Best prevention |
|---|---|---|
| Work a small area repeatedly | Local sheen/haze boundary | Stop after one or two gentle passes; reassess in good light |
| Use on an unknown/aged topcoat | Topcoat “clean-through” or color lightening | Identify finish (or spot-test in an inconspicuous spot) |
| Scrub near edges/corners | Uneven wear becomes more visible | Use the lightest pressure possible; avoid pressing down at edges |
Shellac/lacquer warning in plain language
If your mahogany cabinet has a film type that’s more delicate than typical polyurethane—such as lacquer or shellac—melamine foam’s abrasive action can be especially unforgiving. That’s why expert wood-care guidance often recommends non-abrasive cleaning and careful spot testing for solvent-sensitive finishes.
Verdict: when to use (or skip) a Magic Eraser
If you’re tempted to use one, treat it as a controlled spot-test tool, not a whole-cabinet cleaner. Use only on a tiny, inconspicuous area and stop as soon as you see any change in gloss or color.
– Better to skip Magic Erasers if:
– The cabinet finish is aged, thin, or you don’t know what it is
– You need to clean a large area
– You’re seeing finish wear already (peeling, bare spots, uneven texture)
– Only consider it if:
– You have a small scuff or spot
– The cabinet is clearly well-sealed and in good condition
– You’re willing to accept the risk of minor sheen change
Dislike the uncertainty? Use the soap-and-water + dry routine above, and focus on preventing grit from accumulating in the first place.
A finish-safe approach is to spot-test any abrasive tool on an inconspicuous area first, then stop immediately if gloss or color changes.
According to , avoiding abrasive pads on finished wood is often recommended to prevent patchy sheen and surface haze.
The lowest-friction “do this first” rule
As of 2026, the most reliable sequence remains: dry dusting → mild soap/water on a damp cloth → rinse with water only → dry immediately. If that doesn’t solve the problem, the next escalation should be gentle, controlled, and localized—not broad scrubbing.
Quick checklist (scan/save)
| Situation | Do this | Avoid this |
|---|---|---|
| Dust/grime on the surface | Dry microfiber first, then mild soap/water on a damp cloth | Scrubbing dry dirt into the finish |
| Fingerprints / light smudges | Light pressure, wipe with the grain, dry immediately | Letting moisture sit or over-wetting |
| Stubborn spot | Try gentle repeat passes; test any stronger method on a hidden area | Rubbing hard or for long periods |
| Considering Magic Eraser | Spot-test with minimal pressure while damp; stop if sheen/color shifts | Using it across the whole cabinet or on damaged finishes |
| Finish feels delicate/unknown | Use gentler cleaning only | Abrasive pads/foam sponges |
The single biggest preventable risk is grit: dust first, then clean with a damp cloth, then dry right away.
Sources
If you want the lowest-risk approach, use dusting + mild soap/water and dry immediately. If a Magic Eraser is involved, keep it to a tiny spot-test and stop the moment the sheen or color shifts—then fall back to the gentle routine so your mahogany cabinet stays even, not patchy.
Frequently Asked Questions
Can you clean a mahogany cabinet with a Magic Eraser without damaging the finish?
A Magic Eraser can remove surface grime, but it also works like very fine sandpaper, which may dull or lighten the finish on mahogany cabinetry. Experts generally recommend avoiding it on clear-coated or glossy mahogany finishes unless you test it in an inconspicuous spot first. If the cabinet has a waxed, lacquered, or varnished surface, use a gentle method instead, such as a microfiber cloth with mild soap and water.
How do experts safely remove scuff marks from a mahogany cabinet if you want to avoid a Magic Eraser?
Professionals often start with the least abrasive option: a soft microfiber cloth dampened with warm water and a few drops of dish soap. For scuffs, they recommend rubbing lightly, then drying immediately to prevent water spotting, and finally restoring sheen with a small amount of appropriate wood polish. If the scuffs persist, a non-abrasive cleaner formulated for wood finishes is usually preferred over erasers.
Why does a Magic Eraser sometimes cause hazy spots on mahogany wood cabinets?
Magic Erasers are made from melamine foam, which abrades the top layer of the finish rather than just cleaning the wood. On mahogany cabinets with polyurethane, lacquer, or varnish, that abrasion can remove the clear coat or create uneven wear, leading to haze, dullness, or lightened patches. Experts recommend stopping immediately if you notice streaking or discoloration during testing.
What is the best cleaner for mahogany cabinet doors to remove grease and grime safely?
Many experts suggest using a pH-neutral cleaner or a mild dish soap solution for grease and daily buildup, applied with a soft cloth rather than a sponge that can scrub too aggressively. After cleaning, they emphasize drying right away and avoiding soaking seams and edges where moisture can seep. For finishing protection, a quality wood-safe polish or wax can help maintain luster without the abrasion risk of Magic Erasers.
Which approach should you choose—Magic Eraser, wood cleaner, or polish—based on the cabinet’s finish type?
If your mahogany cabinet has a smooth lacquer or varnish finish, experts typically recommend avoiding Magic Eraser use and choosing a gentle wood cleaner plus a microfiber cloth. For sticky residues, a mild degreaser designed for finished wood is usually safer than abrasive foams. If you’re unsure of the finish, test any cleaner or polish in a hidden area first, then proceed with the method that restores shine without changing the color or sheen.
📅 Last Updated: October 26, 2026 | Topic: Can You Clean a Mahogany Cabinet With a Magic Eraser? What Experts Say | Content verified for accuracy and freshness.
References
- Melamine foam
- https://en.wikipedia.org/wiki/Melamine_sponge
- Mahogany
- Wood finishing
- Varnish
- Abrasive
- https://www.nps.gov/subjects/conservation/conserv-o-grams.htm
- https://scholar.google.com/scholar?q=magic+eraser+melamine+sponge+wood+finish+scratching Google Scholar
- https://scholar.google.com/scholar?q=melamine+foam+abrasive+cleaning+surface+damage Google Scholar
- https://scholar.google.com/scholar?q=care+of+varnished+wood+furniture+cleaning+recommendations+abrasive+mild+soap Google Scholar

[…] Dust first with a dry microfiber cloth to remove […]